Tutorials
Learn new skills with our bite sized lessons
Featured Products
Get Products
Introduction
This tutorial demonstrates how to use Forest Pack's Tint Override and Color By Map features to create the appearance of a football pitch with painted markings. This approach to texturing forest objects is useful where it is necessary to colourise individual scatter objects using an underlying texture map. Though in this case we are using a bitmap, procedural map types can also be used.
The setup to achieve this affect is relatively simple. All that is needed is a surface used a scatter area, a clump of grass that is small enough to generate clean edges when tinted, and a bitmap from which to derive the colour information.
All the necessary assets to follow this tutorial can be downloaded by clicking on the links above.
Step One: Create the Forest Object
In the first step we'll create a field of grass.
- Go to Create>Itoo Software>Forest Pro and create a new Forest object by clicking on the plane used to define the surface of the field
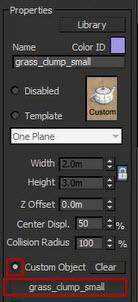
- Open the Modify panel and go to the new Forest object's Geometry Rollout. From the Properties section, change the geometry type to Custom Object, click on the object picker and select grass_clump_small from the scene.
![Football Field-fp_field_1.jpg]()
- The grass is still a bit large to give us clean edges, reduce the size by changing the the Global Scale to 60%.
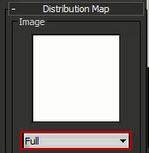
- Open the Distribution rollout and set the map type to to Full to maximise the number of objects being created.
![Football Field-fp_field_2.jpg]()
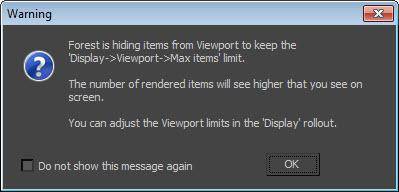
- Change the Density to 7m, you may get a warning about the maximum number of items being displayed, this is to improve viewport performance and will not affect the final render.
![Football Field-fp_field_4.jpg]()
- Go to the Transform rollout and add some randomisation by turning on Translation and Rotation, you can leave the default settings as they are.
- Turn on Transform>Scale, change Lock Aspect Ratio to None and set the X and Y Min to 100, X and Y Max to 110, Z Min to 100 and Z Max to 250.
With the geometry completed the final step is to use a bitmap to tint the blades of grass.
Step Two: Set up the material

In this section we'll create the materials to tint the grass object according to a bitmap applied to the scatter surface.
- Open the material editor and pick the material from the grass_clump_small object, this is a simple V-Ray material with some soft reflection.
- Create a new Forest Color map, and connect to the Diffuse slot of the grass material.
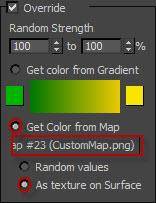
- In the Forest Color map properties, turn on Tint Override and Get Color From Map. Connect a new Bitmap to the Get Color From Map slot and use CustomMap.png from the downloaded files as the bitmap source.
![Football Field-fp_field_5.jpg]()
- From the Tint Override settings change Random Values to As Texture on Surface.
- To strengthen the effect of the tint , change the Blending Mode type to Normal and adjust the Variation slider to Element to affect individual blades of grass.
![Football Field-fp_field_6.jpg]()

If you render the image now each blade of grass in the scatter objects will inherit the colour information from a bitmap aligned using the scatter surface's UVW mapping.

In addition to this example, the technique can have a wide range of applications including using aerial photography to create naturalistic colour tints for huge areas of vegetation, or even creating patterned rugs or carpets.
If you have any questions about this tutorial, scene, or any of the techniques demonstrated here, please feel free to ask on our forums. For more instruction on Forest Pack please visit our tutorials page.