Resources
Requirements
- info 3DS Max 2011, Forest Pack Pro 4.3.x
For V-Ray users, Forest Pack 4.3 introduces a brand new Area boundary checking mode that makes creating clean edges around large scatters as simple as the click of a button!
In a previous tips and tricks tutorial we demonstrated how to use Forest Pack's falloff controls to create clean edges on lawns, by placing small patches of grass around the perimeter and large patches to fill in the majority of the area. With the release of Forest Pack 4.3, this procedure is no longer necessary.
Download Contents
The exercise file for this tutorial includes the following .max scenes compatible with Max 2012 and above and V-Ray only.
- gravel-path.max The starting file if you want to follow the tutorial. To see the end result, unhide the layer named Tutorial End.
Boundary Checking Using Edge Mode
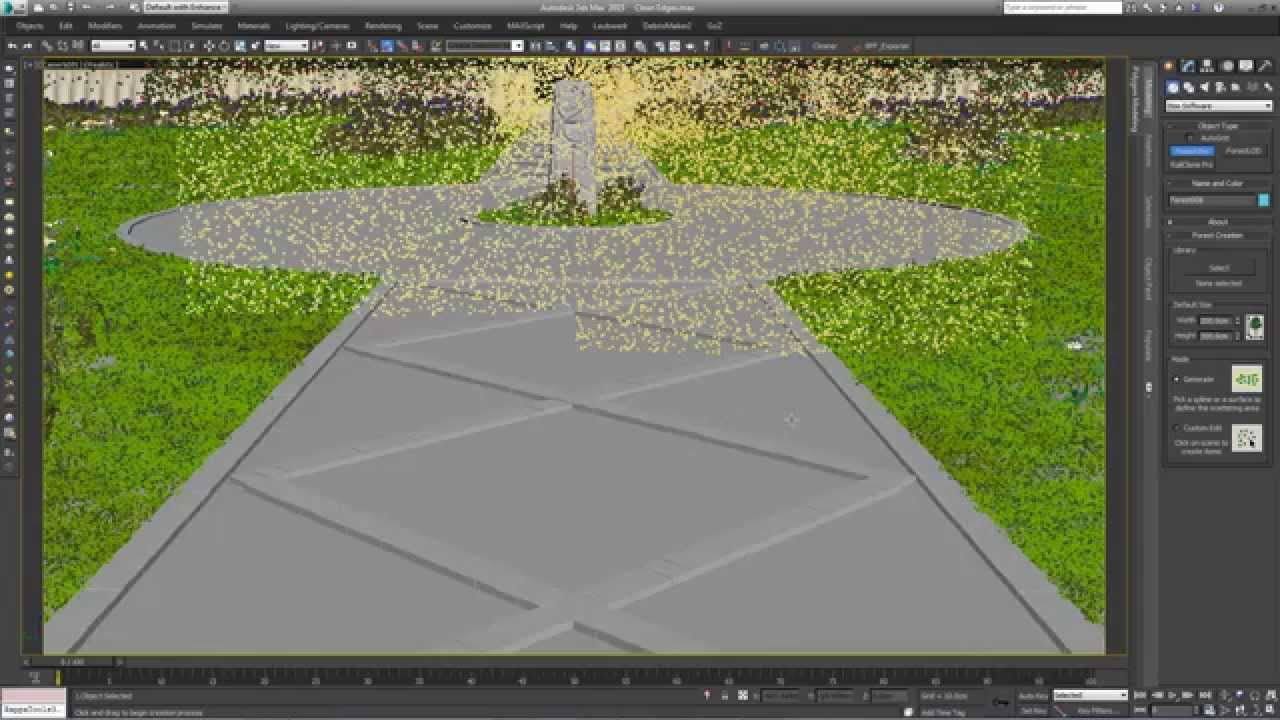
To illustrate how this new feature works, we'll create the lawn and a gravel path for a simple scene:
In this example there's a large area of grass that needs to be covered, but with a crisp border where it meets the stones that outline the path. The path itself contains a challenging criss-cross stone pattern that creates small, well-defined panels of gravel that converge to a much larger area surrounding the sculpture.
Let's fill these areas using the free presets that ship with Forest Pack Pro.
- Create a new Forest Pack object and click on the Surface named Grass-Surface to define the scatter area.
- Click on
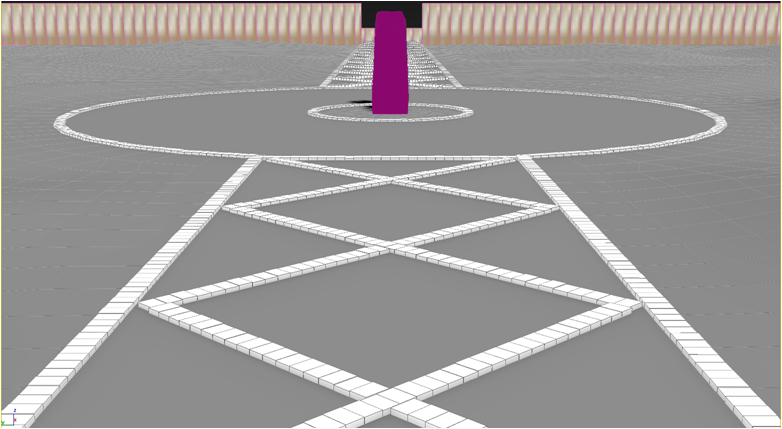
![Using Edge Mode-lib_button.png]() from the Geometry rollout and select the Cut Grass Field 2(Large) preset. This preset only uses large patches of grass and is optimised to cover big areas.
from the Geometry rollout and select the Cut Grass Field 2(Large) preset. This preset only uses large patches of grass and is optimised to cover big areas. - The lawn is well covered and uses minimal instances, but around the perimeter the large patches of grass overlap the edge and intersect with the stones. To fix this go to the Areas rollout and change the Boundary Checking mode from Point to Edge. Please note that in the video and images, the ability to preview edge trimming in the viewports has been enabled, to improve performance, clipping normally occurs only at render-time. If you wish to enable viewport previews, hold down the left CTRL key and click on the Edge radio button.
Boundary Checking Modes
Forest Pack 4.3 and greater can use 3 different modes to determine if an object falls outside of the scatter area and is removed.
![Using Edge Mode-boundary_modes.png]()
- Point: Uses the item's pivot point to check if it's outside the scatter area. If true the entire item is removed and you may get overlaps.
- Size: Uses the item's width and collision radius to check if it's outside scatter area. If true the entire item is removed and you won't get overlaps but the boundary can be uneven if the item's size is too large.
- Edge (V-Ray only): Uses the lowest Z Vertex of each of the item's individual elements to check if they are outside the scatter area. If this is the case, only the individual element is removed creating a clean edge. Because the the geometry itself is not sliced, the result is much more natural
Note that when using edge mode, an element is defined as a group of connected faces that share the same material ID. These are the same elements used by Forest Color.
- To ensure there are no gaps using this mode, you need to ensure the items extend slightly beyond the edge around the entire perimeter. The preset's settings look pretty good but to be certain, decrease the Distribution Map > Density value to 3065cm.
- Now we can follow the same procedure to add gravel. Create a new Forest Pack object by clicking on the surface named gravel-path-surface.
- Click on
![Using Edge Mode-lib_button.png]() from the Geometry rollout and select the new Golden Gravel Angular - Large Area preset.
from the Geometry rollout and select the new Golden Gravel Angular - Large Area preset. - Go to the Areas rollout and change the Boundary Checking mode from Point to Edge.
- Now we'll remove the gravel from the criss-crossing stone pattern, for this purpose there is a spline in the scene that we can use as an Exclude area. Open the Areas rollout and click
![Using Edge Mode-new_spline.png]() then pick the spline named stone-diag-pattern-spline and set the mode to Exclude.
then pick the spline named stone-diag-pattern-spline and set the mode to Exclude. - Finally, to get into those difficult corners, decrease the Distribution Map > Density value to 1250cm.
 from the Geometry rollout and select the Cut Grass Field 2(Large) preset. This preset only uses large patches of grass and is optimised to cover big areas.
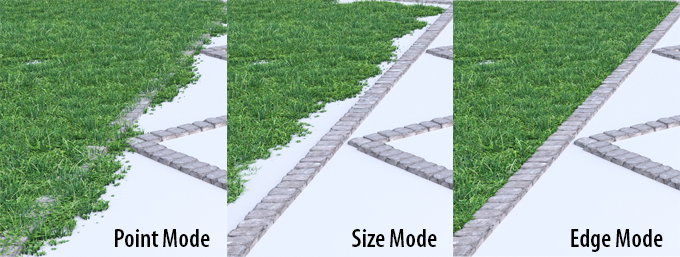
 then pick the spline named stone-diag-pattern-spline and set the mode to Exclude.
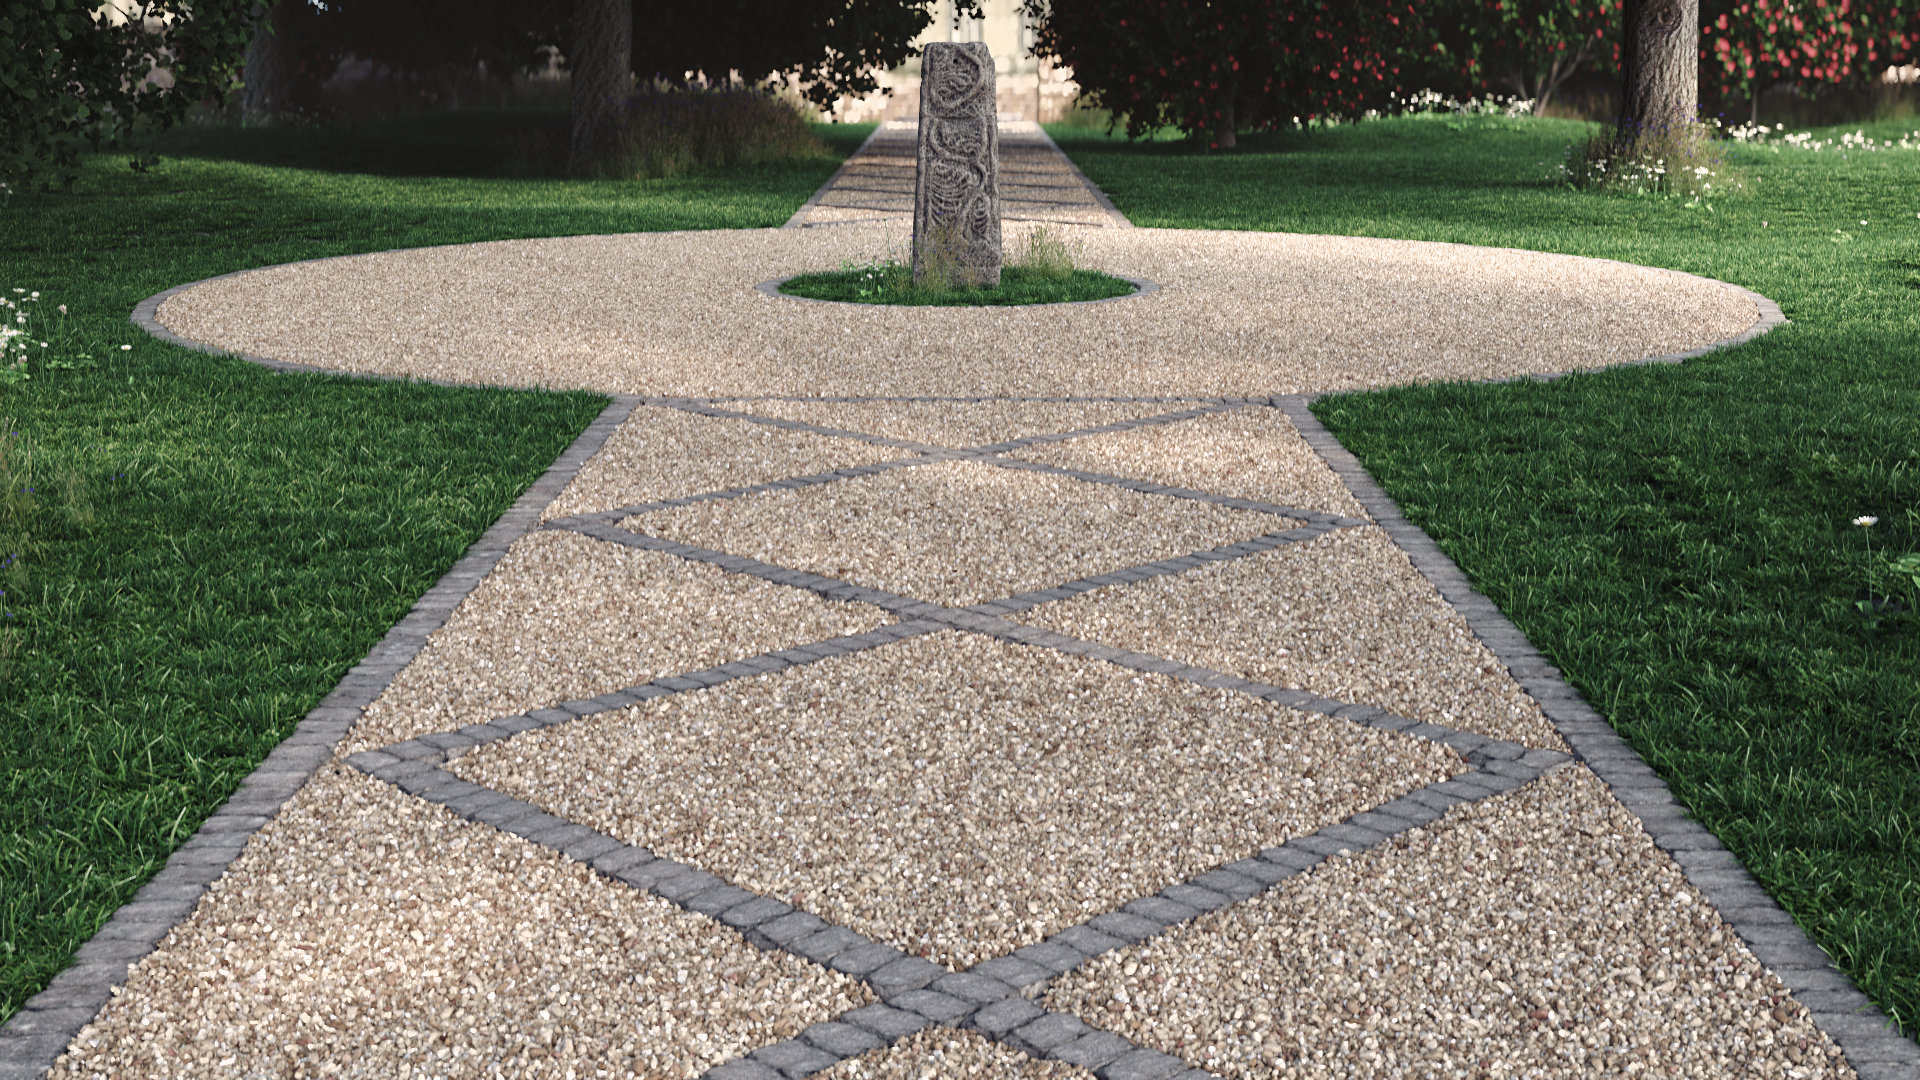
The final render:

Conclusion
That's it! We hope you find Forest Pack's new boundary checking mode will make creating clean edges simpler and faster than ever. Please stay tuned for future training, or for more information about many aspects of Forest Pack's features, please see our reference section or visit the tutorials page for more Tips and Tricks videos and in-depth tutorials.