Requirements
- info 3DS Max 2011, Forest Pack Pro 4.3.x
Introduction
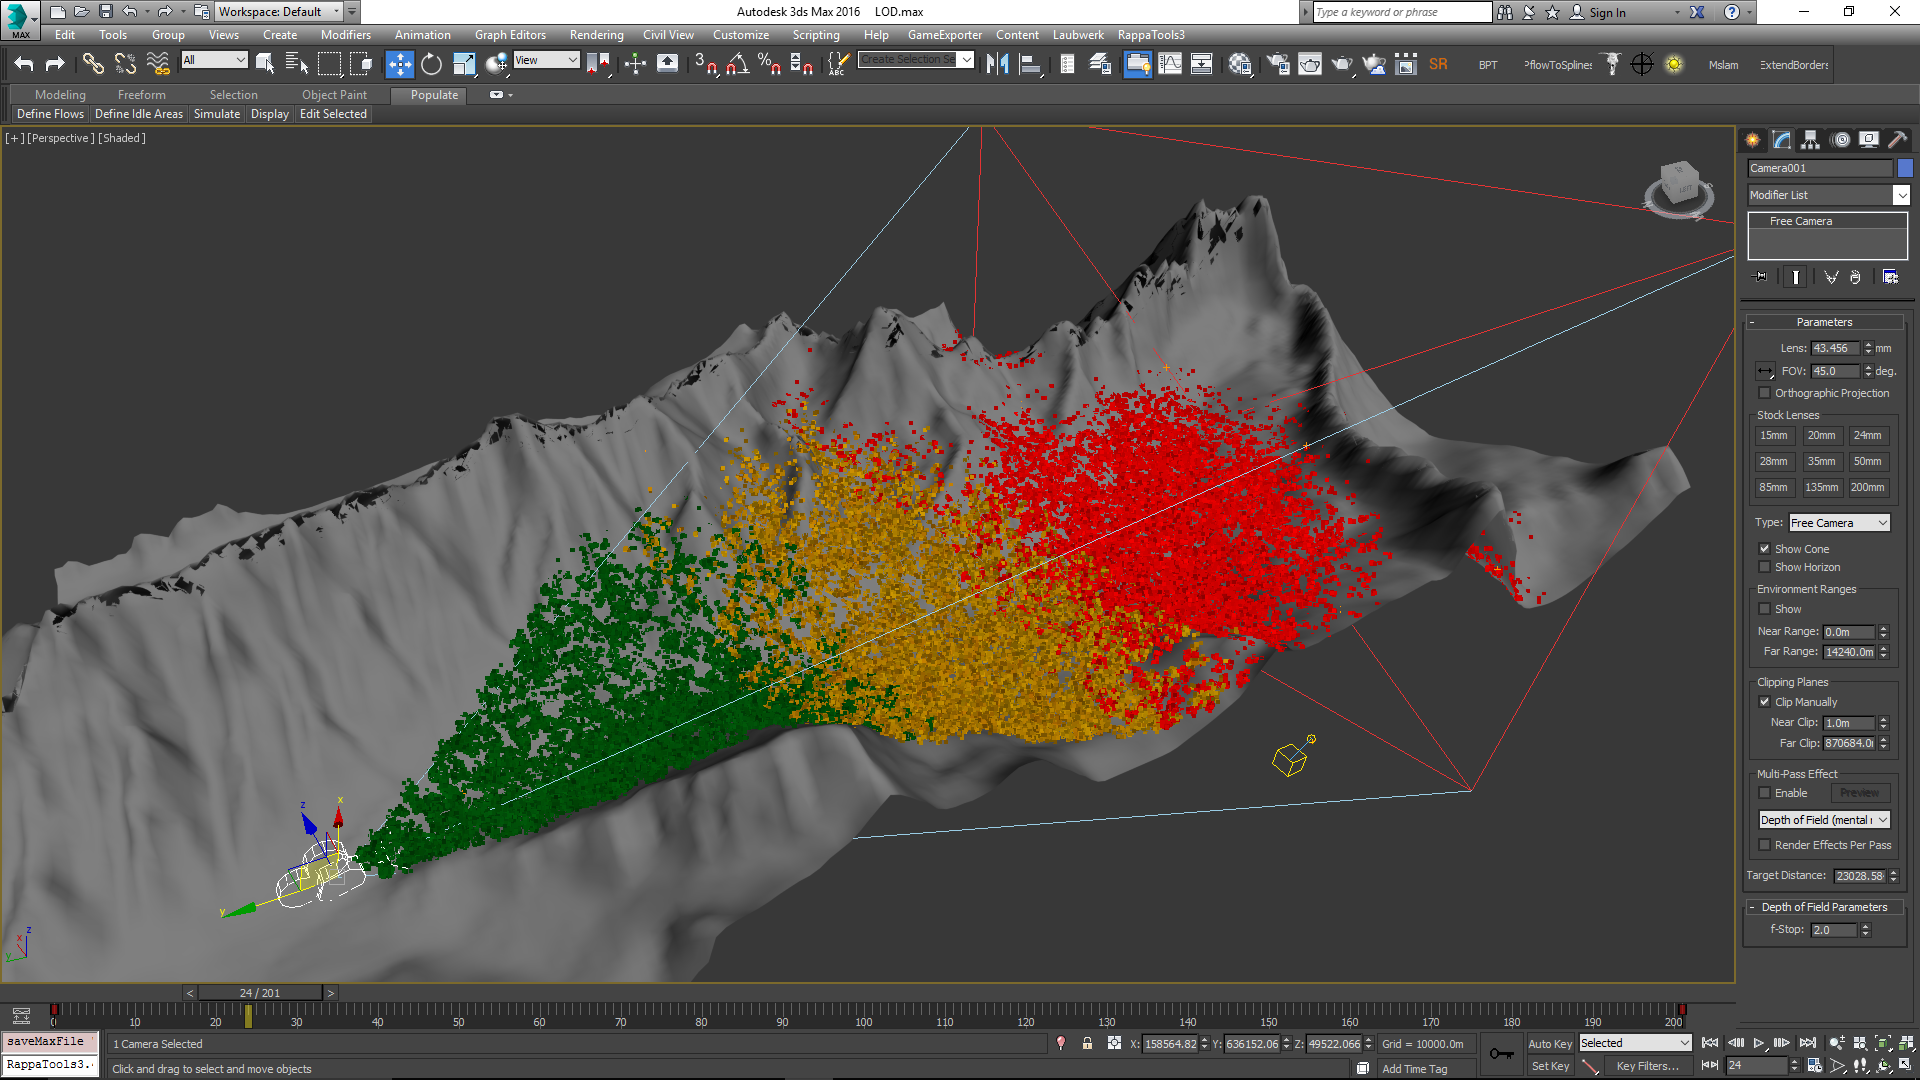
Forest Pack 4.3 introduces ForestLOD, a brand new object that allows you to switch scattered items based on their distance from the camera or their size in the render view. The most common use for this feature is to create Level of Detail models so that less complex models and materials can be used further from the camera to help speed up renders and manage RAM.
In the short video above, we demonstrate how it works.
The ForestLOD workflow
Creating LOD models with Forest Pack requires a slightly different workflow from using standard geometry objects:
- Instead of a single model for each object, ForestLOD requires 2 or more models. Each of these can optionally have unique materials.
- Models are added to a Forest LOD object. From here you can configure the trigger distance or size to switch between models, assign materials and blur the transition between LOD levels.
- Finally the Forest LOD object is scattered by adding it to the Geometry List inside a Forest Pack object. In the Forest Pack object it is also possible to override the distances used to calculate the trigger points directly from the Camera Rollout.
Creating ForestLOD Objects
Forest 4.3 includes the all new ForestLOD object, this can be found in the Create Panel. You'll need to create one ForestLOD object for each set of associated LOD models, by following this procedure:
- Go to Create > Itoo Software > Forest LOD and click and drag in the viewport to create a new Forest LOD object.
![Level of Detail-image2014-10-16%2016%3A45%3A10.png]()
- Add the objects to the Forest LOD object. To add a single object click on
![Level of Detail-image2014-10-16%2016%3A46%3A6.png]() , select Custom Object , Click
, select Custom Object , Click ![Level of Detail-image2014-10-16%2016%3A48%3A4.png]() and pick an item from the scene. To add multiple objects click
and pick an item from the scene. To add multiple objects click ![Level of Detail-image2014-10-16%2016%3A46%3A41.png]() and pick 1 or more items from the Object Picker.
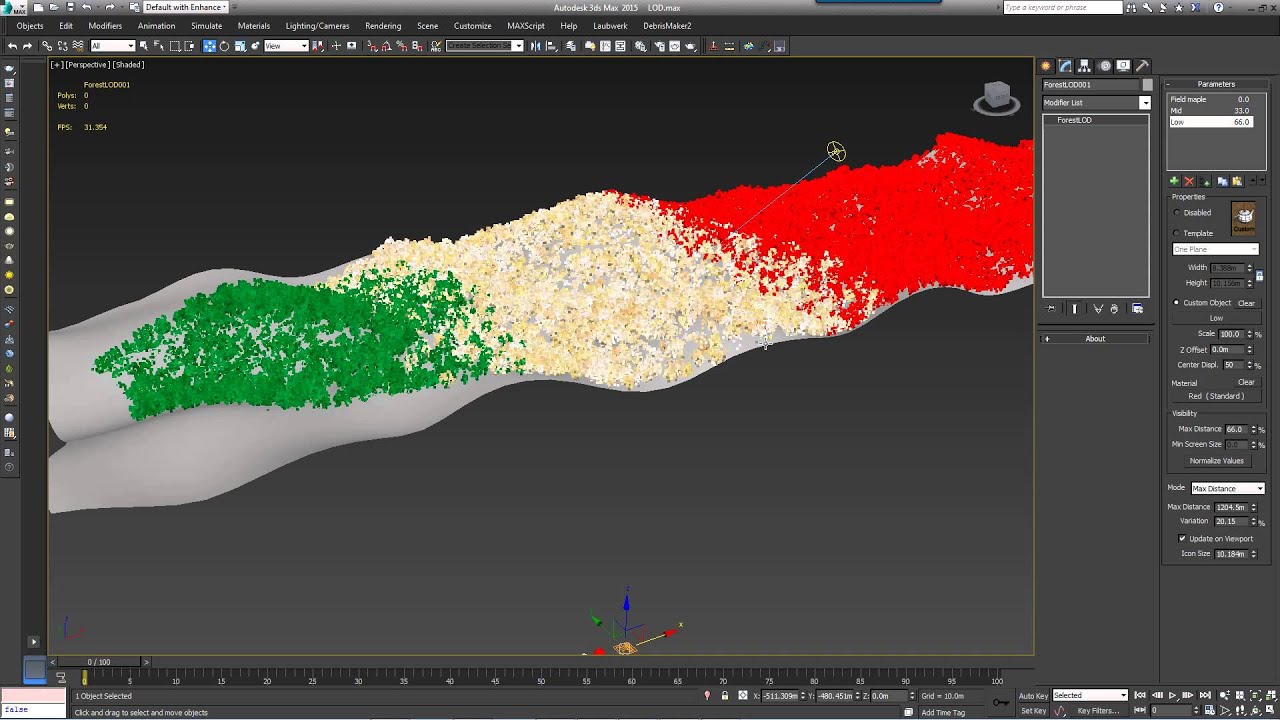
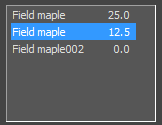
and pick 1 or more items from the Object Picker. - Each object in the LOD rollout has a number next to its name. These values represents the distance from the camera or a percentage of the screen size at which the object will be displayed.
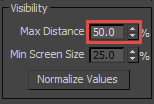
In the default "Max Distance" mode, this is measured as a percentage of the distance from the camera as specified by the Maximum Distance value. To use this mode follow these steps:
- Add Visibility > Max Distance values for each LOD level. The lower the value the closer to the camera, so the more complex models should have the smaller values. Alternatively you can click
![Level of Detail-image2014-10-16%2017%3A35%3A56.png]() to automatically create values based on the object's order in the LOD list.
to automatically create values based on the object's order in the LOD list.
![Level of Detail-image2014-10-16%2017%3A34%3A21.png]()
- Enter a Maximum Distance value. This defines the distance range over which the LOD effect is calculated.
![Level of Detail-image2014-10-16%2017%3A35%3A2.png]()
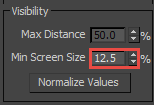
As well as LODs based on distance you can also control transitions according to their size in the camera view. To do this simply switch the mode to Minimum Screen size and then adjust the percentages. Note that you won't see the effect of this mode until you switch the viewport to the camera view.
- Change the mode to Min Screen Size.
![Level of Detail-image2014-10-16%2017%3A51%3A6.png]()
- Add Visibility > Max Min Screen Size values for each LOD level. The higher the value the closer to the camera, so the more complex models should have the larger values. Alternatively you can click
![Level of Detail-image2014-10-16%2017%3A35%3A56.png]() to automatically create values based on the object's order in the LOD list.
to automatically create values based on the object's order in the LOD list.
![Level of Detail-image2014-10-16%2017%3A52%3A44.png]()
- Add Visibility > Max Distance values for each LOD level. The lower the value the closer to the camera, so the more complex models should have the smaller values. Alternatively you can click
 and pick an item from the scene. To add multiple objects click
  and pick 1 or more items from the Object Picker.
  to automatically create values based on the object's order in the LOD list.


Assign materials to LOD levels
In addition to switching geometry you can also assign a different material to each LOD level. For example, you might want the trees nearest the camera use a 2 Sided V-Ray material, use a standard one sided material with an alpha in the mid ground, and for the background, where the leaf shapes are too far away to see, remove the alpha and use simple rectangular cards. To add custom naterials to LOD levels, follow these steps:
- Click on an object from the
LOD List.
![Level of Detail-image2014-10-16%2017%3A56%3A57.png]()
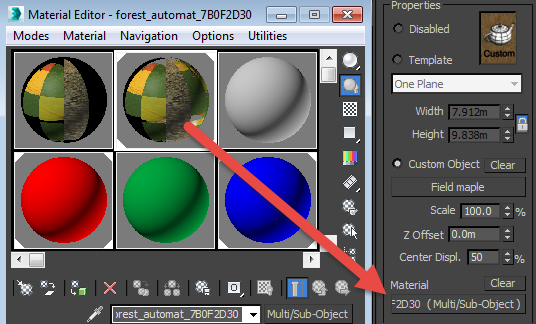
- Drag a material from the Material Editor to the Material slot in the Properties group. Simpler materials would normally be used furthest from the camera.
![Level of Detail-image2014-10-16%2018%3A4%3A42.png]()
- Repeat for each object in the LOD List. Alternatively if you have a unique object for each LOD level, you can also apply materials directly to the source geometry.
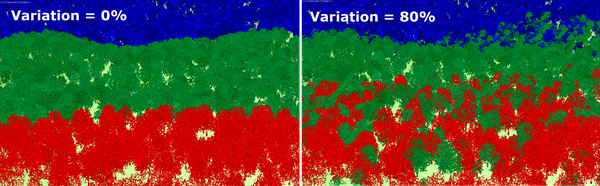
Adding variation to minimise popping
To blend between the LOD levels, ForestLOD provides a variation parameter. Use this to add randomness to the Maximum Distance or Screen Size settings to blur the boundary and help to disguise the transition from one LOD level, reducing visible popping when rendering animations.
Adding a ForestLOD object to a scatter
To use a ForestLOD object in a scatter simply select or create a new Forest Pack object. Go to the Geometry Rollout, click on  and select the Forest LOD object from the scene. There is no limit on the number of LOD objects that can be used.
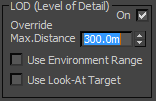
If you have multiple ForestLOD objects, then you may find it easier to override the maximum distance directly inside the Forest Object itself instead of separately in multiple LOD objects. To do this, simply go to the Camera rollout and enter a maximum distance value. From here it also possible to derive the maximum distance from the active Camera's Environment Range, use a custom look at target, and toggle on/off the LOD display for all objects.
We hope you enjoy using the new LOD tools. Please stay tuned for future training, or for more information about many aspects of Forest Pack's features, please see our reference section or visit the tutorials page for more Tips and Tricks videos and in-depth tutorials.