- Inicio
- Tutoriales
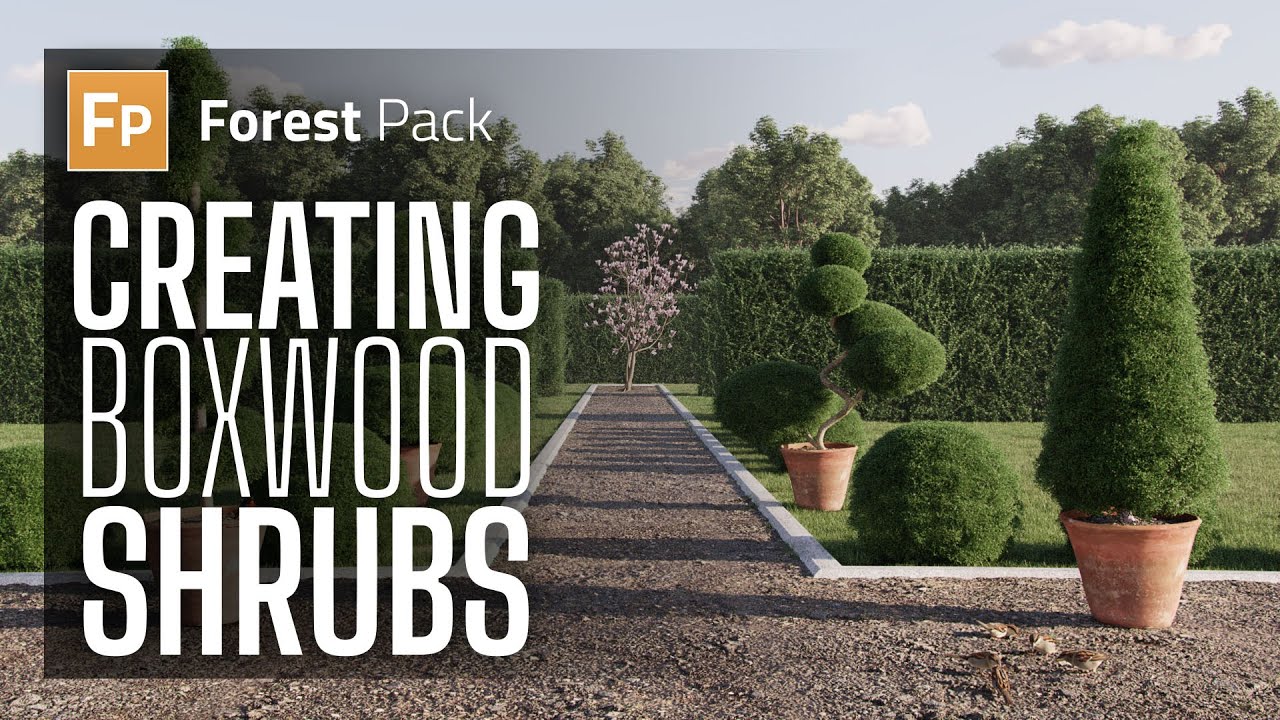
- How to create Boxwood shrubs with Forest Pack in 3ds Max
Requerimientos
- info Forest Pack Pro
In this tutorial, we'll explore how to create any shape of boxwood shrubs using Forest Pack.
To start, you'll need a few essential components: a pot, some form of trunk, and of course the shape of the topiary itself. The topiary shape can be created in any manner you choose; it simply needs to be a polygonal object with UVs. You could use a tapered cylinder, attachspheres to a spline, A helix Shape, or something that’s poly modelled.

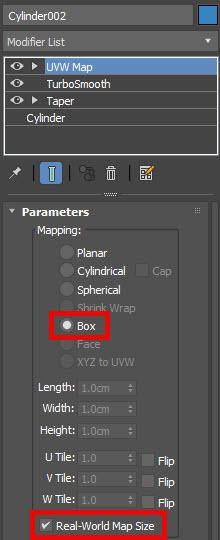
Before you proceed, it's crucial to check the object's mapping coordinates. If your geometry is based on a primitive, enable 'Generate Mapping Coordinates' and 'Real World Map Size'. However, if you've modified the object, add a UV modifier and then activate box mapping, setting it to real-world map size. These steps ensure that your objects are compatible with the Forest Pack preset we’ll be using.
The next step is to ensure the geometry won't render in the final image. This is easily done by navigating to object properties and deselecting 'Renderable'.
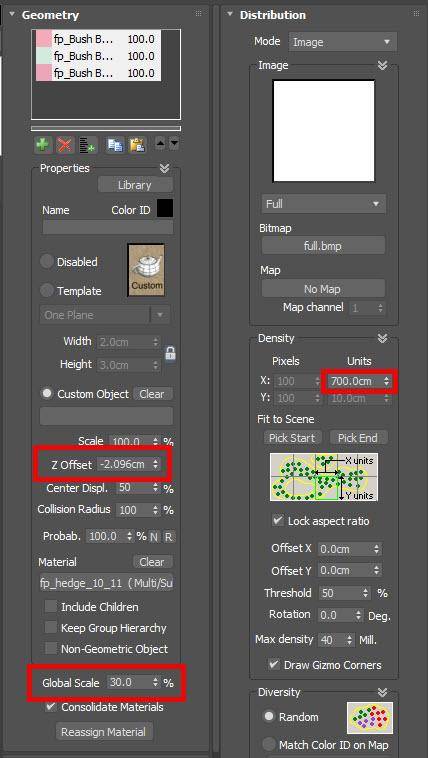
With these preparations complete, it's time to select a preset. Open the Forest Pack library and choose the boxwood preset, which is designed specifically for creating hedge-like structures. Load the preset and apply it to one of your base shapes. At this point, you may notice that the preset is intended for much larger hedges, so you'll need to customise it for your small topiary.
To do so, go to the 'Geometry Rollout' and scale down the geometry to roughly 30% of its original size using the 'Global Scale' settings. However, this will make the density of the foliage too sparse, so you'll need to adjust that next. Navigate to the 'Distribution Rollout' and decrease the density setting to approximately 700 centimetres. Finally, to perfect your design, you might want to adjust the Z-offset to make sure the branches are placed well inside the object.
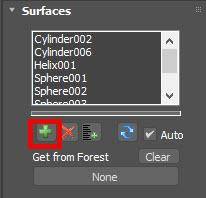
And that's almost it. If you have multiple topiary shapes in your scene, you can apply the Forest Pack to all of them at once. Just go to the 'Surfaces Rollout', click on the plus button, and select each of the surfaces on which you wish to create your boxwood hedges. This method saves time, as any subsequent changes can be made across all objects from this single Forest Pack instance.
As you can see, creating a custom boxwood shrubs doesn't take much time, and the result can be quite good for so little work. Check back soon for more tutorials on Forest Pack and RailClone.