- Inicio
- Tutoriales
- Modelling Gutters in 3ds Max with RailClone
Requerimientos
- info 3ds Max, RailClone Pro
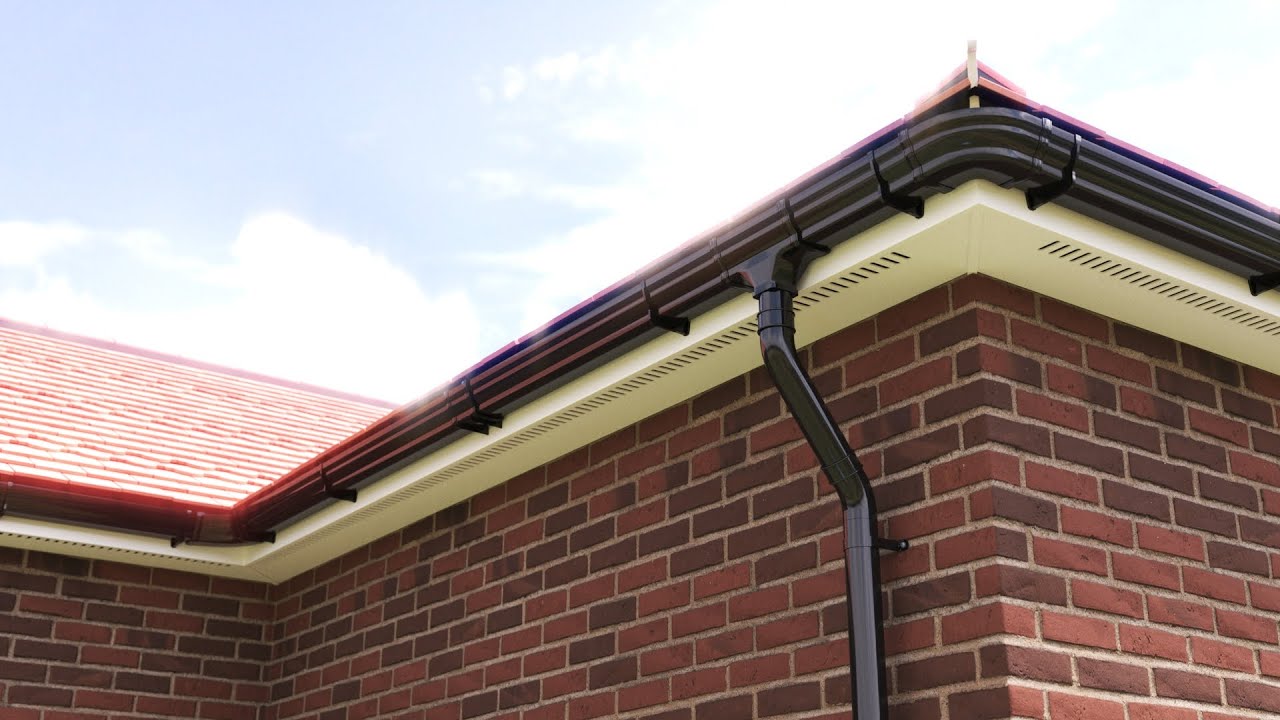
We’ve had a few questions recently about the gutter presets that are included with RailClone, so here’s a quick tip tutorial to explain how they work.
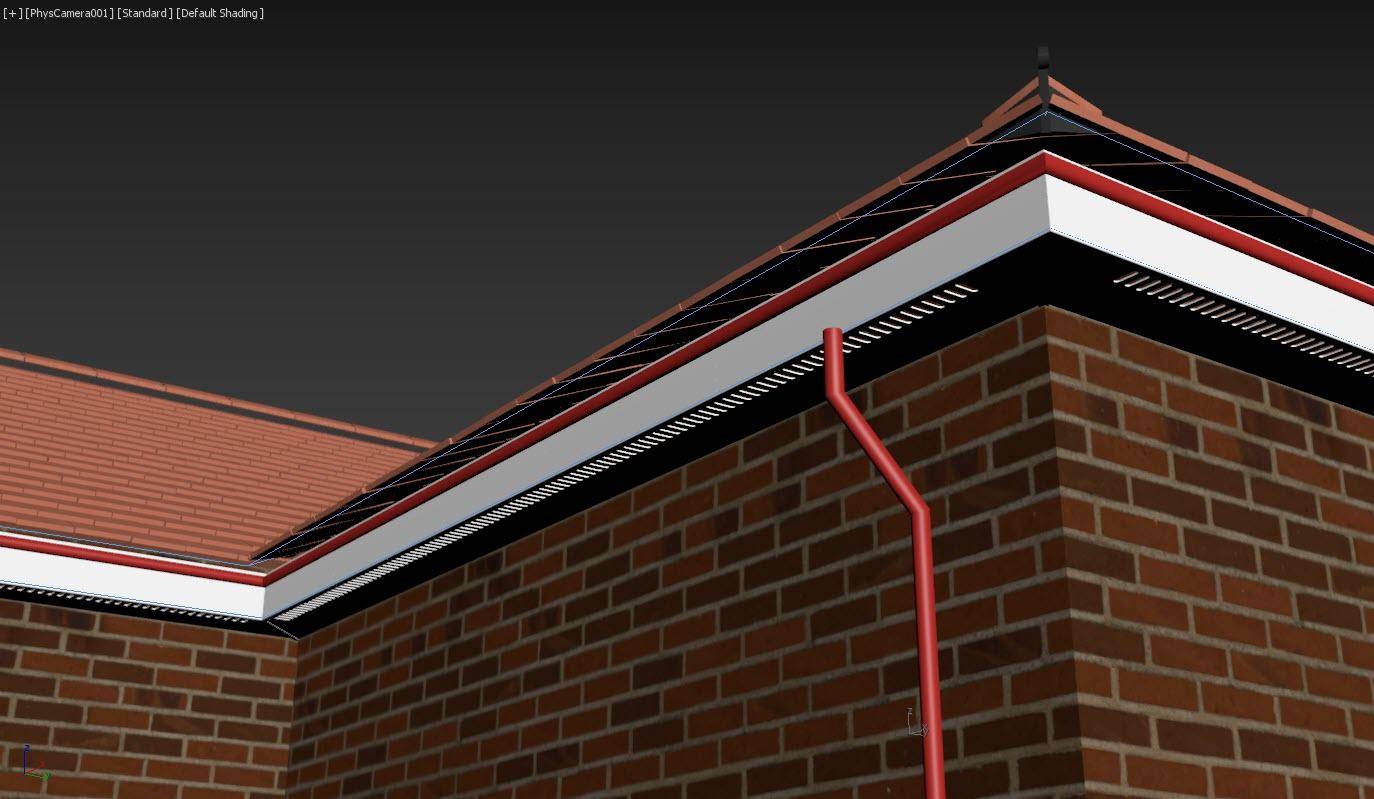
- First of all, You need a spline to define the gutters path. The spline defines the back of the gutter, so it should be tight against your fascia or wall. Most importantly, make sure that all the vertices that you want to generate a corner fitting are set to Corner or Bezier-Corner.
![Splines]()
- Next, create a RailClone object. Go to the Modify panel and find the Style rollout. Click to open the library browser and navigate to the gutter library.
- Select the gutter style you’d like to use and click Import Selected.
- Go to the base objects rollout and click the Spline Picker button. Select your spline from the scene. It’s as easy as that!
So we have a working gutter, but to refine things further you have some options in the Parameters rollout.
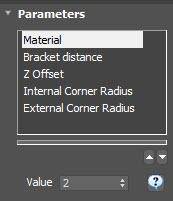
- Material Choose from the 20 existing material or just drag a new material to the RailClone object to use your own. If you are using renderers other than V-Ray, you may need to disable the Instancing engine for this to work
- Bracket Distance You can change the spacing between the support assets simply using this setting.
- Z Offset If you need to adjust the location of the guttering, you can do so without touching the spline using this setting.
- Corner Radius You can change the bend-radius of the internal and external corners separately.
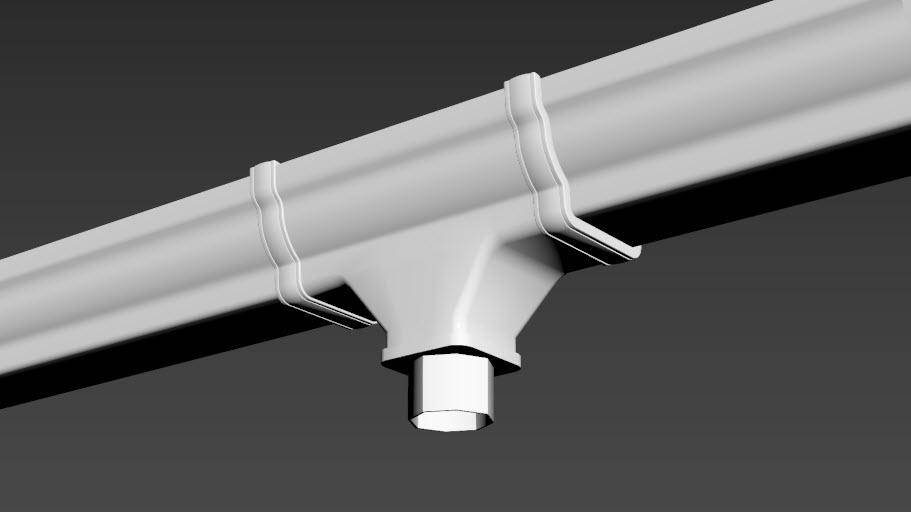
There is another hidden feature, and this is the one we get asked about most. These styles can add a T-junction for downpipes. To add one, just select the spline and add a new Vertex where you would like the junction. Change the vertex type to Bezier and a new T junction will appear. Easy as that!
Do add the downpipe itself, follow these steps.
- Draw a new spline to define the path. Once again the vertex types should be set to Corner.
- Create a new RailClone object and choose a downpipe from the library. Select the spline you just created from the Base Objects rollout.
You can now control the downpipe using the settings int he Parameters rollout.
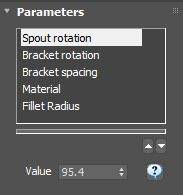
- Spout Rotation changes the rotation of the outlet
- Bracket Rotation changes the rotation of the brackets, allowing you to turn them towards the wall
- Bracket Spacing does what you’d imagine, it changes the distance between brackets.
- Material controls the colour, and finally
- Fillet Radius controls the radius of the curve if there are any corners in your downpipe.
Hopefully, that clears up any questions people have about the gutter presets. We hope this library is useful. Stay tuned for more quicktips coming soon!