Файлы ресурсов
Требования
- info 3ds Max 2012+. V-Ray
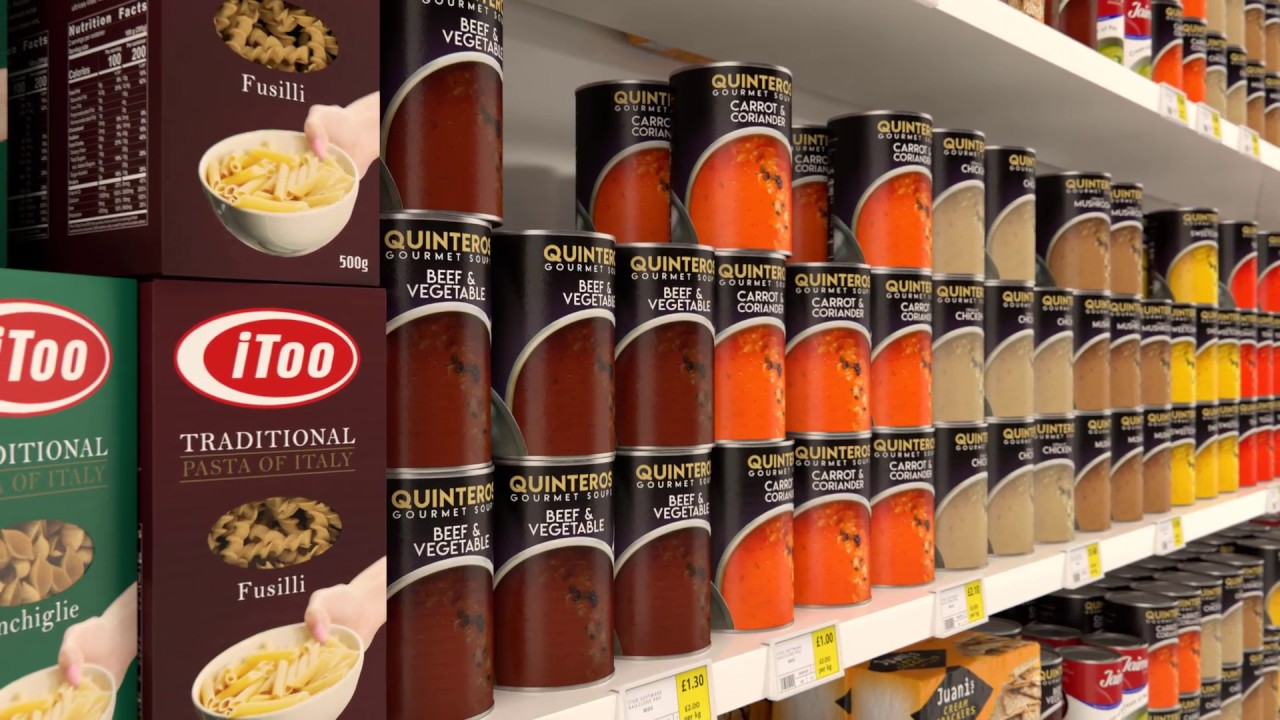
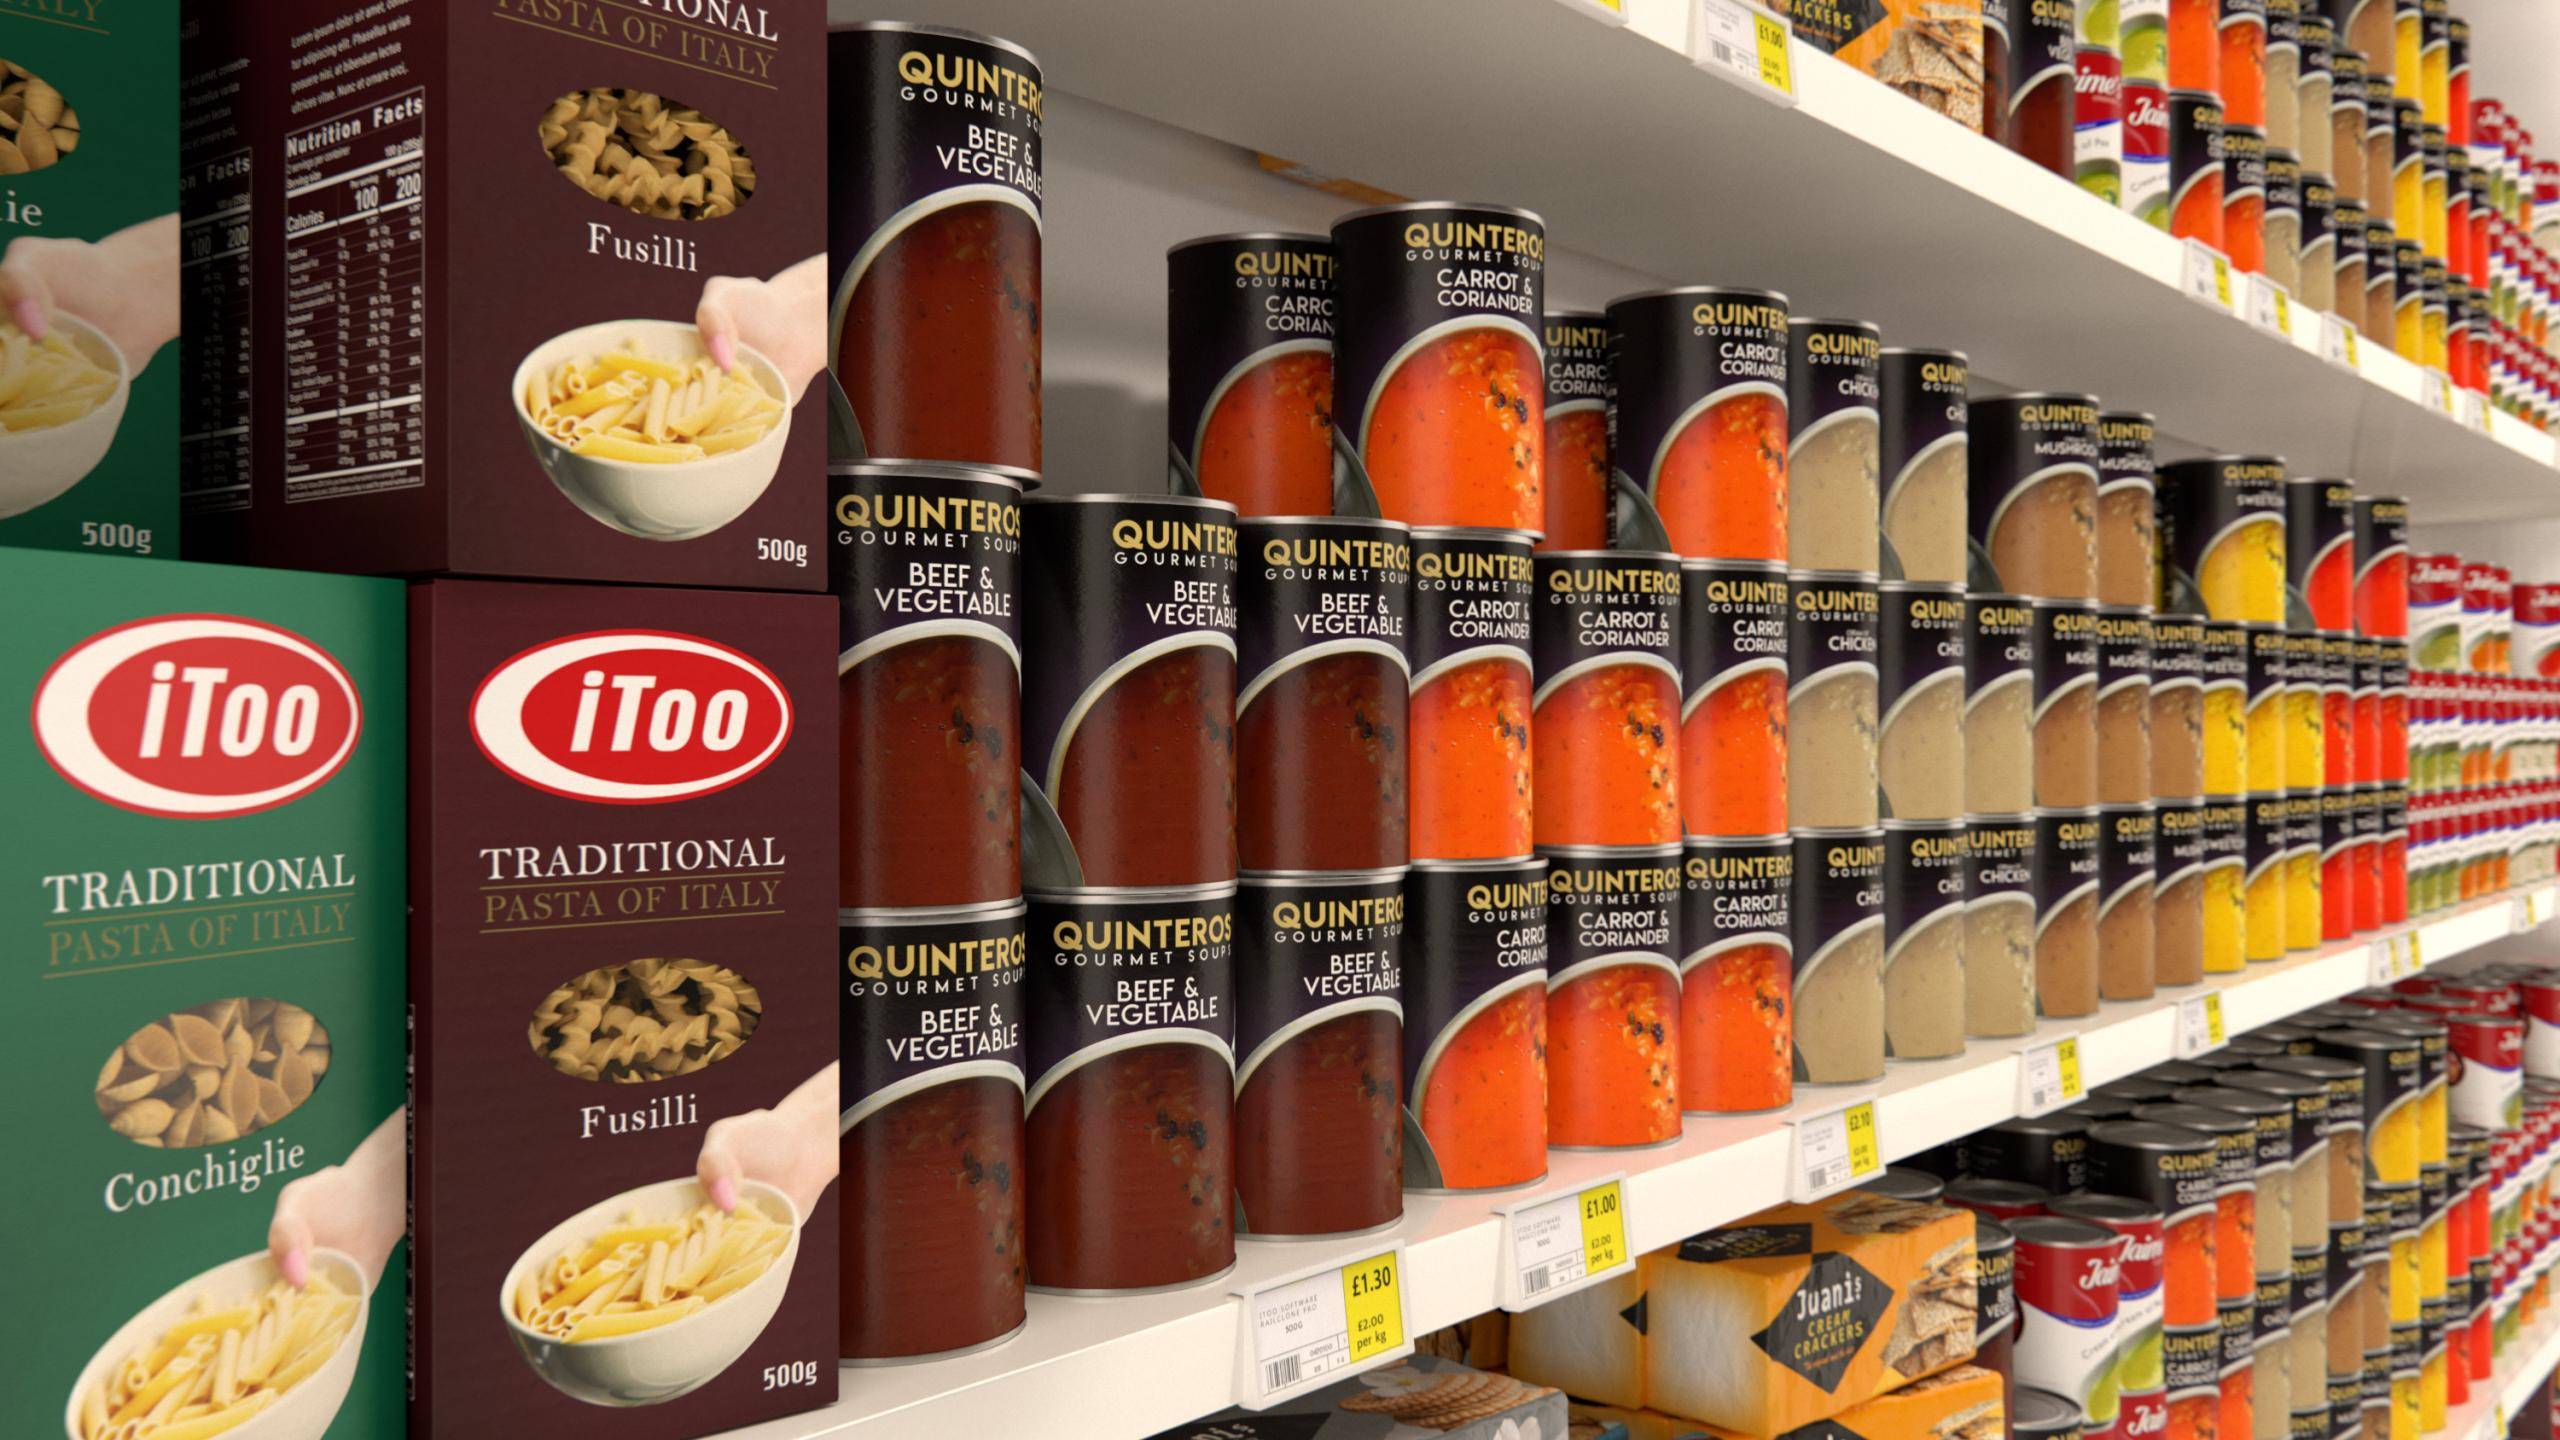
One of the most requested tutorials on our forum has been for techniques to populate supermarket shelves. Specifically, users are interested in how to randomise the number of products on the shelves in depth, and to be able to create patterns of grouped items. In this video, we'll illustrate a couple tips for achieving these effects, and then expand the idea and demonstrate how to use nested objects and a built-in macro to stack objects on top of one another.
By completing this tutorial you'll learn several useful tricks that have a much wider range of applications, including:
- Randomising the rotation of objects to add variation.
- Sequencing geometry to create groups of objects.
- Preparing objects from different sources for use in RailClone.
- Nesting RailClone objects and propagating randomisation
- Switching X/Y Splines for different effects.
- Loading and using Macros from a file.
- Using Macros from the built-in library.
This tutorial is compatible with the free lite version of RailClone, you can get it here. The supplied files are compatible with 3ds Max 2012 and above and Chaos Group's V-Ray renderer.
Preparing Geometry
To populate shelves, the chances are that you're going to need quite a few product models. We've supplied 3 in this tutorial, but in reality you'll need many more. They may not all come from the same source and they'll almost certainly have individual materials. To make them work well with RailClone the following changes are recommended.
First of all, we need to generate a single multi-sub object material for all of the objects. This is because unlike Forest Pack, RailClone doesn't automatically consolidate materials and reassign IDs automatically. Instead you need to create a Multi-Sub object material that uses the same material IDs as set on the source geometry, basically so the same material applied to both RailClone object and the individual components gives the same results. An easy way to consolidate materials is to attach all the objects into a single mesh. Use the default options, so that Max creates the multi-sub object automatically.Once this is done, simply detach each product back into separate objects.
You may also find there are some scripts that can make a multi-sub materials for you automatically. For example, I use RappaTools which has a Multi-Material from Selection option.
Secondly, orientation is important. It's much easier if all the object's transforms are aligned in the same way before adding them to RailClone. For these styles, we rotate the objects imagining that the world's X axis describes the front of the shelf. Once all the objects are correctly rotated, reset the XForm to align the objects' pivot points and bounding boxes with the world coordinate system and make sure there are no sneaky non-uniform scale issues.
Later in this tutorial, we will be using some macros to automatically distribute and stack objects. This macro is expecting the pivot point to be centred on the bottom of the objects. To do this, just go to the hierarchy panel and turn on Affect Pivot Only, and then press Alignment > Centre to Object. Then move the pivot to the bottom of the objects before turning off Affect Pivot Only. There are also several scripts that can do this all for you automatically, and once again I personally use Rappatools.
Sometimes, swapping the X and Y Axis makes more sense
With our geometry prepared we're ready to start building the first style. In this example, we'll populate shelves with a single layer of objects and add the ability to randomise the depth. It's a pretty straightforward 2D array, with one significant difference, we'll be using the depth of the shelf to define the X Axis of the array, not the length of the shelf as would seem more logical. Why we do this becomes apparent as we create the style:
- Draw a spline for the depth of your shelf.
- Draw a second spline for the length of the shelf. For A2S generators the Array's height is measured along the Y axis, so draw the spline in the top or perspective view along the Y axis and then rotate the spline into the correct position to make it easier to visualise.
- Create a new RailClone object and open the Style editor.
- Add a new A2S Generator. This will create the two-dimensional array required to populate a shelf with objects along its length and its depth.
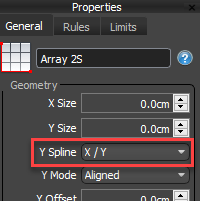
- If you are using RailClone 3, change the Y Spline mode to X/Y.
![Filling Supermarket Shelves-image2018-3-1_17-32-41.png]()
- Create two new Spline nodes. Connect one to the X Spline input and the other to the Y Spline input.
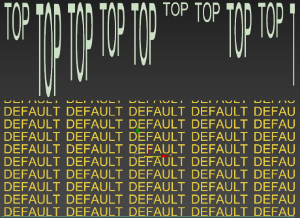
- Now pick the shelf's depth path for the X Spline and the length path for the Y. The reason for this is to be able to add variation to the number of objects in depth. To create the gaps, we're going to randomise the size of a null segment in the border of the array. Here's the problem: if you randomise the height of a segment in the Top input, the rows below get clipped in the same place, determined by the size of the largest segment found in the top row.
![Filling Supermarket Shelves-image2018-2-28_15-37-43.png]()
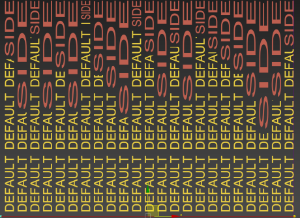
This is because the A2S generator is essentially a stack of 1-dimensional arrays, each row is calculated independently and the height of each row is determined by its largest segment. What this does mean though, is that a segment placed in the left or right inputs can be used to clip the default segments a random distance from the edge of the array.![Filling Supermarket Shelves-image2018-2-28_15-40-22.png]()
Armed with this understanding it's a simple case to rotate the array to move the left and right sides to the front and back, simply by swapping the X and Y Splines. (You may need to reverse the Y Spline to change the direction of the array).![Filling Supermarket Shelves-image2018-2-28_15-42-46.png]()
We now have the randomised side segment at the back of the shelf, where it can be used to control the number of objects that are placed in depth. - Back to our style, create 3 new Segment nodes and pick the 3 products from the scene.
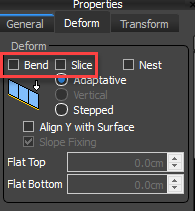
- We never want this geometry to be cut or bent to follow the path, so for each segment node, go to Properties > Deform and turn off Slice and Deform.
![Filling Supermarket Shelves-image2018-2-28_15-47-12.png]()
- Wire the 3 segments to a new Sequence operator. Wire this to the generator's Default input.
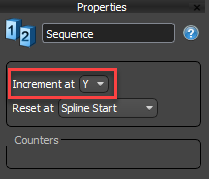
- Because we've rotated the array, we need to change the sequence operator to work on the Y axis. To do this change Increment On to Y.
![Filling Supermarket Shelves-image2018-3-1_17-35-26.png]()
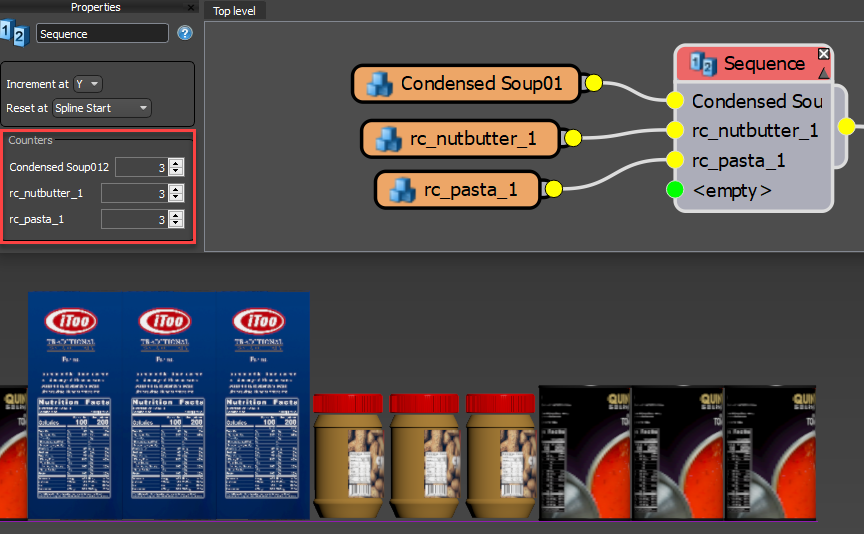
- You can now control how many times a product is repeated using the Sequence operator's Counter parameters. This allows you to create the groups of products we mentioned in the introduction.
![Filling Supermarket Shelves-image2018-2-28_15-55-8.png]()
- To control and randomise the rotation of the products, we can add a new Transform operator between the Sequence operator and the Generator.
![Filling Supermarket Shelves-image2018-2-28_16-13-37.png]()
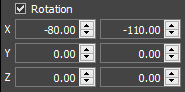
- Go to the Transform operator's Properties and enable Random Rotation. Enter minimum and maximum values to get the desired look. In this case, to turn the items towards the front of the shelf and get some random rotation I used a Minimum value of -80% and a Maximum value of 100%.
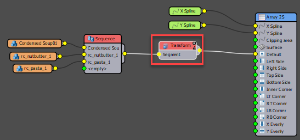
- Finally, to randomise the number of objects distributed in depth, create a new Transform operator and wire it to the Right input. Create a new Segment node and wire it to the Transform operator. We won't be using any geometry for this segment, it's only to add a space.
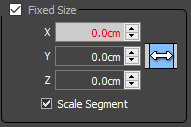
- Right-click on the Transform operator, select Export Parameters and choose X Size then click OK. Go to the node's Properties and make sure Fixed Size is enabled.
![Filling Supermarket Shelves-image2018-2-28_16-32-41.png]()
- Finally, add a new Random Number node and wire it to the newly exported X Size property. Change the Type to Scene Units and set the minimum and maximum values to get the desired effect. Finally change Generate On to segment so that each row gets a new random value.

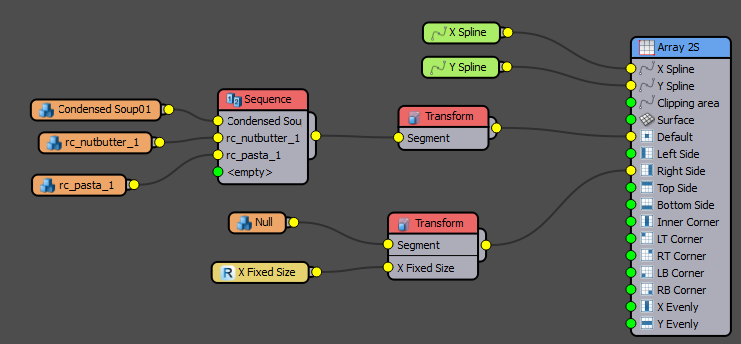
That's the style completed. The final graph is shown below:
Nesting segments
The previous technique works really well if you only need a 2-dimensional array of objects, but what if you also need products to be stacked on top of one another? There isn't a 3-dimensional array in RailClone so we have to resort to some tricks. The first is using nested arrays, which involves using one RailClone object as a segment inside a second.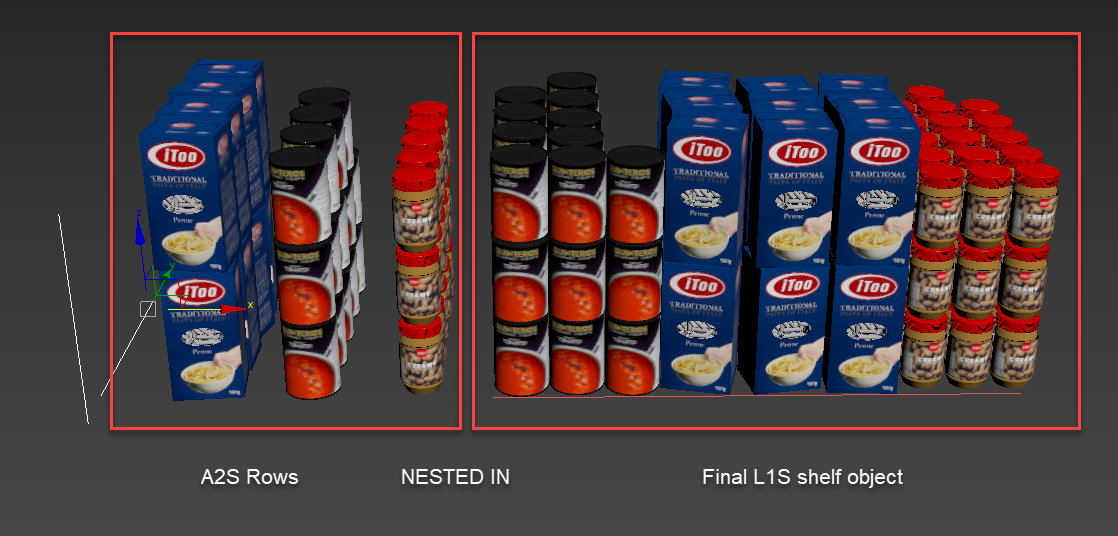
Here's how it works:
- Create two splines, one to define the depth of the shelf created in the top or perspective view, and a second to define the height created from the front or side orthographic views.
- Create a new RailClone object and open the Style Editor.
- Create a new A2S Generator.
- Create a new Spline node and select the depth spline created in step 1. Wire it to the X Spline input.
- Create a second Spline node and select the height spline. Wire it to the Y Spline input.
- Create a Segment node and wire it to the Default input. Select an item from the scene and disable Slice and Bend.
- Because this is an A2S array turned on its side, the orientation of the geometry will be incorrect. To fix this, go to the Transform tab and enter a value of -90 degrees for Y Fixed Rotation.
- Add some randomisation too by enabling Rotation Randomisation and adjusting the Minimum and Maximum values.
![Filling Supermarket Shelves-image2018-2-28_16-51-22.png]()
- To randomise the depth we'll use the same trick as the previous example. To recap: create a new Transform operator and wire it to the Right input. Create a new Segment node and wire it to the Transform operator then Right-click on the Transform operator, select Export Parameters, choose X Size then click OK. Go to the node's Properties enable Fixed Size. Then add a Random Number node and wire it to the X Size property. Change the Type to Scene Units and set the minimum and maximum values to get the desired effect.
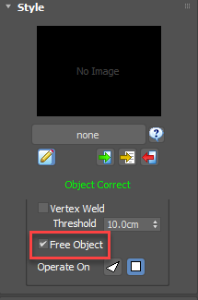
- That's one of the products complete. Simply duplicate this object and swap the geometry to create styles for the other product types. If you want to move the RailClone object away from the spline so that they're not all on top of one another, turn on Free Object in the Style rollout. When you're done all of your products should be controlled by the same two splines to determine the shelf's height and depth.
![Filling Supermarket Shelves-image2018-2-28_17-3-36.png]()
- To distribute these along the shelf's length next create a new RailClone object. Open the Style Editor and add an L1S Generator.
- Create a Segment node for each of the RailClone objects we just created and pick them from the scene. Disable Bend and Slice.
- Create a new Sequence operator and wire it to the Default input. Connect all the segments to the Sequence operator's inputs and set the number of desired repetitions using the Counter parameters
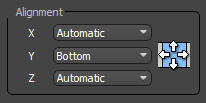
- Finally, the default behaviour is to centre segments to the spline on the Y Axis. We want to align our products to the front of the shelf, so go the segment's Alignment options and change Y Alignment to Bottom.
![Filling Supermarket Shelves-image2018-2-28_17-14-51.png]()
You will now have a 3-dimensional array that is controlled by 3 splines. The height and depth splines control RailClone objects that are nested inside a final style with a third spline to control the shelf's length.
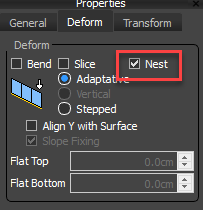
In terms of instancing, this is slightly less efficient than the first example because only the final RailClone object is instanced. The nested RailClone objects are treated as though they are single objects. Another issue is the lack of randomisation. Each time the nested object is repeated, it is identical. It is possible to randomise the nested object every time they are used to provide much more natural variation. To do this you just enable the Nest option in the Segment's Deform settings.
Use this with caution though, it completely disables instancing so it's best used for low-poly source objects or for smaller arrays.
Using a Macro
The final option demonstrated in this tutorial is to use a pre-built macro. This technique is able to create a 3-dimensional array like we just showed in the nesting technique, but it retains full instancing and randomisation. The best part is you don't have to learn how to set up a complex graph. We've done the hard work for you and packaged it up into a single node that's easy to understand and quick to use.
- Macros are graph snippets that can be represented as a single node. All numeric nodes contained in the in the graph are exposed in the Properties panel making it possible to simplify graphs and create completely new and flexible operators for RailClone. Macros can be shared in two ways. They can be saved as external files to be shared with colleagues or online, or we can add them to the built-in macros which are updated automatically using Update Manager. In that way, we are able to extend the feature set of Forest Pack at any time. In this example, we'll load a Macro from the downloads for this tutorial.
- Draw a spline to define the length of your shelf.
- Create a new RailClone object and open the Style Editor.
- Create an L1S Generator and wire a Spline object to the generator's Spline input. Pick the spline from the scene
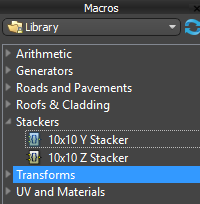
- Create a new Macro node. Right-click on the macro and select Macro > Load From.
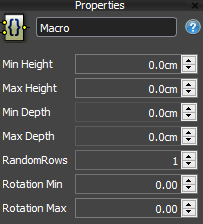
- Find and load the 10x10 Z Stacker.rcm included in the downloads for this tutorial. Once the file has loaded you will see all the parameters for the macro shown in the Properties Panel.
![Filling Supermarket Shelves-image2018-2-28_17-38-56.png]()
- Wire the Macro to the generator's Default input.
- Time to add the geometry. Wire a new Sequence operator to the Macro's input.
- Create Segment nodes, pick the objects from the scene then disable Bend and Slice. Attach the segments to the Sequence operator and that's it. The Macro takes care of everything else!
- Adjust the Minimum and Maximum Height to control the randomisation stacked products, or set the parameters to the same value to remove randomisation.
- Adjust the Minimum and Maximum Depth to control the depth of the shelf and add randomisation to the number of products that are added.
- Random Rows also allows you to remove some objects from the front of the shelf, as though customers had bought a few. The higher the value the more products are removed.
- Finally, you can add some variation using the Rotation Minimum and Maximum values.
- To control the distribution of products, use the Sequence Counter parameters just like the previous examples. Or if you prefer you could try using a Random operator, or even a Selector operator to control placement using material IDs that are applied to the spline. If you want to create multiple shelves, just select the spline object and clone the spline sub-object.
Conclusion
As you can see, this macro is easy to use and involved very little set up. It does have a hard-coded limit of 10 objects high by 10 deep, but if you need more we could add larger versions - just let us know. This macro will be added to the built-in library, available in the stacking category. There will also a second macro available that stacks objects on the Y axis. This can be used in conjunction with the A2S generator to create multiple evenly spaced shelves. To use it:
- Just drag the Macro from the library to the construction view and wire it to the A2S array's Y Evenly and optionally Bottom inputs.
![Filling Supermarket Shelves-image2018-2-28_18-22-13.png]()
- Attach geometry and adjust the settings in the usual way.
- Rotate the A2S generator, either using the X Rotation property or with a path wired to the Y Spline input. If you're not using a second spline, you can adjust the height of the array using the Y Size parameter.
- To adjust the spacing between shelves, use Y Evenly Distance and don't forget to disable Justify if you need the distances to remain a fixed size.
We hope you enjoyed this technique, we're sure it has a wide range of applications beyond stacking shelves.
Remember too, that this tutorial is compatible with the free Lite version of RailClone, which can also be used for commercial work.
Stay tuned for our next tips and tricks instalment and check out our other videos in the tutorials section of the website and If you use these tutorial files or the techniques shown in this tutorial, we'd love to see them on our forum.