Файлы ресурсов
Требования
- info 3DS Max 2011, RailClone 2.x
In the previous tutorial we created all the railings and walls for the stadium scene. In the second part we'll add the advertising hoarding around the perimeter of the arena. This style will demonstrate how to control the material ID of segments to allow us to randomly apply different textures and introduce how to add parameters that can be adjusted without needing to open the style editor.
Creating the RailClone Object
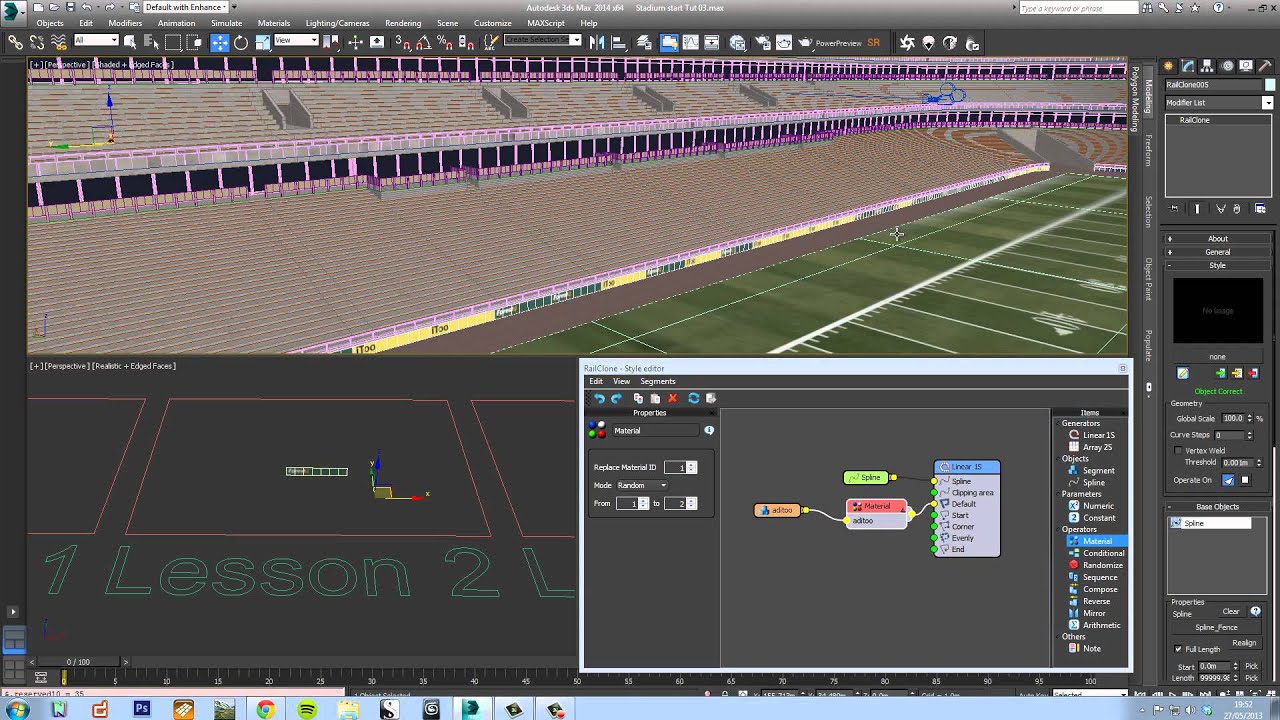
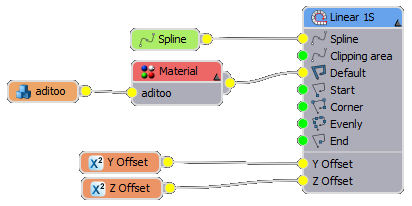
- To get started create a new RailClone object, name it "RC_Ads_Lower" and open the style editor. Add a new L1S Generator and Spline node. Wire the Spline node to the spline input and pick "Spline_fence" from the scene.
- Create a new Segment node and pick the geometry called "adItoo" from the scene. Wire this to the default input node of the generator.
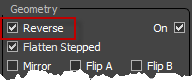
- Open the material editor and apply the material named Adverts to the new RailClone object. If the texture appears mirrored in the viewport, simply open the style editor and turn on Reverse from the generator's parameters, alternatively it is possible to reverse the spline itself.
![Advertising hoarding-reversespline.png]()
Randomising material IDs
The material we just applied is a simple multi sub object material with 3 variations of advert and 3 coloured blanks. Next we'll add a node that randomly shuffles the material ID to apply one of these textures to each segment.
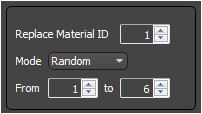
- Open the style editor and create a new Material operator.
- Wire this to the default input of the generator and wire the segment to the material ID node.
- Go to the node's parameters. Leave the mode on Random and set the end value to 6. You should now see a random selection of textures displayed in the viewport.
![Advertising hoarding-materialid.png]()
Adding parameters
To make this style easier to reuse we'll add parameters to a couple of the generator's values.
- Right click on the generator and Export the Y and Z offsets
- Create two new Numerical nodes, set the type to Scene Units and wire one to each of the newly exposed inputs.
- From the Parameters rollout in the plugin it is simple to adjust the height and position on the Y axis to prevent the billboards from interpenetrating the wall.
Cloning and adjusting the style for the upper stadium
Styles can be easily reused within a scene using the copy and paste functions within the style rollout.
- With the style complete create a new RailClone object for the upper levels and use the Copy Style From button
![Advertising hoarding-copyfrom.png]() to pick and re-use the style we just created.
to pick and re-use the style we just created. - From the Base Objects rollout pick "Spline_UpperFence" from the scene.
- These ads could be bigger to cover the join between the stadium floors and the wall. To easily adjust the size go to the Style rollout and set the Global Scale to 150%.
- Position the boards using the Y and Z offset parameters to align the ads to the wall.

Conclusion
This short video explored how to use the material node to randomise textures, how to create parametric styles with the material node and how to copy styles from other railClone objects. In the next tutorial we'll continue to build the stadium scene, this time creating a new seating style from scratch.