Resources
Welcome to a special Easter instalment of our regular tips and tricks episodes. It’s that wonderful time of year when Max’s egg spline finally makes some sense, and to celebrate we’re going to demonstrate 3 ways to randomise and manipulate textures on easter eggs using RailClone or RailClone Lite. First we’ll look at using a Macro to randomly sample tiles from a single texture. Second, we’ll select colours by sampling them from a random pixel on a map, and thirdly and finally we’ll use a map applied to a surface to to control a mask that blends between the previous two techniques.
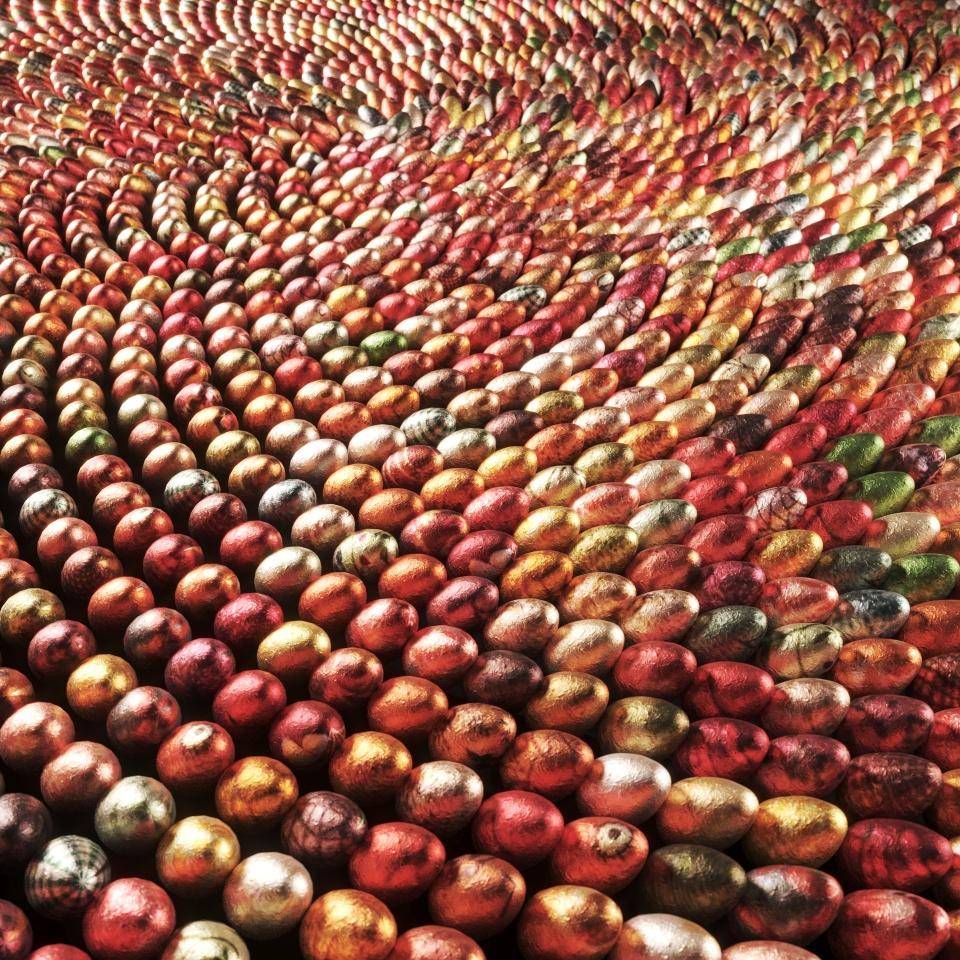
Before we do that though, we’ll take a quick look at a macro that was created especially for this tutorial that creates Phyllotactic spirals, a fancy word that simply describes the kind of patterns you see in nature (best exemplified by the seeds on a sunflower). To create the effect in RailClone we have provided a simple Macro in the downloads - it’ll also soon be available in the Transform section of the built in Macros.
To use it:

- Add a new Segment and select your geometry from the scene. In this case it’s an egg.
- Apply the same material to the RailClone object.
- Wire the Segment to the Macro’s Input.
- Create a new L1S Generator and wire the macro to its Default input.
- Increase the Size of the generator from the Properties panel to control the size of the circle.
- If you’d like to rotate the eggs, you can do so using the Fixed Rotation properties. You might also want to adjust the padding to get them to overlap slightly. The macro will take both these changes into account automatically. You can randomise transforms to add some jiggle too if you like.
![Rotate and jiggle]()
- You can also add a Clipping Spline should you wish to use the macro to fill an area. This could be used to create an interesting paving effect for example.


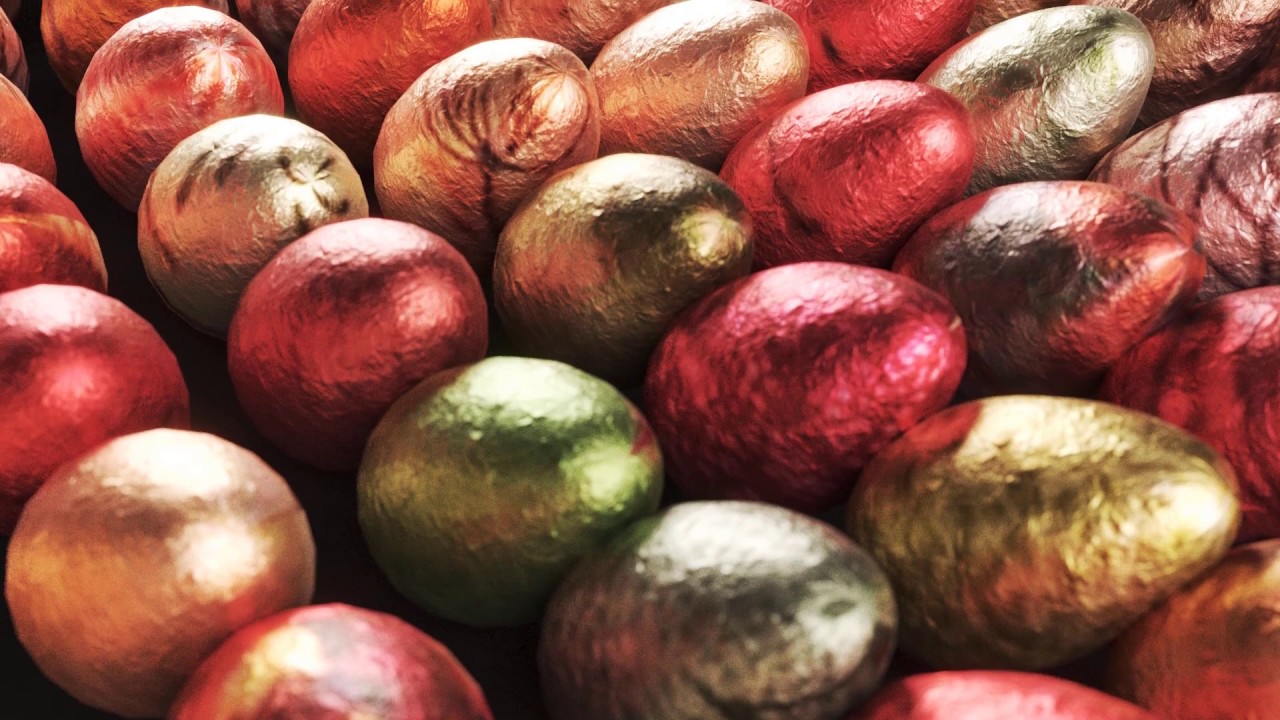
Now we have our basic style set up we can start playing with the materials. I’d like to randomly apply several patterns to these eggs, but I don’t really want to have to create loads of individual maps. One solution is to find a texture that contains several tiles in a stacked formation (in this example I used a patchwork texture), and then automatically offset the UVs to grab each individual tile. It’s a really quick approach.
Some time ago now, we released a tutorial explaining how to do this with RailClone, but the graph setup was a little too complex for everyday use. However, thanks to RailClone’s Macro feature we can now make this much much simpler and achieve the same affect using a single node. Here’s how it works.
- Make sure the source geometry (the egg) is mapped using the whole of the texture - UV Space 0 to 1. This means it should display to complete texture with all the tiles.
![UV setup for extracting tiles]()
- Create a new Extract Tiles Stack Bond macro from the UV and Materials Group or use the one in the tutorial file. Wire it between the existing macro and the Generator.
- Set the # Tiles on U value to the number of tiles horizontally on your texture. In this example there are 15 tiles.
- Set the # Tiles on V value to the number of tiles Vertically on your texture. In this example there are 9 tiles.
- If the tiles are slightly random sizes or you want to remove the joints between them, you can use the Fixed Offset and Tile Adjust settings to crop in on each square a little closer. It just takes a little experimentation to get it right.
![UV Extraction]()
- And that’s it! You have now randomly extracted the patches from this texture and distributed them randomly on the eggs. It’s a really handy macro for paving, walls, facades and much more.


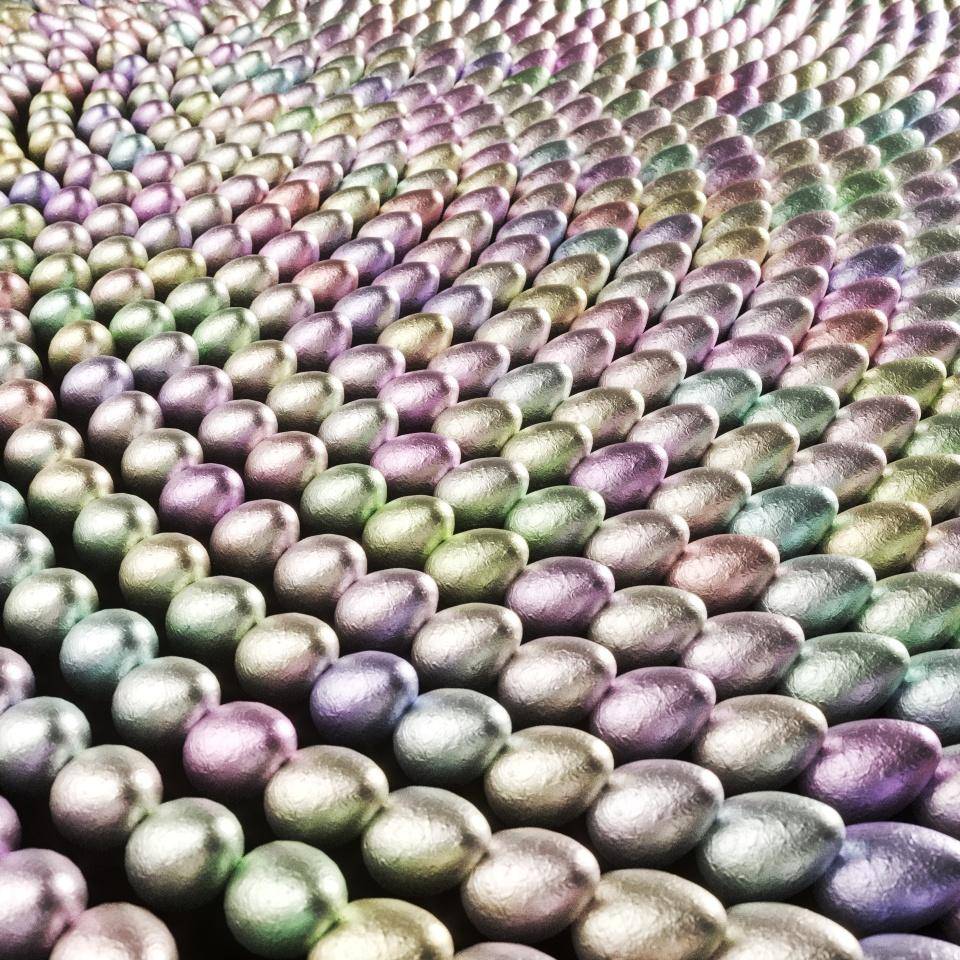
If you don't need textures but want to create egges with solid colours instead, you can do that easily using RailClone Colour, which has the ability to use a colour sampled from a random pixel on a map. Here’s how it works:
- Open the Material Editor and pick the material from the RailClone Object.
- Wire a new RailClone Colour map to the Diffuse Input.
![RailClone colour setup for colour extraction]()
- Enable the Tint setting. This allows you to apply a colour picked either from a gradient or a map.
- Leave Random Strength Min and Max on 100%
- Click on Get Colour from Map and load the map you wish to extract colours from.
- Finally, choose the Blending Mode. These are akin to the blending modes in Photoshop and they’re used to mix the colour selected using the tint features with the textures randomised from the Maps section above. In this case we don’t have any maps and we want just the tint colour to be used, so change the Blending mode to Normal.
- That’s it. If you render now you’ll have eggs tinted using colours that have been randomly selected from the texture.

Finally we can combine these two techniques using a third RailClone Colour map. Not many people are aware if this, but by outputting black and white values, RailClone Colour can easily be used as a mask. In this example we will use the pastel colours to write the iToo Software logo in egge, and tint the remaining eggs using the patchwork textures. Here’s how:
- First of all, you’ll need to add a surface to your RailClone style that’ll be used to place the mask texture. Just add a Surface node and wire it to the Generator’s Surface input. Pick a mesh from the scene. The segments will be projected onto this surface, but since it’s planar in this example there’s no visible effect.
![the final graph]()
- Next go back to the Material editor. Create a new Mix map and wire it to the material's Diffuse input.
- Wire the Patchwork texture to the Mix Map’s first input.
- Wire the pastel RailClone Colour map to the second input.
- Create a new RailClone Colour map and wire it to the Mix Amount input.
![The final material network]()
- Select the new RailClone Colour map and enable Tint.
![Mask Map]()
- Change the mode to As Texture on Surface and set the Blending mode to Normal.
- Click Get Colour From Map and pick a black and white mask map. This will now mask the two textures, placed under the RailClone object using the surface’s UV mapping.


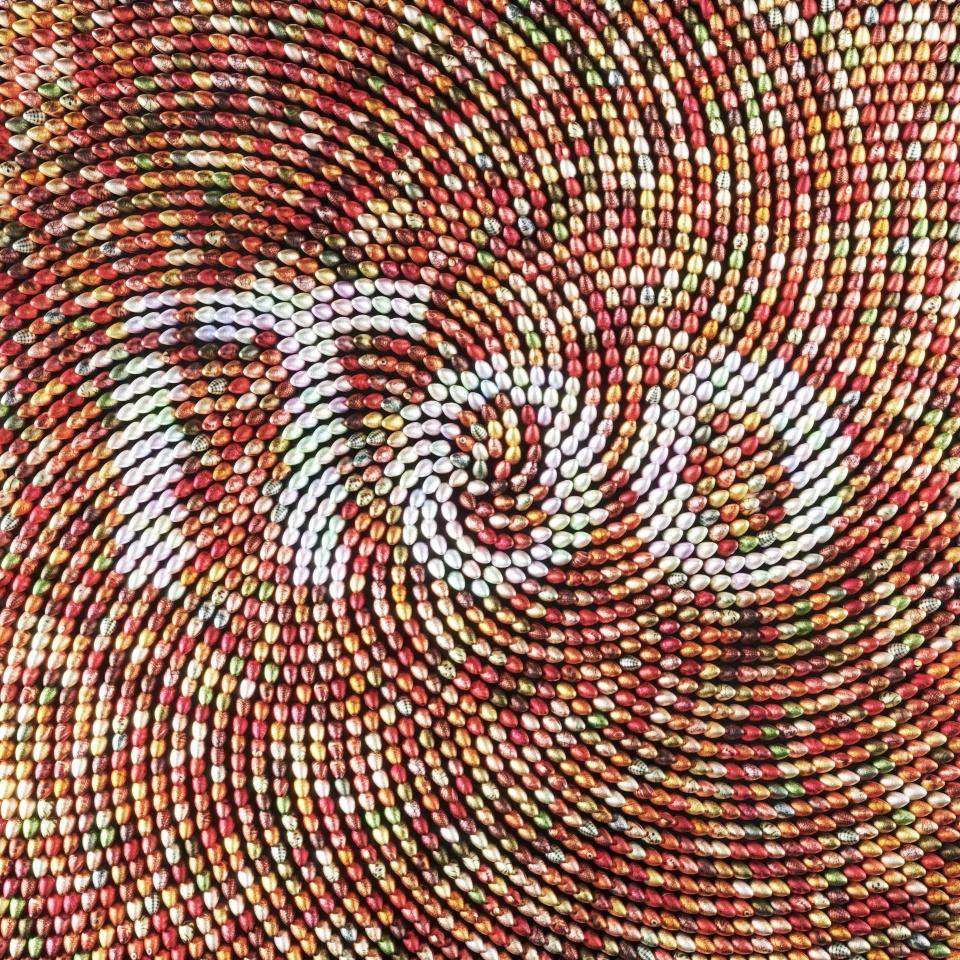
And that’s it! If you render now you’ll have masked between the two texture randomisation approaches. Now, this is perhaps not an everyday usage for these techniques, but I hope you can see how this could be useful for all kinds of other purposes. One final note. If you are using Corona (or another engine other than V-Ray) and material effects are not working, you might need to disable the Instancing engine from the Display rollout.
Thanks, and stay tuned for more coming soon, and remember if you’ve got a question you’d like to see explained in a short tutorial, just let us know on the forum or the comments below this video.