Tutorials
Learn new skills with our bite sized lessons
Featured Products
Get Products
Introduction
In Forest Pack 5 we released a brand new feature called Forest Effects. This allows you to extend the existing features of Forest Pack by adding new functionality from a library, importing them from individual files, or creating your own using expressions. Forest Pack 5 also includes a number of examples of effects that could be useful for your work and can act springboard to help you to learn to write your own.
When we created Forest Effects we envisaged two types of user. Effects Users who would download, install and use existing effects created by iToo or other artists. And Effects Authors who would create and use their own effects and hopefully share them within the studio and the wider online community. In this introductory tutorial we'll focus on the former, and demonstrate how effects are imported and used, including an overview of the built in effects, how to run 3rd party effects and how to install effects files to the library for easy access and re-use.
Included in the download for this tutorial are 10 new effects which can be categorised into 4 types.
Transform effects
- Bend by exclude area
Transform Effects can be used to control the rotation, translation or scale of scattered items.In this example scattered objects can be made to lean away from exclude areas. Ideal for placing items on rugs!
Tint effects
- Change tint colour by altitude
Effects can also be used to control Forest Colour maps. This effect changes tint based on the item's altitude with a blend control to transition between two colours.
Item effects
- Change items by altitude
- Change items by distance to boundary
Using the index of the Geometry list effects can be used to control which items are being scattered. In these two example the geometry is changed based on the altitude or the items proximity to a boundary. There's also a noise control to help disguise the transition.
Animationeffects
- Animate frames by distance to object
- Animate frames by distance to boundary (exclude)
- Animation frames by distance to boundary (Include)
- Lock animation frames
- Offset animation
- Leaf fall animation
Sampled frames can be controlled using Animation effects. In the first four items in the list above the displayed frame is changed depending on an item's proximity to Include areas, Exclude Areas or an object. You can also use effect to lock or offset animation frames which is useful if you want to use animation samples to vary geometry as we illustrated in the Randomising Procedural objects tutorial. Finally it's even possible to animate objects procedurally, in the Leaf Fall animation effect we've created a simple animation directly in Forest Pack.
The Effects Interface
To get started let's take a look at the effects rollout. Using this simple interface you can control the parameters of any effects loaded into the Forest Pack object, load effects from the library, or launch the editor to create your own. To open the Effects Browser to view the presets in the library click on the  button.
The Effects Library
The Effects Browser allows you to navigate the effects that ship with Forest Pack. It also allows you to install and manage your own effects or those obtained from a third party. Let's take a look at the browser interface and then load an effect.
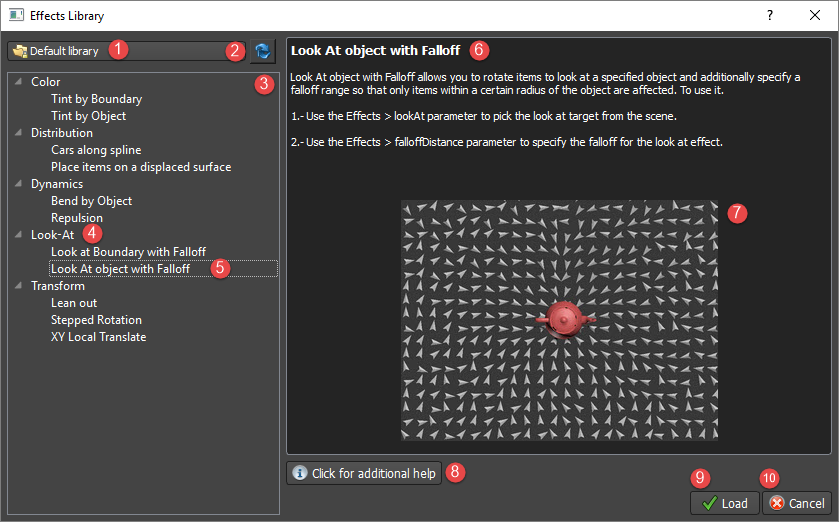
Starting from the top left you have the Library Selector dropdown (1) that let's you change between libraries. In a standard installation you have two libraries, the Default library for the effects that ship with Forest Pack, and a User's library for your own effects or those you've downloaded from others. If you make any changes to the libraries manually, click the Refresh button to update the browser.
The large pane on the left is the Effects Navigator (3) that displays a tree view of the effects (5) in the selected library. This is divided into Categories which are similar to folders in that they provide a way of organising your effects.
When you select an effect in the Effects Navigator a description (6) and preview image (7) will display in the main window. This is user-definable but would normally contain information and instructions on how to use the effect.
Underneath this you have a Click for additional help button. Click this to go to a web page with online help or more information about the selected effect. For iToo effects this takes you to our documentation server but if you create your own effects you can add any URL here you like.
Once you've selected an effect and understood how it works by reading the description, to add it to Forest Pack just click the Load button (9). For example, in the scene shown below we have an island populated with some Palm trees.At the moment the trees are all mostly upright, but in real life trees near the edge of an area would normally lean outwards to maximise their exposure to available light.

In Forest Pack 5 we include an effect to simulate this called Lean Out. To load this effect all I have to do is:
- Go to the Effects rollout.
- Click to
![Introducing Forest Effects-image2016-4-1 18:47:22.png]() open the Effects Browser.
open the Effects Browser. - Use the Effects navigator to select the Lean Out
- Read about the effect in the description pane to see instructions for its use.
- Click Load, that's all there is to it.
Parameters list
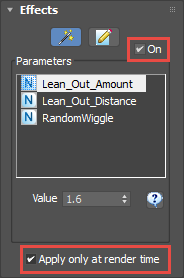
Once you've loaded an effect its editable values are available in the parameters list. For example, this effect has 3 editable parameters: Lean_Out_Amount, Lean_Out_Distance and RandomWiggle. Based on the description we know that:
- Lean_Out_Amount determines the angle of the lean effect. Positive values lean objects towards the boundary, negative values lean objects away from the boundary.
- Lean_Out_Distance defines the size of the falloff from the boundary's edge that the lean out effect influences. Increase this to influence more trees. At 0 the lean our effect is disabled.
- RandomWiggle is used because lean out effect overwrites any existing randomised rotation so this will reintroduce a bit of chaos.
After configuring the lean out effect correctly we get a much more realistic distribution of trees. Without effects this would be difficult to achieve without manually adjusting the scattered objects or complex maps.

You'll also see in the rollout a couple of other useful options. A On checkbox allows you to disable the effect, and Apply Only at Render Time allows you to disable the effects in the viewport only which is useful when an effect takes a while to calculate, especially if you're working on animations.
Examples of included effects
That's really all there is to using the built in effects and most are easy to understand and use. A few though require you to set up Forest Pack in a specific way, and where this is the case the details can be found in the description, so lets look at a few examples, starting with the tint effects.
Tint by Boundary and Tint By Object are two included effects that allow you control a Forest Colour map based on an item's distance from either an include spline or an object. Our tint based effects are set up to change the colour from white to black so that a Forest Colour map can be used to blend between two other maps or materials. To do this you have to set up the scene as follows:
- To blend between maps or colours, use a Mix map. For clarity I'm just going to change the colours to red and green and then apply a Forest Colour map to the Mix Amount slot.
![Introducing Forest Effects-image2016-5-27 11:8:22.png]()
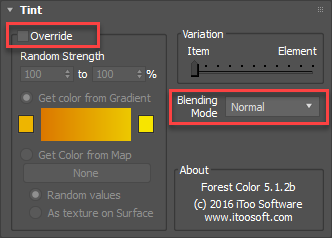
- All Forest Colour maps applied to the object will be affected except those that have Tint Override turned on. For this map to work as a mask we need to make sure this option is disabled.
![Introducing Forest Effects-newcolorsettings.png]()
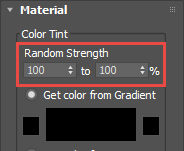
- In the Forest object's Materials rollout the Random Strength value is still applicable - for the tint effects to work fully set the start and end to 100%. Alternatively use different values if you'd like to retain some randomisation.
![Introducing Forest Effects-image2016-5-27 11:9:16.png]()
- To illustrate I'll use Tint by Boundary. Open the Effects editor, select the effect and click Load
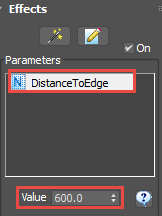
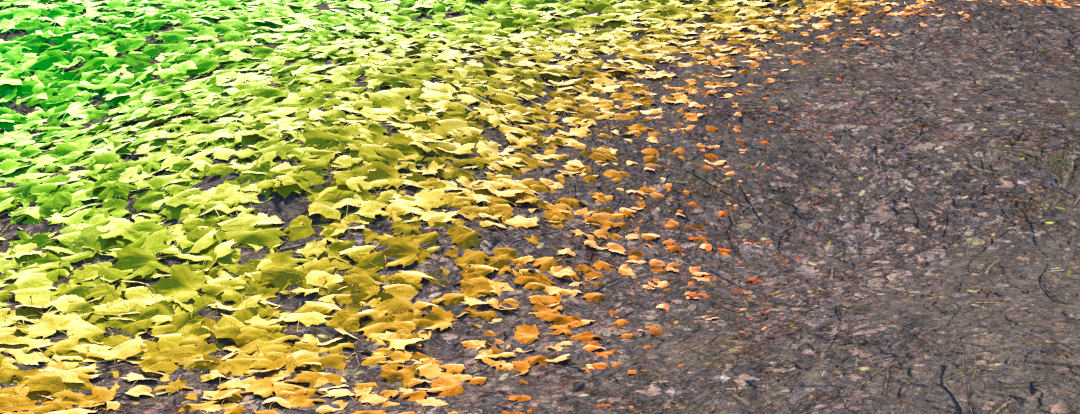
- This effect has only one parameter called DistanceToEdge.
![Introducing Forest Effects-image2016-5-27 11:22:17.png]()
If I increase this value and then click render the colour of the scattered items blends between red and green based on their distance from the nearest edge of an Include area.![Introducing Forest Effects-image2016-5-27 11:30:8.png]()

Some effects may require to pick an object from the scene. For example the Bend By Object effect is similar to the Lean Out effect demonstrated earlier, except in this version the scattered items are rotated based on their proximity to an object in the scene instead of Include areas. To use it, select the Object property in the Parameters list. Click the Object Picker button and select a geometry object from the scene. You can now use the Lean_Out_Amount, Lean_Out_Distance and RandomWiggle parameters as we did earlier to bend the scattered items based on their proximity to the selected object.
Other Effects that use objects include Repulsion, Tint By Object, and Lookat Object With Falloff.
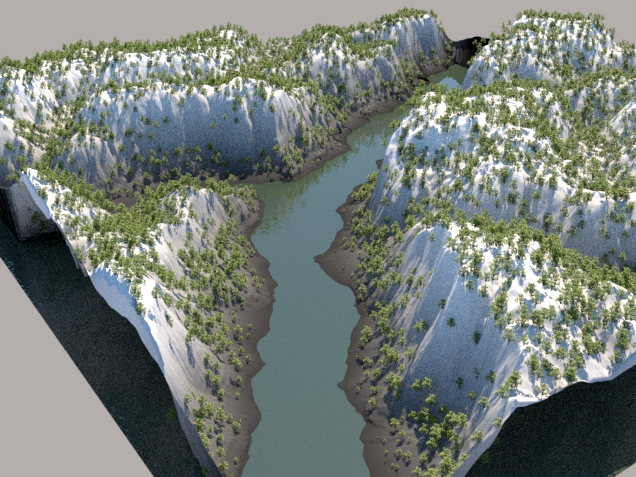
You can also drive effects based on the tracks of any other objects in the scene. For example, we'll use the DisplacementSize track of a V-Ray Displacement modifier to position trees on the Z axis.
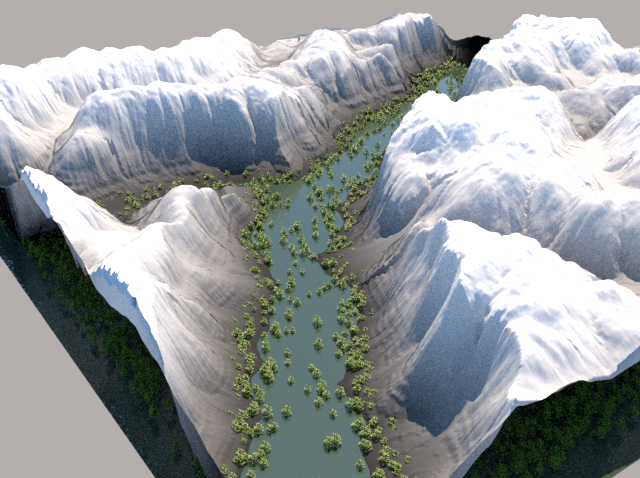
if you use Displacement maps to create terrain then you'll be aware that this can be an issue combined with Forest Pack. Forest needs to read the height information of the terrain before rendertime in order to correctly place the objects but this information is not available if you're using displacement. The image below represents this problem, the displaced surface is not detected by Forest Pack
Forest Pack 5 includes an effect called Scatter on Displaced Surface that allows you to position the objects on the Z axis to match the displaced mesh with additional controls to randomise each item's position on the Z axis. To use it follow these steps:
- Add item(s) in the Geometry rollout in the usual way.
- Make sure Forest Pack is aligned with the displaced plane on the Z axis.
- In the Transform rollout, enter a value of 100% for both the Z Min and Z Max parameters. Activate Z > Map and Probability map.
- Apply the same displacement texture as is applied to the plane to the Map input slot.
- Feel free to add any Scale randomisation, the effect can compensate for differently sized items.
- In the Distribution rollout, set the Collision Height to 100%. Once the value has been changed, collisions can be turned off if you don't need them.
- Go to the Effects rollout and click DisplacementSize, select the Amount controller of the V-Ray Displacement modifier (or other similar plugin) that is applied to the surface. The tree's Z position is now driven by this value and changing the parameter
also automatically updates Forest Pack's distribution. If you render now you'll see that the objects are moved to the surface of the displaced geometry!![Introducing Forest Effects-image2016-5-27 12:30:48.png]()
- For more control you can fine -tune this scatter. Use zRandMin and zRandMax to add additional Z position randomisation to the items after displacement.
- Use AltitudeLimitTop to hide objects above a certain height.
- Use AltitudeLimitBottom to hide objects below certain height.
- Use topFalloff to gradually scale objects to 0 as they approach the height set in AltitudeLimitTop.
- Use bottomFalloff to gradually scale objects to 0 as they approach the height set in AltitudeLimitBottom.
Note: this effect will not allow you to use the Slope or Direction controls in the surface rollout.
Loading 3rd party effects
If you'd like to import an effect supplied by us or another user, then Forest Pack makes this process simple. To illustrate I'll import the Leaf Fall effect included in the downloads for this tutorial. This effect is designed to create a simple leaf animation for those times when you don't need something as complex as a particle system. To load it, follow these steps:
Forest effects are saved in .eff files that include all the necessary data including the expression, parameters, description plus other information and any preview images. They are designed to be small, portable and easy to share.
- From the Effects rollout, click
![Introducing Forest Effects-image2015-10-23 13:19:4.png]() to Open the Effects Editor.
to Open the Effects Editor. - We'll look at this interface more in a future tutorial. for now just click
![Introducing Forest Effects-image2015-10-23 13:21:17.png]() to open the file selector.
to open the file selector. - Select the FEffects_LeafFall.eff file from the downloads for this tutorial and click Open.
- In the Effects Editor you'll now see the expression and the Parameters that are used. All you need to do is Click OK to evaluate the expression and close the editor. The effect is now working and you can adjust the parameters as follows to see how it works.
![Introducing Forest Effects-image2016-5-27 13:1:31.png]()
- Use startFrame to enter that time at which the items should start spawning.
- Use endFrame to enter that time at which the items should have finished spawning.
- Use startHeightMin to define the minimum randomised starting height for scattered items.
- Use startHeightMax to define the maximum randomised starting height for scattered items.
- Use startRotMin to define the minimum randomised starting rotation for scattered items.
- Use StartRotMax to define the Maximum randomised starting rotation for scattered items
- Use minSpeed to define the minimum randomised speed for scattered items.
- Use maxSpeed to define maximum randomised speed for scattered items.
 to Open the Effects Editor.
 to open the file selector.
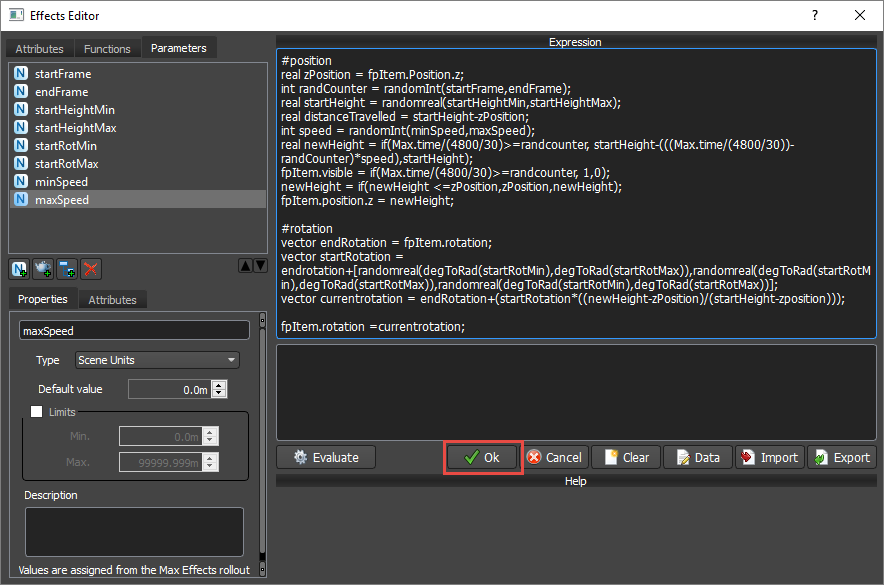
Imported effects will overwrite any code or parameters you already have in the effects editor. A warning will be displayed to prevent accidentally losing work but be aware that the import process is undoable.
Adding Effects to the library
The effects library is fully editable so it's easy for you to add effects that you'd like to access regularly. To do this:
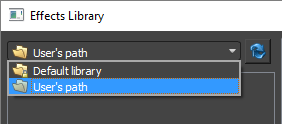
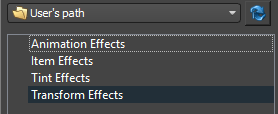
- Open the Effects Browser window. From here you'll see a library dropdown above the navigator. the Default Library contains the effects that ship with Forest Pack and this cannot be edited. The second option is the User's Library, this is where you can save your own effects.
![Introducing Forest Effects-image2016-5-30 12:4:25.png]()
- In this example we're going to add 10 new effects to the user library, but rather than just add them in one long and confusing list let's get organised! Effects are grouped using Categories. To add them all you need to do is Right-Click in the tree navigator and select Add New Category.
![Introducing Forest Effects-image2016-5-30 12:5:29.png]()
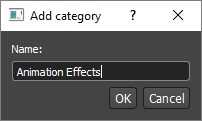
- An Add Category window will open asking you to name the category. Enter Animation Effects and click OK.
![Introducing Forest Effects-image2016-5-30 12:7:45.png]()
- Do the same for Transform Effects, Tint Effects, and Item Effects. You'll now have 4 categories in the navigator view.
![Introducing Forest Effects-image2016-5-30 12:10:27.png]()

Though not demonstrated here, categories can be nested so that you can organise them any way you like.
Now the categories are set up we can add the effects. To illustrate, here's how you'd add the Animate by Distance to Exclude effect to the Animations category:
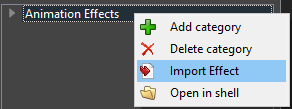
- Right Click on the Animation Effects category and select Import Effect.
![Introducing Forest Effects-image2016-4-1 19:16:57.png]()
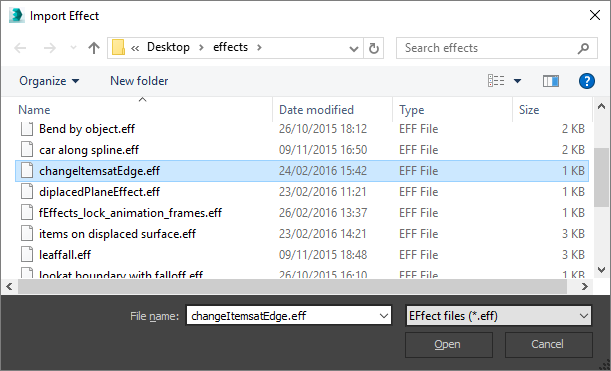
- Select an FEffects_AnimateByDistanceToExcludeBoundary.eff file from the downloads for this tutorial and click Open.
![Introducing Forest Effects-image2016-4-1 19:17:59.png]()
- The .eff file will be moved to the user directory and will now be available whenever you need if from the browser.
It's also possible to add effects manually by simply copying them to the effects directory. To do this:
- Right click on a Category and select Open in Shell to locate the location where effects are saved
- Copy the .eff files to this location.
- Once you moved all you files, open the Library Browser and click Refresh
![Introducing Forest Effects-image2016-5-30 14:17:4.png]() .
.
 .
.it's actually possible to organise you're entire library this way if you choose. Just add folders for new categories and add the .eff files where you'd like them. remember to click refresh to update the browser if you make any changes.
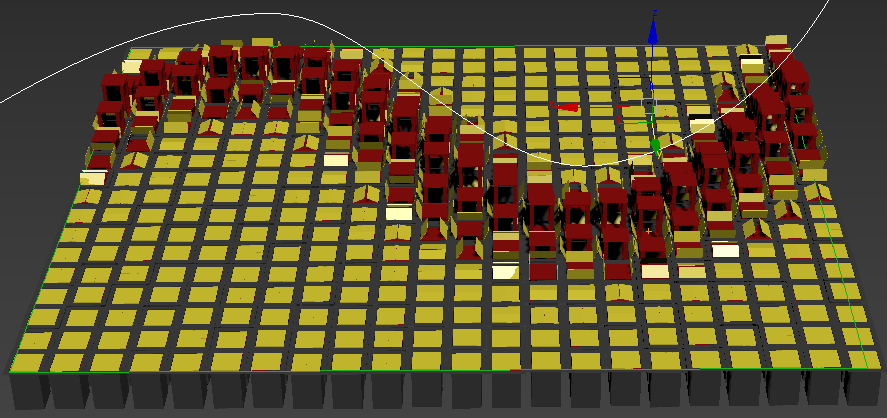
Once you're new effects have been added, they're ready to use! To illustrate I'll quickly show how the animation effects are set up using the Animate By Distance to Exclude Area effect but the same applies for most of the animation effects we've released so far.
- Firstly, go to the Animation rollout and change the mode to Frame From Map
- Enter a Start and End value to define the range. These are the frames that are controlled by the effect. For example, for an object with a 35 frame animation at the start of the timeline you would set the End value to 34.
- Since we added it earlier we can load the Animate By Distance to Exclude Area script using the Effects Browser.
- There's not currently a way for effects to access the number of samples defined by the animation rollout so we need to enter it using parameters. To do that enter 35, the total number of frames, for the Samples parameter.
- Finally you can enter a Falloff value to define the size of the excludes area's influence. When the exclude area is moved or animated, the animation of the scattered objects are now driven by their proximity to this spline. Check out the other effects included in this tutorial, they work in a very similar way.
![Introducing Forest Effects-image2016-5-30 15:5:27.png]()
Conclusion
As you can see using and managing effects is an easy and powerful new feature. In this tutorial we've looked at how to import existing effects, load them from the library, and add them to the browser as well as focusing on a few key examples to help get you started with using effects in your work. In a future tutorial we'll look at how to create your own effects using the simple expressions editor. If you'd like to create your own effects and you can't wait until then, please feel free to check out the detailed documentation for more information to help you get started, and please feel free to share your efforts on our forum! In the meantime stay tuned for more training and visit the tutorials page for even more Tips&Tricks videos and in-depth tutorials.