Amazingly, this year marks Forest Pack’s 25th anniversary. Over the past quarter-century, we've worked hard to evolve and expand Forest Pack's features, adding hundreds of tools all with the guidance and feedback from you—the artists who use them every day in your projects.
Despite our efforts to keep you informed, the sheer breadth of Forest Pack means that some features might not get the spotlight they deserve. With constant updates and new tools added to our roster, it's easy for some truly handy techniques to go unnoticed.
To fix this, here are ten Forest Pack features that you might have missed. This list includes a few recent additions alongside some older ones that have stood the test of time but might not have caught your attention. .
1. Using Object, Paint, and Forest Areas
We all know about using closed Splines as include or exclude areas, but did you know that Forest Pack also allows the use of 3D objects, paint areas, and even other Forest Pack objects for this purpose?
The video above demonstrates how to use objects to exclude items from a scatter, including advanced controls that allow you to choose the height of the model that should be used for the exclude calculation. It great for excluding scatters from below objects in your scene, without you needing to create and manage additional splines.
In this video we take another step back in time to a video that shows the shows and overview of the area types but with a focus on the paint features of Forest Pack, including some little known options that allow you to specify which models to scatter on a per-area basis, as well as the ability to convert any spline to a paint area and vice versa.
In this video you can see how one Forest Pack can be used to scatter trees, while another is used to scatter grass. By linking them together, the grass can be removed from underneath the trees, just as it would in real life! As you can see, it’s another old video, but its amazing how many people don’t take advantage of this powerful feature. Excluding grass from under your trees can really improve the realism of your landscape renders!
2. Advanced Falloff Controls with Custom Curves
Falloff is a powerful feature that controls how items in your scatter area change in size and density at the perimeter of areas. While linear falloff is straightforward, using custom curve controls opens up so many more artistic possibilities. You can create falloffs that simulate natural transitions, such as how grass thins out towards a pathway or how trees gradually become sparser near the edge of a forest. It’s also great for creating wear patterns on roads and paths, an option put to great use by the Blur team in their trailer for Mafia 3.
3. Natural Growth Patterns with Clusters
Clusters are designed to mimic the way plants group in natural environments, an essential look for achieving realistic vegetation scatters but it has all kinds of other uses as demonstrated in the video above. This feature groups similar types of objects together based on their color ID assigned in the Items rollout. It also works great with Forest Sets, but more about that feature later!
4. Match Colour ID for Custom Distributions
Match Colour ID on Map leverages the color data in a bitmap to drive the distribution of scattered objects, allowing for precise control over where different objects appear within the scatter area. This is particularly useful for replicating real-world ecological patterns, such as distributing different types of plants according to soil type or moisture levels represented in a color map. Some people use this feature in an extreme way as demonstrated in our detailed case study of the film Baahubali, where this feature played a critical role in laying out 400 unique building structures and over 50 varieties of plants!
5. Improve Scene Management with Forest Sets
Now for a more recent introduction - Forest Sets. This invaluable helper plugin is used to create a multi-purpose container for scene objects. A Forest Set object can be added to a Forest object as a collection of geometry, surfaces, references, or areas. Multiple Forest Objects can share a Forest Set, making it simple to add or remove areas, geometry, or surfaces and update several scatters from one easy-to-edit location. Even better, the contents of a layer can be dynamically linked to a Forest Set, making it easy to update scatters using familiar scene organisation tools
6. Custom Edit Mode for Detailed Placement
This mode is invaluable for fine-tuning your scene, allowing you to move items in a scatter and place specific objects in precise locations to perfect the composition or meet specific design requirements, such as placing larger trees at focal points or adjusting the position of unique elements in a landscape design.
7. Go Beyond the Default Distribution Mode
When most people think of Forest Pack, think of using areas and distribution maps for scattering, but the plugin is capable of so much more! In addition to image-based scattering, it also supports various distribution modes to cater to different design needs, including reference, path, and particles. Each mode offers unique benefits, such as aligning objects along a spline for paths or using particles to work with PFlow or TyFlow and achieve things that are simply not possible with a traditional scattering tool.
8. Extending Forest Pack’s features with Effects
Forest Effects was introduced in Forest Pack 5 and has been quietly improved in every release since. For the uninitiated, it’s an expressions editor built directly into Forest Pack that allows you to create your own scattering rules. You can add these new features by importing presets from a built in library , importing them from individual files shared by the community, or even creating your own using from scratch. Many new features and presets have been added since the video above was recorded, so it’s well worth checking out!
9. Integrated Colour Correction
The integrated Colour Correction feature in Forest Pack lets you modify the hue, saturation, and value of scattered objects directly within the plugin. This means you can rapidly adjust the colours of imported assets if they don’t quite match the rest of your scene, or even completely change the colours from summer to autumn as shown in the video above!
10. Customisable Asset Library
Forest Pack’s library browser not only comes with an extensive range of presets but did you know it also allows you to import your custom assets directly from your scene in a couple of clicks? This feature makes it incredibly easy to expand your library with personal, free, or other downloaded items to reuse and share across multiple projects.
Of course there are many many more features, in fact this could probably have been a list of 100 features, so whether you're a veteran user or new to the software, we hope you feel inspired to explore new ways to use Forest Pack. Every update is developed with your feedback and needs as an artist in mind, so keep experimenting, keep sharing your insights, and let’s keep growing together.
Related Post
Explore more articles from the ITOOSOFT team
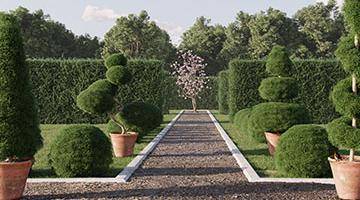
Learn how to create topiary boxwood shrubs of any shape using handy Forest Pack presets
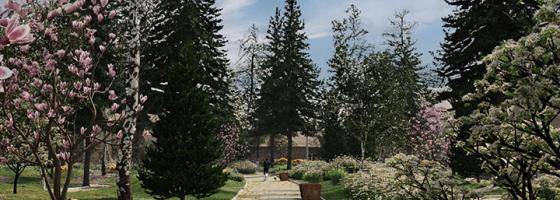
Get more presets in the latest collection from The3dGarden