Файлы ресурсов
Требования
- info RailClone Pro
Introduction
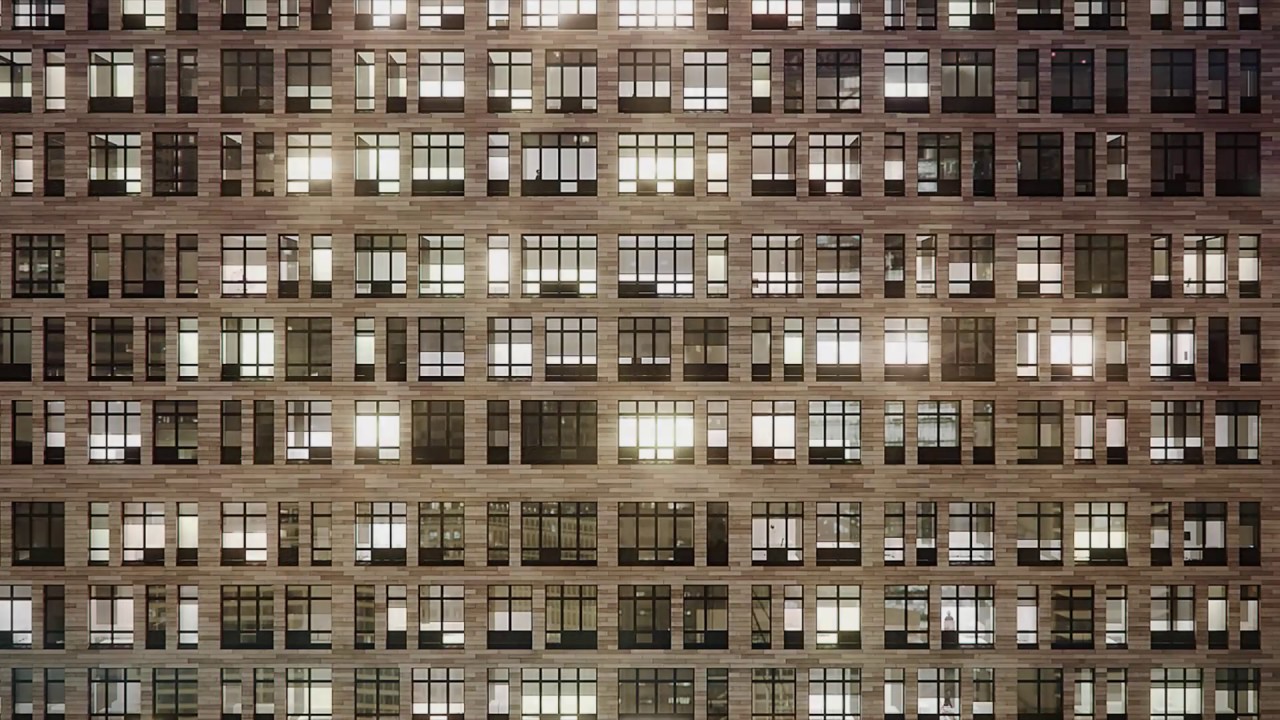
In a recent Tips and Tricks instalment we looked at how to use RailClone to easily add 100s of differently sized windows to a façade. In this video we'll extend that idea and add roller blinds to the windows. To make them easy to use, the blinds will use the same splines as the windows and will also have randomised "openness" properties to add some lifelike variety to your buildings.
By completing this tutorial you will be able to:
- Fine tune the position of segments using Padding
- Export the current size of segments and use them to drive other parameters
- Create an expression that returns a given percentage of the height of the array.
Download Contents
The exercise files for this tutorial includes the following .max scenes compatible with Max 2010 and includes materials for Mental Ray and V-Ray.
- paramterising_blinds_start.max The starting file if you want to follow the tutorial.
- parameterising_blinds_end.max The result of the completed tutorial.
Creating the Blinds
In the downloads for this tutorial you'll find the blind has already ben sliced into pieces ready to fit into an A2S array. Using the same slicing approach as seen in the window tutorial I've provided segments for the top left. the top right, the top, the default, and the bottom. The first thing to do is to add these to a basic array. To do this:
- Create a new RailClone object and open the Style Editor
- Drag an A2S generator from the Items list to the Construction View.
- Create a new Spline node and wire it to the generator's Clipping Spline input.
- In the spline node's properties, pick a rectangular spline
- Select the Generator and turn on Properties > Rules > Clipping Area > Extend X/Y Size to Area. This will automatically set the size of the array to fit inside the spline
- Change Rules > Default Segment > Mode from tile to Scale to stretch the segments on the X axis.
- Create a new Segment and set Properties > Alignment > Z to Pivot. We'll do this to all the segments to make sure they connect correctly. Pick blind_bottom from the scene and wire to the Generator's Bottom input.
- Now we'll quickly add the other segments. Duplicate the segment, pick blind_default from the scene and wire to the Generator's Default input.
- Duplicate the segment again and pick blind_top from the scene and wire to the Generator's Top input.
- Duplicate the segment, pick blind_left from the scene and wire to the Generator's LT Corner input.
- Duplicate the segment, pick blind_right from the scene and wire to the Generator's RT Corner input.
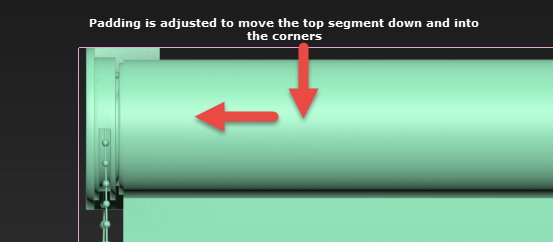
- If you look at the top of the blind you'll see it doesn't line up with the brackets on the sides. To fix this select the blind_top Segment and enter a Padding > Top value of 0.007m to move the blind down so that it is correctly aligned.
- Because of the shape of the bracket it's pushing the top section along too far. Fix this by selecting the blind_left Segment and enter a Padding > Right value of -0.036m to close up the unwanted gap in the top row. Similarly enter a Padding > Left value of -0.022m for theblind_right segment.
![Randomising Blinds-image2015-11-20 19:22:26.png]()
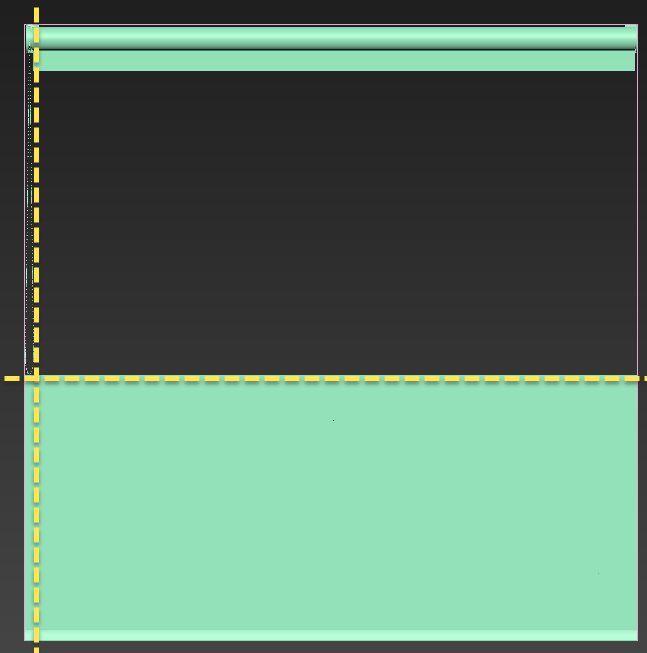
- Because of the chain the default segment has a large gap above it, also the default and bottom segments are not inset on the sides to account for the top corner brackets.
![Randomising Blinds-image2015-11-20 19:24:19.png]()
- We can fix this by automatically extracting the size of geometry and using this to control the Fixed Size parameter of other segments. For example, to fix the chain issue you can right click on the blind_top segment and click Export Attributes > Size > Y, this will output the height of this segment taking into consideration any padding.
- Select the blind_left segment, right click and select Export Parameters > Fixed Size > Fixed Size > Y.
- Wire these two exported properties together and the Default segment will close up the gap. This works but there's a problem because the chain is now being scaled incorrectly
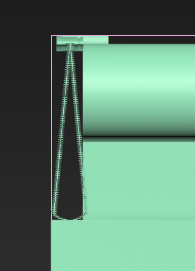
![Randomising Blinds-image2015-11-20 19:33:3.png]()
We can fix this by select the blind_left segment and turning off General > Fixed Size > Scale Segment. With this setting disabled the fixed size value is used to calculate the position of adjacent segments but it doesn't affect the shape of the geometry. - To inset the default and bottom on the sides, add two new empty segments to the graph, one wired in the Left input and one in the Right.
- Export the Export Parameters > Fixed Size > Fixed Size > X property for both segments.
- Export Export Attributes > Size > X for theblind_left and blind_right segments.
- Wire the blind_left segment's X Size output to the Left Segment's X Size input.
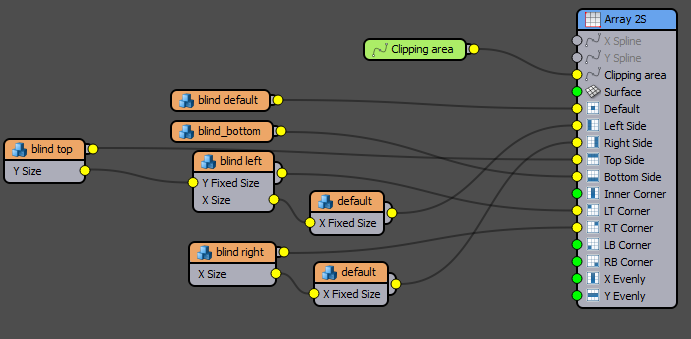
- Wire the blind_right segment's X Size output to the Right Segment's X Size input. At this point your graph should resemble the image below.
![Randomising Blinds-image2015-11-20 19:41:35.png]()
- The blind fills the entire clipping spline, in the next few steps we'll randomise the openness of the blind within a minimum and maximum percentage range of the window's height.
- To do this you add a randomised padding value to the bottom segment, but you can't use expressions to control the properties of a segment directly, instead you have to wire the segment to a Transform operator and manipulate that instead. Wire a new Transform operator between the blind_bottom segment and the Generator.
- Right click on the Transform operator and select Export Parameters > Padding > Bottom.
- We want to randomise this padding value so add wire the exported value to a new Random Number node.
- Select the Random node and change the type to Scene Units.
- Change Generate on to X Spline Start. This will generate a new random value for each window.
- Export Min (Scene Units) and Max (Scene Units). we're going to add an expression so that the random number are within a range determined by a percentage of the windows height. This will mean you can use the style on windows of any size without having to enter measured values.
- Wire an Arithmetic node to the Min input. Change the Operation to Expression, open the Expression Editor and enter the following
YSplineLength*(Input1/100)
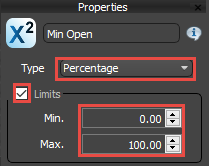
YSplineLength is used in this expression to automatically return the height in scene units of the current array. To get the height for the random operator we multiple this by input1, which is the exported percentage value, divided by 100. When you're done, Click OK. - Next we create the Percentage paramter. Wire a new Numeric node to the Arithmetic operator's input, change the type to Percentage and Limit the range between 0 and 100%
![Randomising Blinds-image2015-11-20 19:54:8.png]()
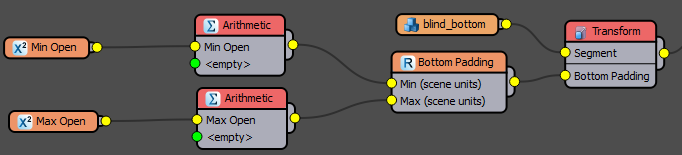
Name the Numeric node Min Open - Select the Numeric and Arithmetic node and copy and paste to create a duplicate. Wire the duplicate to the Random node's Max input. Rename the second Numeric node to Max Open.
![Randomising Blinds-image2015-11-20 19:58:39.png]()
- In the Parameter's rollout, set the Min Open value to 30% and the Max Open value to 80%. Change General > Random Seed to see variations using these values.
- Your final graph looks like this:
![Randomising Blinds-image2015-11-20 20:2:34.png]()
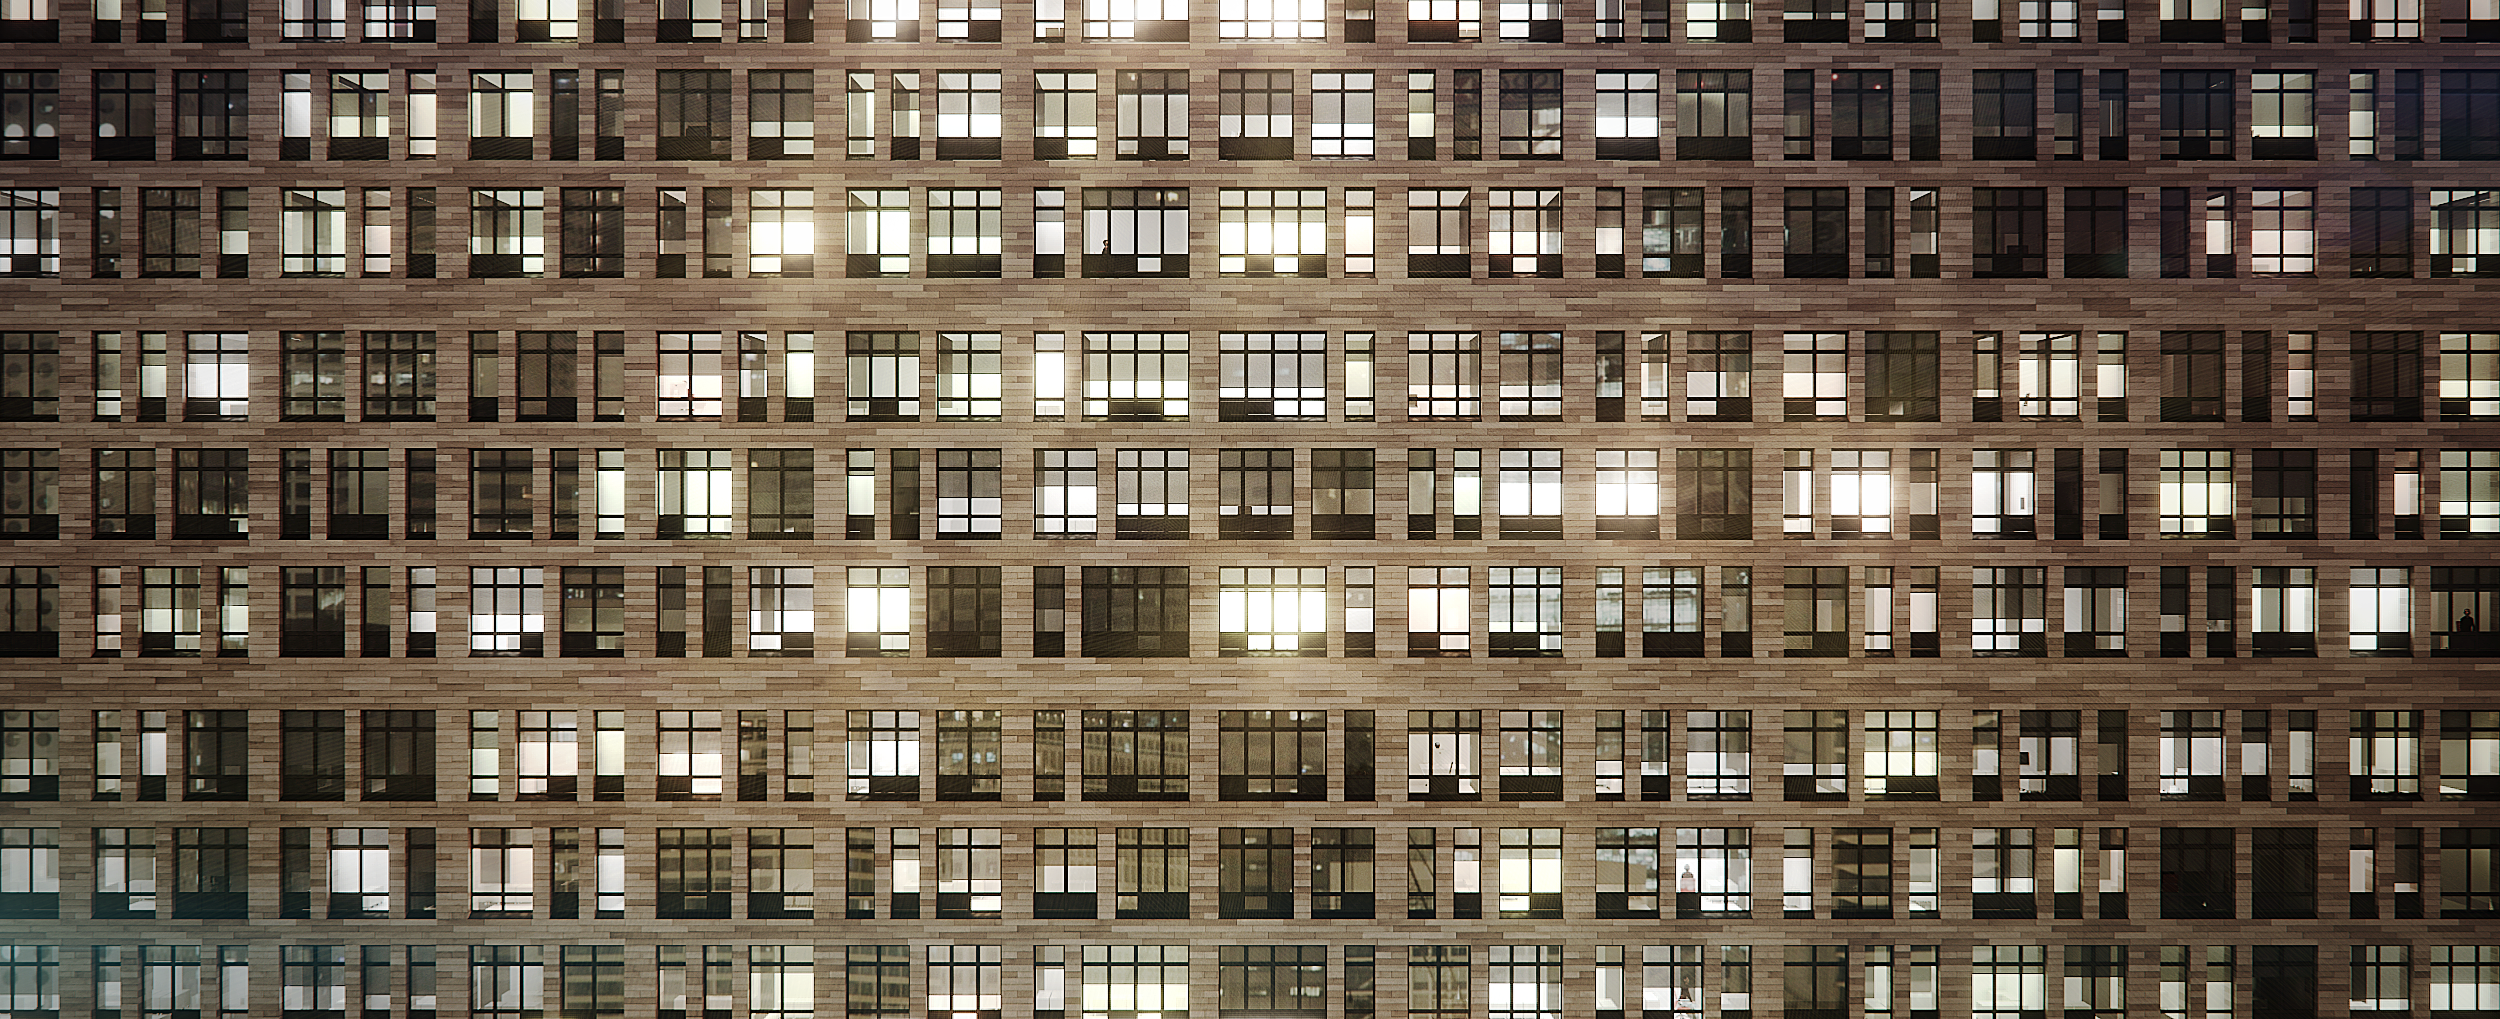
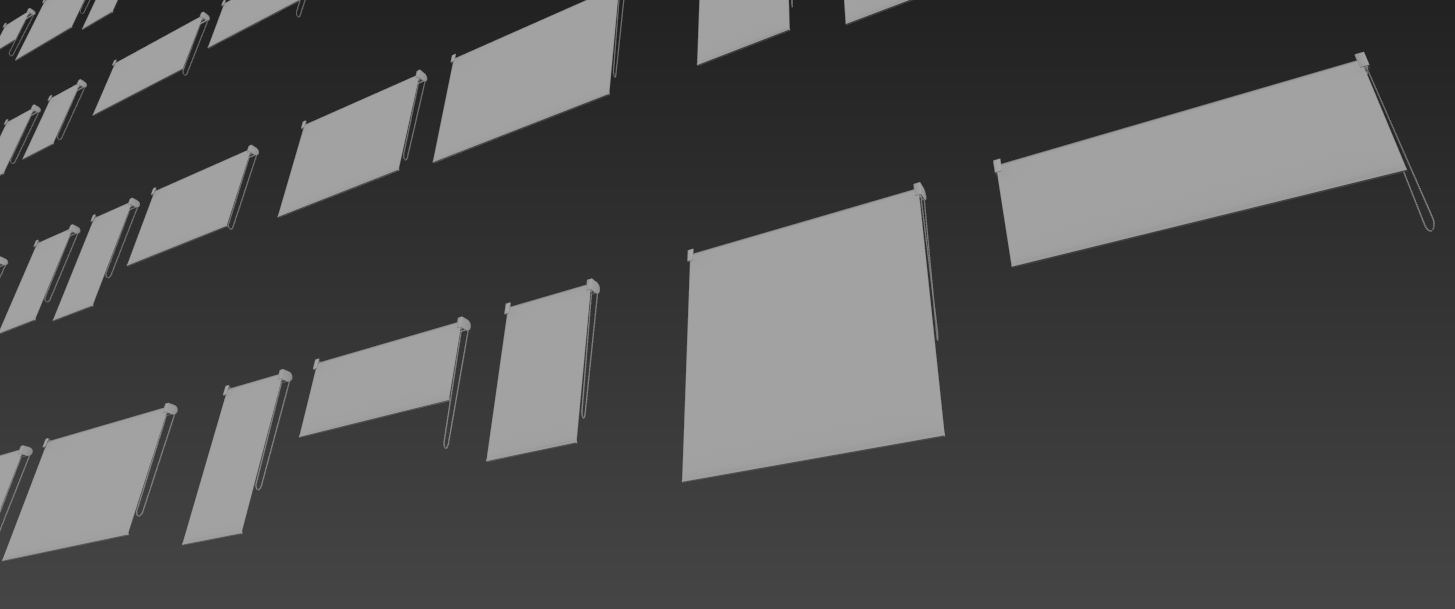
- The beauty of this style is that we can easily apply randomised blinds to an entire façade. To do this make sure to rotate the whole style 90 degrees on the X Axis, and 180 degrees on the Z Axis so that the blind would face inside the windows and change the Clipping path to the Window spline. That's it, instant blinds with randomised open sizes within a minimum and maximum range.
![Randomising Blinds-image2015-11-20 20:5:47.png]()

Conclusion
In this tutorial we illustrated how to create a parametric randomisable roller blind, but similar techniques could easily be used to add many other blind types. If you do this kind of work regularly you may find it beneficial to create a library of generic windows blinds, and curtains that can be easily re used or adapted for projects. If you're interested in learning how to create custom libraries for RailClone, check out the last chapter of our Next Steps with RailClone guide. Meanwhile, stay tuned for future training, or for more information about many aspects of RailClone's features please see our reference section or visit the tutorials page for more Tips&Tricks videos and in-depth tutorials.