Файлы ресурсов
Требования
- info RailClone Pro or Lite

For this week’s Macro Monday tutorial we’re going to take a look at a little-used node called Gradient Probability, a macro that allows you to switch between two different values based on their position along either the X or the Y Spline. Let’s take this building as an example. The architect has decided they’d like to use orange spandrel panels at the bottom of the building, and blue at the top. In between they’d like to gradually transition between the two colours.
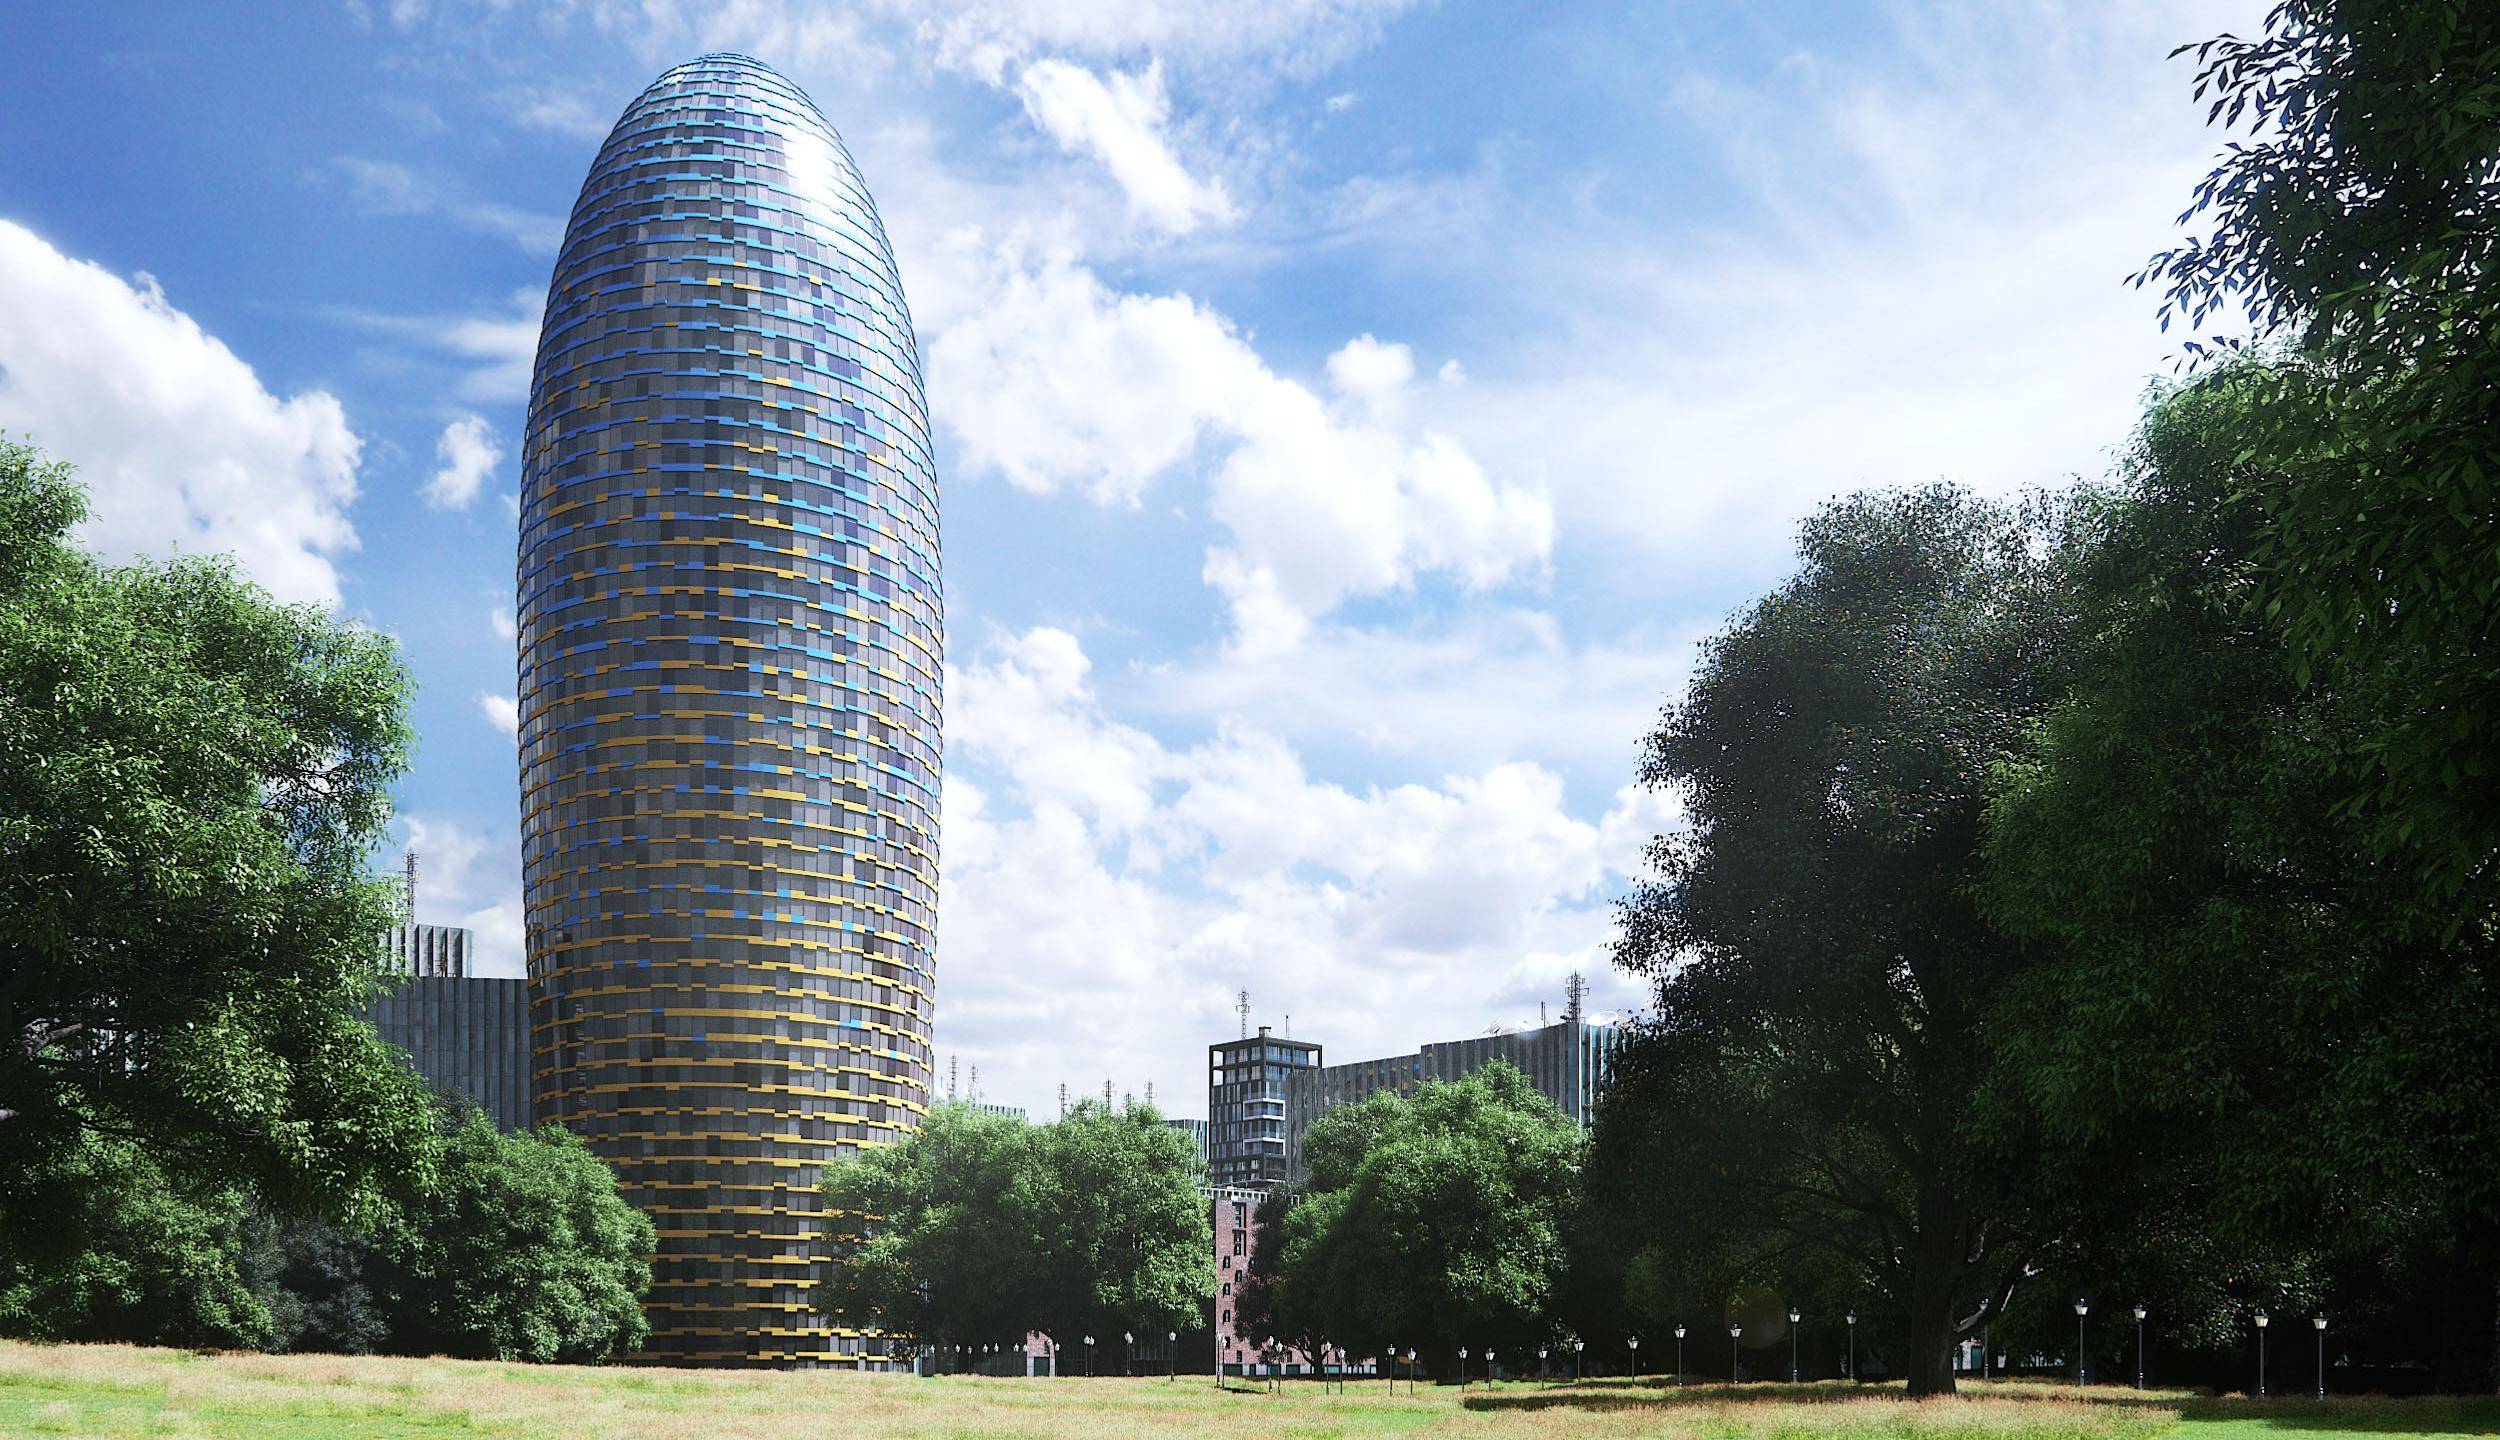
That’s where the Graduated Probability macro can help out.
Before we look at the macro though, let’s create the building since it’s a very simple setup. It consists of just 3 segments, and uses two splines: A circular spline defines the footprint of the building, and a curved spline describes the profile.
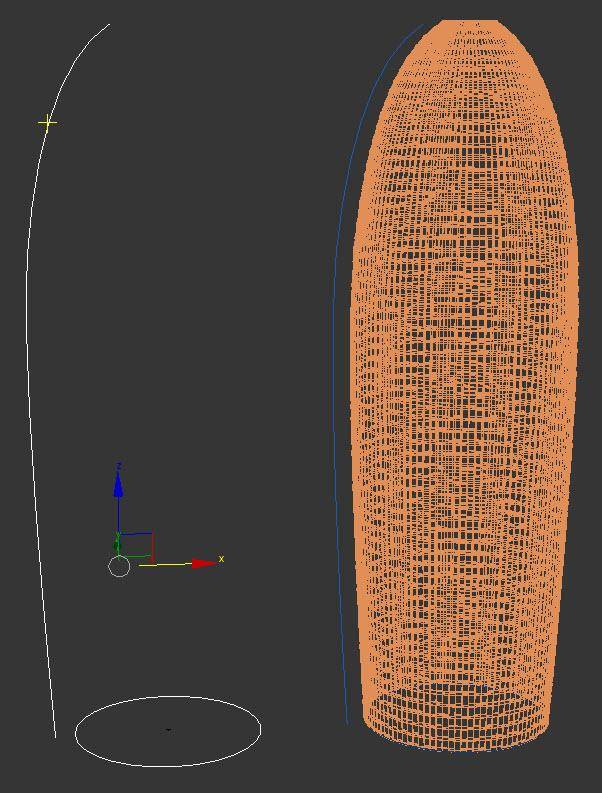
For the materials, there are two IDs set aside for the spandrel panel. Material ID 1 is the orange colour, and material ID 2 is reserved for the blue colour. On the geometry, all the spandrel panels are currently assigned Material ID 1. Also of note, this building can be created using the free Lite version of RailClone. Get it from the iToo Software website.
Now let’s turn these simple components into a building:
- Create a new RailClone object and assign the existing material.
- Open the Style Editor.
- Add an A2S generator. This generator can be used to create double-curved 2-dimensional arrays using splines for the X and Y axes.
- Create a new Spline node, go to its Properties and pick the circular spline from the scene.
- Wire the Spline node to the Generator’s X Spline input.
- Create another Spline node and wire it to generator’s Y Spline input.
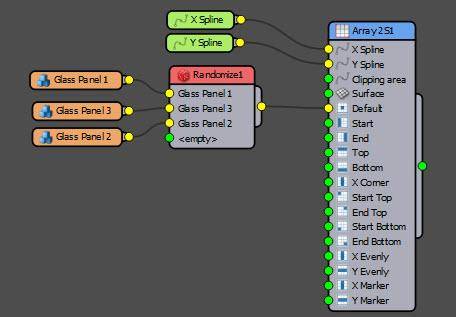
- Now we’ll bring in the geometry. Create 3 new Segment nodes and use them to pick the 3 facade objects from the scene.
- Wire them to a new Randomise operator and wire the Randomise operator to the Default input. Your building should be created.
![RailClone Gradient Probability - final graph]()
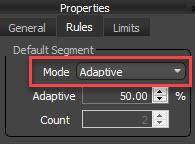
- Finally, change the Generator’s Default Segment mode to Adaptive. This will subtly scale the segments so that they are not sliced at the end of the spline.
![RailClone Gradient Probability - adaptiveMode]()
That’s the basic building setup done, you know have a tower with randomised spandrel panel geometry, but the same orange colour. Let’s look at creating the graduated probability colour effect using a built-in macro. To do this:
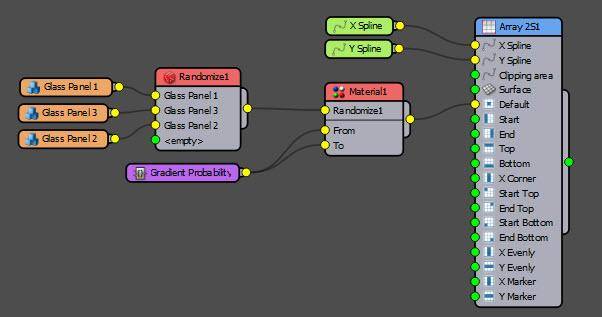
- Wire a Material node between the Randomise node and the Generator. This operator is used to control and randomise material IDs. Use the Material ID property to choose which ID you wish to manipulate.
- To control the selected material ID with the macro, we need to expose the To and From values as inputs. To do that, right click on the Material Node and go to Export Parameters. Select From and To and then click OK.
- Now, go to the Macros panel and open the Arithmetic group. Drag a Gradient Probability Macro to the graph.
- Wire the macro to the Material node's From and To inputs. This macro now controls the new Material ID assignment.
![RailClone Gradient Probability - final graph]()
- Select the Macro and go to the Properties Panel. It has just 5 parameters.
![RailClone Gradient Probability - macro properties]()
- Value 1 is the number that the Macro will output at the start of the spline. In our example we want to use the Orange colour, so we’ll set this to 1.
- Value 2 is the number that the Macro will output by the end of the spline. In our example we want to use the blue colour, so we’ll set this to 2.
- Transition Position is the centre of the transition gradient from 0 to 1. 0 represents the start of the spline and 1 the end. To set the transition to the middle of the building’s height - set this to 0.5.
- The size over which the graduated effect takes place is set using the Transition Range property. The larger this value, the more the transition expands from both sides of the Transition Position.
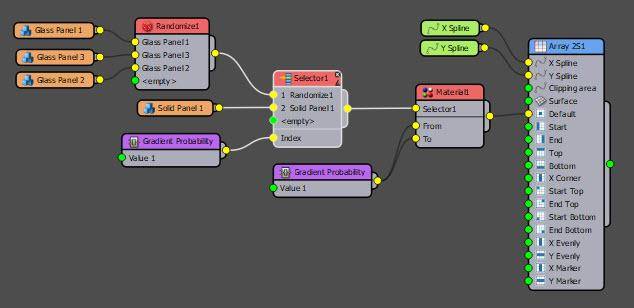
And that’s more or less all there is to it. It’s a simple macro, but for some effects, it can save a lot of time. In this tutorial, we’ve used this macro to control Material IDs, but it can also be used with anything that has a numeric Index. For example, instead of changing the material assignment it could have been used in conjunction with a Selector node to gradually change the geometry based on spline position.
Once again, we hope you’re enjoying this tutorial series. Stay tuned for more videos explaining how to use RailClone and Forest Pack's built-in Macros and Effects.