Resources
Requirements
- info Forest Pack Pro, RailClone Lite or Pro

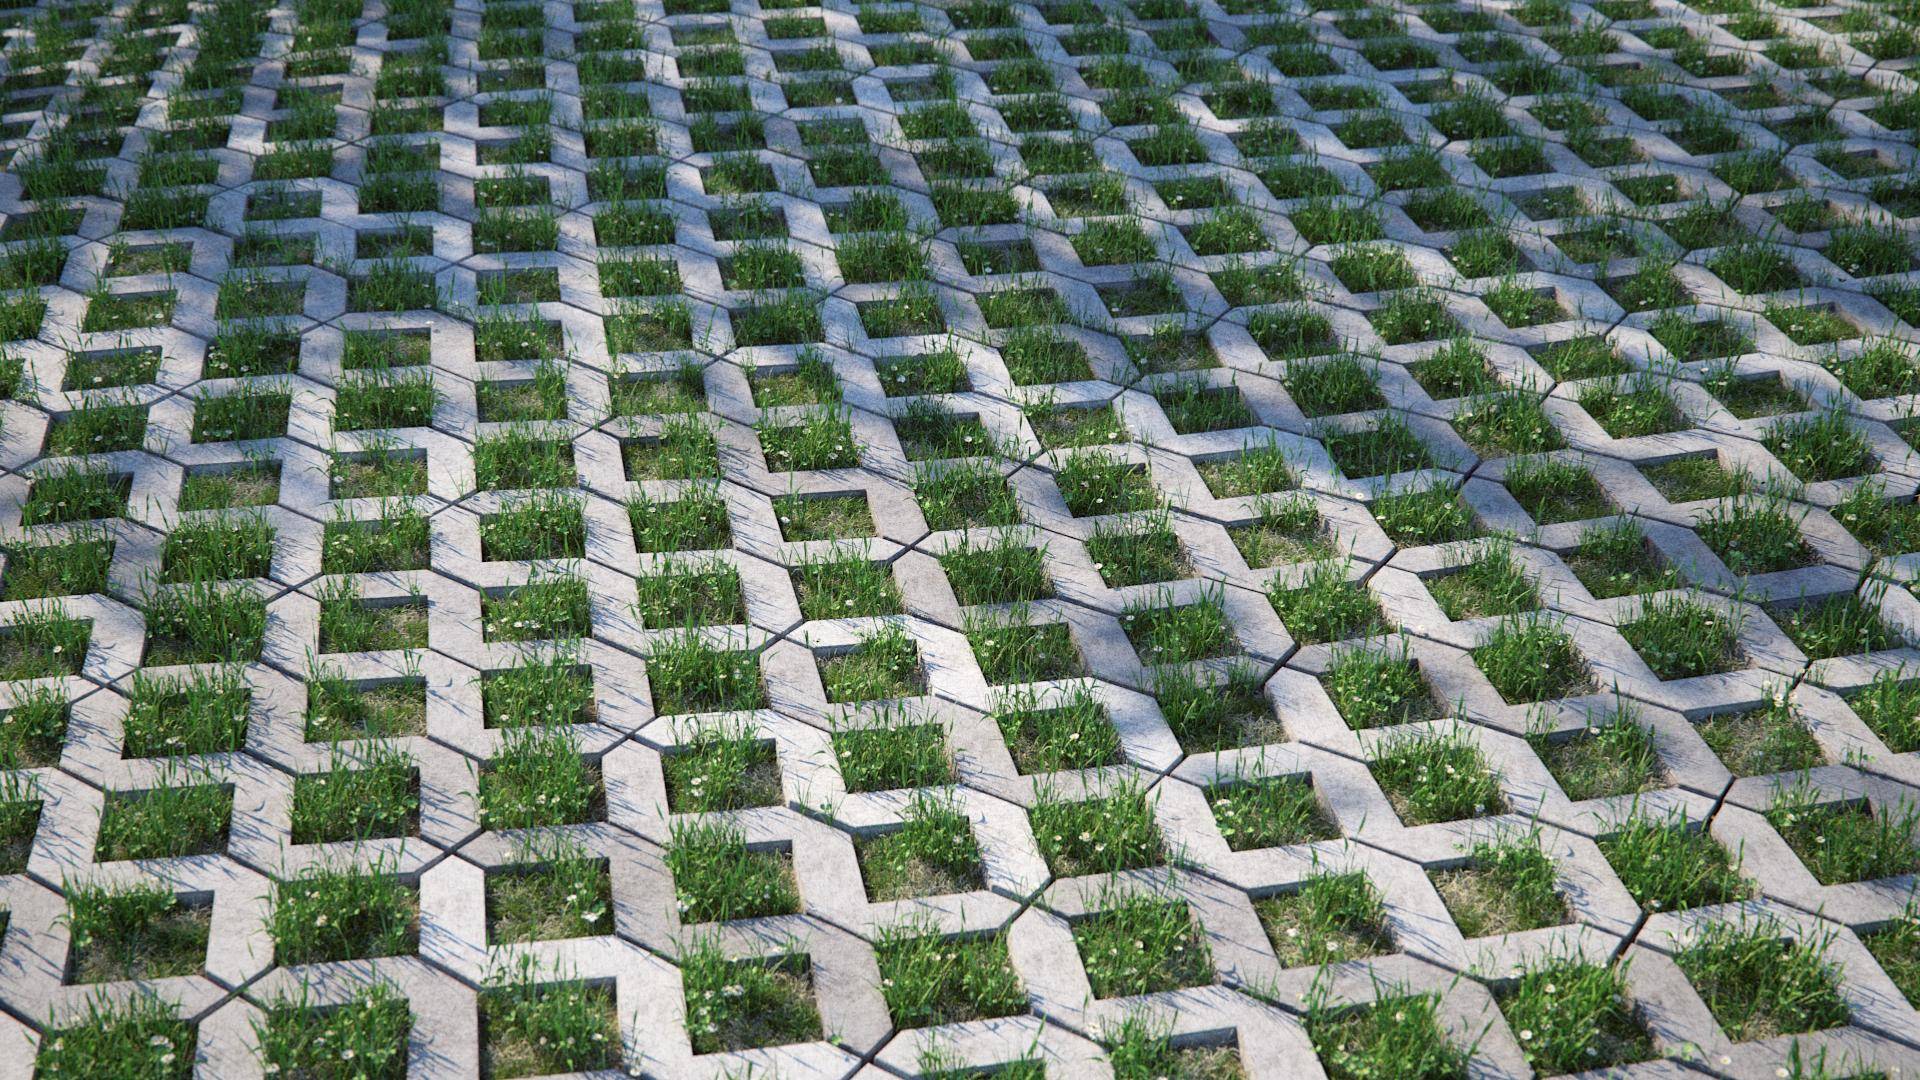
In this tutorial we look at a technique to combine grass and concrete paving. This involves two procedures, firstly creating the paving with RailClone, and secondly adding the plants with Forest Pack. Though this is a specific application, you'll learn many skills that you can use for other purposes, including:
- Creating a RailClone object with a pattern that repeats on the Y axis
- Using Clipping Splines in RailClone
- Randomising transforms in RailClone
- Creating "layers" in Forest Pack by adding a single area multiple times
- Overriding distribution maps on a per area basis
- Excluding geometry using objects
- Using RailClone and Forest Pack together.
Scene Setup
The base scene is easy to set up. If your paving is flat, then all you need is a closed spline, if however you need paving that undulates slightly you'll also need a surface. To illustrate we'll create both:
- Create a spline to define the perimeter of your paved area. A 5.5m x 5.5m rectangle will be fine for this demo.
- Create a plane for the ground that's larger than the spline, 6m x 6m will suffice for this demo. Centre the spline and the surface so that there's an equal overlap all the way around. It's important for RailClone that the surface is larger than the Spline, as it prevents unwanted deformation at the borders.
- To add some undulation to the surface, increase the number of Length and Width segments to 50. Add a Noise modifier, change Z Strength to 30cm and Scale to 200.
That's all we need to do to set up this scene. Now we'll populate this with the concrete paving using RailClone.
Creating pavers with RailClone
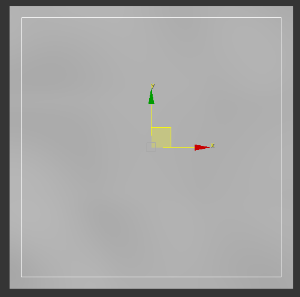
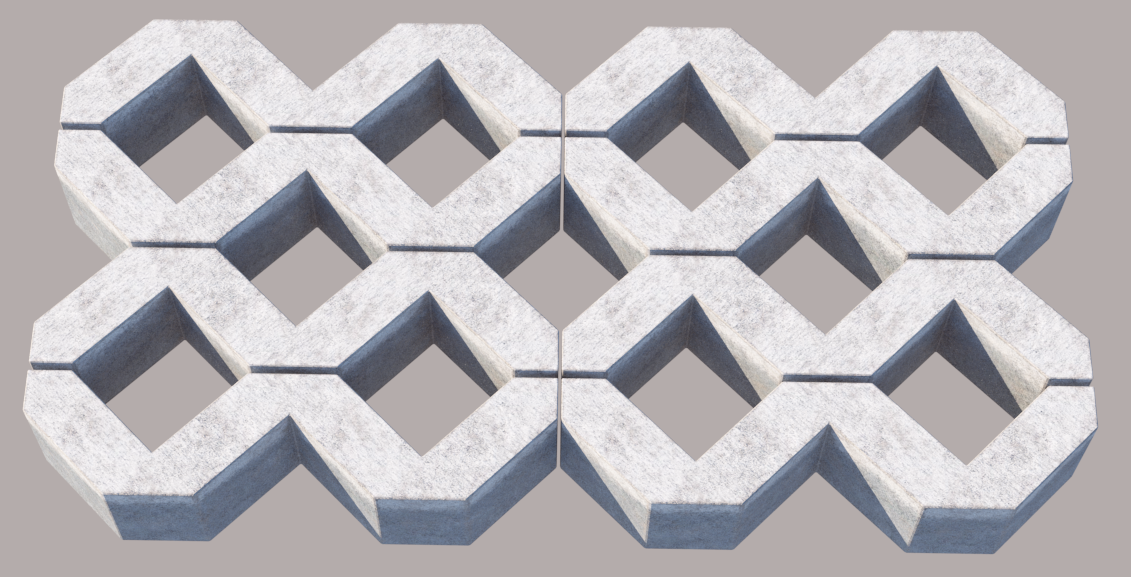
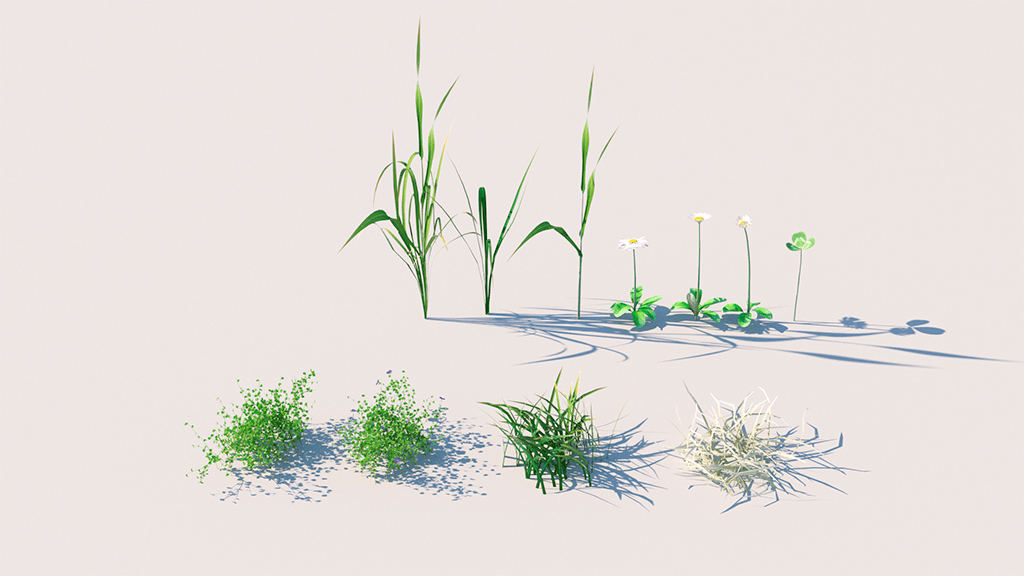
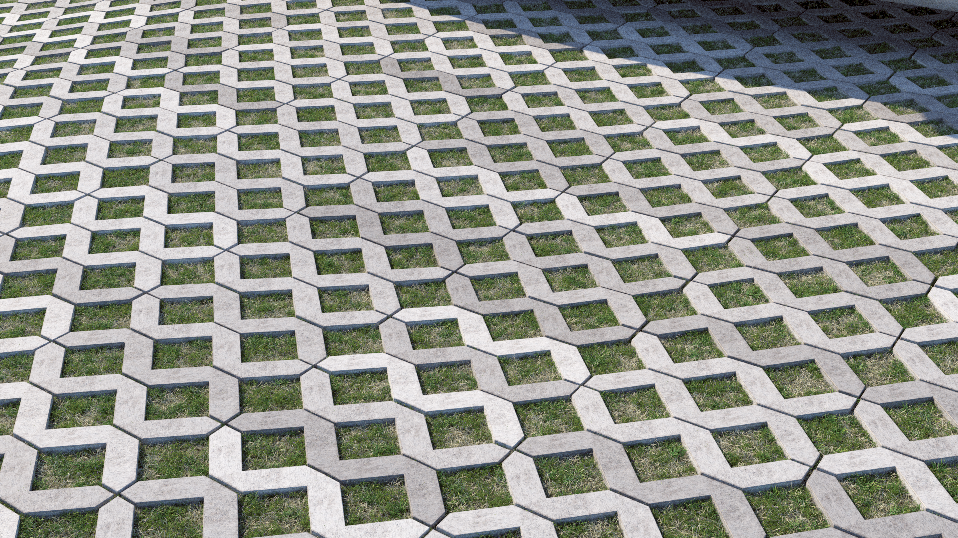
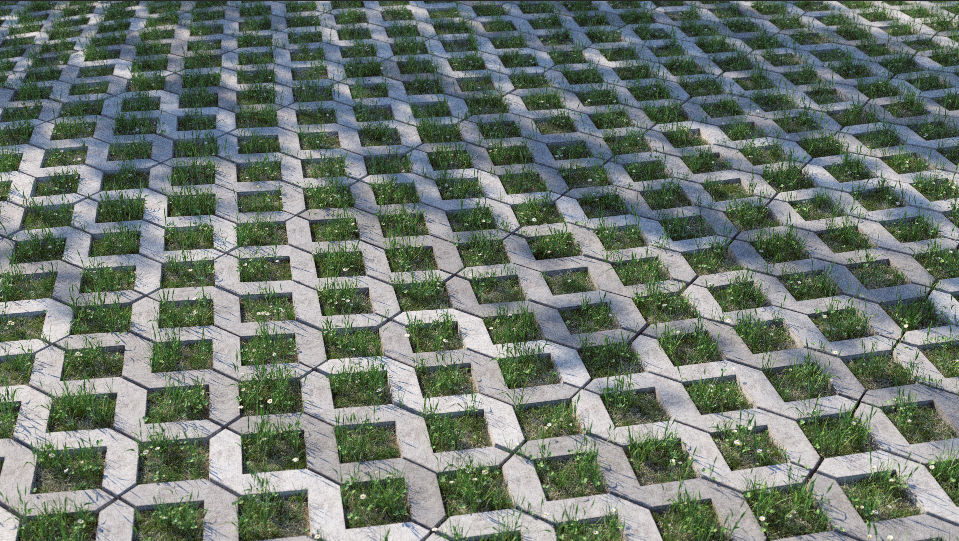
To create the paving segment we need only one segment, a repeatable W shaped slab.
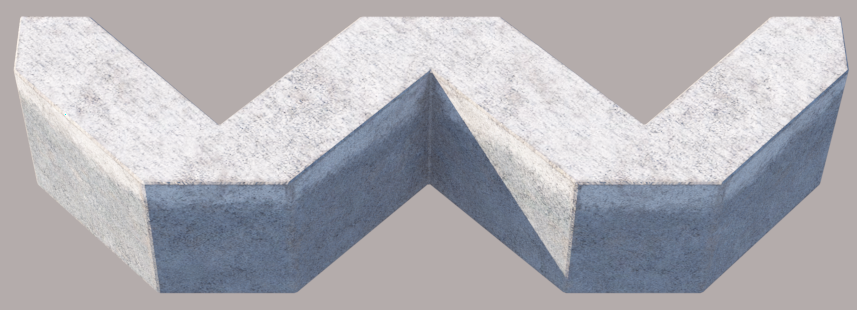
This will be repeated on the X axis and mirrored on the Y axis for alternate rows to create small rectangular pockets that are populated with grass (or stones if you prefer)
This kind of repeating style is perfect for RailClone. Here's how to recreate it with a simple graph: 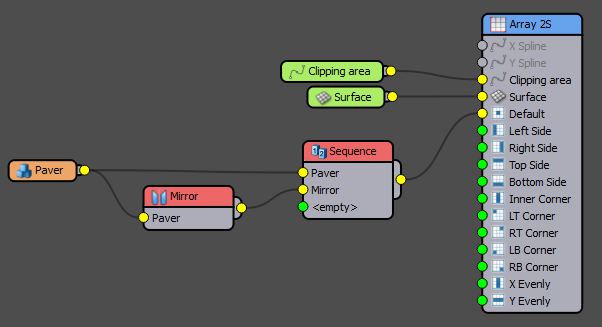
- Create a new RailClone object and open the Style Editor.
- Create a new A2S Generator and turn on Clipping Area > Extend X/Y Size to Area. In this mode the size of the array is calculated automatically using the spline wired to the Clipping Spline input. The array will be large enough to fill the spline, and segments are automatically clipped around the perimeter.
- Create a new Spline base object, pick the rectangular spline created earlier and wire the node to the generator's Clipping Spline input.
- Create a new Surface base object, pick the plane from the scene and wire the node to the Generator's Surface input. Geometry will deform to follow this plane.
- Now we'll add the paving. Create a new Segment node and pick the Paver object from the scene.
- To create a repeating pattern, create a new Sequence operator and change the Increment At parameter to Y. Wire the Sequence operator to the Generator's Default input, then wire the paving Segment to the Sequence operator's first input.
- Create a new Mirror operator and wire it to the Sequence operator's second input. Wire the paving Segment to the Mirror operator and the pattern is complete!
- At the moment the pavers are butted against one another, lets add some gaps between them with some padding. Add 0.3cm of padding to the Top, Bottom, Left, and Right to create a gap.
- Finally let's break it all up a bit with some randomisation. Go to the segment's Transform > Random settings and enter -0.15cm for the minimum value and 0.15cm for the maximum value for all 3 axes. Note that these values are half of the padding size, so they'll never accidentally overlap.
- Finally we need to lower the whole array, through the ground plane. The paving stone is about 10cm tall, but we only really want about 2cm to appear above ground. To do this go to the Generator's settings and enter a value of -8cm for the Z Offset parameter.
The RailClone part of the tutorial is now complete! Let's add the plants.
Adding the Grass with Forest Pack
To add the grass we'll actually create two "layers". One layer of short grass that fills the whole area, and a second layer of individual taller plants. For the techniques shown in this video edge mode isn't available, and when placing an object and detecting edges Forest Pack will use an items pivot point. For filling very small areas this can be problematic if the plants or patches are much wider than the pivot, because you may get issues with leaves and stems overlapping the surrounding concrete. To get around this, the plants in this scene are edited so that the short grass patches are no taller than the height of the paving, and the longer individual plants don't really bifurcate and spread out until they're above the height of the paving. This will help to minimise the likelihood of them intersecting with the concrete, even if they are placed near the edge of the paving.
To scatter these plants:
- Create a new Forest Pack object by picking the surface from the scene.
- In the Surfaces rollout, change the Direction parameter to 0. This will enable the scattered segments to align to the surface normal. Leave all other settings at their defaults.
- Let's add the plants. Go to the Geometry rollout and click Add Multiple
![Creating Concrete and Grass Paving-image2017-6-27_11-46-7.png]() . Pick all the plant models in the scene and select Add.
. Pick all the plant models in the scene and select Add.![Creating Concrete and Grass Paving-image2017-6-27_11-49-53.png]()
- To set the density of the scatter, go to the Distribution rollout and change the map to Full. Adjust the Density > Units value to get the desired coverage of plants, 140cm worked well for me.
![Creating Concrete and Grass Paving-image2017-6-27_11-54-18.png]()
- Add a bit of randomisation by going to the Transform rollout and enabling Rotation and Scale (the default settings are fine). Note that I'm not enabling Translation because later in the tutorial this would randomly offset plants so that they intersect with the pavers.
- Now we can start building this style's first layer. Go to the Areas rollout and turn off the existing Surface area. Next add a new Spline area and select the spline created earlier from the scene.
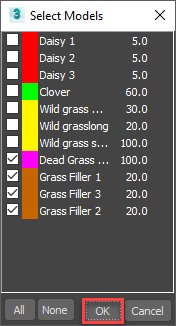
- At the moment this spline contains all the plants in the Geometry list. We would like it to use a subsection of those. Fortunately, in Forest Pack each area can use a selection of the plants by checking the box next to Select Models. Click on the Pick button to choose the models you wish to scatter in this area, in this example we'll use Grass Filler 1 to 3 and Dead Grass Filler. Check these and click OK.
![Creating Concrete and Grass Paving-image2017-6-27_12-15-48.png]()
- To better visualise which plants are being scattered in the viewports you can assign each one a Colour ID in the Geometry rollout, for example as you can see in the image above I assigned a separate colour for the daisies,the clover , the wild grass, the dead grass, and the filler models . To see these colours on the points-cloud, go to the Display rollout and choose Use Color ID. Now we can see more clearly what's going on let's change the probabilities. In this example I used a probability of 100% for the dead grass and 20% for the 3 filler objects but you should experiment to get a mix you're happy with. If you render now you should see the ground cover underneath the paving. Because the grass is not as tall as the paving it doesn't visibly interpenetrate, even though it's covering the whole area.
![Creating Concrete and Grass Paving-image2017-6-27_12-39-40.png]()
- Next lets add the second layer - tall plants. Create another new Spline area and select the same spline from the scene. Turn on Select Model and click on the Pick button to select the remaining plants from the scene, comprising the daisies, clover, and wild grass.
- We can adjust the Probabilities of these plants, and again it's a matter of taste. I'm going to significantly reduce the number of daisies by changing their probability to 5%, reduce the clover to 60% and adjust the grass mix by changing the long grass to 20% and medium length grass to 30%. Now if you render you'll have the two layers but of course now the long grass covers the paving.
![Creating Concrete and Grass Paving-image2017-6-27_12-54-7.png]()
- Forest Pack allows you to remove scattered items that appear underneath geometry in the scene by adding Object areas. To do this, click the Add Object button
![Creating Concrete and Grass Paving-image2017-6-27_12-44-45.png]() from the Areas rollout and select the RailClone pavers object from the scene. Grass will now only appear in the empty squares between the pavers. It works but it could be more accurate. Internally object areas work by creating a black and white map projected from above. This means they're highly optimised for high-poly geometry, but the resolution of this map affects the preciseness of clipping. The size can be edited easily from the Areas rollout, just increase the Resolution parameter from the default 512px to something larger. In this scene I used 4096px to try to get some grass in between the small cracks between the paving stones. Now if you render you get grass only between the paving stones - perfect!
from the Areas rollout and select the RailClone pavers object from the scene. Grass will now only appear in the empty squares between the pavers. It works but it could be more accurate. Internally object areas work by creating a black and white map projected from above. This means they're highly optimised for high-poly geometry, but the resolution of this map affects the preciseness of clipping. The size can be edited easily from the Areas rollout, just increase the Resolution parameter from the default 512px to something larger. In this scene I used 4096px to try to get some grass in between the small cracks between the paving stones. Now if you render you get grass only between the paving stones - perfect!![Creating Concrete and Grass Paving-image2017-6-27_17-35-48.png]()
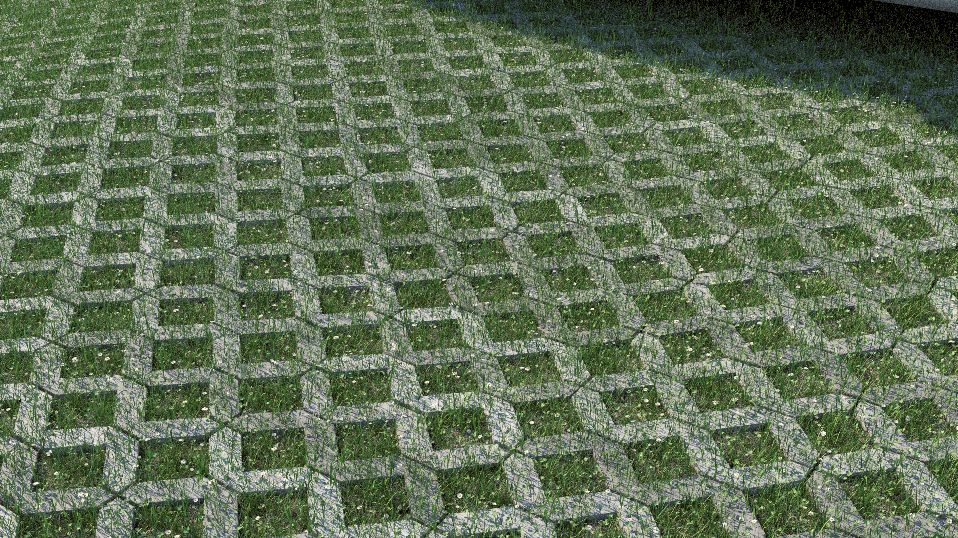
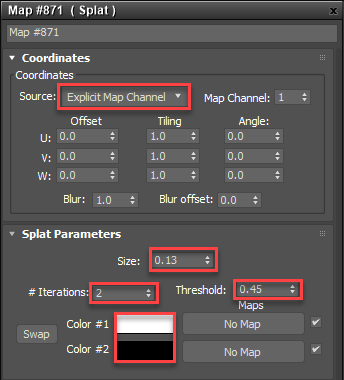
- If you need more variety you can use a different distribution map for each area. For example, instead of an even distribution of long grass, maybe we want the density to vary across the area. To do this add a map to the Distribution Override slot for any Include area. In this example I'll add a Splat map with the following settings:
![Creating Concrete and Grass Paving-image2017-6-28_10-6-52.png]()
This creates some areas where the long grass in missing. Depending on your scene this kind of variation may help to add an additional layer of naturalistic chaos and realism.![Creating Concrete and Grass Paving-image2017-6-27_14-56-26.png]()
 . Pick all the plant models in the scene and select Add.
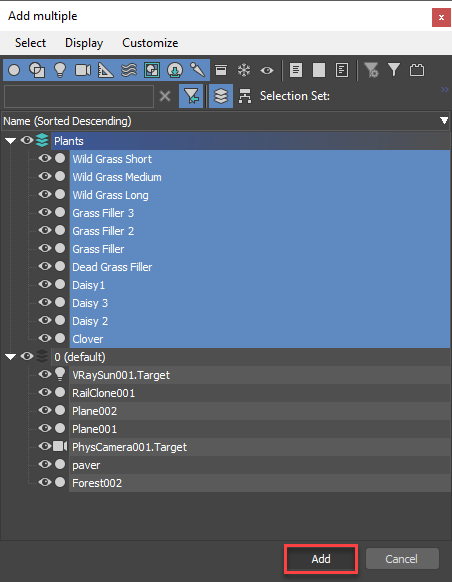

 from the Areas rollout and select the RailClone pavers object from the scene. Grass will now only appear in the empty squares between the pavers. It works but it could be more accurate. Internally object areas work by creating a black and white map projected from above. This means they're highly optimised for high-poly geometry, but the resolution of this map affects the preciseness of clipping. The size can be edited easily from the Areas rollout, just increase the Resolution parameter from the default 512px to something larger. In this scene I used 4096px to try to get some grass in between the small cracks between the paving stones. Now if you render you get grass only between the paving stones - perfect!
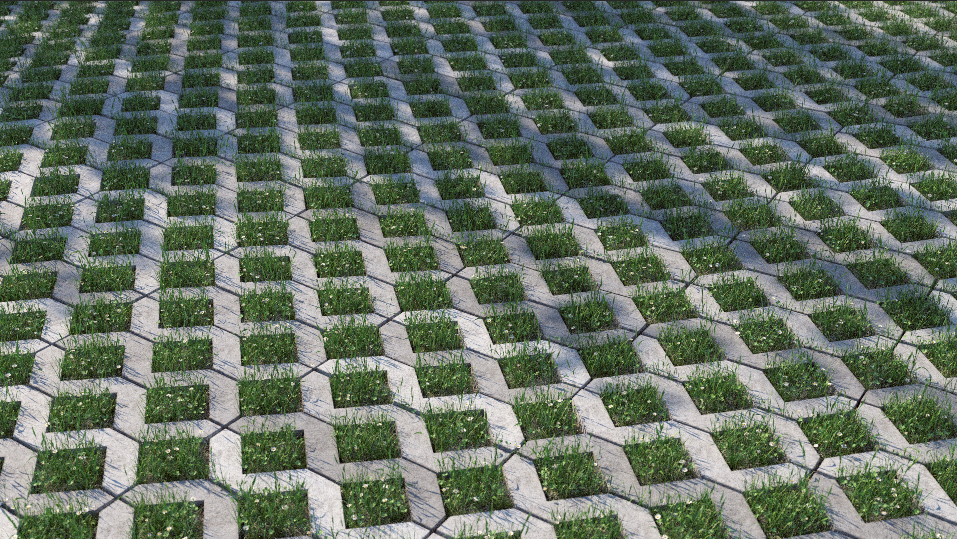
Remember that for large areas you should use Forest Pack's Camera Clipping features that allow you to limit the scatter to only those plants that appear in the camera view. You can also decrease the Density of the scatter based on their distance from the camera, it's seldom necessary to require so many ground cover objects in the mid to far distance. Just a reminder that this tutorial, was based on a request, so if you have a question you'd like answered or a technique you'd like to see covered just let us know on the forum.