Resources
Requirements
- info Forest Pack Pro
This tutorial was kindly created by Mickael Riciotti a 3D artist who specialises in realistic and stylized full-CG environments. Mikael started his career in 2011 as a lighting artist for animated features, later becoming a generalist supervisor at Unit-Image in Paris before moving to Vancouver, Canada to join Industrial Light & Magic as a Lead Generalist.
In this tutorial you'll learn how to:
- Use Forest Pack libraries to create realistic assets.
- Focus on details and imperfections to create photorealistic renders.
- Setup V-Ray Sun, Sky and Physical Cameras.
- Use V-Ray Post Effects and filmic curves.
Introduction
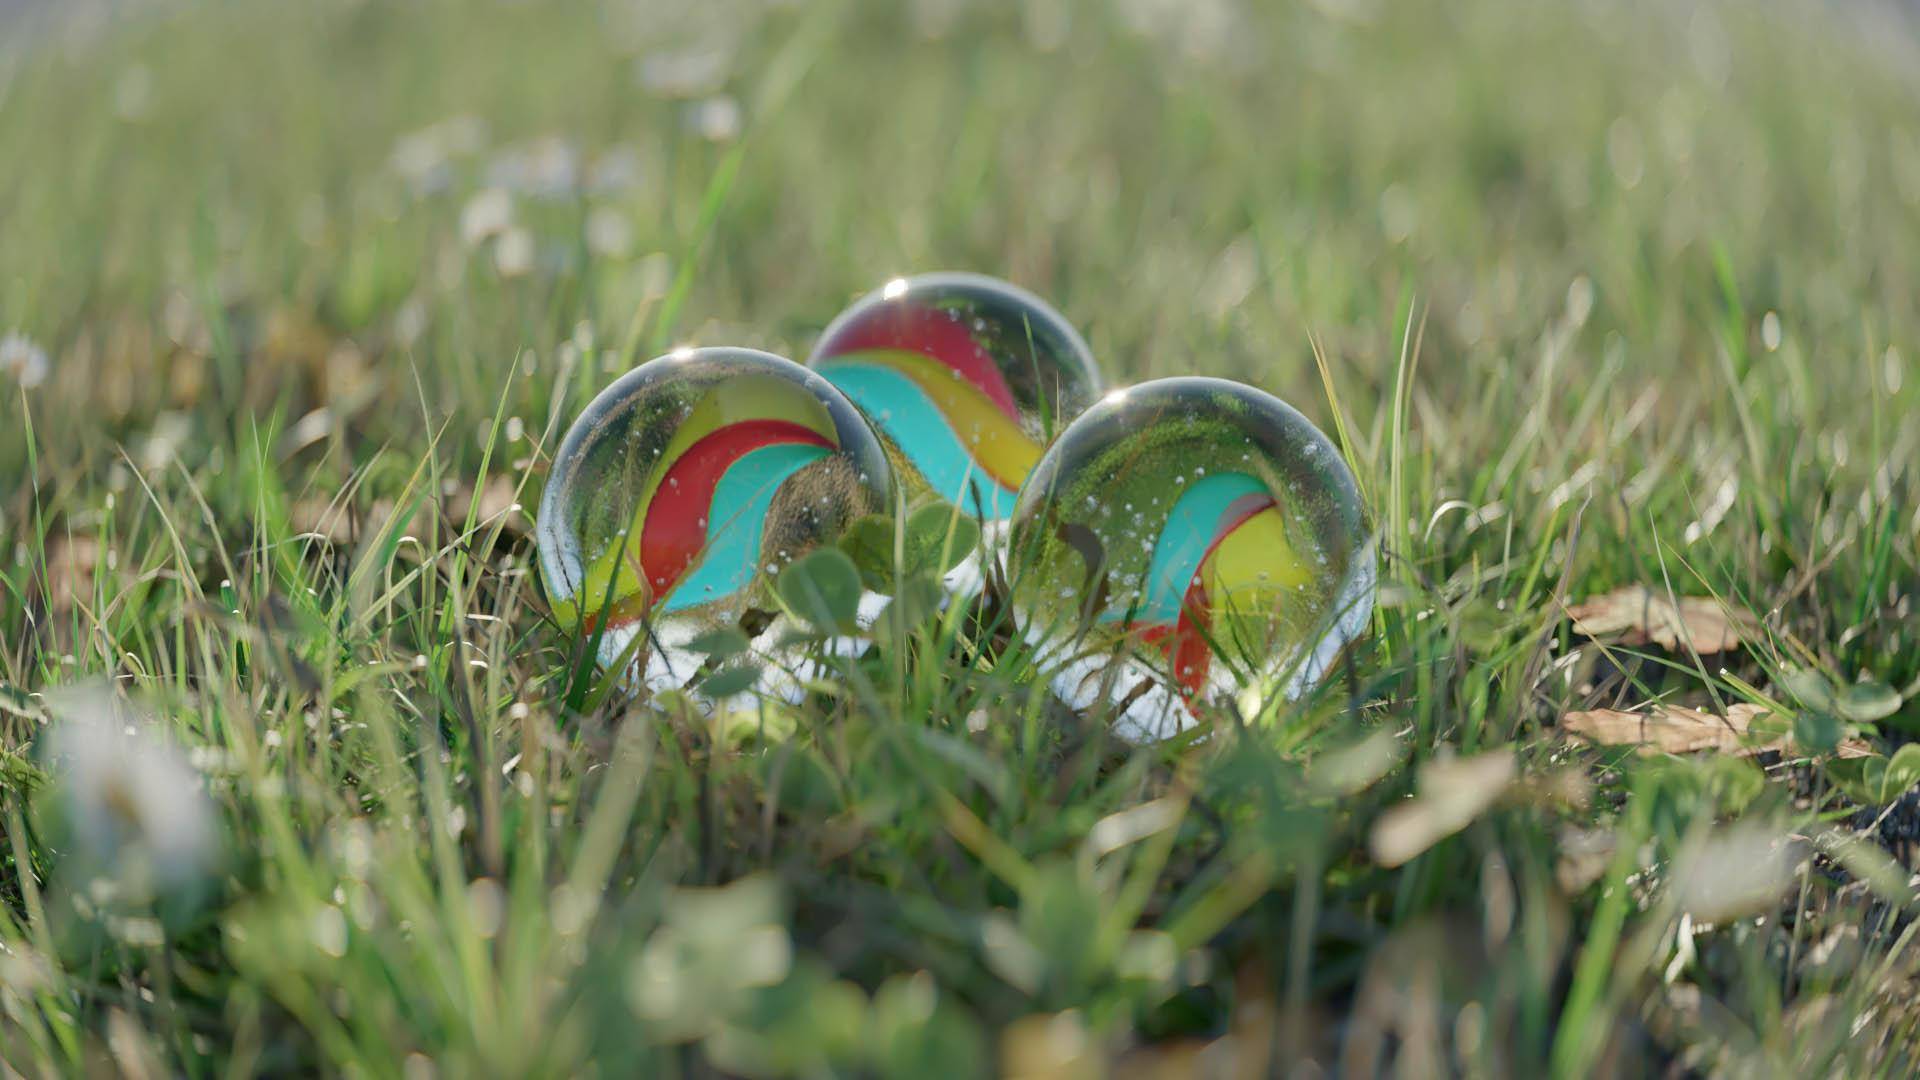
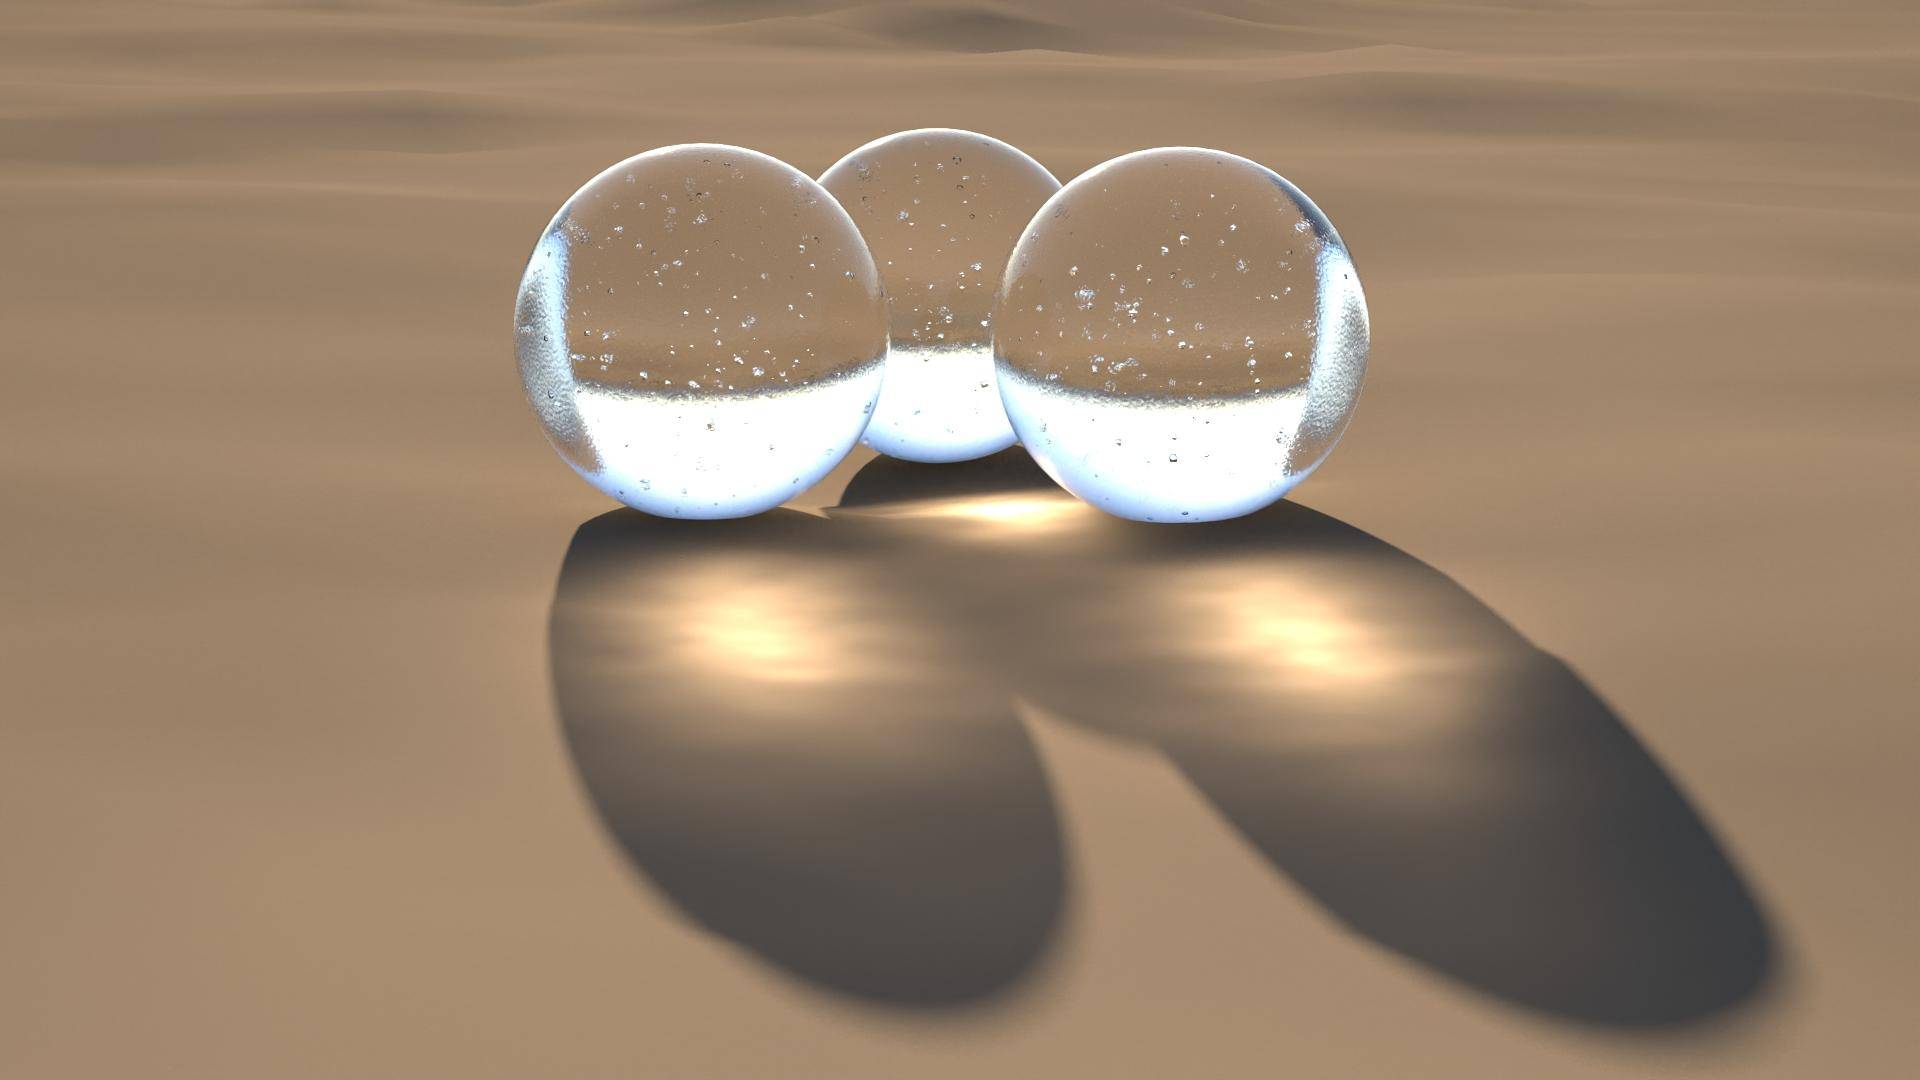
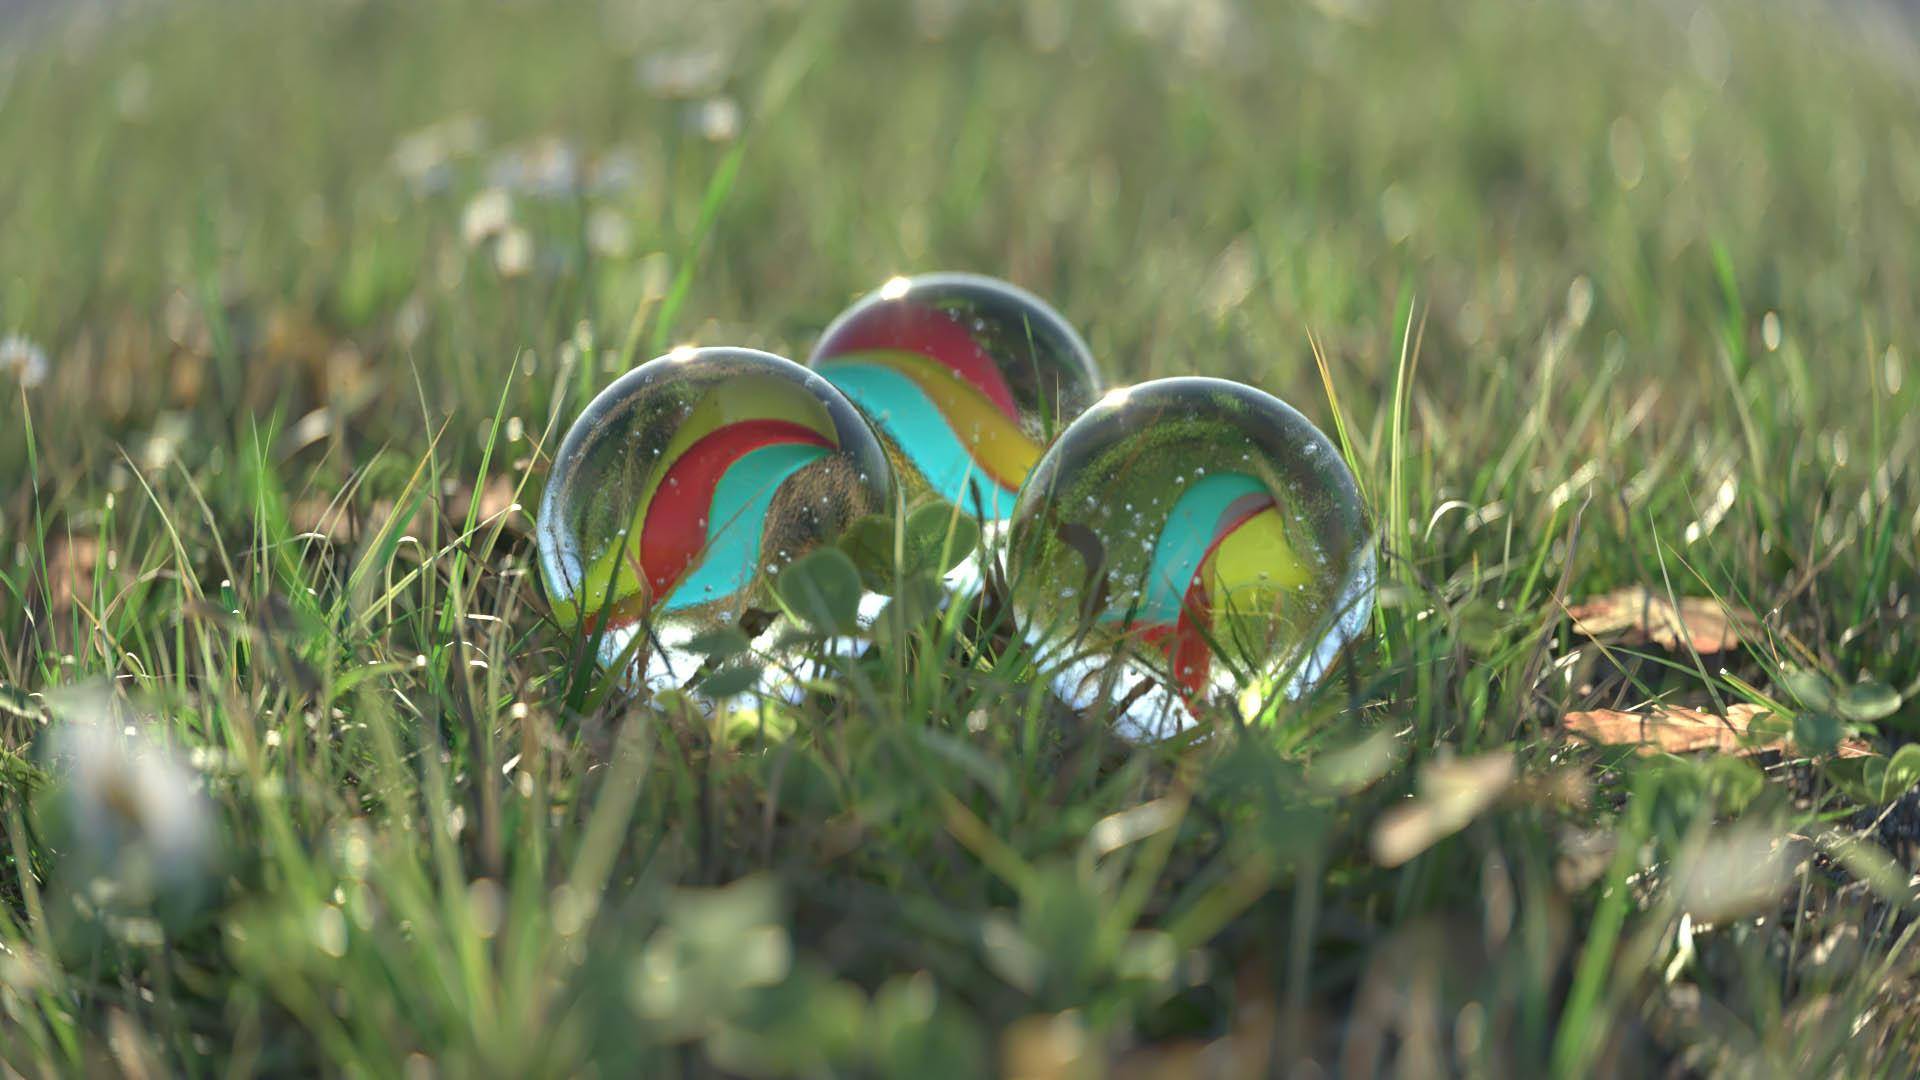
Forest Pack, comes with a fantastic library of presets. In this tutorial, we’ll explore them to create a realistic macro-photography scene. Most of these assets have been created for covering mid to large areas, so we’ll tweak these libraries, both the geometry and the shaders, to make them more believable for a macro photography inspired render. We’ll also discuss optimisation techniques and layered workflow to manage complex scenes. The marbles represent a great opportunity to touch on glass and caustics. Finally, we’ll push the realism of the final image using V-Ray’s camera emulation tools and post production effects.
Concept
I was browsing through the library of presets in Forest Pack and thought it was an awesome starting point for a scene: with a few tweaks, you could easily get realistic results. From there, the idea of exploring macro-photography, using some marbles as a focal point in a grass environment, came up and I decided to share the process.
On the left-hand side, you can download the assets for the tutorial. This includes the following files
- startscene.max
- finalescene.max
- bokeh.jpg
- forest_update.ms
- film_look_lut.cube
- fo_final_render.png
- All necessary maps
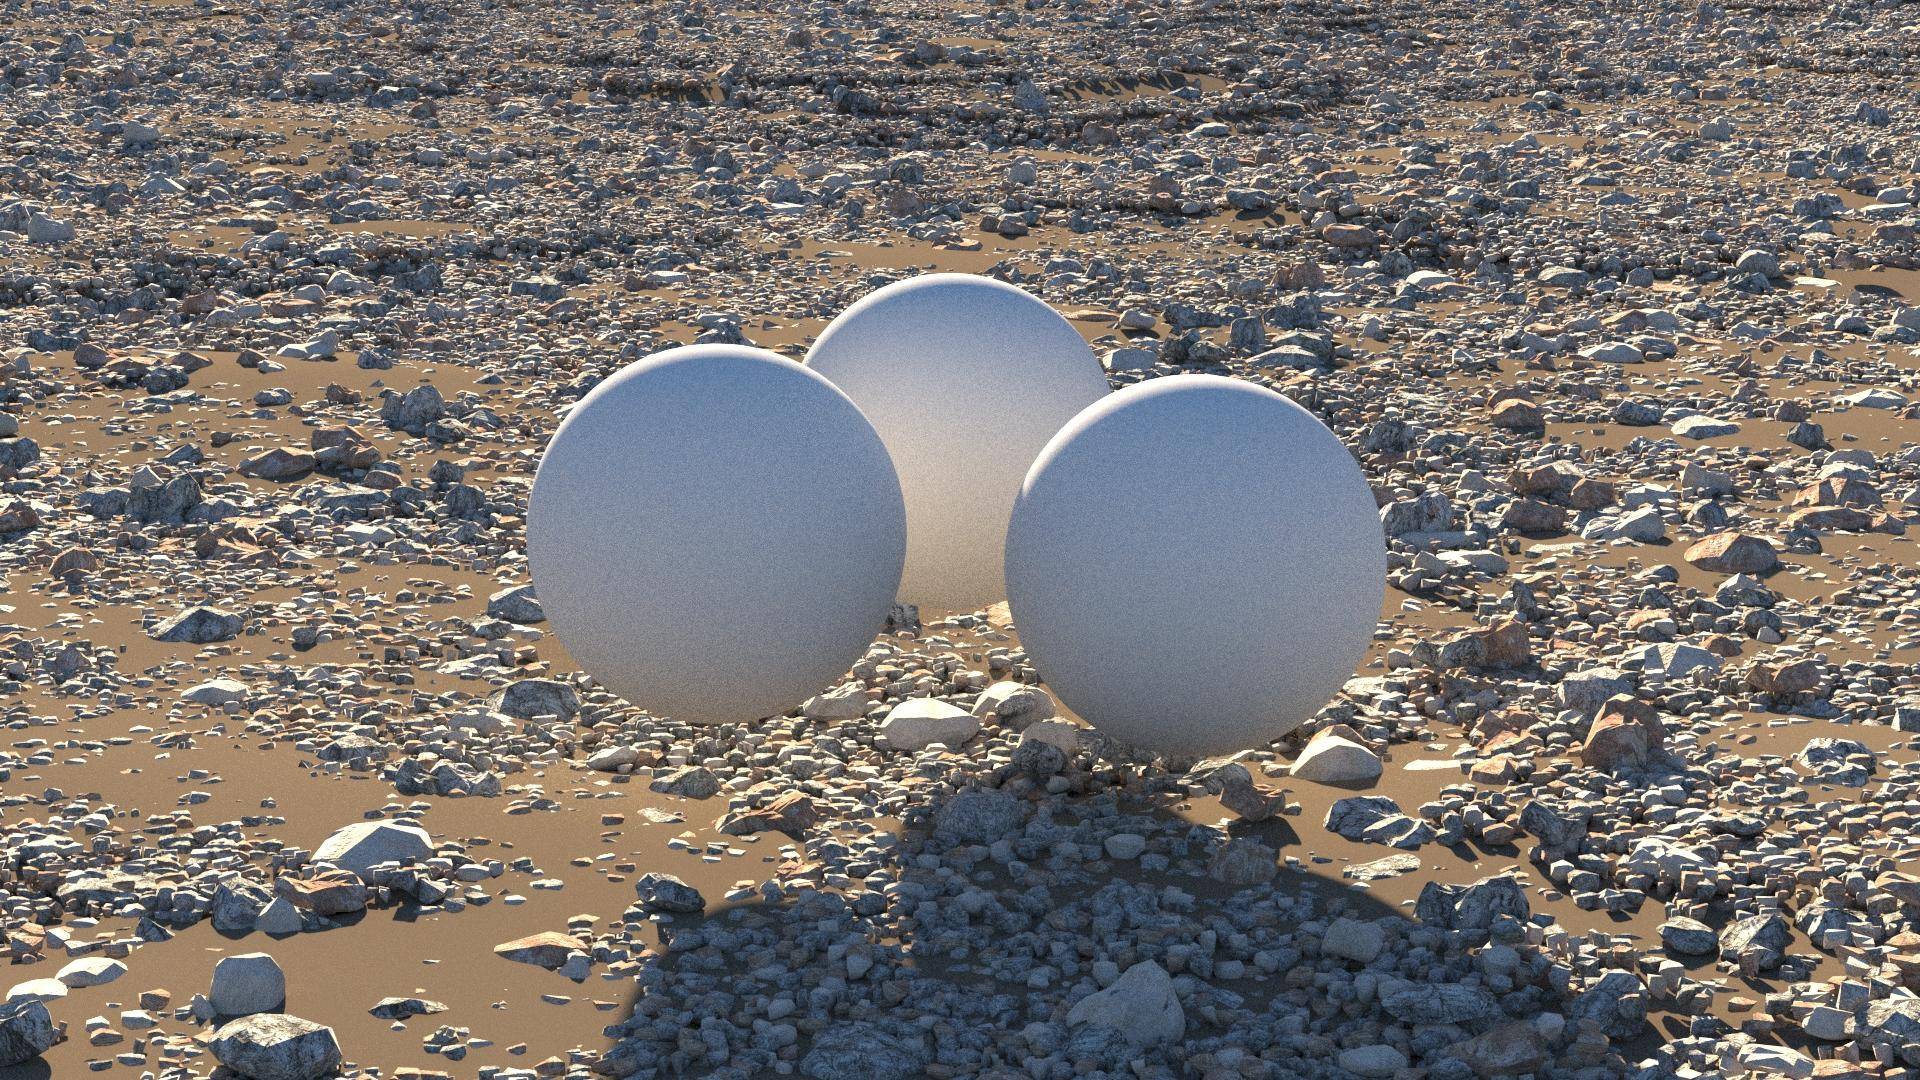
Step 1 - Creating the basic scene
Before scattering our vegetation, let’s create a basic scene. If you prefer, you can skip this step and open the file called startscene.max to follow along.
Before we start, let’s change the measurements unit set up in max to centimetres. Next, create a 1000x1000cm plane with a simple noise modifier on it and assign a dark-brown VrayMaterial– this will act as our ground surface. It doesn’t need to be very detailed since it will be hidden under a lot of geometry, but feel free to use your own textures. We’ll also create the marbles by adding 3 small spheres (instanced) with a radius of 5cm and a random rotation. Position them so that they float off of the ground as if they were resting on a thick layer of grass (we’ll adjust that later). You can assign a grey shader to your marbles for now; we’ll deal with it later
Step 2 - Adding lights and a camera
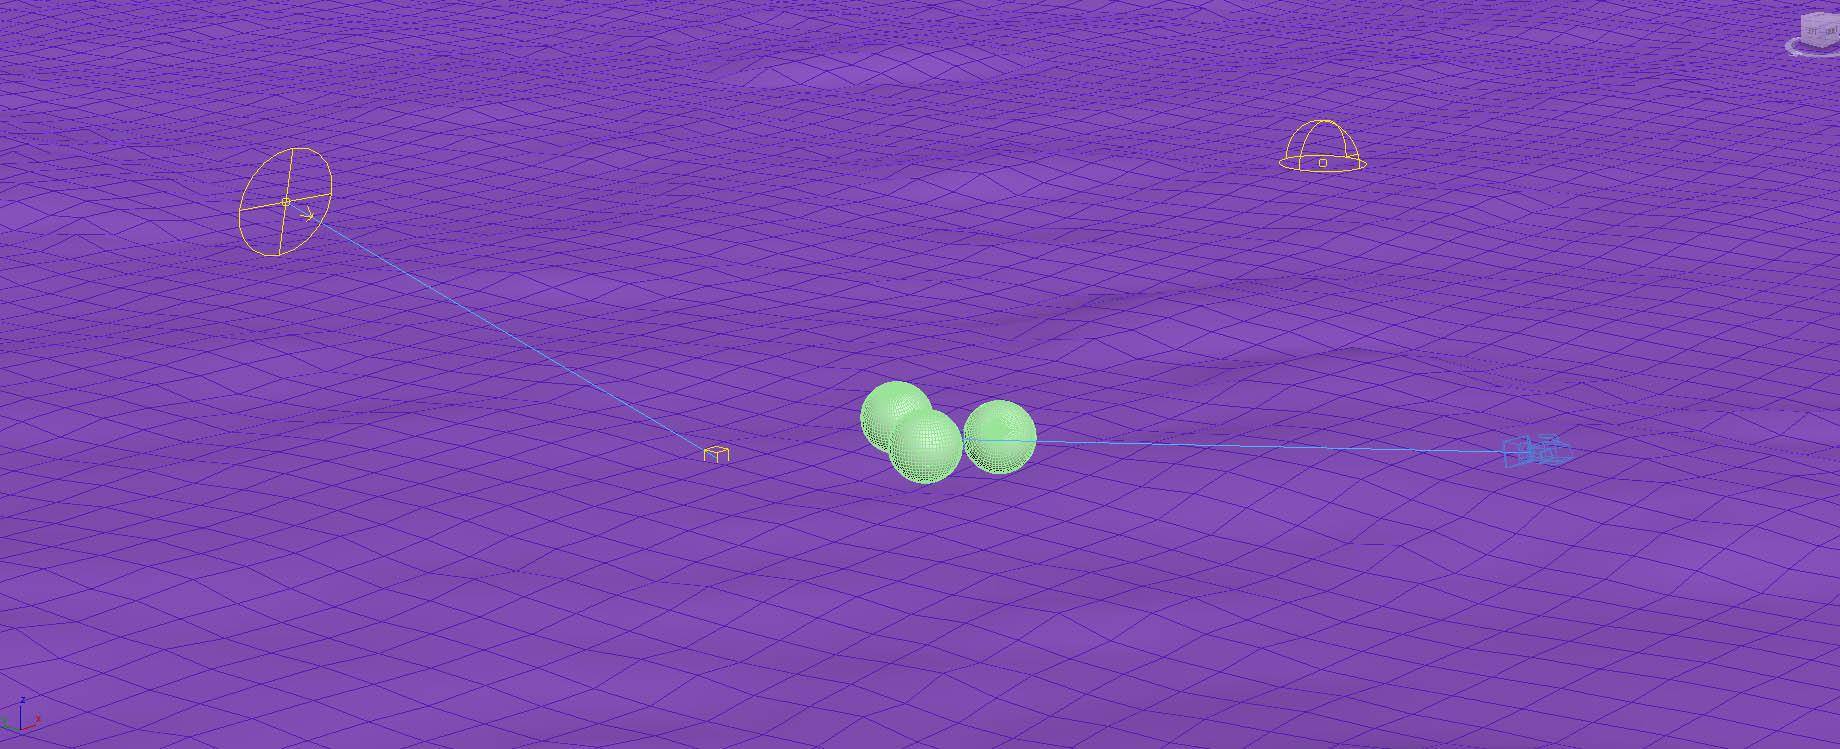
For the lighting, we’ll be using a simple V-Ray Sun and Sky setup; this gives great results, offers more controls than an HDRI and is faster to render - but it’ll need a little hack. By default the sun/sky ratio is not very contrasty and creates flat unappealing lighting, so it’s a good idea to assign your VRaySky texture to a VrayDome Light, and play with the intensity – for this scene, we’ll reduce it to 0.15 and we’ll place our sun quite low and behind out marbles for a strong backlighting effect. The elevation is approximately 15 degrees.
Next, let’s create the camera. We’ll be using a VrayPhysical camera since they have a lot of advanced lens effects that will help with realism; we’ll talk about these more in-depth later in this tutorial. Make sure the target is aligned to the marbles so that we can use it as our focus point later.
With the Sun Intensity set to 1, we’ll need to adjust the exposure of our camera. Click on Install Exposure Control and set the EV value to 10.4. This will set the brightness of our scene to an appropriate exposure. And last but not least, let’s set our White Balance to sunlit (5200k).
Step 3 - Adding pebbles
We’ll be working our way up, from more general to more specific assets. Our first pass will be the pebbles on the ground. We won’t see much of them since it will be the lowest layer, but it will poke through the grass and help add complexity. Create a ForestPack Object and pick the ground as your surface. In the geometry rollout, click on Library, navigate to the Stone category and choose Stone 01 (large). In the geometry tab, change the Global Scale to 20%. In the Distribution rollout, change the mode from Full to Spread 1 and change the Density to 150cm. In the Area category, change Surface Z Offset to -0.33 cm: this will push the pebbles slightly under the ground and make them look less floaty.
Finally, the only few tweaks we’ll do to the shader are to reduce the Reflectivity down to 0 and darken the Diffuse by half (via an Output node)
Splitting your scatterers
Looking at references, try to identify the various assets you will need to create your scene (rocks, grass, leaves, etc). It is an efficient way of recreating an environment and makes things much easier to tackle. This is true for any kind of environment: if it looks too complex, splitting it into simpler assets/substeps helps build a scene. It is also a good habit to split your scatterers by types (rocks, grass, trees, etc) and work in layers to help organize and optimize your scene and applying changes to each species is much easier that way.
Step 4 - Improving the geometry
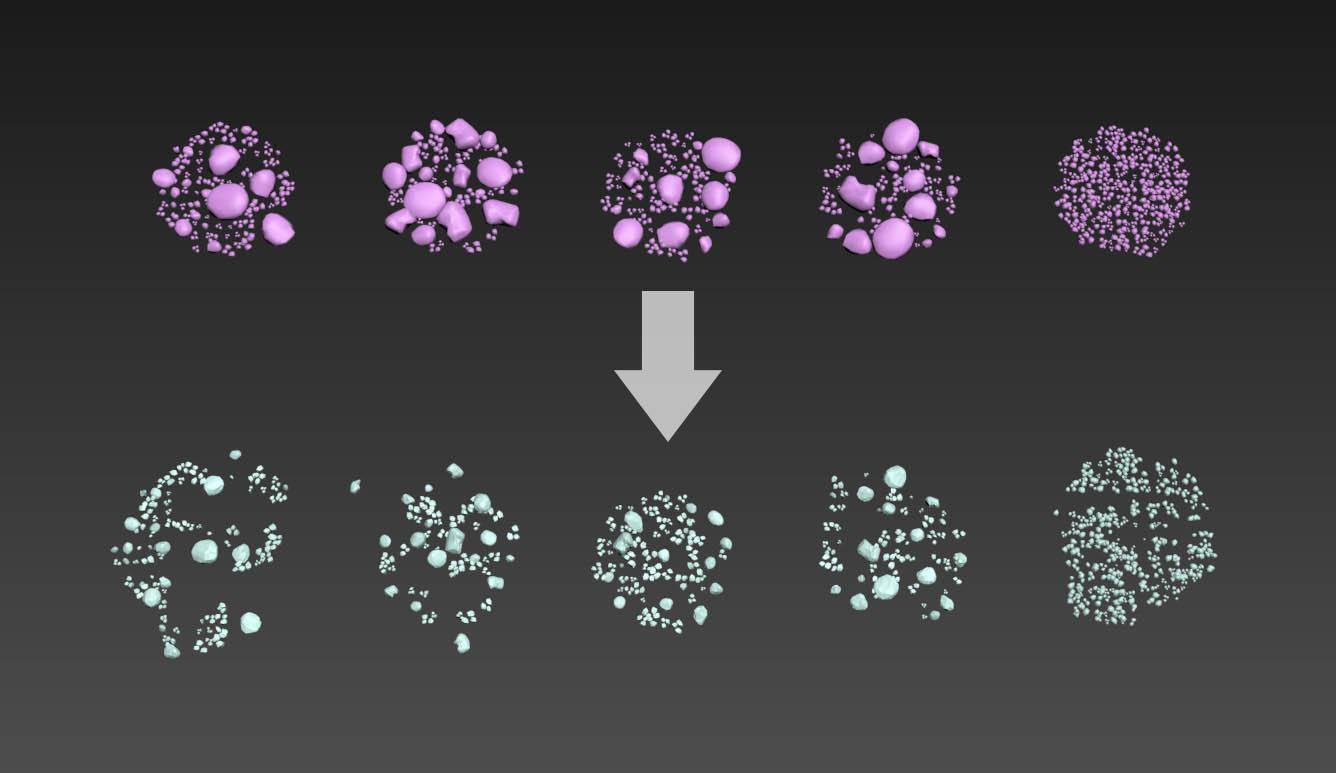
In the following steps of this tutorial, we’ll need to tweak the source geometry slightly. The base objects for the pebbles can be found in the Forest Templates layer. For each source object, you will need to scale down the bigger pebbles and add a noise modifier to randomize their shape a bit. Also, from a top view, shuffle the pebbles around to break the perfectly circular distribution and have a more organic feel.
Step 5 - Creating the grass

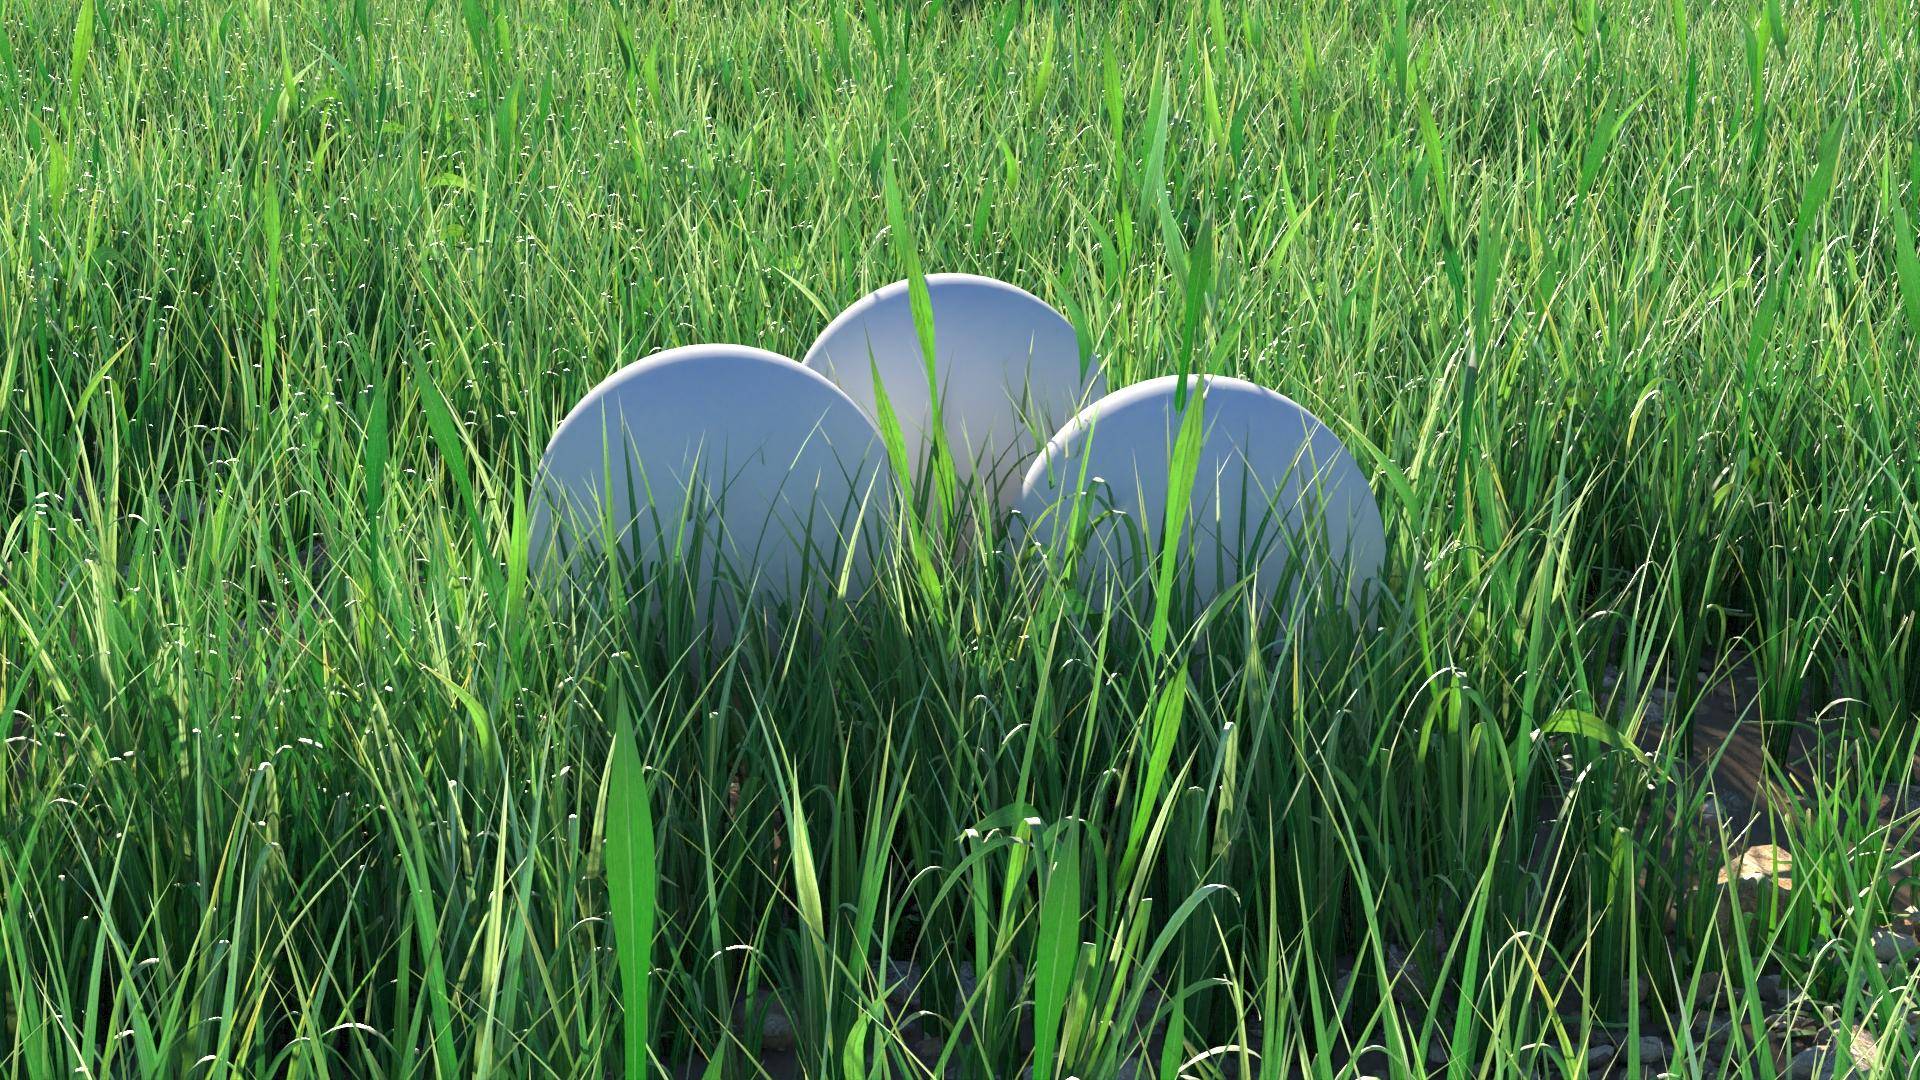
Create a new Forest Pack object from the library, just like you did for the pebbles, navigate to the Lawns category and choose WIld Grass 02 (detail). In the Geometry rollout, change the Global Scale to 30%. In Distribution, change the mode to Patches 1 and the Density to 130cm. It looks pretty good already, but it feels too perfectly green and clean.
Let’s damage it!
In the Transform rollout, change the X/Y Rotation ranges to -80/80, this will add chaos to the orientation of the grass and make it look more like wild grass. We’ll add 2 new source geometries for this scatter to add dead grass clumps.
Duplicate the 2 tallest grass sources (from the template layer) and splay their blades, shuffle them around and add a noise modifier to them. You’ll want to make them look like they've been heavily stomped. Add these 2 sources to the Geometry List inside your Forest Object, and lower their Probability so they look more sparse
Step 6 - Grass shader simplification
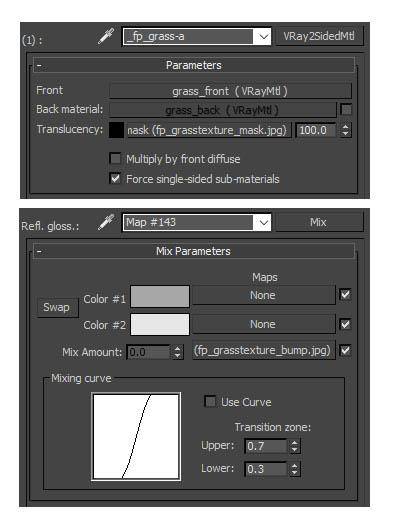
Sometimes, for some of the old libraries, the default shaders are a little too complex and a bit tricky to modify – so we’ll first simplify them, and later create a variant for our dead grass. Pick the _fp_grass shader from your scene. In the multi-sub material, drag/drop the first sub material to a new slot, and assign this to all your grass sources. This will become our main shader. Untick the Back Material checkbox: we’ll use the same shader for the front and back of our blades. Also, push the Translucency spinner up to 100%, to rely entirely on the map. For the grass_front submaterial, in the BRDF category, let’s change the default model from Ward to the much more realistic and predictable Microfacet GTR (GGX) one. The reflection glossiness slot is using a complex falloff setup – let’s replace that with a simple Mix, with the fp_grass_texture_bump.jpg driving the mix amount. Colour #1 will be a medium grey and #2 a light grey.
Step 7 - Diffuse variation and dead grass
Click to see the full image
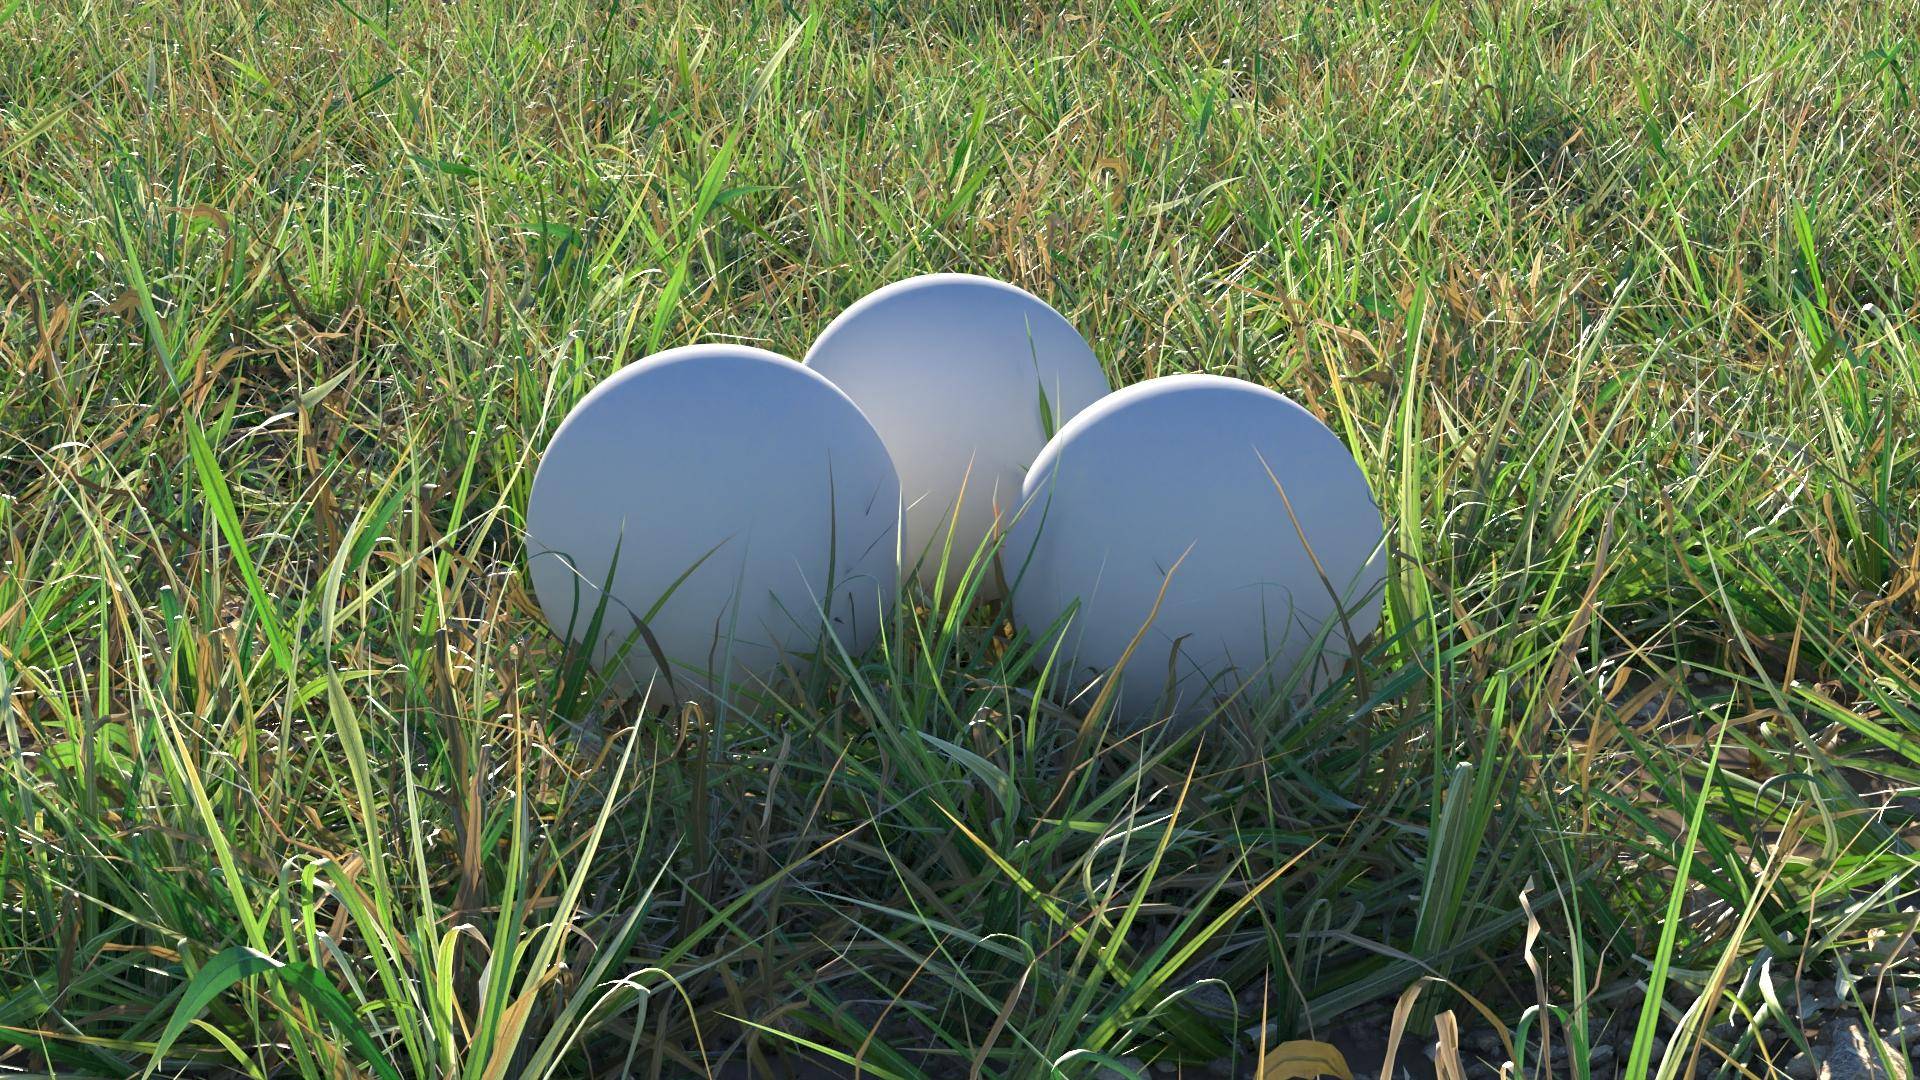
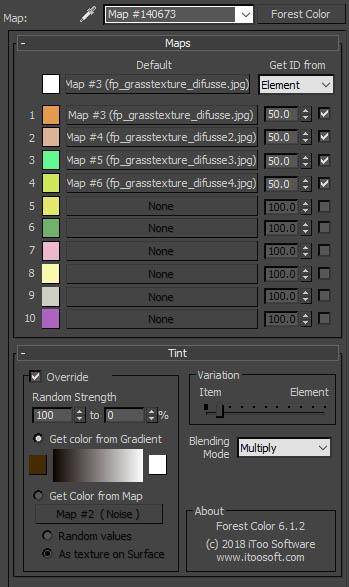
Let’s adjust the Diffuse map. The Forest Color map helps by adding variation but the default settings aren’t ideal for this scene. First, let’s set all the texture probabilities to 50%, so the distribution is more even and predictable. Now, the idea will be to randomly multiply our diffuse with a different shade of brown for each blade. This method works great for any kind of vegetation and helps break up the repetition. In the tint category, set the Random Strength range between 100 and 0 %. For the Gradient, we’ll choose brown for the left side and white for the right one. And the Blending Mode will need to be set to Multiply to get the desired effect.
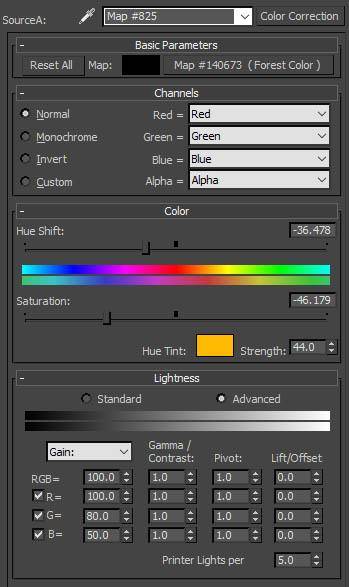
For our dead grass, we’ll assign a copy of this shader to our "dead” meshes, with a few tweaks: let’s reduce the Glossiness by Half. For the Diffuse, drop the forest_color map via a Colour Correct node, then shift the Hue towards a more yellow/orange, and drop the Saturation to -50. Set the Hue Tint to a yellow/orange (r:1,g:0.5,b:0) and the Strength to 50% (this will unify the colours of the different diffuse maps so you don’t get weird blue/pink hues). Finally, in the Advanced section at the bottom, set the Red, Green and Blue Gain to the following values: R:100 / G:80 / B:50
Forest Pack tips and tricks
If you assign a new material to source geometry that was loaded from the built-in library, then you might wonder why Forest Pack doesn't render the newer shader. This is because there is a material present in the Material Override slot in the Geometry rollout. To fix this, just clear that slot. If you'd like to automate this for multiple items then you can run the script available in the downloads called “forest_update.ms”. It will cycle through all the forest pack objects in your scene and update the materials accordingly!
Another situation you may face is reaching the max limit of instances for a Forest Object. To solve this, before you increase “max faces”, make sure you are using the Limit to Visibility option in the camera category. Also, for objects that aren’t that visible in the distance (like the pebbles on the ground), you can play with the Distance Falloff attributes in that same rollout, and cull them.
The last tip, for the best viewport performance, when you have multiple Forest Objects it is not really recommended to use the point cloud display mode – proxy mode is much faster and your viewport will be much more responsive
Step 8 - Add more vegetation
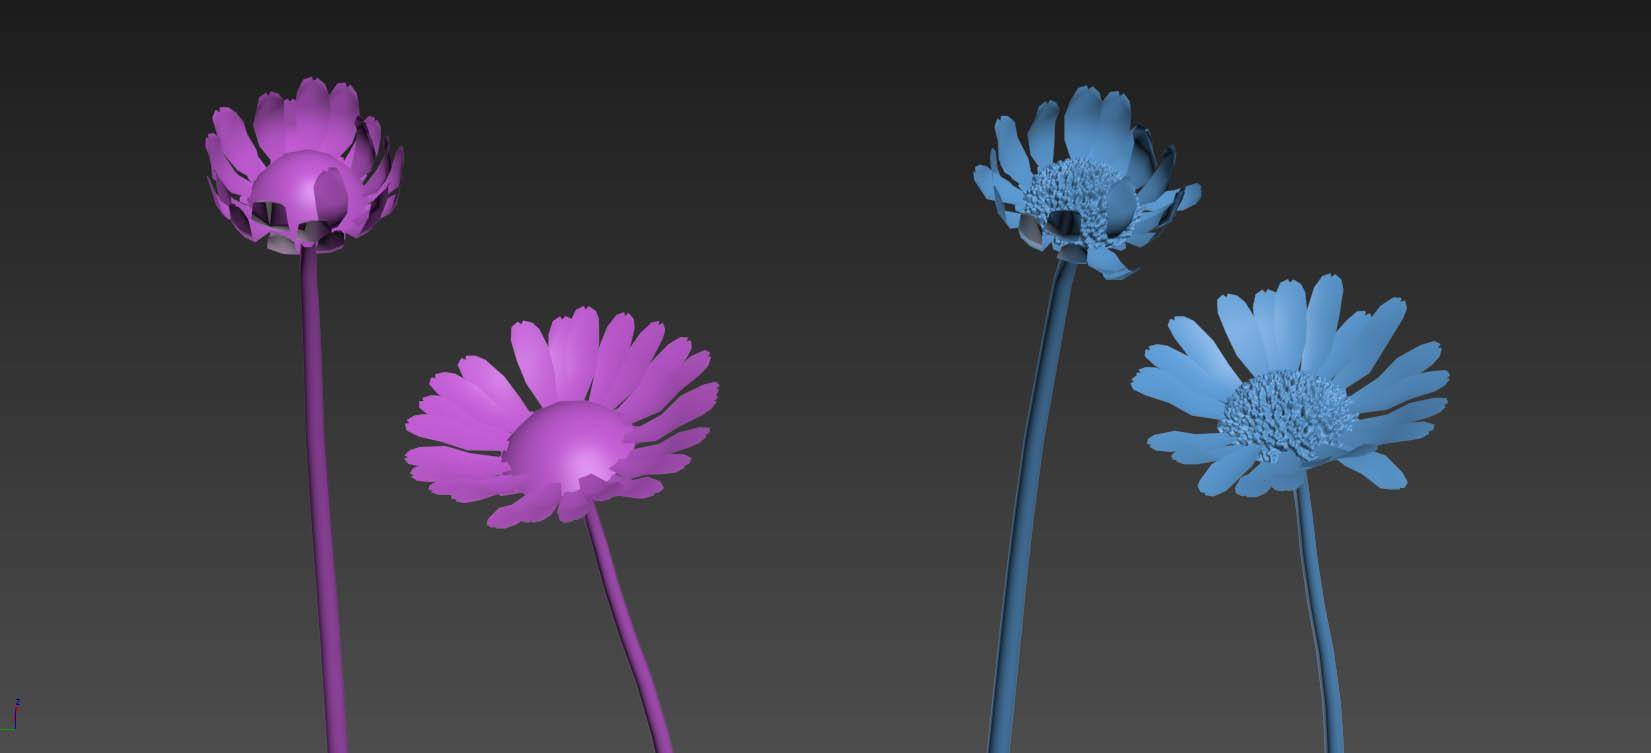
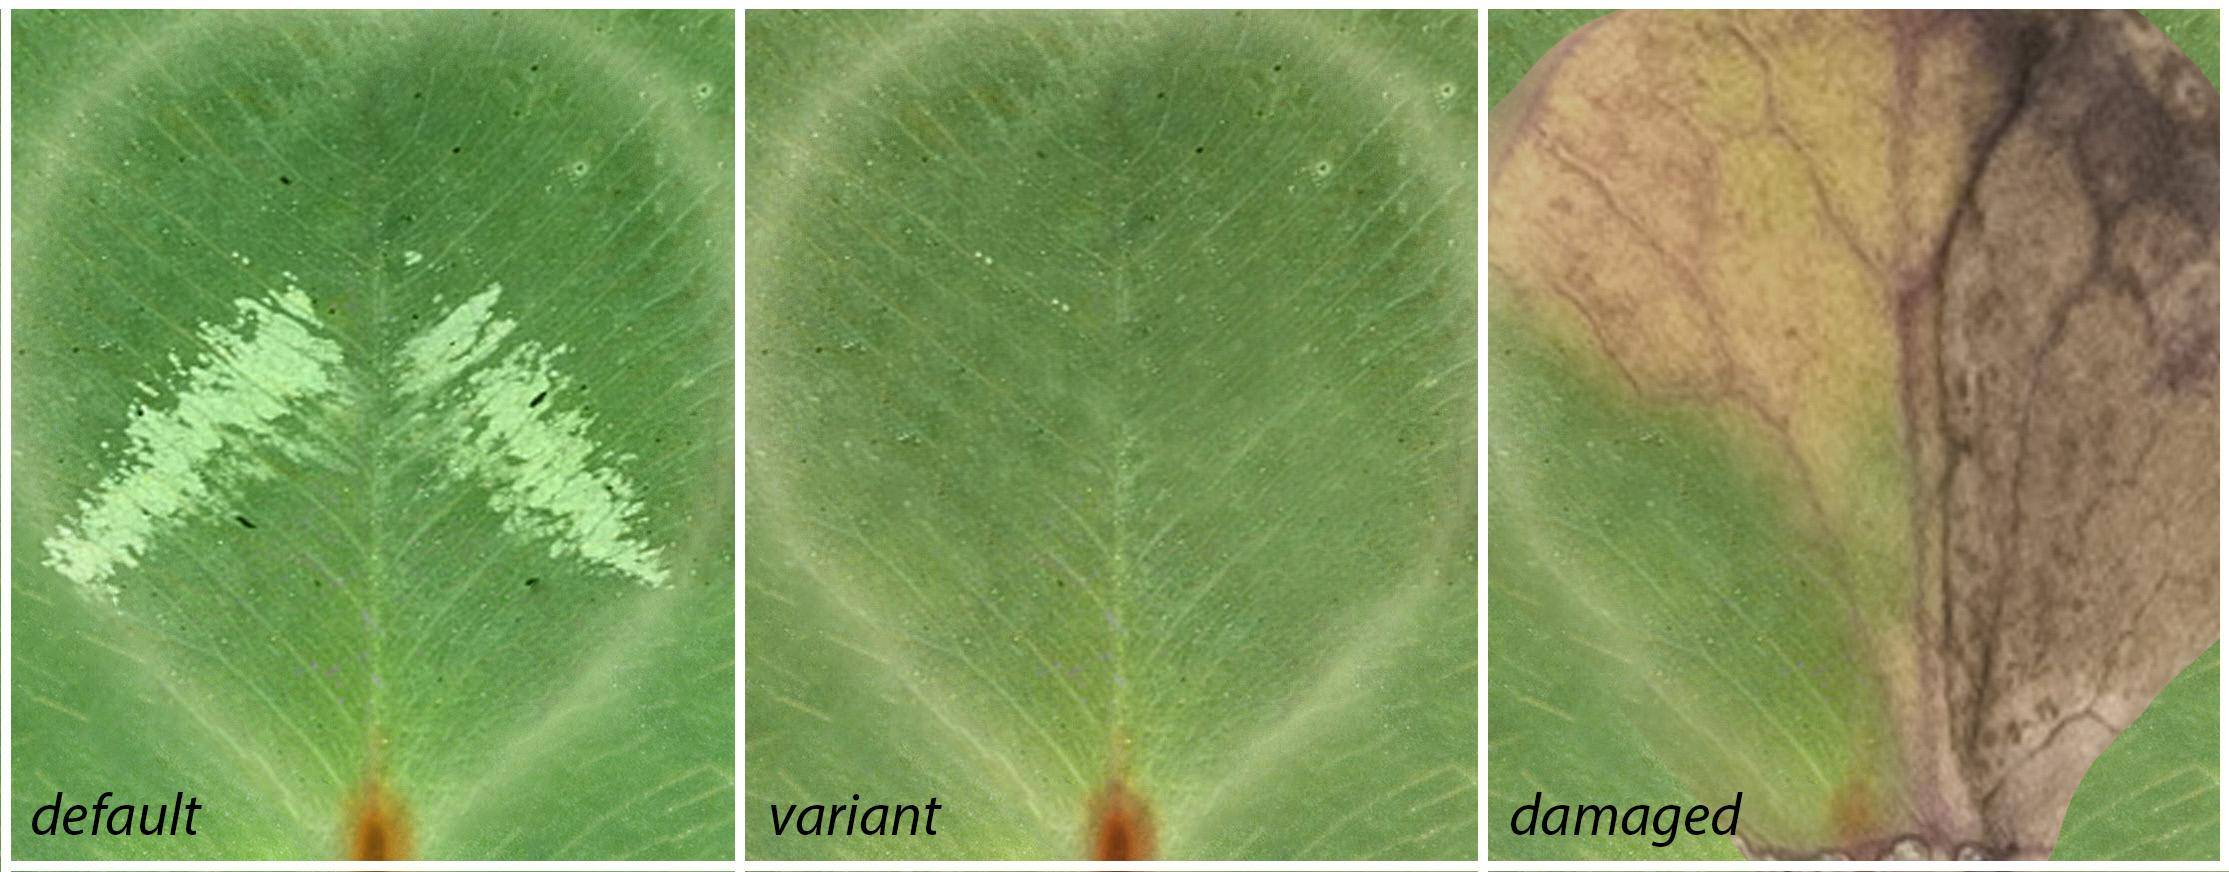
Using the exact same method, we can start layering more and more vegetation. Each species will have its own Forest Object, and you can scroll through the libraries to find something you like. The daisies visible in the final render are based on the lawns/daisies_02(detail) preset (you’ll need to get rid of the grass assets from this preset). The clovers are from lawns/whiteclovers_01(detail) and the dead leaves use leaves/oak_leaves. Just as before, start by simplifying the shader and then create damaged variants of your assets, or add geometry if you feel that they need it. For example, with the daisies, I shuffled the orientation of the petals and modelled pistils which went a long way to increasing realism. Some textures may be too generic, too bright or too saturated for your particular usage. In the example image above, the single clover texture was replaced with 3 photograph-based variants. Finally, remember that you can add variation to your scatter using the Forest Color map and the method mentioned in step 7.
Step 9 - Modelling the marbles
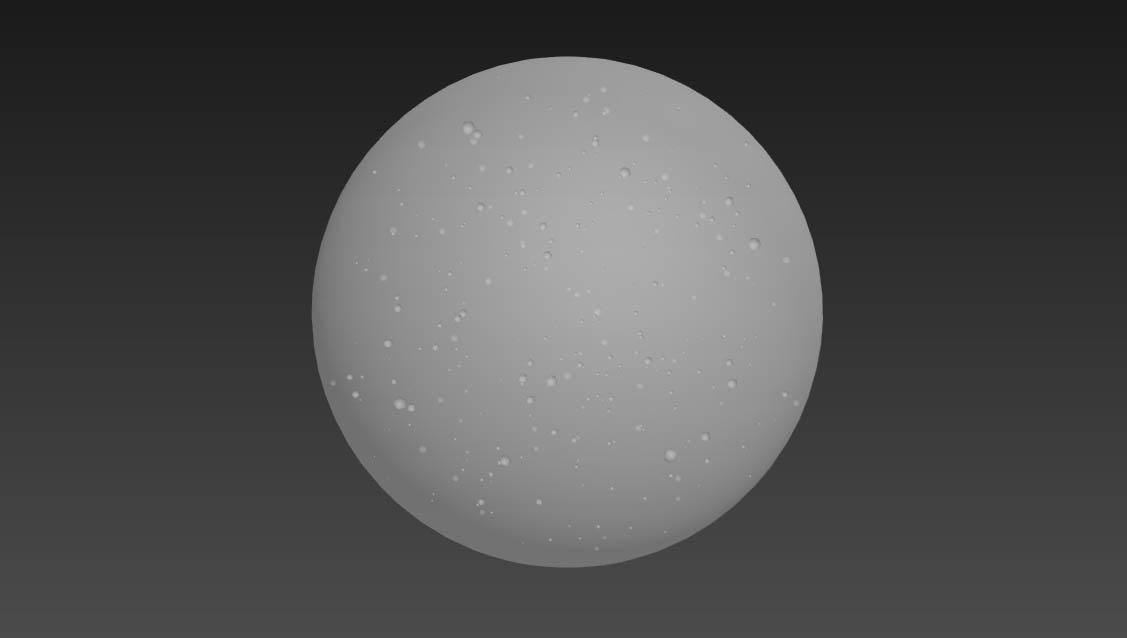
The base shape of the marble is a simple sphere, but we are going to add micro-bubbles of air to mimic real glass marbles. You can use Particle Flow for this, filling the sphere volume, and randomizing the scale of your particles. You can then bake the result into geometry, using a built in Mesher Compound object. If you don’t know Particle Flow, you can always do this manually, of course.
you will need to make sure that the bubbles' normals are inverted and that they are attached to the mesh of the marble (so you only have 1 mesh for 1 marble). We are inverting the normals so that V-Ray understands that these are holes in the glass and calculates the proper refraction.
The shader of the marble is very simple:
- It’s a default VrayMtl with the Diffuse set to red:12 / green:15 / blue:16
- Reflections are fully white, and Glossiness is 0.97 (almost perfectly reflective)
- Refraction is fully white and Glossiness is 0.97 (same as above)
- IOR is set to 1.33(water) in the scene, but you can try 1.5 (glass ) to be fully accurate
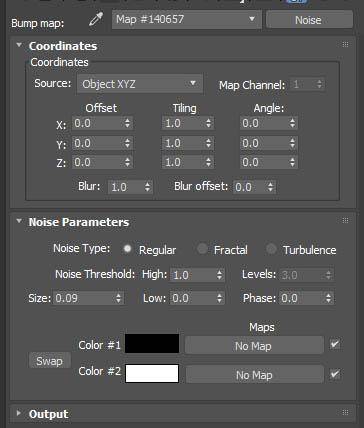
- And last but not least, we’ll put a Noise map in the Bump slot, with a map value/intensity of 10% - a Coordinate Source set to Object XYZ, and size to 0.09 (everything else remains at its default settings)

Click to see the full image
For the cat’s eye shape inside the marble, you can simply start from an S-shaped spline, rendered in the viewport as a 3-sided tube and extract the edges – with some basic poly-modelling and a Turbosmooth modifier, you get the final shape below

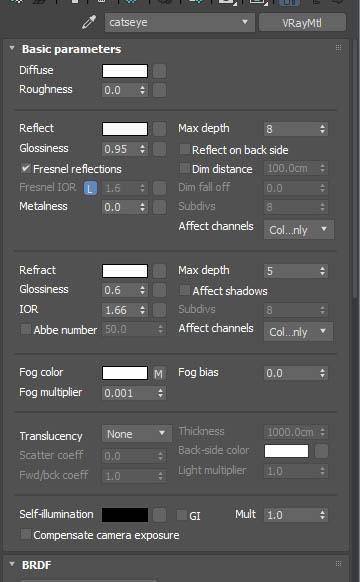
The shader is also a VrayMtl with the following settings
- Diffuse: white
- Reflect: grey 238. and Glossiness: 0.95
- Refract: white and Glossiness 0.6
- IOR : 1.66
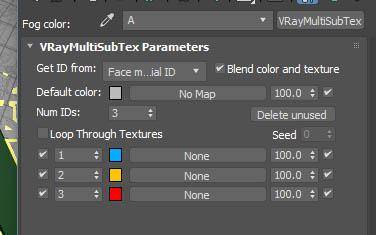
- Fog colour: use a vraymaterial-Id to give the 3 different colours for the 3 sides of the cat’s eye
- Fog multiplier: 0.001
Note: make sure you have “fog system unit scaling on” in the “options” category of the V-Ray Material to get proper results
Step 10 - Caustics in V-Ray
The final step is to go to your glass shader, and untick Affect Shadows in the Refraction category: this option was designed to mimic caustics by reducing the opacity of the shadows, but it won’t work correctly when you have caustics enabled.
Step 11 – Physical camera effects
As mentioned above, let’s recreate some of the physical aberrations we get from a real camera lens
in the VRayPhysicalCamera you created earlier. Go to the Lens Distortion category and enable Cubic – an amount of 0.11 is good enough for a realistic effect. In the exposure category, you can enable Vignetting and use a value of 1.0.
in the main category under Focus, make sure you ticked Use Target Distance and enable Depth of Field, then in the Bokeh category, change the Aperture Shape to Custom Texture and browse for the bokeh.jpeg file attached
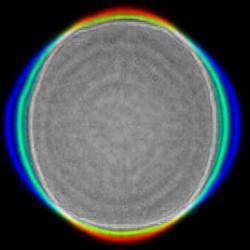
as you can see, this file has some colour shift baked in – this will give a lot more texture and richness to your out of focus pings, and help with realism
Last but not least, set Center Bias to 0.5, Optical vignetting (cat eye) to 0.0 and Anisotropy (anamorphic lens) to -0.25 so your bokeh looks more elongated like you would get with an anamorphic lens.
Step 12 - Bloom and flare
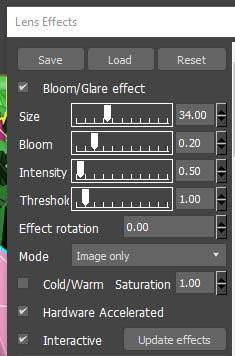
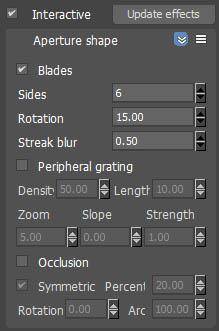
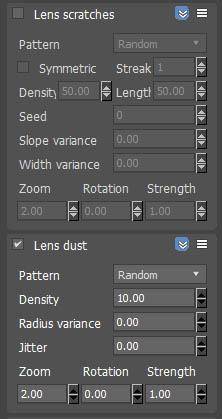
Although I prefer doing it in post, the V-Ray frame buffer comes with some pretty nice lens effect settings.
Here’s what I used for this project:
![]()
![]()
![]()
![]()
Step 13 – BONUS: the filmic look
To get a quick and easy filmic curve that will soften your highlights and contrast your image a bit, you can use Filmic Blender from Troy Sobotka. He created a .cube file you can load as a LUT in your V-Ray Frame buffer. Of course, you can also mimic it in comp!
Conclusion
And we are done! I hope this tutorial was useful to you – Feel free to navigate the libraries and play with them, they will definitely save a lot of time for your projects.