Requirements
- info RailClone Pro or Lite

RailClone already comes with several wooden cladding presets, but sometimes you want to create your own. The easiest way to to do that is to take an existing library and modify the style to suit your own needs.
If you open any of these presets and open the style editor you will find that they use the same macro.
Understanding this macro’s settings is the key to being able to adapt the styles and create your own cladding. In this tutorial, we’ll explain each of these settings so you can create your own styles quickly and easily.
- The first thing you’ll need for any cladding is a closed spline. RailClone automatically aligns itself to closed spline and creates an area of cladding that is large enough to fill the area. It’s also worth mentioning that you might find you get better results if you reset the XForm of splines before using them with RailClone
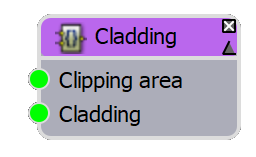
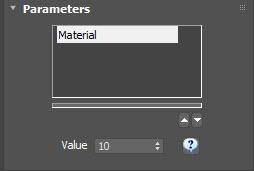
- Next, create a RailClone object and open the Library. Go to the Architecture > Exterior > Cladding library and load any of the Plank cladding presets. Assign the object to the spline. Although in the library thumbnails these presets look as though they have different textures, in fact, they all have the same ability to choose from one of twenty-two built-in colour options. Once you’ve loaded a cladding style you can change the materials using the option found in the Parameters rollout.
![RailClone Parameters]()
If you are using Corona or renderers other than V-Ray, please make sure you disable instancing from the Display rollout to enable this feature. - For most people, the many included styles are probably enough and remember you can always change the materials to use your own textures when a job requires it. If however, you’d like to customise the style or create your own - keep reading!
- The first step to learn how any style is made is to open the Style Editor. Fortunately, for this example, it’s a very straightforward graph. There’s a node for the clipping spline, a node for the geometry, but most of the work done by a macro designed specifically for cladding.
![Wood Cladding Graph]()
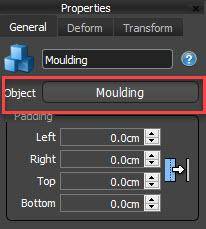
- The first thing you might want to do is change the geometry itself. To do this, just select the Segment node and pick new geometry using the button in the Properties panel. In this case we’ll pick a simple straight-edged plank.
![RailClone Segment]()
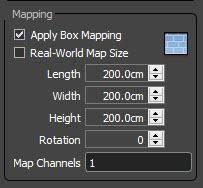
To ensure the geometry aligns correctly to the array you should model it so it is flat on the world XY plan with the length of the plank pointing along the X Axis. Just to be safe I always also reset the XForms. - If you’ve added your own materials, you might want to change the UV mapping, to do this go to the Deform > Mapping settings and enter new values for the Length, Width and Height.
![RailClone Mapping]()
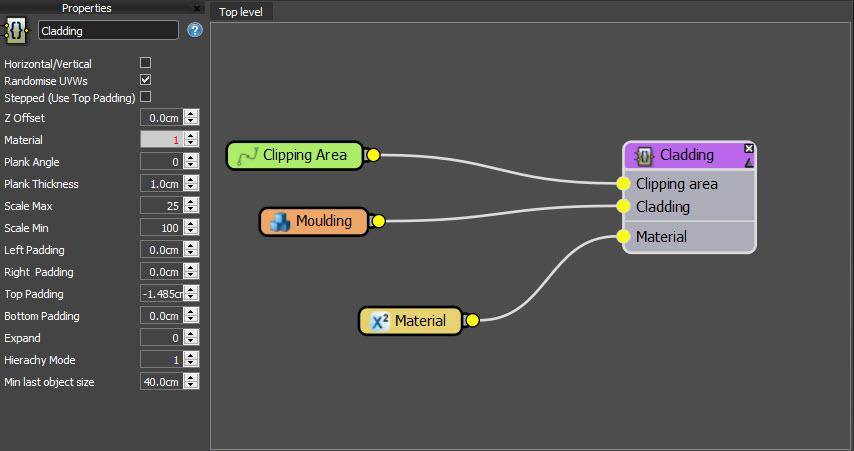
Now let’s turn our attention to the macro and walk step by step through its options.
- Horizontal/Vertical is straightforward, it allows you to switch the orientation of the planks.
- Randomise UVWs will shuffle the position of the UVW of each individual plank. It’s great for hiding obvious texture repetition. Of course, the maps you use will need to be tileable.
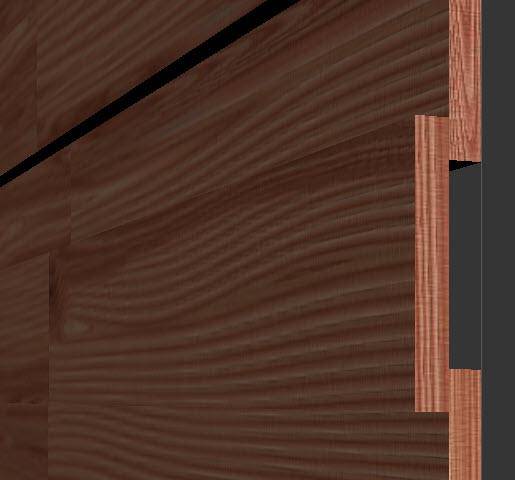
- Stepped mode is used in conjunction with the Top padding value. When this option is enabled, entering a negative value for top padding will cause alternate boards to overlap in front of their neighbours. If this mode is off they still overlap as expected, but they are not moved in front of the neighbouring boards.
![RailClone Stepped Mode]()
- Z Offset does what you’d imagine, it offsets the entire cladding so that you can move it towards or away from a surface.
- Material allows you to parametrically change the material ID of the planks. It is primarily used for our libraries where we want to allow users to choose materials easily. If you want to create a similar set-up, then this is the option to do it.
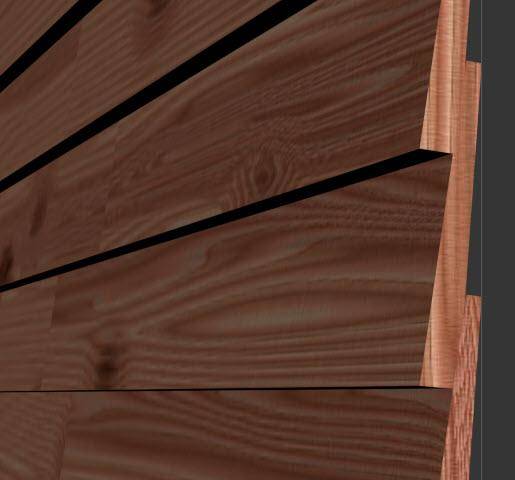
- Plank Angle rotates the planks. It’s quite a smart feature though - if the rotation angle is large enough planks will start to automatically overlap.
![RailClone Angled Plank]()
Fun Fact: In boat building this type of construction on wooden hulls is called “clinker-built”. - If we swap the plank for this tapered style you can see a limitation of the Plank Angle feature. It uses the bounding box to calculate when the boards should overlap. Because this board is tapered it’s narrower at one end. The Thickness parameter is therefore used to override the size used internally to calculate the overlap. Enter a thickness here that’s the size of the plank at the end to overlap, in this case about 1cm.
- Scale Min and Max allows you to randomise the size of the boards on the X-axis. Because we are automatically box mapping the segments, there’s no need to worry about stretched UVs.
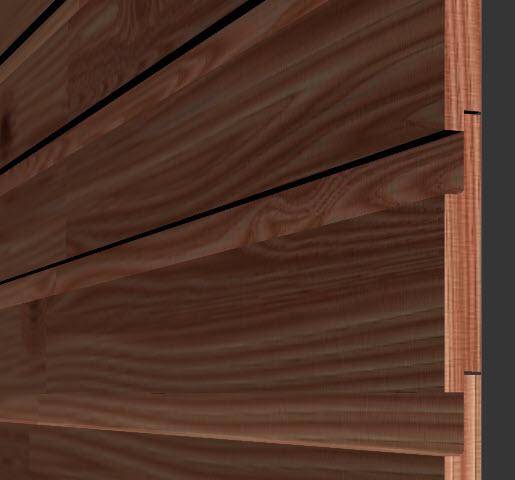
- Padding allows you to adjust the spacing between the boards to either add gaps or cause them to overlap. If we change to another board profile we can see when this might be useful. Here the board is designed to jigsaw together vertically. By using a negative top padding value (with Stepped disable) the board will close up correctly.
![Padding Plank]()
- Chances are you won’t need to use the Expand property for wooden cladding, but in rare cases where the planks are not rectilinear, you might find that the geometry does not quite reach the edges of the Spline. The Expand property fixes this by enlarging the size of the array and then cutting off anything that’s outside the splines.
- Related to clipping splines we have Hierarchy Mode, which is used to control how cladding is created when you have several sub-splines. Option 1 disables hierarchy checking meaning each individual spline generates a unique array. Option 3 attempts to work out which splines belong to which bit of facade - it does a pretty good job but sometimes it needs a helping hand, so Option 2 allows you to assign matching material IDs to the sub splines to tell RailClone which paths belong together.
- Finally, Min Last Object Size allows you to set a minimum size for the final plank in the array. This is useful when you have very short planks on the perimeter. If you enter a value here, you can be sure that no plank on the right side of the cladding will be smaller than this size.
And that’s it! We hope you find the built-in styles and the cladding macro useful for your work. If you have any further questions, please contact us on the forum and stay tuned for more tutorials coming very soon.