Requirements
- info RailClone Lite or Pro
As everybody knows, Christmas is all about tradition, and so here is our annual tutorial demonstrating how to use RailClone to model an unconventional Christmas tree. This year we'll demonstrate how to stack any model, either your own or a stock object, into a cone to create an eye catching "tree" from nearly any geometry. Along the way you'll learn some core RailClone skills, pick up some tips for using the A2S Array's Y Mode settings, and see the power of using simple expressions. Let's get started.
Creating the "Tree"
- Create a new circular spline to define the footprint of your "tree".
- Create a new RailClone object and open the style editor.
- Create a new A2S generator. This is used to create 2D arrays and it features the ability to control the X and Y sizes with either splines or numeric measurements.
- For this example we'll use the circular spline for the X axis, and a value for the Y axis. To add the spline, create a new Spline node and use it to select the circular spline from the scene. Wire the spline node to the Generator's X Spline input.
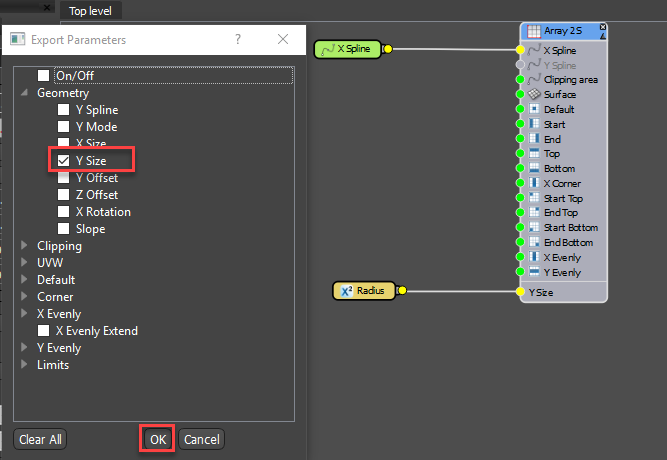
- To control the Y size, you could use the parameter in the Generator's properties, but to make it easier to edit we'll export it to the Modify panel. To do this, right-click on the generator and select Export Parameters. Select Y Size and click OK.
- To add a parameter to the Modify panel, we add a Numeric node. Name it Radius, change the Type to Scene Units, and wire it to the Generator's Y Size input.
![Stacked models Christmas Tree-image2018-12-18_13-11-11.png]()
- We can't see the results of this yet because we haven't added any geometry. Create a new Segment node and pick an object from the scene, (for this example we'll use the venerable 3ds Max teapot). Wire the segment to the Generator's Default input.
![Stacked models Christmas Tree-image2018-12-18_13-12-59.png]()
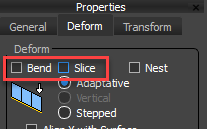
- We don't want to cut this object, so disable Slice in the Segment's properties. You may also want to disable Bend to prevent the geometry from being deformed to follow the curvature of the spline.
![Stacked models Christmas Tree-image2018-12-18_13-13-57.png]()
- You can now edit the Radius value and the array will expand towards the centre of the spline.
![Stacked models Christmas Tree-image2018-12-18_13-14-27.png]()
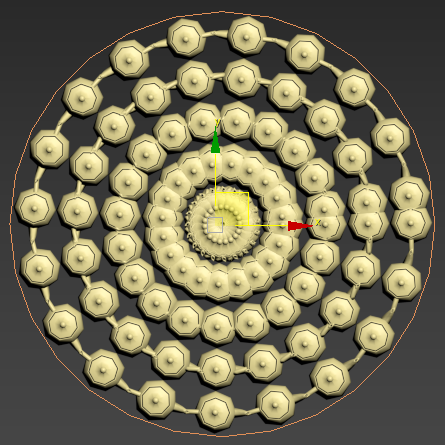
- As you can see, the number of teapots in every row is identical. This means that as they get closer to the centre they must overlap. There is a little-known mode in RailClone that allows the segment count of each row in a 2D array to be calculated independently. To enable it, go to the Generator's properties and change General > Y Mode to Free.
![Stacked models Christmas Tree-image2018-12-18_13-16-48.png]()
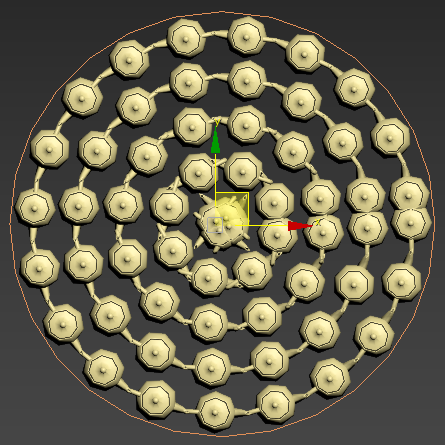
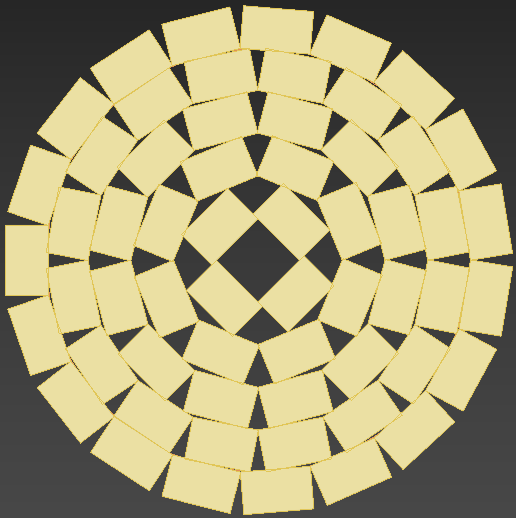
- You will see that the segments overlap at the end of the array. This is because the teapots don't fit exactly into the circumference. To fix this, change the Generator's Properties > Rules > Default mode to Adaptive. This will subtly scale the geometry to ensure whole segments fit in the available space.
![Stacked models Christmas Tree-image2018-12-18_13-19-17.png]()
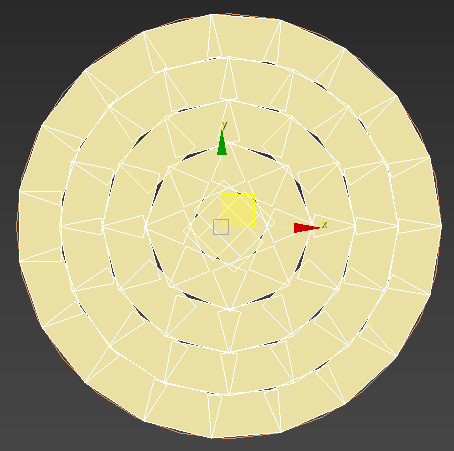
- To calculate adjacent segments, RailClone uses the object's bounding box. The side used for the calculation depends on the Alignment settings, and if we turn on Box display mode we can in this example that the outer edge is being used. This explains the overlap, if the outer edge is touching, the inner edges will overlap.
![Stacked models Christmas Tree-image2018-12-18_13-25-48.png]()
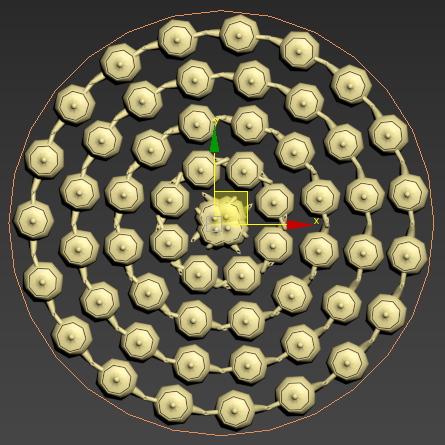
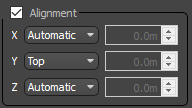
- To fix this we can change the Segment's alignment by adding a Transform node between the Segment and the Generator. Enable Alignment and change Y to Top.
![Stacked models Christmas Tree-image2018-12-18_13-27-58.png]()
The segments are now aligned to the inner edge and no longer intersect.![Stacked models Christmas Tree-image2018-12-18_13-30-27.png]()

Once we have the basic layout, the next step is to move each row on the Z axis to form a conical shape. For this we will use an expression. If that word alarms you, don't worry! There's a misconception that Expressions in RailClone are programming. They're not, they're just a simple way of doing some maths and they give you access to a few values that aren't available elsewhere. For simple mathematical operations, it can also often be easier to create a quick expression than it it is to create a lot of nodes. Here's how they work.
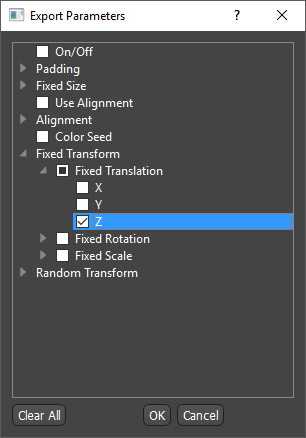
- First of all you need to export a parameter that you want to control with an expression. This is no different from exporting the Y Size of the array we looked at earlier in this tutorial. This time we will export the Fixed Z Translation from the Transform node.
![Stacked models Christmas Tree-image2018-12-18_14-19-1.png]()
- Next create a new Arithmetic node, and and wire it to the Z Fixed Translation input. Go to the Arithmetic node's settings and change the Operation to Expression. To create an expression we open the editor by clicking Edit Expression.
- The expressions editor is divided into 3 parts. On the left hand side you have two tabs: Attributes show you all the values that you can use in your equations, there's no need to remember these because they are all listed for you; the other tab shows the mathematical functions you can use to go beyond simple operators like +,-,*,/ etc; again these are listed so you don't need to remember. them. To see more information about an attribute or a function just select it from the list and information is displayed in the bottom-right panel. Here you will find a description and an indication of how it can be used. Above this you have the text editor where you can write your expressions.
- For simple expressions there are 3 parts you need to include. First of all, you should type return to tell RailClone to output the result of following expressions. Secondly you would enter you expression, it could be something as simple as 1+1. Finally each line needs to be terminated with a semicolon. So a typical expression might read:
return 1+1;
Let's try a real world example. - We want to increase the Z offset by a set distance for each row in our array, but first of all let's add the all important return command.
return - Next we need to find a counter that increases for each row. If we search through the list of attributes we'll find one called SegmentYCounter that sounds promising. If you click it the description reads "Segment's index along Y path". Perfect! To add the attribute to the equation you don't even need to type - just double click to add it automatically.
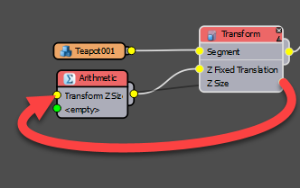
return SegmentYCounter - Now we to multiply this by the distance we want each row to be offset. In order for segments to stack, this should be the height of the geometry. We could enter a value manually here, but then we'd need to change it if we swap or resize the segment. Instead it's better to extract the dimensions automatically. You can do this by right-clicking on any node and selecting Export Attribute. In this case we want to export the Z-Size from the Transform node.
- Wire this to the Arithmetic node's first input.
![Stacked models Christmas Tree-image2018-12-18_14-54-11.png]()
- To reference this value in the expression you just enter Input followed by the number of the input starting from 1 at the top. So in this case you would add * Input1 to the expression.
return SegmentYCounter * Input1 - Finally, don't forget to add the semicolon! The expression will read
return SegmentYCounter * Input1;
If you click Evaluate you should now see a stepping effect. - This is looking good, but you'll notice that the first row is also stepped so the array is hovering above the ground. This is because the first row is being translated, and really we only want the effect to start from row two. You can achieve this by subtracting one from the Y Counter (which starts at 1) as follows:
return (SegmentYCounter-1) * Input1;
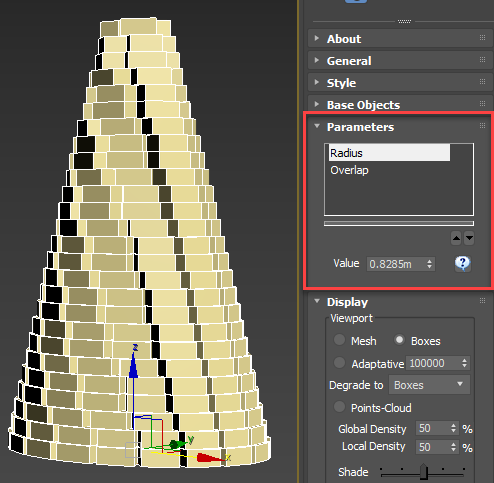
(The brackets are used to control the order of the mathematical operations). - That's the stepping effect complete! To finish this part of the tutorial, we just need to change the segments so that they are able to overlap and stack on top of one another. To do that we'll use the Transform operator's Bottom Padding value. If you enable Padding and reduce this value you will see that the rows start to overlap (and the tree gets taller too). We can make this easier to edit by Exporting the value and wiring it to a new Numeric node called Overlap. Make sure you set the Type to Scene Units. This value, like the Radius, can now be controlled from the Modify panel.
![Stacked models Christmas Tree-image2018-12-18_15-14-14.png]()
Adding shelves between rows.
As an option, you can also add shelves between rows. This would work well for objects like the tea pot or wine bottles that don't necessarily stack very safely! Here's how to do it:
- Select the Generator, Segment and Transform node and duplicate them using Copy and Paste. Disable and disconnect padding inputs. We don't need them for this part of the graph.
- In the copied Segment node, pick some geometry for a shelf. Make sure you enable Bend if you turned it off or the geometry won't deform around the spline.
- In order for the same number of shelves as there are objects, it should be the same size on the Y axis as the teapot. However we can tell RailClone what size to use for a segment without it actually affecting the geometry. In that way the shelf can be deeper than the teapot, but all of the calculations that determine spacing will assume that they are the same size. To achieve that, in the new Transform node, enable Fixed Size.
- Uncheck Scale Segment. This will stop the geometry being affected by the new size.
- Export the Y Size Attribute from the Teapot's Transform node.
- Export the Fixed Size > Y Parameter from the shelf's Transform node and connect it to the Y Size Attribute exported in the previous step.
- Next, we'll align the outside of the shelf to the outside of the teapots. To do this, first change the Y Alignment for the shelf to Bottom. Now the outer edge of the shelf is aligned to the spline and all we need to do is move it back along the Y axis the depth of the teapot. This might seem like an odd way of doing things, but it allows us to have a shelf that is deeper the teapots with everything still aligned automatically.
- Right-click on the teapot segment and export the Y Size attribute. Note that this is not the same as the Y Size attribute exported from the transform node. The segment Y Size attribute is the width of the geometry. The Y Size attribute on the transform node includes the padding values that we have added or subtracted.
- Export the Y Fixed Translation property from the shelf's Transform node. Add an Invert Value macro (which makes a positive number negative or vice versa) then wire it to the Fixed Translation property. Connect the Segment's Y Size attribute to the Macro.
- Nearly there! All we need to do now is add the thickness of the shelf into the existing stepping expression. To do this, first export the Z Size attribute of the shelf.
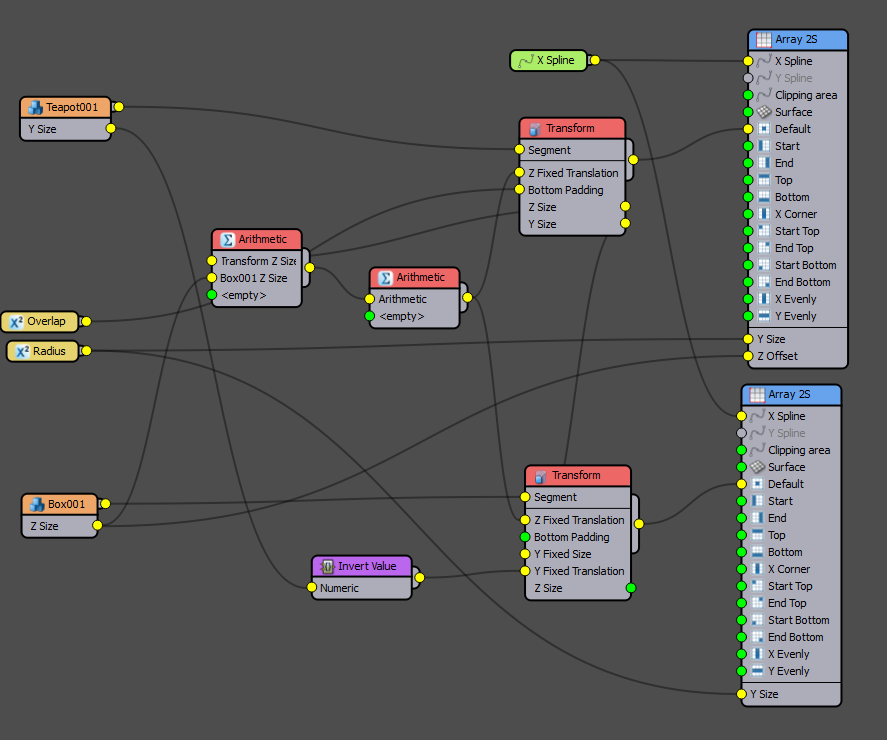
- Wire a new Arithmetic node between the existing Arithmetic node and the teapot Transform's Z Size property. Leave the mode set to addition.
- Wire the shelf's Z Size property to the second input of the new Arithmetic node. The size between each row is now the sum of the height of the teapot and the shelf.
- Finally, to move the teapots on top of the shelves, Export the teapot generator's Z Offset and wire if to the shelf Segment's Z Size, and we're done!
![Stacked models Christmas Tree-image2018-12-18_15-42-51.png]()
With all that work done, we have a very flexible style in which all the importance values are derived automatically from the geometry. This means that we can easily change the size of the teapots and change the depth and thickness of the shelves and the model adapts. Using our exported parameters we can also adjust the radius to match a different size spline and easily edit the amount each row overlaps.
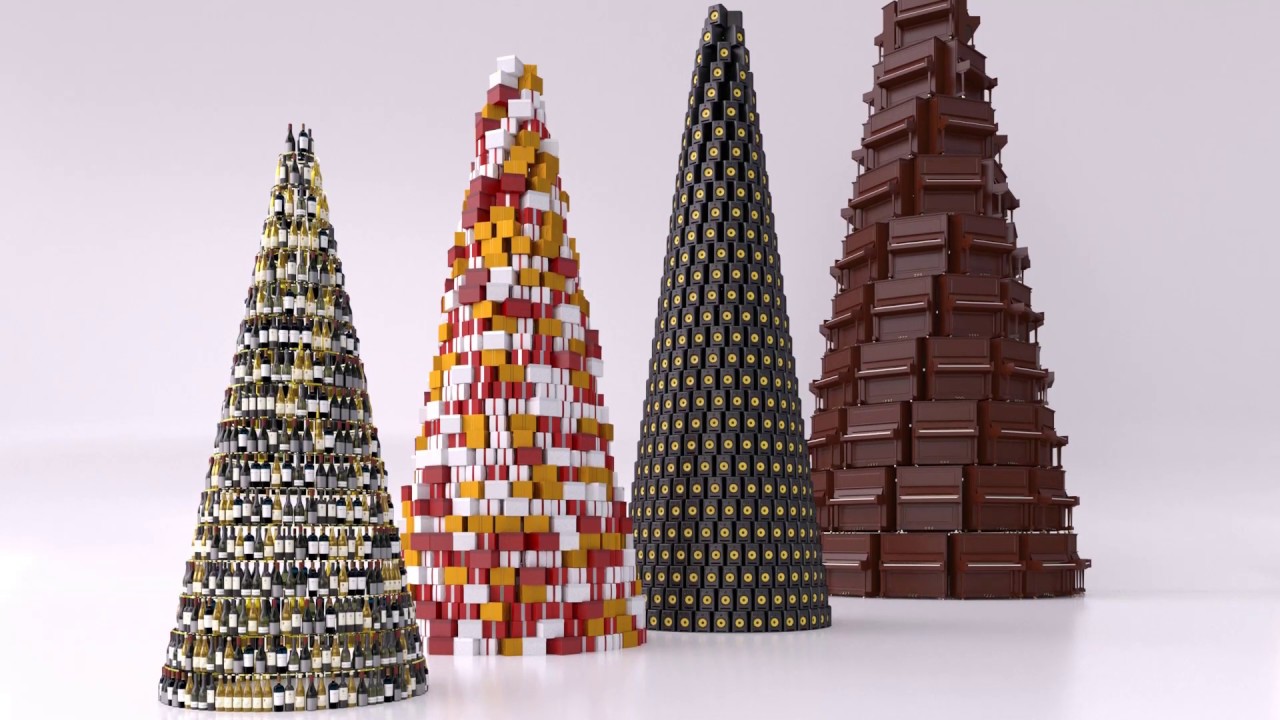
It get's even more interesting though when you swap in different geometry. We could easily swap our teapots for pianos for example, and the style updates automatically. Don't want the shelves? No worries, just clear them in the segment's settings and the geometry is removed and the array closes up to compensate. You can even add multiple segments.
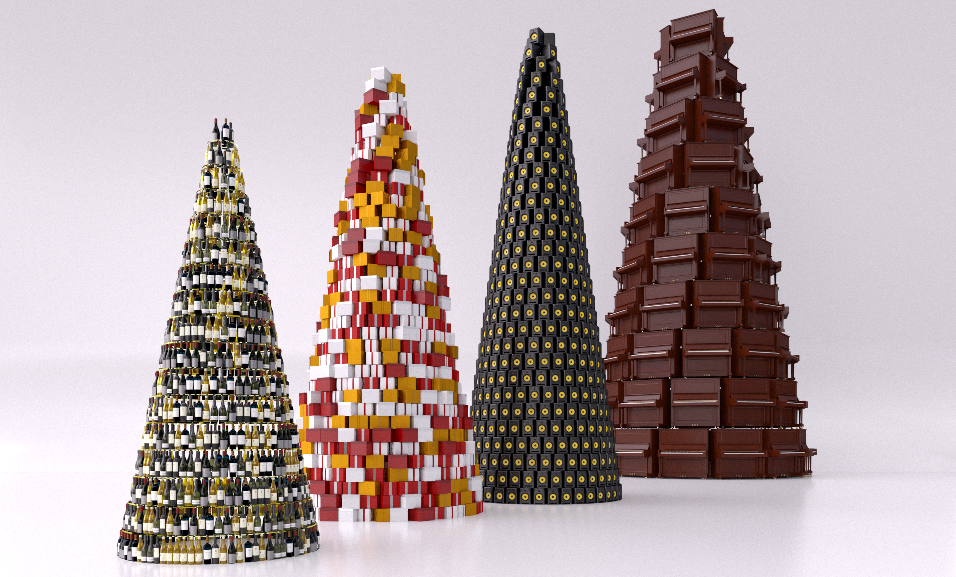
In this example several present models have been added simply by wiring several segments to a Random node connected to the Transform operator. The rest of the graph is exactly the same as this tutorial. The same is true of the tree made of wine bottles. They're added to a randomise node and in this example, a shelf is added as well.
This is the final tutorial of 2018 and so we'd like to take the opportunity to thank you for watching and we hope you'll stay tuned to plenty more episodes in the new year.