Video Transcript
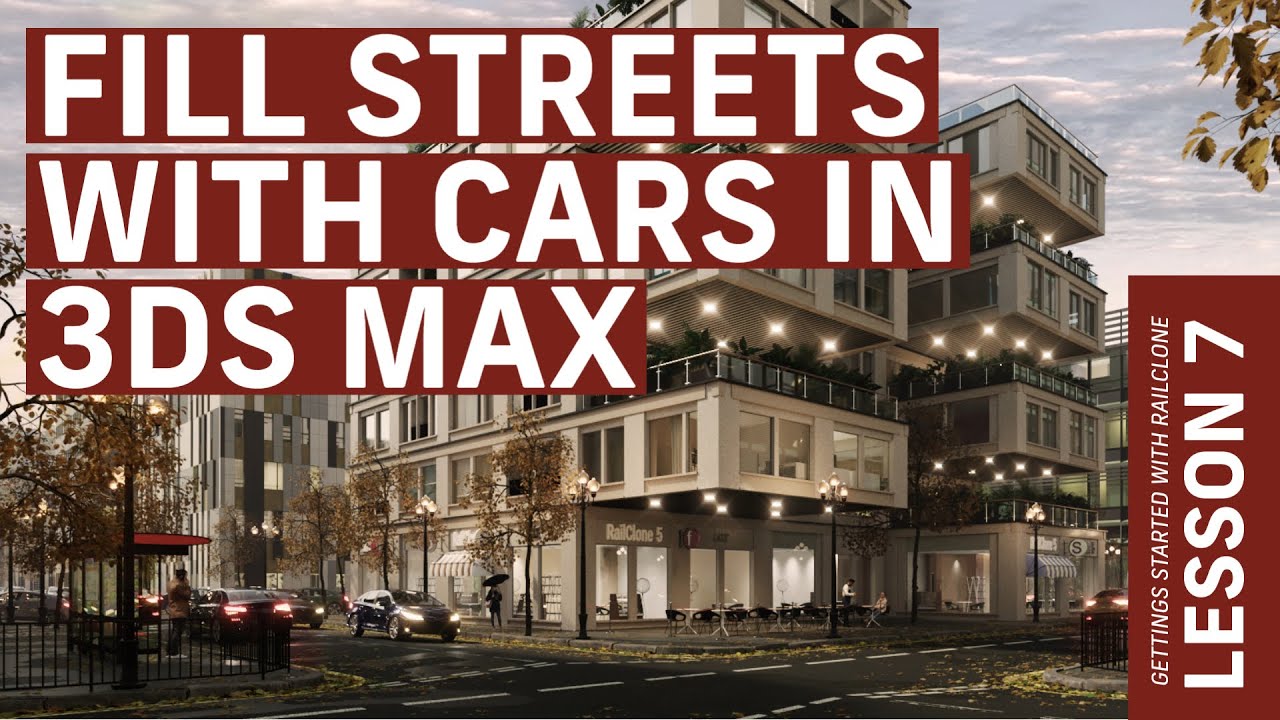
Now that we have the bare bones of our city blocked out, we can start bringing it to life with the addition of some cars. This is a great excuse to demonstrate that RailClone is just as useful for scene assembly as it is for parametric modelling.
In this demo, we’ll use the existing spline that is used to create the curbs and pavements as a path for the cars. In that way, everything is driven by one set of paths, and changing it will update all of the linked styles. We also need some cars, we used 3 that were imported from Chaos Cosmos. Let’s build a quick style to distribute them on the streets.
- Create a new RC object and call it RC-Cars.
- Open the Style Editor and add a new L1S generator.
- Connect a Spline node and pick the spline around the perimeter of the pavements.
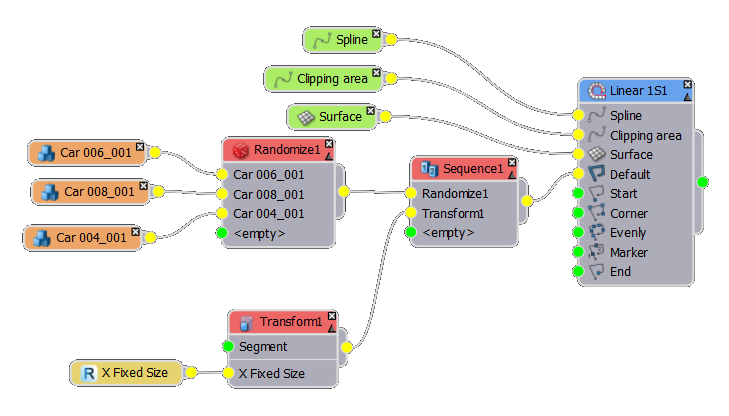
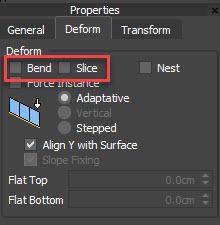
- Add a Segment node and change the Deform settings. We never want a car to be sliced, nor do we want them to bend to follow the corners, so disable Slice and Bend.
![]()
- Pick a car from the scene. Clone the Segment and do the same for the other 2 cars.
- Add a Randomise operator and wire the cars to its input. Wire the Randomise node to the Generator’s Default input. We’ll now have a LOT of cars, bumper to bumper, driving rather dangerously on the pavements!
- Let’s ease the congestion by adding a randomly sized gap between each car. To do that, add a Sequence operator, wire the random node to its first input and wire a new Transform node to its second input. You can use a Transform node to stand in for a segment if you don’t plan to use any actual geometry.
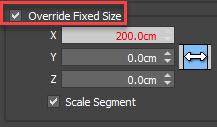
- Enable the Fixed Size property and increase the X Size value. As you can see, you are creating a gap between the cars.
![]()
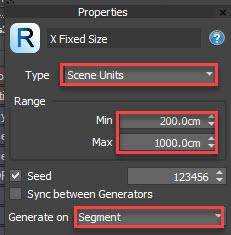
- The gap is currently identical between each vehicle which isn’t very realistic. Instead, let’s randomise this value by right-clicking on the node and Exporting the X Fixed Size property. Click OK and a new input appears.
- Wire a Random Number node to this input and then set a Minimum and a Maximum size for the spaces between the cars. Larger values will result in lighter traffic, smaller values will give you rush hour traffic!
![]()
- You’ll notice the gaps are still the same, and that is because currently a random number is being generated just once and used everywhere. We want a new random number each time this node is placed in the array. To do that, change the Generate On mode to Segment.
- So we’ve eased the congestion, now let’s get these vehicles off of the pavements.
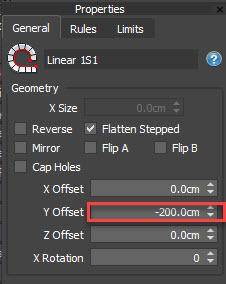
- Select the Generator. In the General tab you’ll find all of the controls that affect the entire array. We can use the Y Offset parameter to move the cars into their rightful place on the road.
![]()
- If we move the camera to a low angle, we can see that the cars aren’t sitting on the road correctly. If this was a flat road, we could use the Z Offset parameter to move it into position, but it’s actually got a camber. To fix it wire a Surface node to the generator’s Surface input. When a surface is present in this input, then the spline it projected down until it hits the surface. That takes care of the position, but not the rotation.
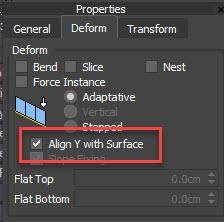
- To rotate the cars to follow the road’s camber, all you need to do is go to the Segment’s settings and go to the Deform Tab. Activate the checkbox labelled Align Y with Surface and the cars now rotate so that all 4 wheels are on the ground!
![]()
If we switch to the camera view we can see that the cars are slightly obscuring our view of the building. In RailClone, it’s possible to use something called clipping splines to remove segments using a closed spline.
- To demonstrate, draw a closed spline in the top viewport that encloses the area in front of the camera where you'd like to remove the vehicles.
- Go back to the RailClone object and add a new Spline node to the graph. Pick the new spline from the scene.
- When you wire the Spline to the generator’s Clipping Area, you’ll see that the cars are removed. Thankfully, because we have slice disabled, the whole car is removed.
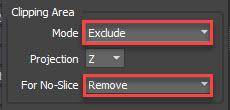
- The clipping area actually has a couple of modes too. For example, you can choose whether the clipping area removes the segments inside its boundary, or retains them and deletes everything outside. You also have three options to choose how to handle segments for which slice is disabled.
![]()
That’s work great, but unless we have a huge library of 3D cars, it is going to be quite easy to spot the repetition of the vehicles. One way to disguise this and get away with using fewer cars and saving memory is to simply randomise their paint colours. In order to do that you can use a RailClone colour map. This is a simple setup, the only challenge you may encounter is identifying the material that’s used for the car’s paint colour.
- Open the material editor and import the material from one of the cars.
- You'll find in most cases it's a large multi-sub material, find the car paint material.
- Wire a RailClone Colour map to the Diffuse and optionally the Coat Colour inputs.
- Now let’s take a look at the RailClone colour settings.
- RailClone Colour is able to randomise and tint maps to provide nearly limitless colour variations. One of the most useful options is the ability to use a fixed selection of specific colours by picking them from a map.
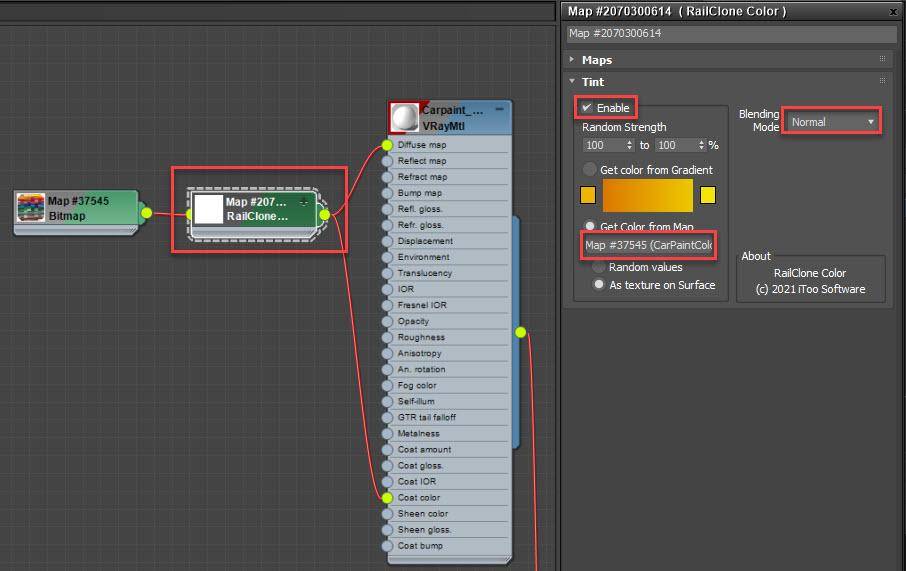
- To use it, turn on Tint Mapping and set a range for the random strength of the tint effect. If you’d rather use a fixed value, just make sure the Minimum and Maximum values are identical.
- Turn on Get Colour from Map and apply a bitmap to the map slot. RailClone will sample the colour from a randomly selected pixel. This means that you can control the probability of a colour being selected by controlling how many pixels it occupies in the source map.
- Finally, choose a transfer mode. In this example we want the Tint Colour to overwrite the base colour so we’ll pick Normal.
Hit render and that’s it! Randomly tinting geometry based on pixels selected from maps is a great way to precisely control randomising colours, and it works really well for instances like this where you have a number of coloured swatches, or even for matching a colour palette based on a photograph.