Requirements
- info Forest Pack 7
How often have you wished you could quickly add new assets and presets to the library so you can use them in other projects? Well, now you can!
Forest Pack 7 includes new library management tools that, with one click, allow you to add selected objects to the library, collect the necessary assets, build a material library and generate thumbnails. If the library is saved in a network location, it will even become instantly available to the rest of your team. Here’s how it works.
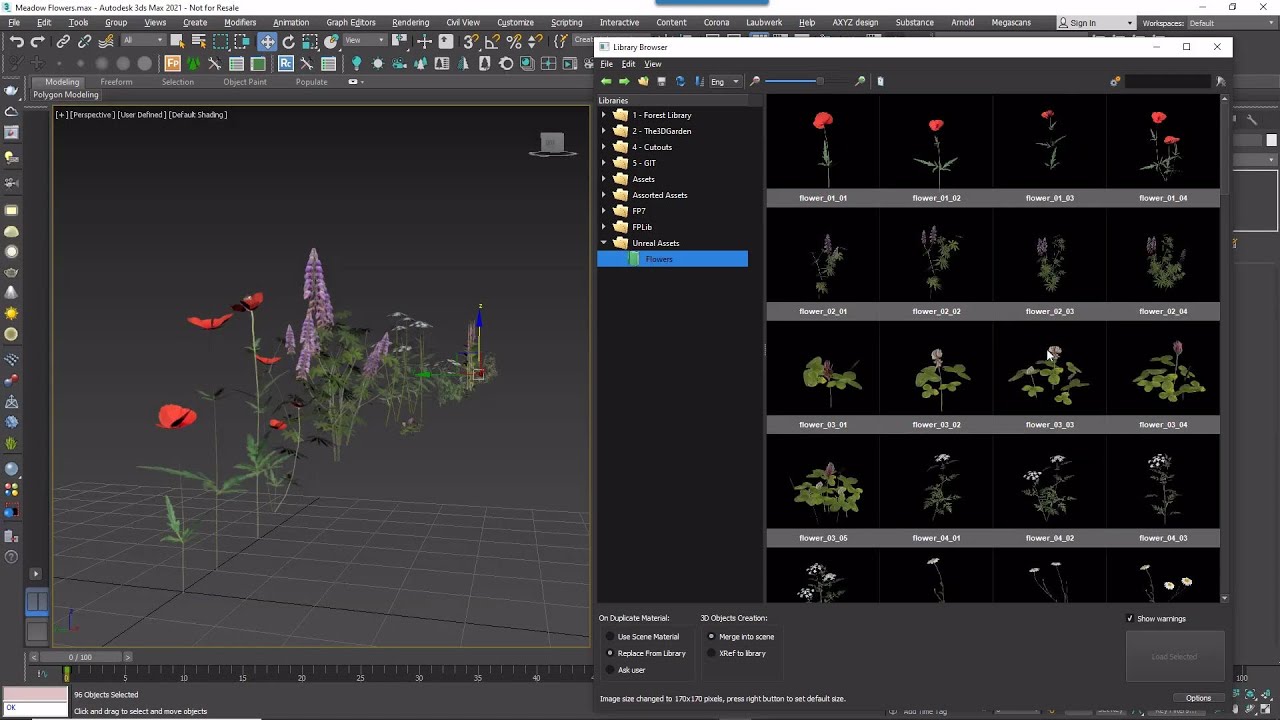
- First of all, it’s now possible to open the library browser without a FP object. Just click on the Library Browser button on the Forest Pack toolbar.
![]() If you prefer you can also open it from a Forest Object either from the Forest Object’s setting in the Create menu, or from the Geometry Rollout in the Modify Panel.
If you prefer you can also open it from a Forest Object either from the Forest Object’s setting in the Create menu, or from the Geometry Rollout in the Modify Panel. ![]()
- To save individual objects to the gallery, first select them in the viewport.
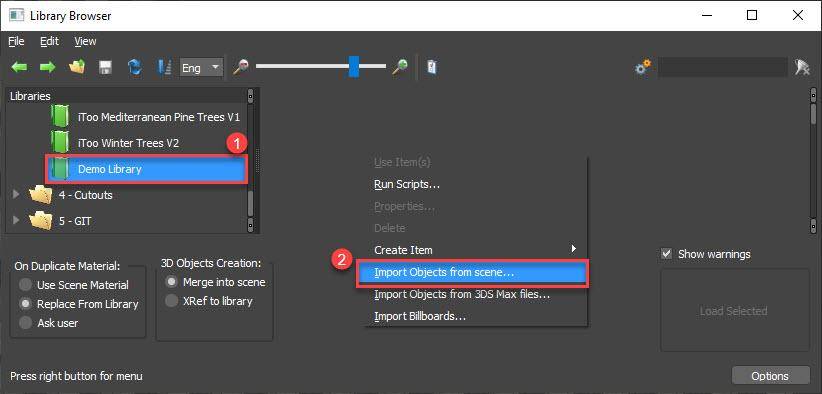
- Next, select the library to which you wish to add the items, then right-click in the Items List and select Import Object from Scene
![]()
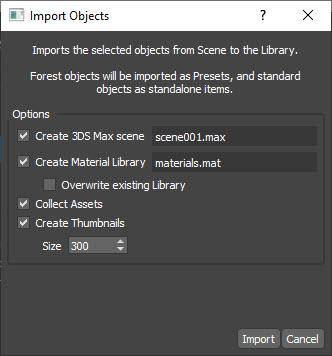
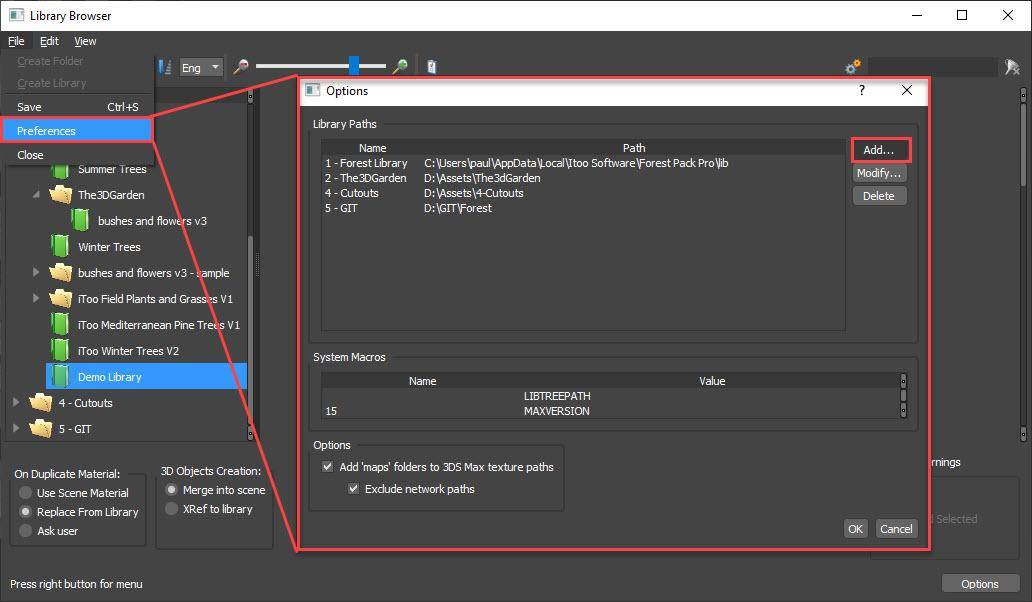
- A new dialog will open with a number of options. For the most part, you won’t need to change much here and it’s pretty self-explanatory, but let’s take a look at what each option does.
![]()
Create 3DS Max Scene allows you to change the name of the Max file to store the new library objects. You can let FP automatically name files for you, or you can specify them manually. The browser cannot add objects to an existing file, so a new max file we be created each time you run the process, and you’ll be warned if you try to overwrite something
Create Material Library will save the materials assigned to the objects to a new material library. The materials in this library are assigned to the objects on import. we separate them in this way to allow users to have a different matlib for each renderer should they want it. If you choose a material library name that already exists, the new materials are appended to the existing file. This option allows you to overwrite the file instead.
The Collect Assets option will move all the external files referenced by the selected objects to a Maps folder in the library location. This will help to ensure that assets never go missing and can be found by Max.
Finally, the Create Thumbnails option allows you to create and assign a thumbnail captured from the viewport for each object. - And that’s it. To add objects to the library just click Import. Wait a few seconds and it’s done!
 If you prefer you can also open it from a Forest Object either from the Forest Object’s setting in the Create menu, or from the Geometry Rollout in the Modify Panel.
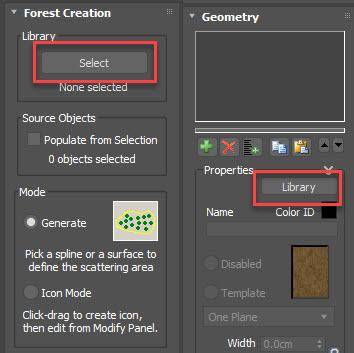
What about if you’ve created a whole scatter you’d like to re-use in the future. That’s no problem either. Instead of selecting source objects, you just select the Forest Object and import it in the same way. Once it’s in the library you can easily reuse it in a new scene just by loading it from the library and assigning new areas. It’s a great way to save time by reusing systems that you’ve already taken the time and energy to set up.
Finally, we've only discussed how to add objects to an existing library. To create a new library location and add libraries to it here’s what you need to know.
- First of all, we’ll set a location to save your libraries. This could be on your local HDD or in a network location if you’re working in a studio. Go to Preferences and click Library Paths > Add…
![]()
- Navigate to the location you’d like to use for your new libraries.
- To name the library location, double- click in the Name column of the Library Paths list then. Click OK. The new location now shows in the tree view on the left.
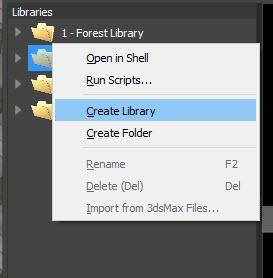
- Now let's add a brand new library. Select the new folder. Right-click and select Create Library. Right-click the library and select Rename and then give it a new name
![]()
- With that done we can add assets to the library in the same way we’ve already demonstrated. Just select them in the scene - run the new Import Objects from Scene tool and you're done. All the assets will now be at your fingertips every time you use Forest Pack.
Far more than just one new feature, the library browser has actually been entirely rewritten from the ground up to ensure it is future proof and easy to update. Along the way we’ve added a few other usability improvements including improved selection techniques similar to windows explorer, and an updated search tool. You can now type any name into the search field and the whole library is searchable. There are also filters that give you some boolean search options.
We hope you enjoy these changes to the library experience.