Resources
Requirements
- info RailClone Lite or Pro
Welcome the first instalment in a regular series of quick tips in which we'll explain in a couple of minutes how to use RailClone's macros and Forest Pack's effects. To get started, we'll look at a couple of Macros in RailClone that can be used to get more out of your assets by randomising rotation and mirroring segments to help disguise repeated geometry and textures.
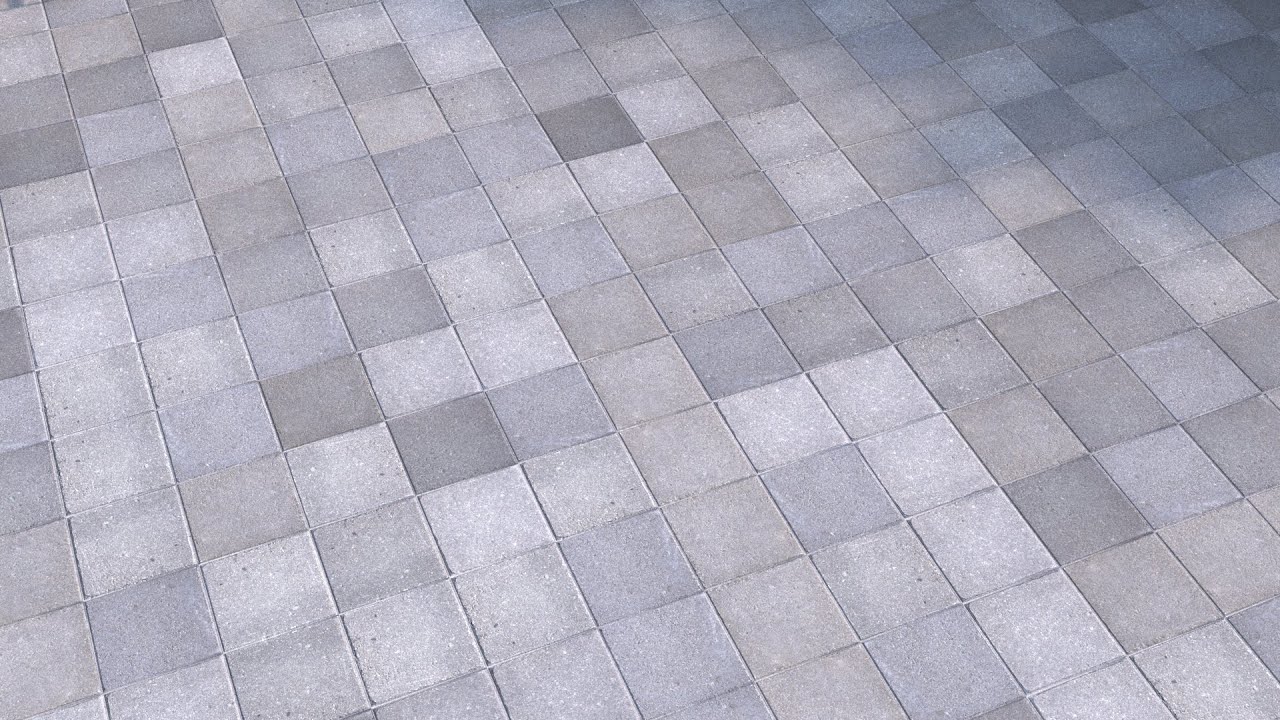
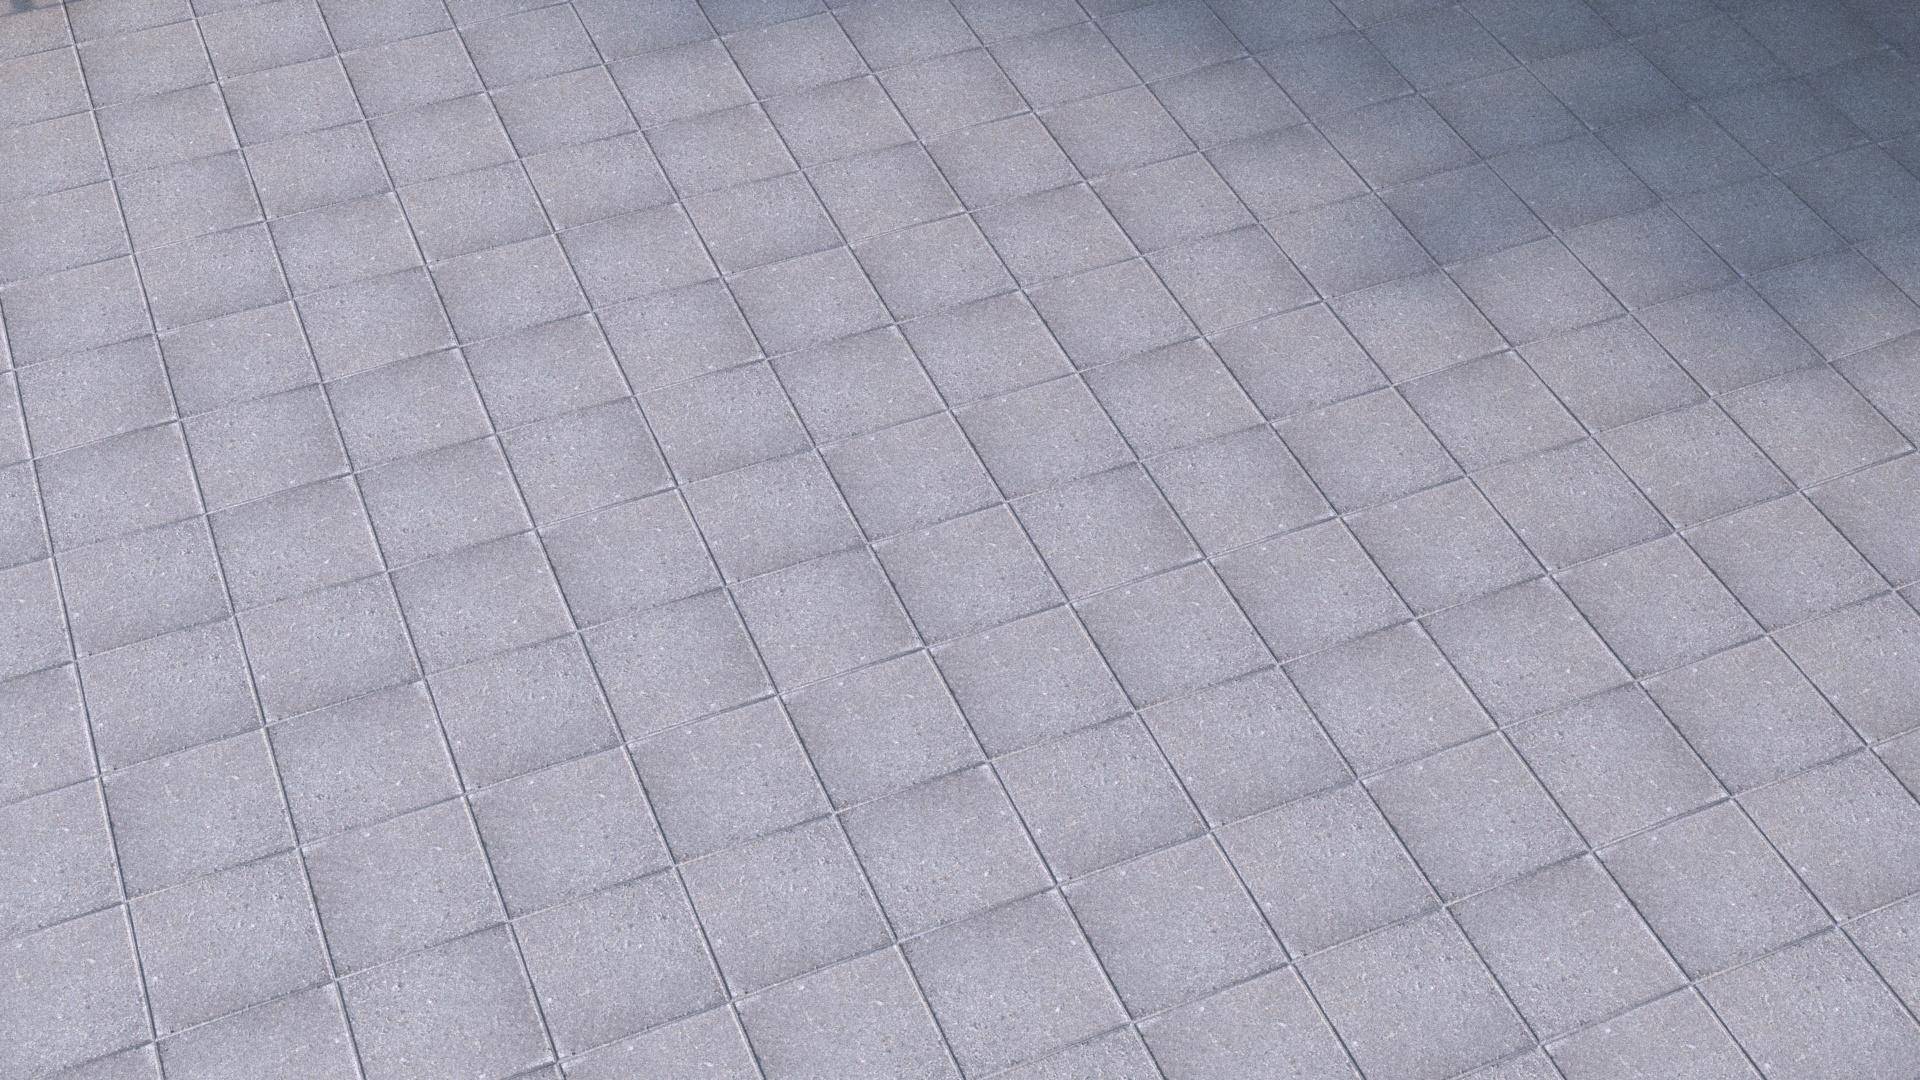
For example, in this scene I have a single tile which is wired to a simple A2S array to create a concrete paving style. As you can see, the repetition of the segment is obvious.
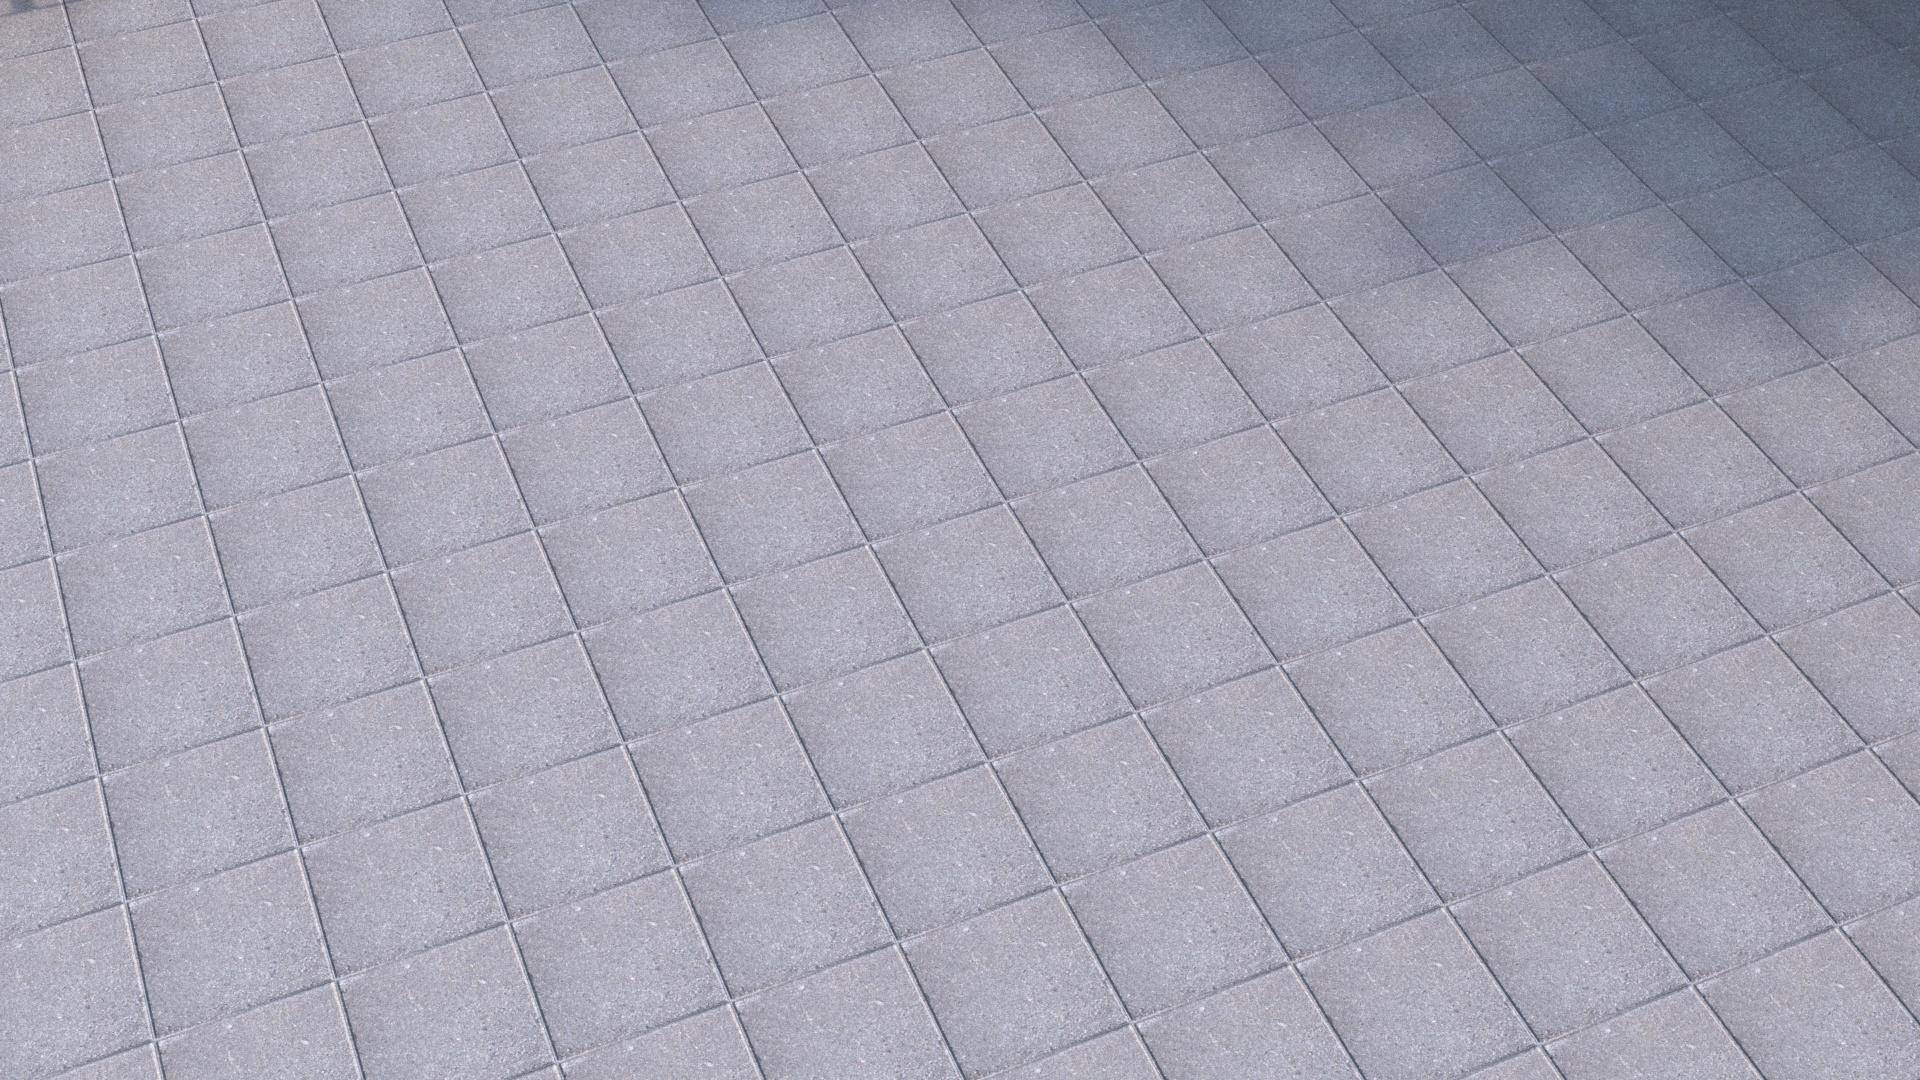
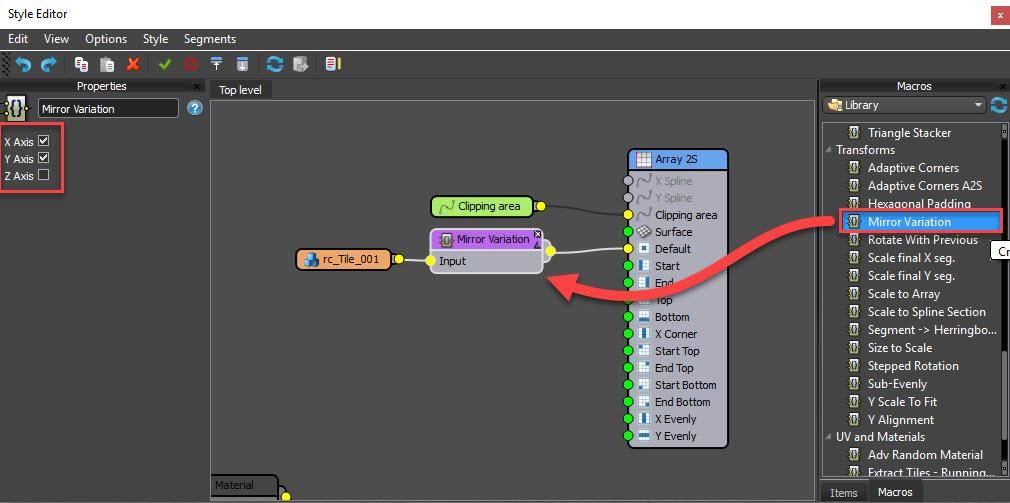
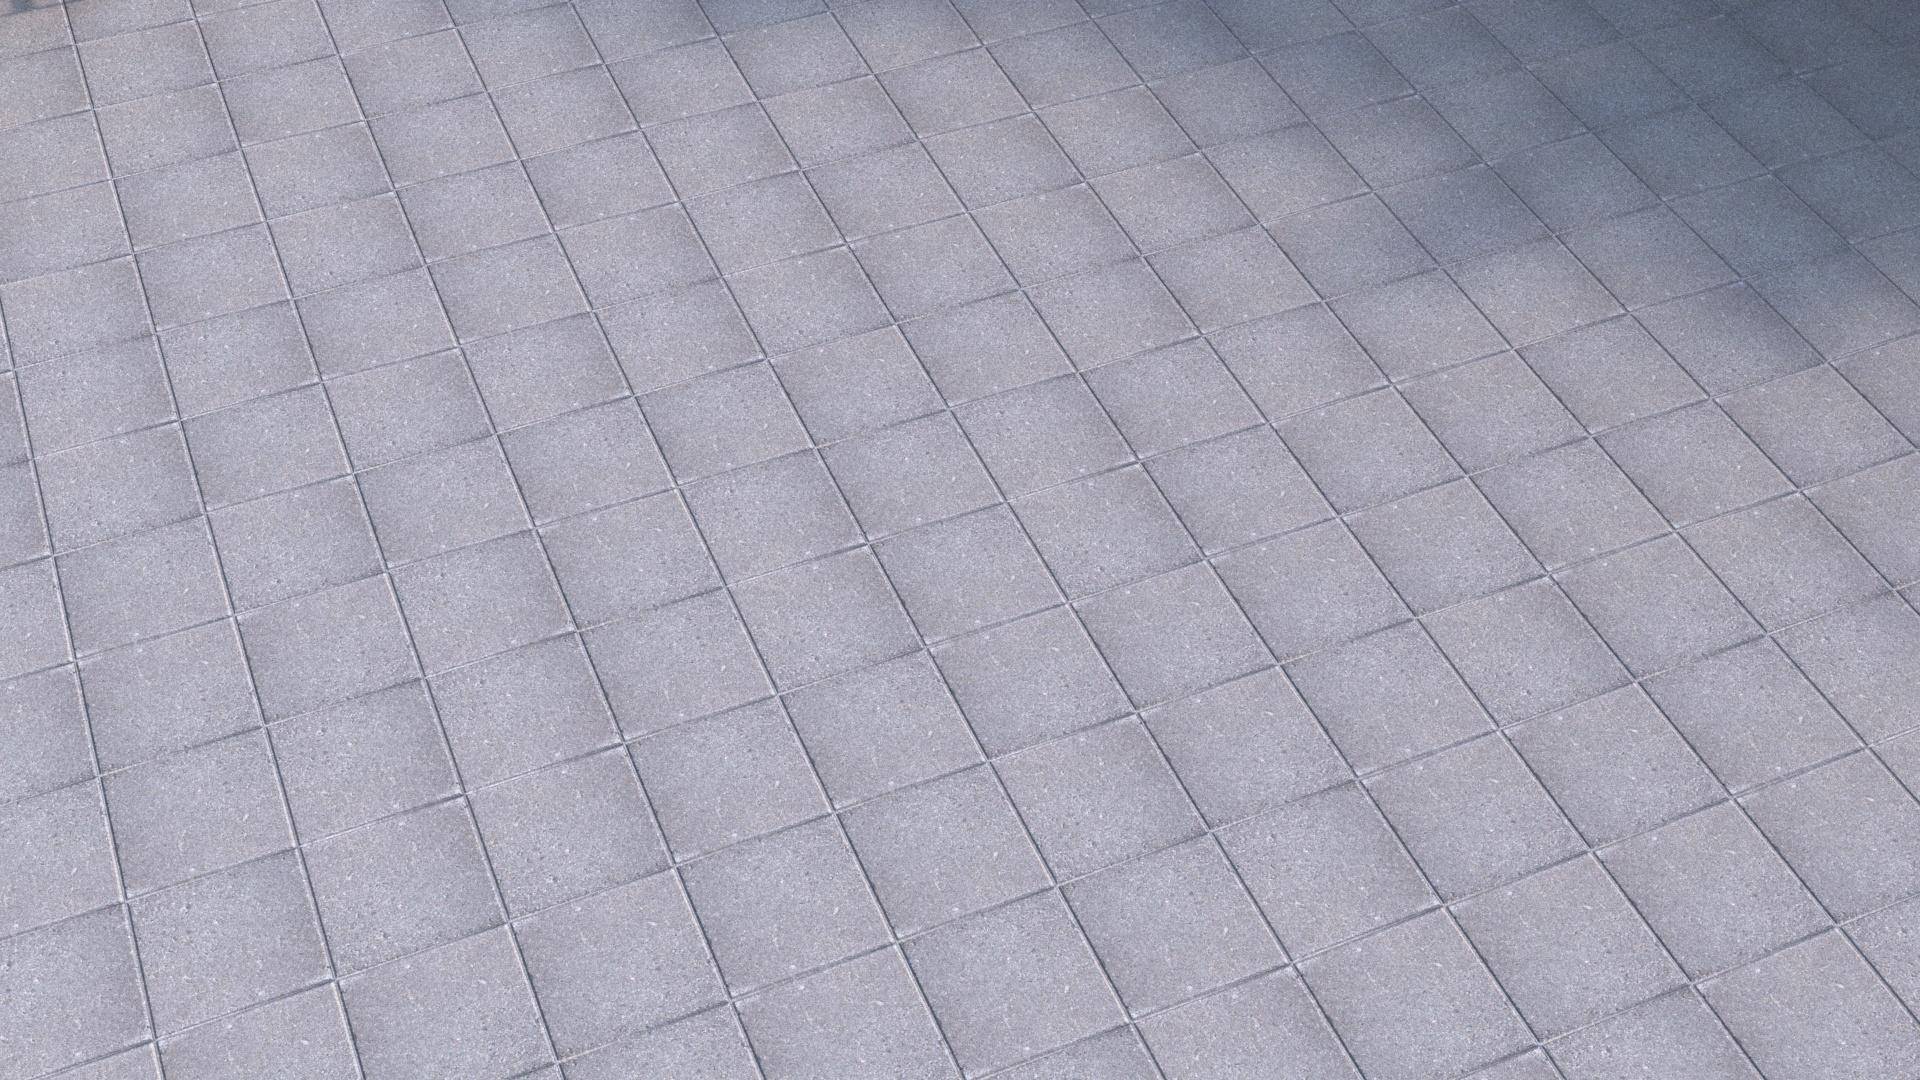
One way to help disguise repetition is by randomly mirroring geometry on the X and Y axis. To do that we can use a built in Macro. Just go to the Macro's tab on the right of the style editor and find the Transform group. Drag a Mirror Variationsmacro to the graph and wire it between the existing Segment and the Generator. Select the Macro and in the Properties panel you will see options to control which axes are used for the random mirroring operation.
In this example we will enable the X and Y axes, and already the repetition much less obvious:
Another option to add variation to our single tile is to randomly rotate the segments in 90 degree increments. To do this temporarily disconnect the Mirror Variations Macro and instead wire a new Stepped Rotation Macro between the Segment and the Generator. Select the new Macro and go to the Properties panel. Here you will find a Minimum, Maximum and Step Increment parameter for each axis. To rotate the tiles leave the Z Min value at 0, change Z Max to 360 to allow for a full rotation, then change the Z Step value to 90.
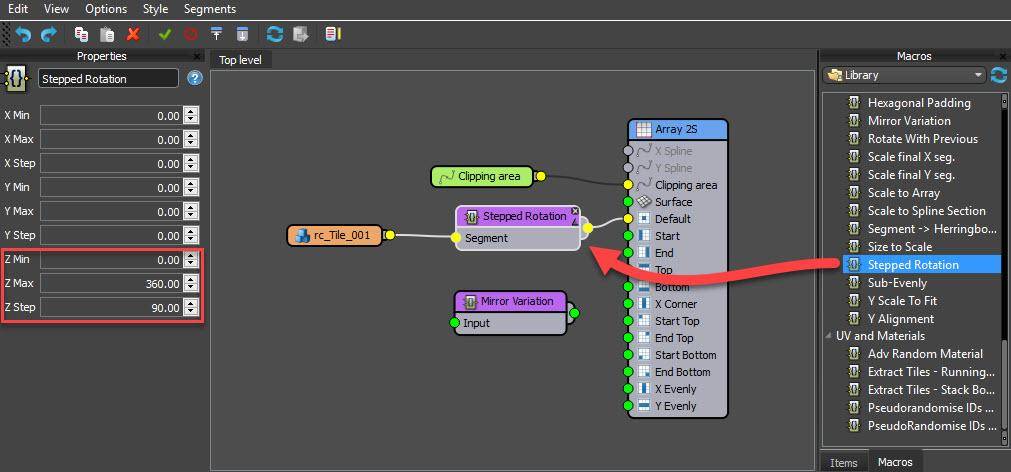
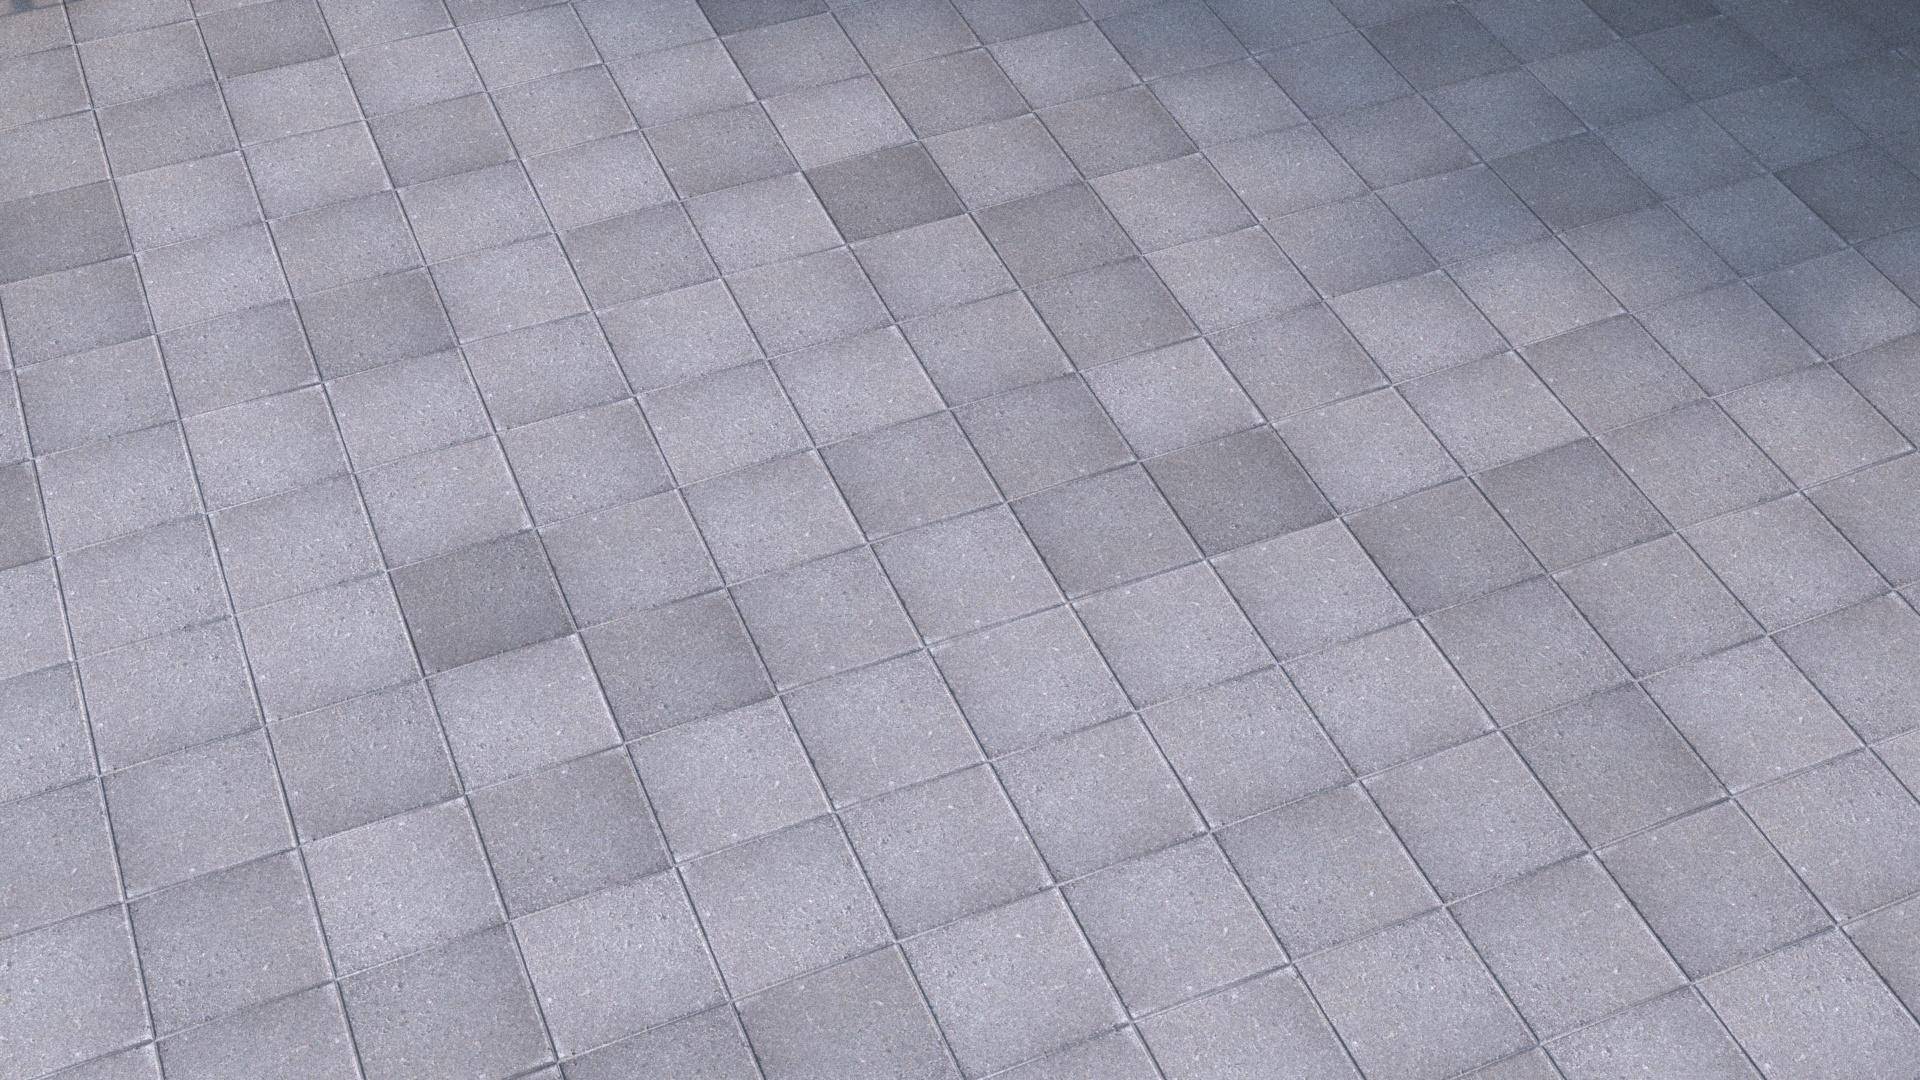
This combination will randomly output rotation values of 0, 90, 180, 270, and 360. Of course for other purposes, different Step, Min and Max values can be used. With this complete you can see we have a slightly different way of randomising the segments to disguise repetition:
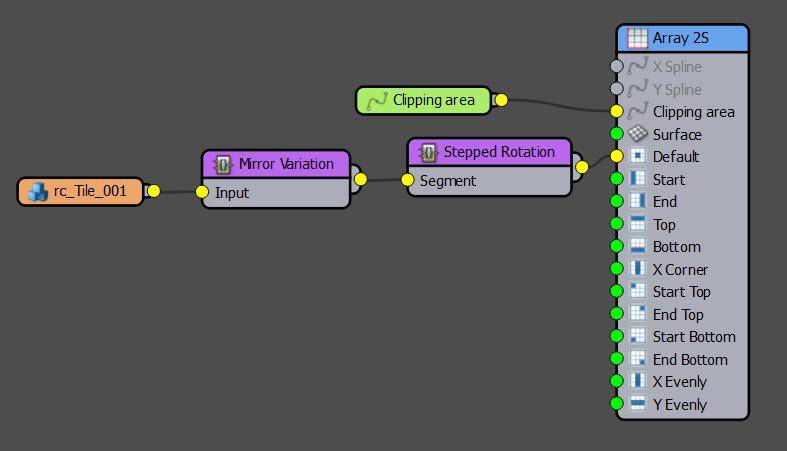
For maximum variation, you should combine both these macros in series by wiring the output of one to the input of the other.
As you can see, these macros are very useful for getting the most from just a few assets, but you can go even further by adding a RailClone colour map to the material's Diffuse input and using it to randomise the value. To do this.
- Open the Material Editor.
- Find the material applied to the RailClone object.
- Wire a new RailClone Colour material between the existing Diffuse map and the material. For compatibility with the widest range of renderers, make sure you also wire the diffuse map to the Map 1 Input and enable it.
- Enable Tint and change the gradient from white at one end to black at the other.
![Tint Settings]()
- Change the Blending Mode to Multiply, a random value picked from the gradient will now be used to multiply the values of the diffuse texture. You can control the strength of this effect using the Random Strength Min and Max values. 0to 30% works well in this case.

If you render now, you will see that the subtle changes in value combined with the macros really help to disguise the fact that this is still only a single model.
 The material applied to this object actually includes 4 additional tile textures on material IDs 2 - 5. To really add some variety we can randomise between these in RailClone too. Just open the Style Editor and add a new Material node after the segment. In the Node's settings change Replace Material ID to target the ID you wish to randomise. In this example we will leave it at 1. You can then enter a From and a To value to define the range from which a random material ID will be selected. There are 5 materials, so change From to 1 and To to 5. Now if you render the tiles are randomised by mirroring, rotating, tinting and applying one of five different materials!

I hope you enjoyed this tutorial, stay tuned for more videos explaining how to use RailClone and Forest Pack's built-in Macros and Effects.