Resources
Requirements
- info RailClone Lite or Pro

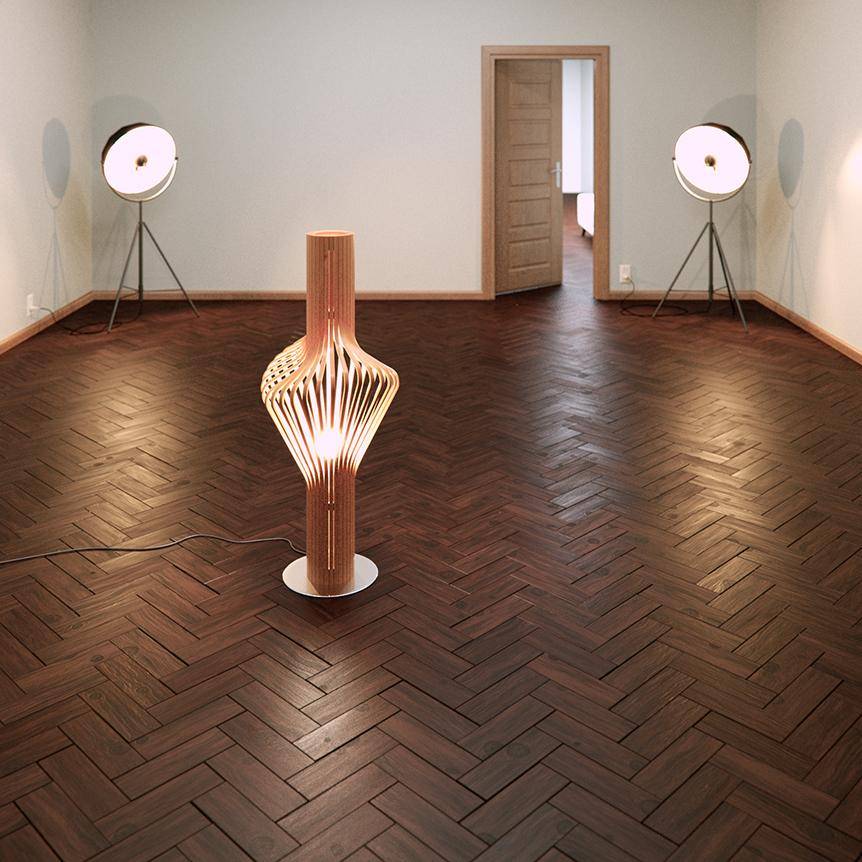
In this tutorial, we will explain how to create a herringbone pattern using one of RailClone’s built-in macros. This technique is very useful for floors and paving and because all of the necessary calculations are performed for you automatically, it’s very quick and easy to set up.
To get started, you’ll just need a closed spline to define the outline of your floor or paving area, and at least one object you’d like to distribute in a herringbone pattern. Then create a new RailClone object and open the style editor to follow these steps.
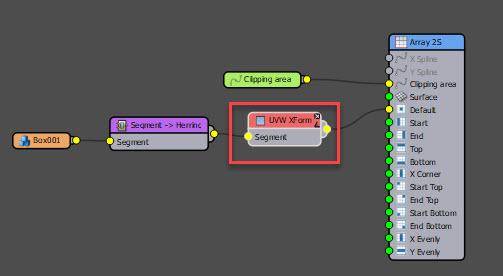
- Add a new A2S array.
- Create a new Spline node, go to the node’s Properties and use the Object picker button to select the closed spline from the scene.
- Wire the Spline node to the Generator’s Clipping Spline input.
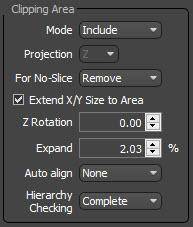
- Select the Generator and enable Extend X/Y Size to Area. When this option is enabled, the array is automatically sized to fill in the spline and clip the geometry around the perimeter.
![]()
- Import geometry to RailClone by adding a new Segment node and using it to pick an item from the scene.
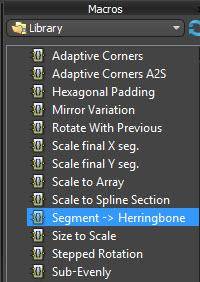
- Switch to the Macros tab and add a Segment -> Herringbone macro to the graph. This macro automatically adjusts a segment’s rotation translation and padding to create a herringbone pattern. No fiddly maths required!
![]()
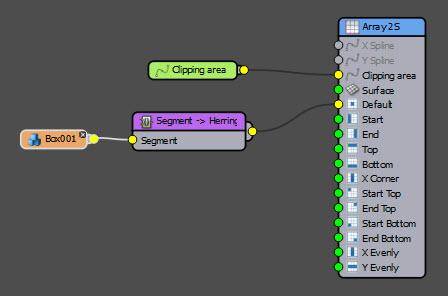
- Finally, wire the Segment to the Macro and then wire the Macro to the Generator’s Default input. A herringbone pattern is now created … and that’s all there is to it!
![]()
We could finish the tutorial here, but let’s take it a little further and add some randomisation to the textures. In the last macro lesson, we added a RailClone colour map to the material's Diffuse input and using it to randomise the value to create some variation in the textures. Exactly the same thing can be done for flooring too.
- Open the Material Editor.
- Find the material applied to the RailClone object.
- Wire a new RailClone Colour material between the existing Diffuse map and the material.
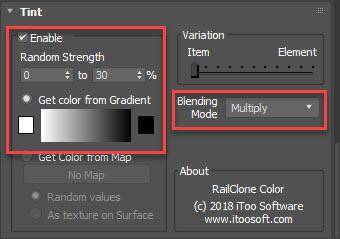
- Enable Tint and change the gradient from white at one end to black at the other.
![]()
- Change the Blending Mode to Multiply, a random value picked from the gradient will now be used to multiply the values of the diffuse texture. You can control the strength of this effect using the Random Strength Min and Max values. 0 to 30% works well in this case.
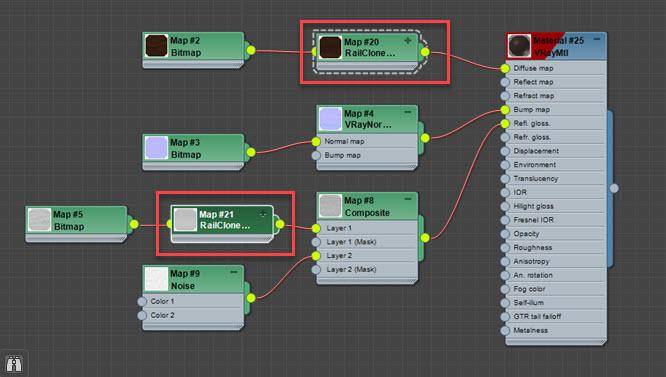
- You can even use the same technique for the maps in the roughness input to subtly randomise the reflective properties of the boards.
![]()
If you are using V-Ray you can go even further and randomise the UVW Offset for the textures for even more variety. To do this:
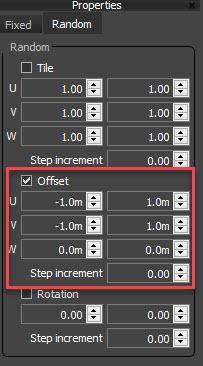
- Go back to RailClone’s Style Editor and add a UVW Xform modifier.
![]()
- Enable Random > Offset and enter -1 for the Min and 1 for Max in the U and V parameters. This will shuffle the texture on these axes for each plank.
![]()
You now have a nice, easy to create, flooring style. Best of all, the whole thing is easy to edit. If you’d like bigger planks simply change or swap the base model and the whole style updates automatically.