Resources

For this weeks RailClone tutorial, we’re going to explain the Sub-Evenly macro. It’s a useful node to help solve a particular problem that is best explained with an example.
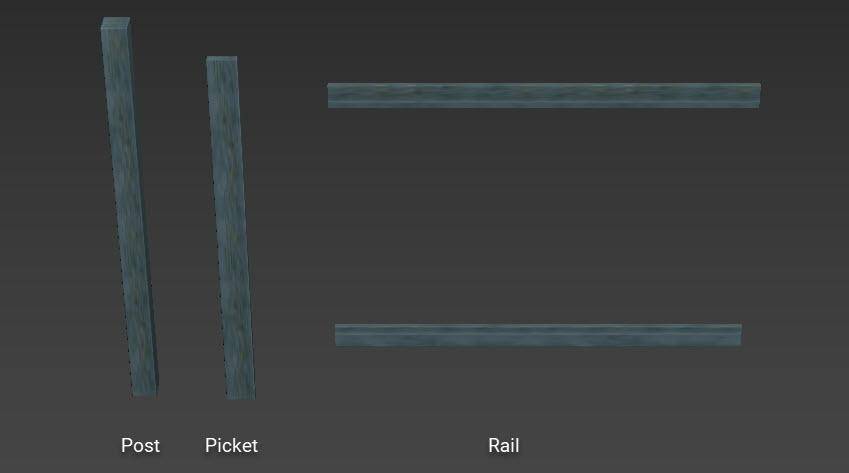
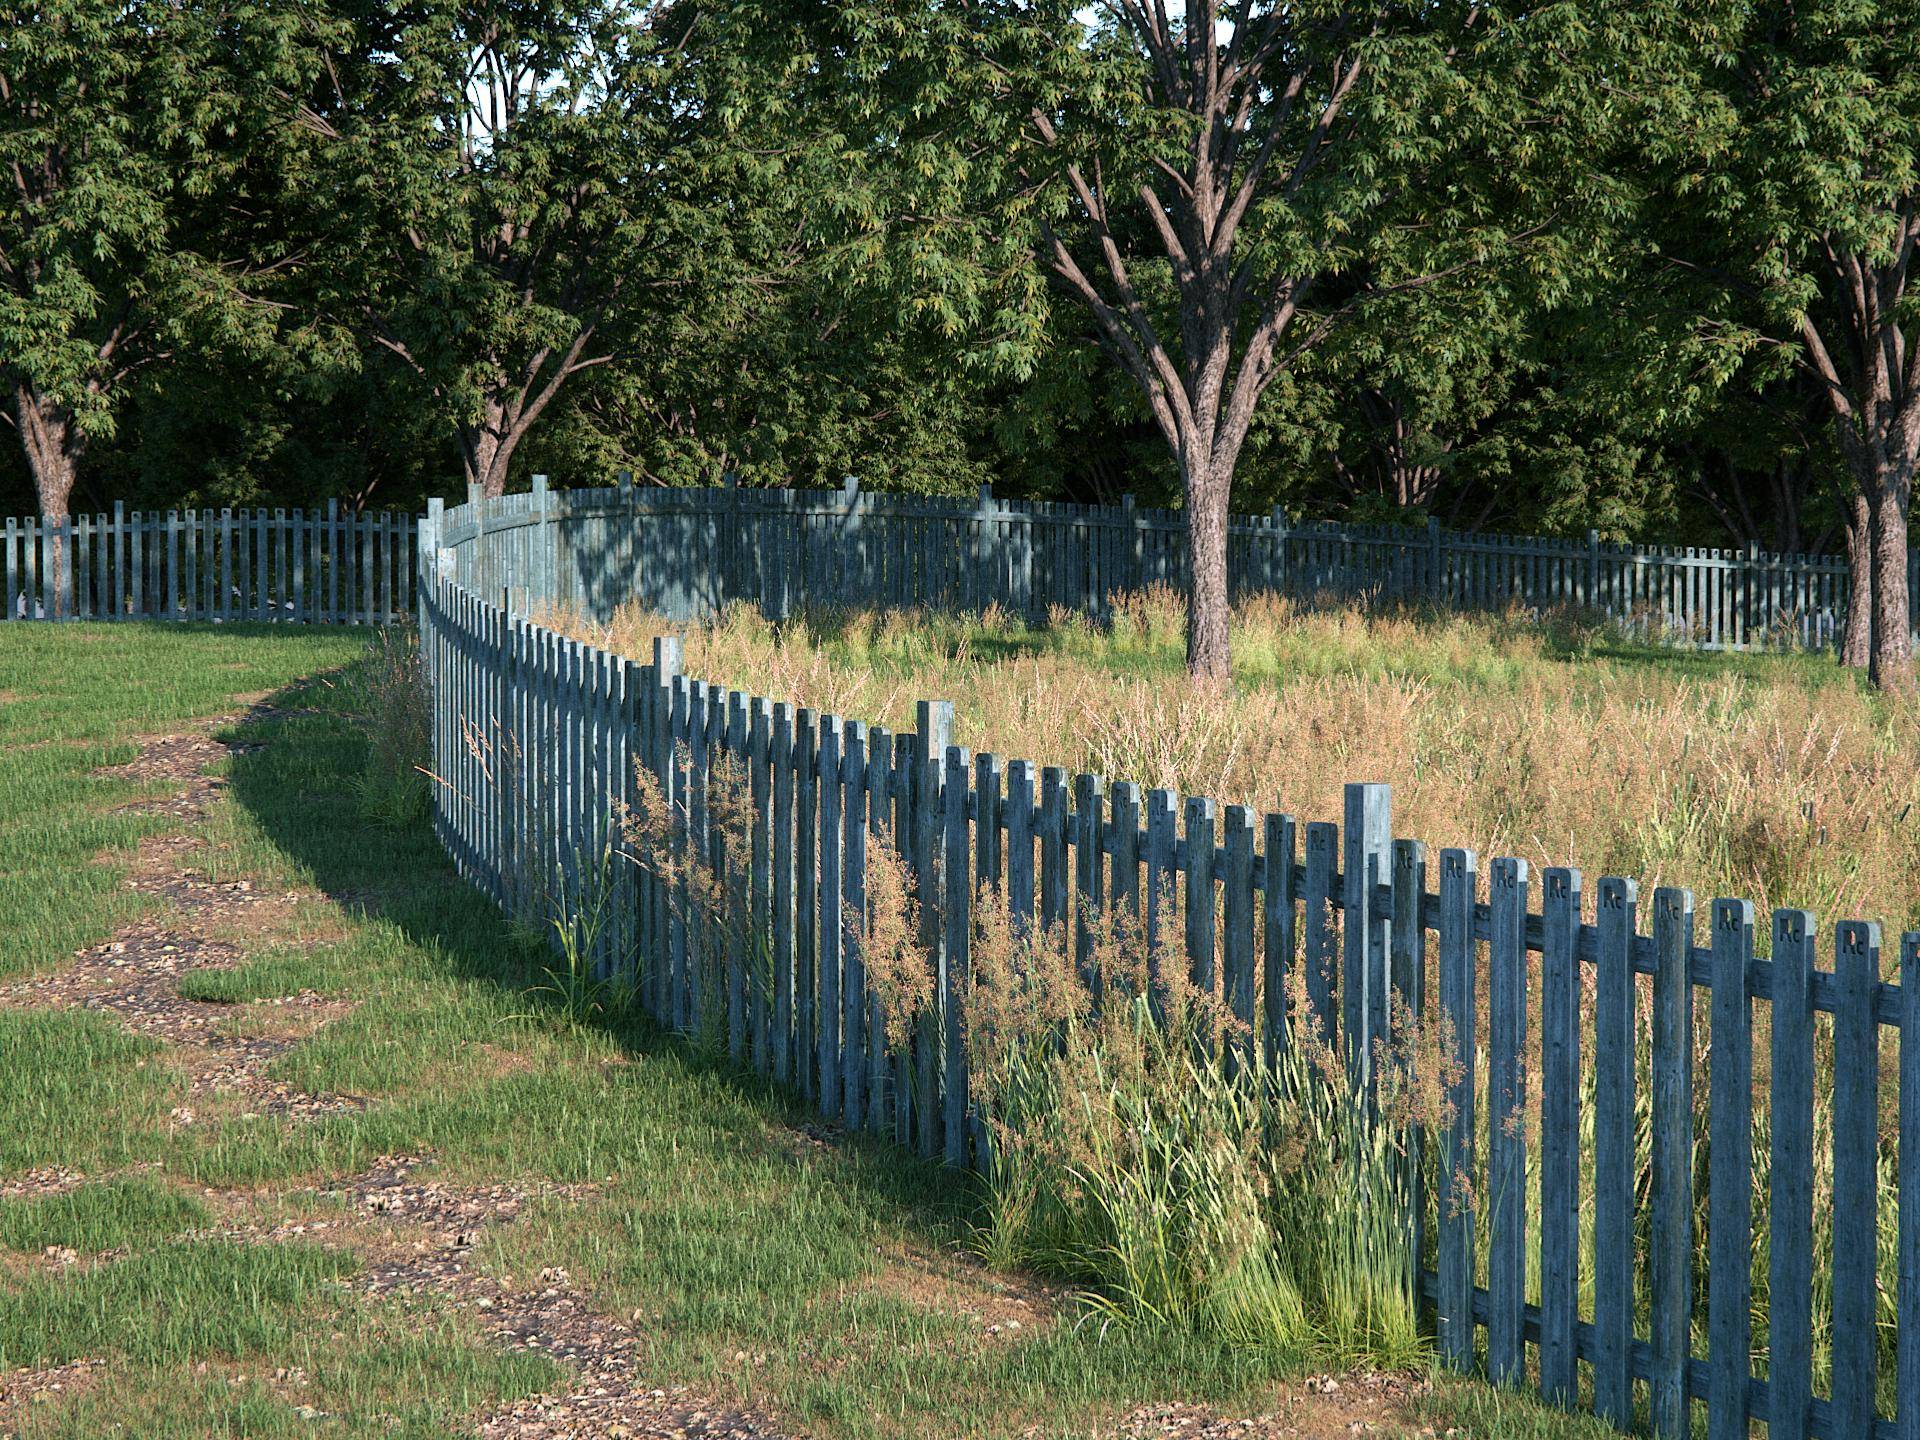
Let’s imagine we’re creating the picket fence shown above. The setup is pretty simple, you need 3 objects, one for the posts, one for the pickets, and one for the horizontal rails.
To make these components into a complete parametric object, you’d just follow these step.
- Create a new RailClone Object, add an L1S Generator and connect a Spline node.
- Pick a path from the scene and we’re ready to add geometry.
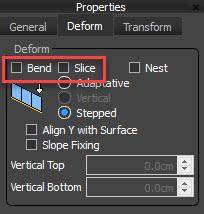
- Add a Segment node and pick the post geometry from the scene. Change the Deform mode to Stepped so that the posts will remain upright even on undulating splines. You should turn off Bend too, to prevent the posts from bending unnaturally to follow curved splines.
![Picket Fence deform modes]()
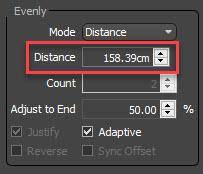
- We want to add these posts at regularly spaced intervals. No problem, that’s what the Evenly input is for. Wire the Segment node to the Evenly Input and change the spacing using the generator’s Rules > Evenly > Distance parameter.
![Picket Fence Distance settings]()
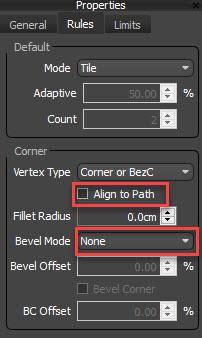
- Wire the post to the Start, End and Corner Inputs. To prevent the post from rotating on the corners, disable Align to Path from the Generator’s Rules > Corner settings.
- While you’re in the Generator’s properties, change Bevel Mode to None or Reset. This will stop the Default segment from being mitred on the corners and force a full Segment to start in each new section.
![picket fence corner settings]()
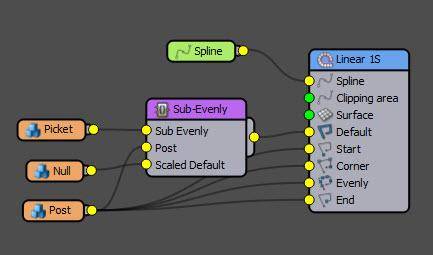
And now we want to add pickets, but we’re already using the Evenly input, and pickets need to be spaced at regular intervals too. That’s where the Sub-Evenly Macro can help out. It can space Default segments at regular intervals between the Corners and existing Evenly items. To use it:
- Go to the Macros tab and find the Sub-Evenly macro in the Transform group. Drag it to the graph and wire it to the Default input.
- Add another Segment node and pick the picket geometry from the scene. Change the Deform mode to stepped and turn off Bend too. This time we’ll change the Segment’s Y alignment to Bottom to move it to one side of the centre line. Later on, we’ll add the rails setting the value to Top to put it on the other side of the centre line.
- Wire the picket to the Macro’s Sub-Evenly input
- Wire the post to the Macro’s Post input.
- Segments wired to the Scaled Default input will be stretched between the segments in the evenly input. If, as in this case, you just want gaps, then connect a new Segment node but don’t select any geometry. We call these Null segments.
- That’s it, you can now adjust the spacing of the pickets using the Macro’s Railing Spacing parameter and the posts using the Generator’s Evenly Distance Parameter.
- Finally, for the Macro to calculate correctly for the first and last evenly sections, the post Segment’s X Alignment needs to be set to centre.
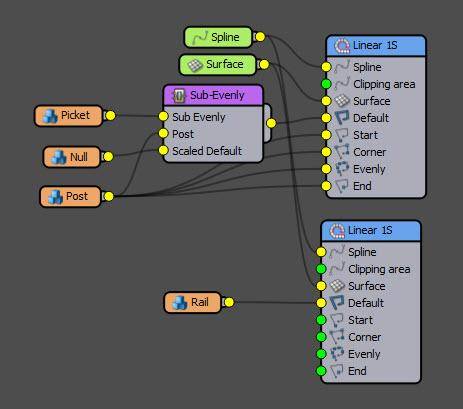
One part is still missing, the horizontal rails, to add those we’ll add another generator.
- Create a new Generator and connect the same Spline node to its Input.
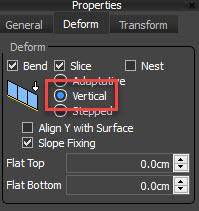
- Add the 3rd and final Segment node and pick the railing geometry from the scene. Change the Segment’s Y alignment to Top to move it to the other side of the centre line. Change the Z Alignment to Pivot to use the source geometry’s pivot position to move the segment up and into position.
- Change the Deform mode to Vertical, this will allow it to follow undulating splines while keeping the verticals upright.
![Picket Fence Vertical Deform mode]()
Test the style by applying it to different splines. To follow a landscape you can also add a Surface node and wire it to both generators. When you use this to pick a surface, the fence is automatically projected onto the terrain.
And if we add a few of the Presets that come with Forest Pack we get our final scene.
I hope you’re enjoying these regular tutorials, stay tuned for more explanations of how to use RailClone and Forest Pack's built-in Macros and Effects.