Resources
In this video, the second of our two-part tutorial on creating raised flower beds, we explain how to use Forest Pack to add the plants. If you’ve yet to watch the first part, it explained how to model wooden raised beds using RailClone, but we’ve split this tutorial in two because even if you don’t want to create raised beds, some of the tips in this second video should be useful for any kind of decorative planting.
In this tutorial, we will be using the Bushes and Flowers collection from The3DGarden which contains 41 species of common small decorative garden plant, each in 4 variations for a total of over 180 plants (plus additional presets and grasses), but of course, these techniques will also work with other assets
- Add a new Forest Pack object by selecting a spline from the scene. If you are combining this tutorial with the last one for raised beds, make sure you choose the same spline that is being used to drive the RailClone object.
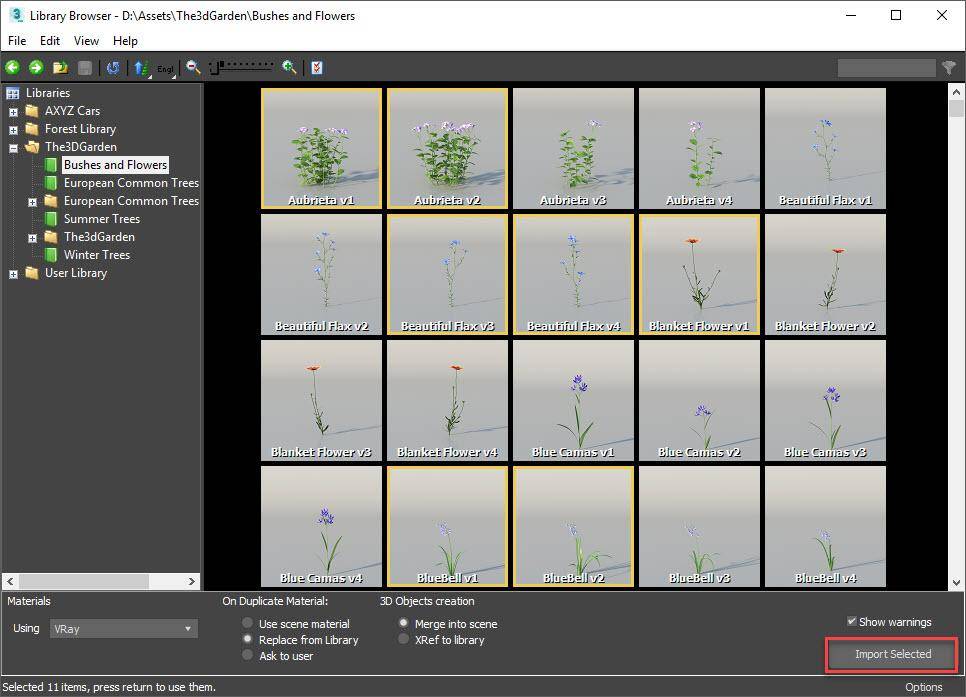
- Go to the Geometry rollout and click to open the Library Browser. Either add plants from the scene or from a library. As I mentioned in the intro, I will be using flowers from The 3D Garden Plants and Bushes collection. To select multiple items from the library, hold down control as you click and choose a selection of plants that you want to grow in your beds. When you are done, click Import Selected.
![Library Browser]()
- Do a quick edit of the Distribution > Density value to approximate the final planting - we’ll come back to this and refine it later.
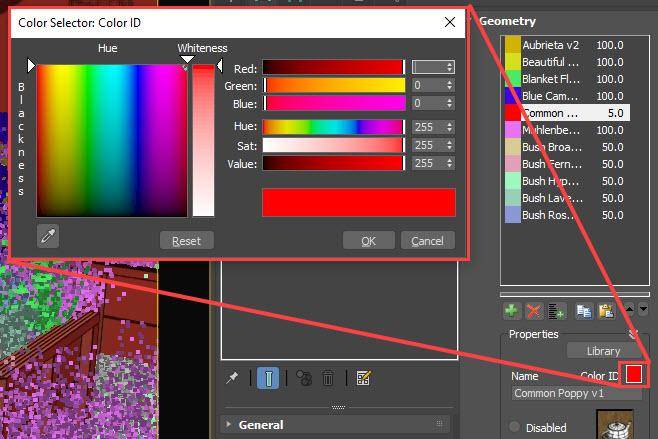
- In a second we will use Forest Packs auto-clustering feature to create groups of plants parametrically. To determine which plants belong in a group the feature uses the Colour IDs set in the Geometry panel. In some cases, we may have two plants of the same species that should be clustered together, or maybe you just want a patch of planting that contains multiple species, either way, you group them by assigning them the same Colour ID. Go through the list and assign Colour IDs as appropriate.
![Colour Ids]()
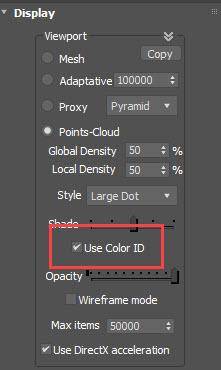
- To see the Colour IDs represented in the viewport, go to the Display rollout and enable Use Colour IDs
![Use Colour Ids]()
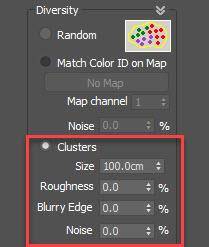
- Go to the Distribution > Diversity settings and turn on Cluster. This feature creates noise maps that automatically create clusters from items with the same Noise ID. There are 4 settings.
![Cluster Settings]()
Size which is used to control the size of the clusters in scene units.
Roughness which set the shape of the cluster from smooth at 0% to rough at 100%
Blurry Edge which allows adjacent clusters to bleed together from sharply defined borders as 0% to blurred borders at 100%
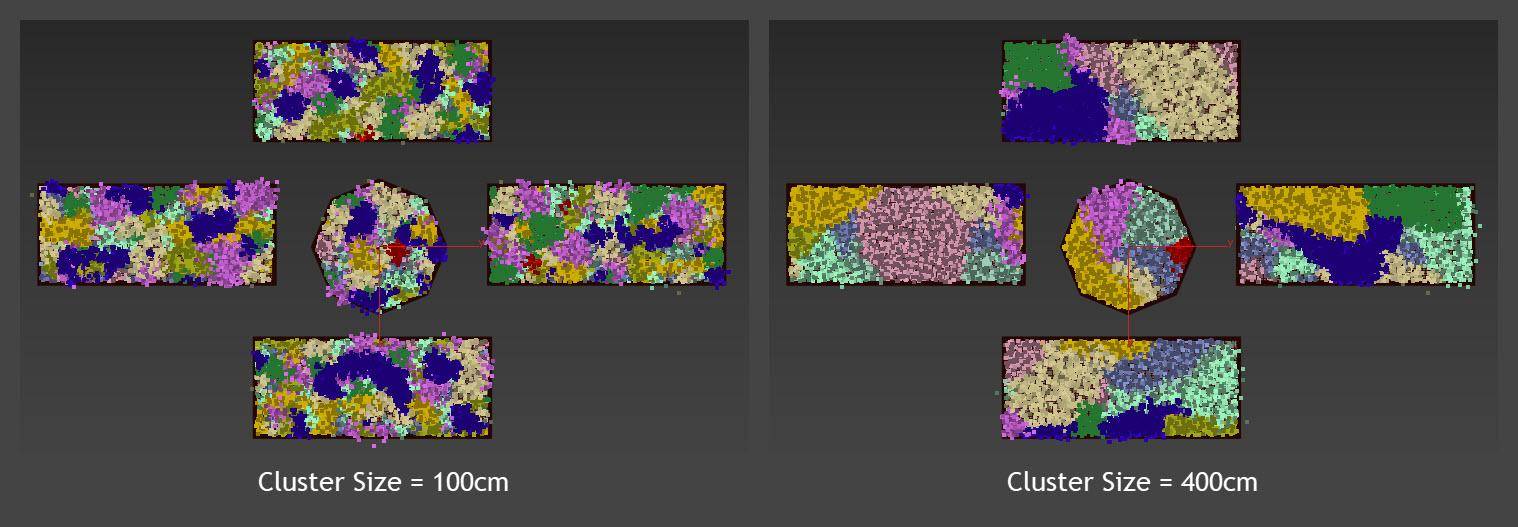
And finally, Noise which adds random items to the distribution. - In this example you have some choices to make, if you use a small Size value you will get small clusters of plants, which looks nice but all the beds will look more or less the same. If you use a larger size, each bed will contain fewer species of plant, but the beds can end up looking visually different because of this. As always, the exact setting depends on the look you’re going for.
![Cluster Size]()
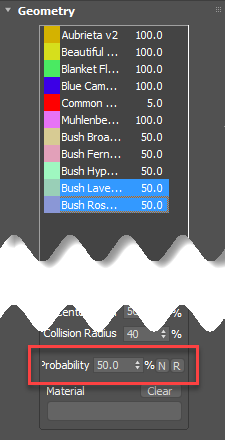
- Don’t forget too that the clusters feature respects the Item’s Probability value, so you can easily adjust the mix of plants by increasing or reducing the probability values from the Geometry rollout.
![Probability]()
- What about a situation where you have several plants that are quite different sizes? In this scene, for example, I have many small flowers but also some bushes that are much larger. When we decrease the density to a point that the small flowers are correctly spaced, the bushes will overlap far too much. To fix that you can use Collisions. (Sometimes it’s easier to see and resolve this issue by changing the viewport representation to Pyramid Proxies from the Display rollout.)
- First of all, with Collisions disabled adjust the Density, Threshold and Distribution Map to get the correct spacing for your smallest plants.
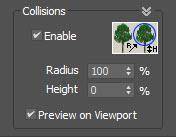
- Enable Collisions and turn on Preview on Viewport so we can see the results of our changes.
![Global Collisions]()
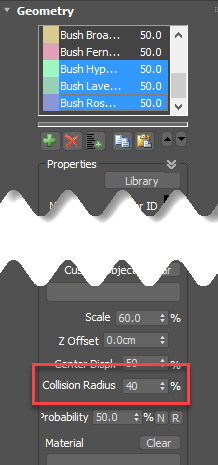
- Next, go to the Geometry rollout. Select everything and set the Collision Radius value to 0%. Effectively you have disabled collisions again, but you can now increase the Collision Radius for just those large plants that need it. In that way, you can mix large and small plants and maintain a nice density throughout.
![Local Collisions]()
- Once you’re happy with the distribution, don’t forget to add some Randomisation from the Transform rollout. For this scene, I set the Scale randomisation Minimum to 30% and the maximum to 140% to create a much larger range. I also changed the X and Y Rotation to -15% to 15%.
- In the Areas rollout, for Edge mode I would choose either Point, or if that results in plants intersecting the wooden bed, Size or Edge.
So that finishes the beds, so far this has all been relevant whether you are planting normal beds or raised beds. In the final part, we’ll look at two techniques for moving the plants into position on the Z axis: either using the Item's Z Offset parameter or by linking the Z position to a RailClone parameter using Forest Effects.
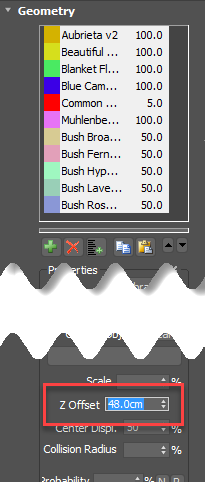
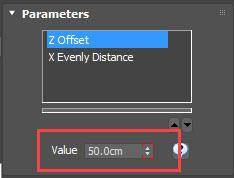
- To raise all the plants manually, simply select them all from the Geometry rollout and increase the Z Offset property.
![Z Offset]()
This is by far the easiest way to get the desired look and you could leave it here, but it’s not a fully integrated system, if I want to change the height of the bed I have to edit the RailClone object and the FP object separately. Let’s fix that with an expression - Set the Z Offset back to 0.
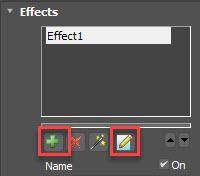
- Go to the Effects rollout and click to add a New Effect
- Open the Effects Editor.
![Effect Rollout]()
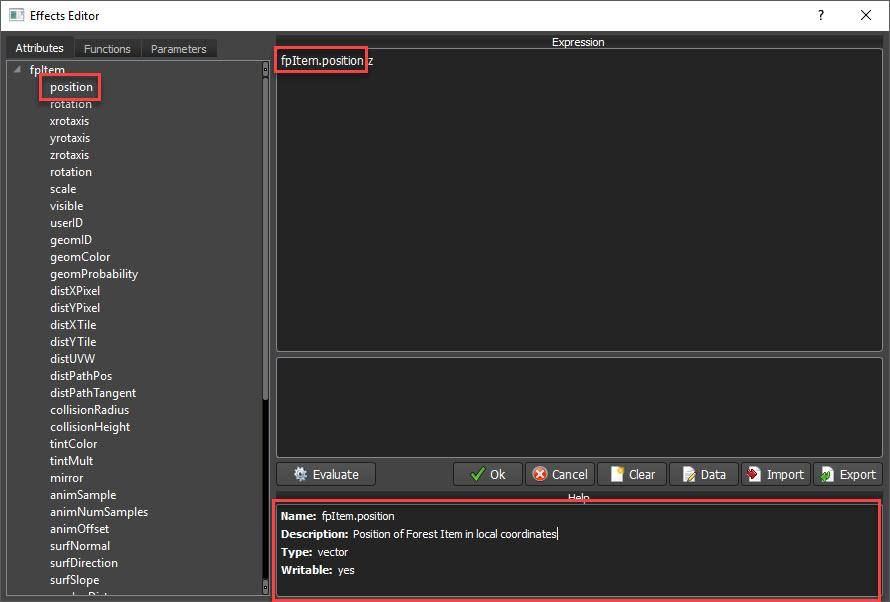
- The first thing to do when creating an effect is to decide what property of the scatter you want to control. In this case, it is the Z position of the plants. If you look at the list of Attributes you should find one called fpItem.position. Double click to add this to the expression.
![Effect Editor]()
- In the description pane at the bottom of the editor some information is displayed about this property. For example, here we can see this is a Vector. That means it has 3 values: X, Y and Z. To access them you append a .x, .y, or .z to the end of fpItem.position. Since we want to control the Z position our expression will start with fpItem.position.z and then an equals sign.
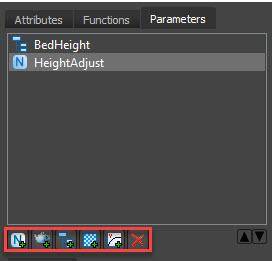
- We want to be able to edit the Z position outside of the expression, and for that, we need a parameter. Several types are available including Numeric, Scene Objects, Controller, Texture or Curve.
![Parameters]()
- Let’s start with a simple one. Add a new Numeric Parameter and call it HeightAdjust. Change the type to Scene Units.
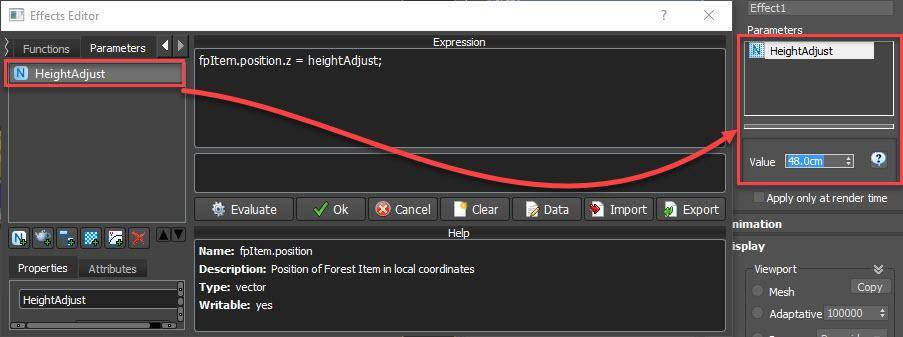
- To update the expression to use this parameter add its name after the equals sign so that it reads fpItem.position.z = heightAdjust
- Add a semicolon (;)to finish the line and click Evaluate. You can now change the Z position for all plants using one simple parameter in the Effects rollout. Easy!
![Simple Expression]()
- We can go further though, instead of entering this value, let's leave it as an additional adjustment and instead link the Z position directly to RailClone. To do that you use a Controller which allows you to wire a variable in Forest Pack directly to a value in another object. Click to add a controller and call it bedHeight.
- Update the expression to use the new parameter so that it now reads fpItem.position.z = bedHeight+heightAdjust; (note that I’ve kept heightAdjust in case I want to tweak the position after it’s been offset.) If you now evaluate, go to the effects panel and select bedHeight you’ll see a button to Pick Controller. Click this and in the subsequent window find the RailClone object - go to Object (RailClone)and look for the exported parameter. Bad news, it’s not there. That’s because parameters in RC are not visible to wiring by default. Fortunately, there’s an easy workaround.
![Select Tracks]()
- Select the RC object. Turn on Autokey animation and make a change to the parameter you want to use for wiring.
- Turn off Autokey and then delete the keyframes. By animating those properties we have added exposed controllers that can be used for wiring, even though we’ve subsequently deleted the keyframes.
![Keyframed parameter]()
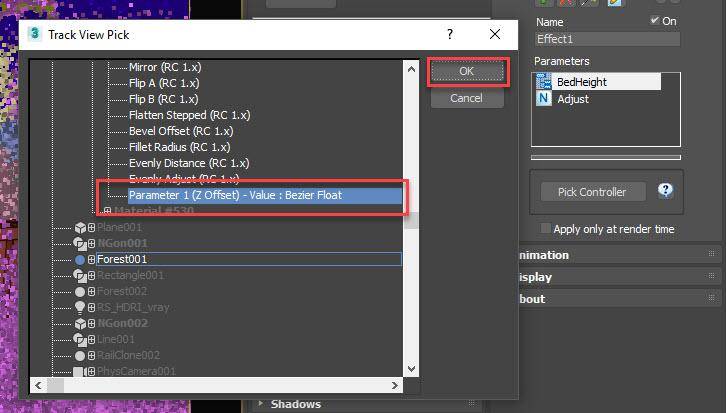
- Now you can go back to Forest Pack. Select Pick Controller again and then find the controller that defines the height of the raised bed. Click OK and these two objects are now wired together.
![Connected Tracks]()
If you change the RailClone objects Bed Height parameter, the Forest Object is also updated, ensuring that the two items work together as one system!

You now have a fully procedural raised bed system. The splines define the footprint for both the Geometry of the raised beds created with RailClone as well as all the plants added with Forest Pack. By selecting the RailClone object you can adjust the height of the bed which in turn adjusts the Z position of all the plants. I'm sure you can see that this approach has many other uses beyond this example and we hope you enjoyed this tutorial. If you have any questions, please contact us on the forum and stay tuned for more tutorials coming very soon.