Resources
Requirements
- info Forest Pack Pro, RailClone optional
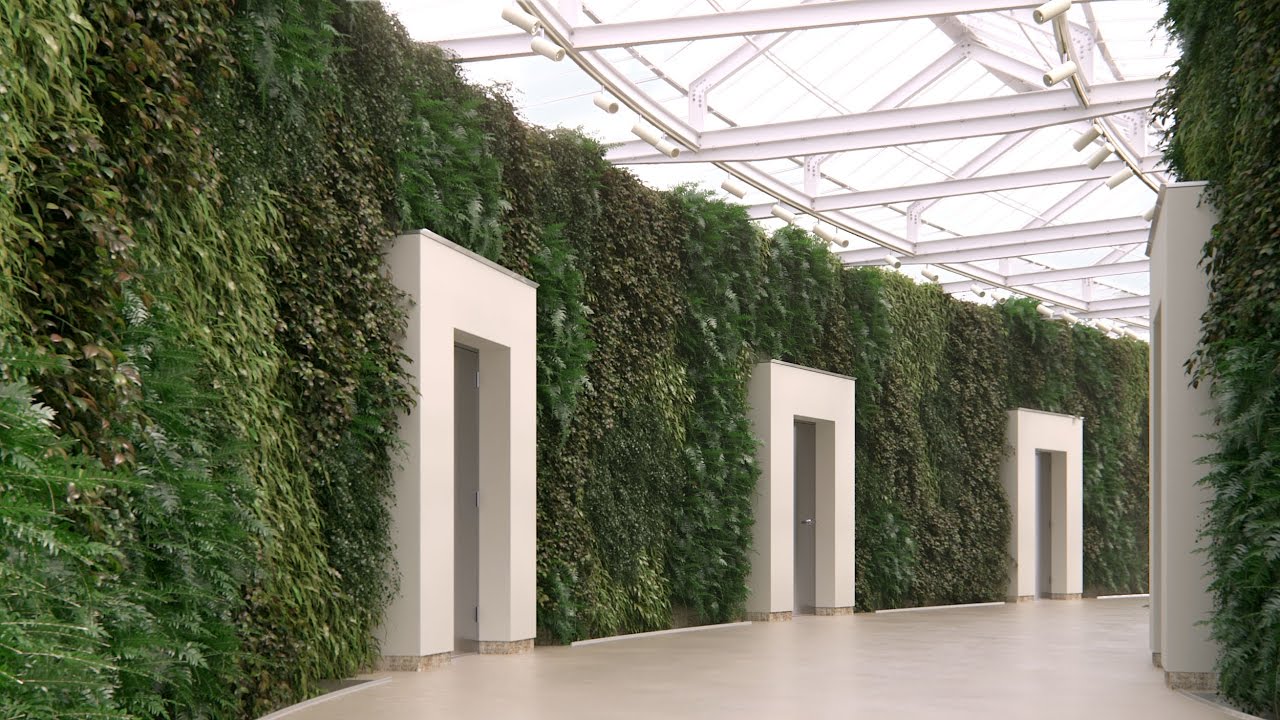
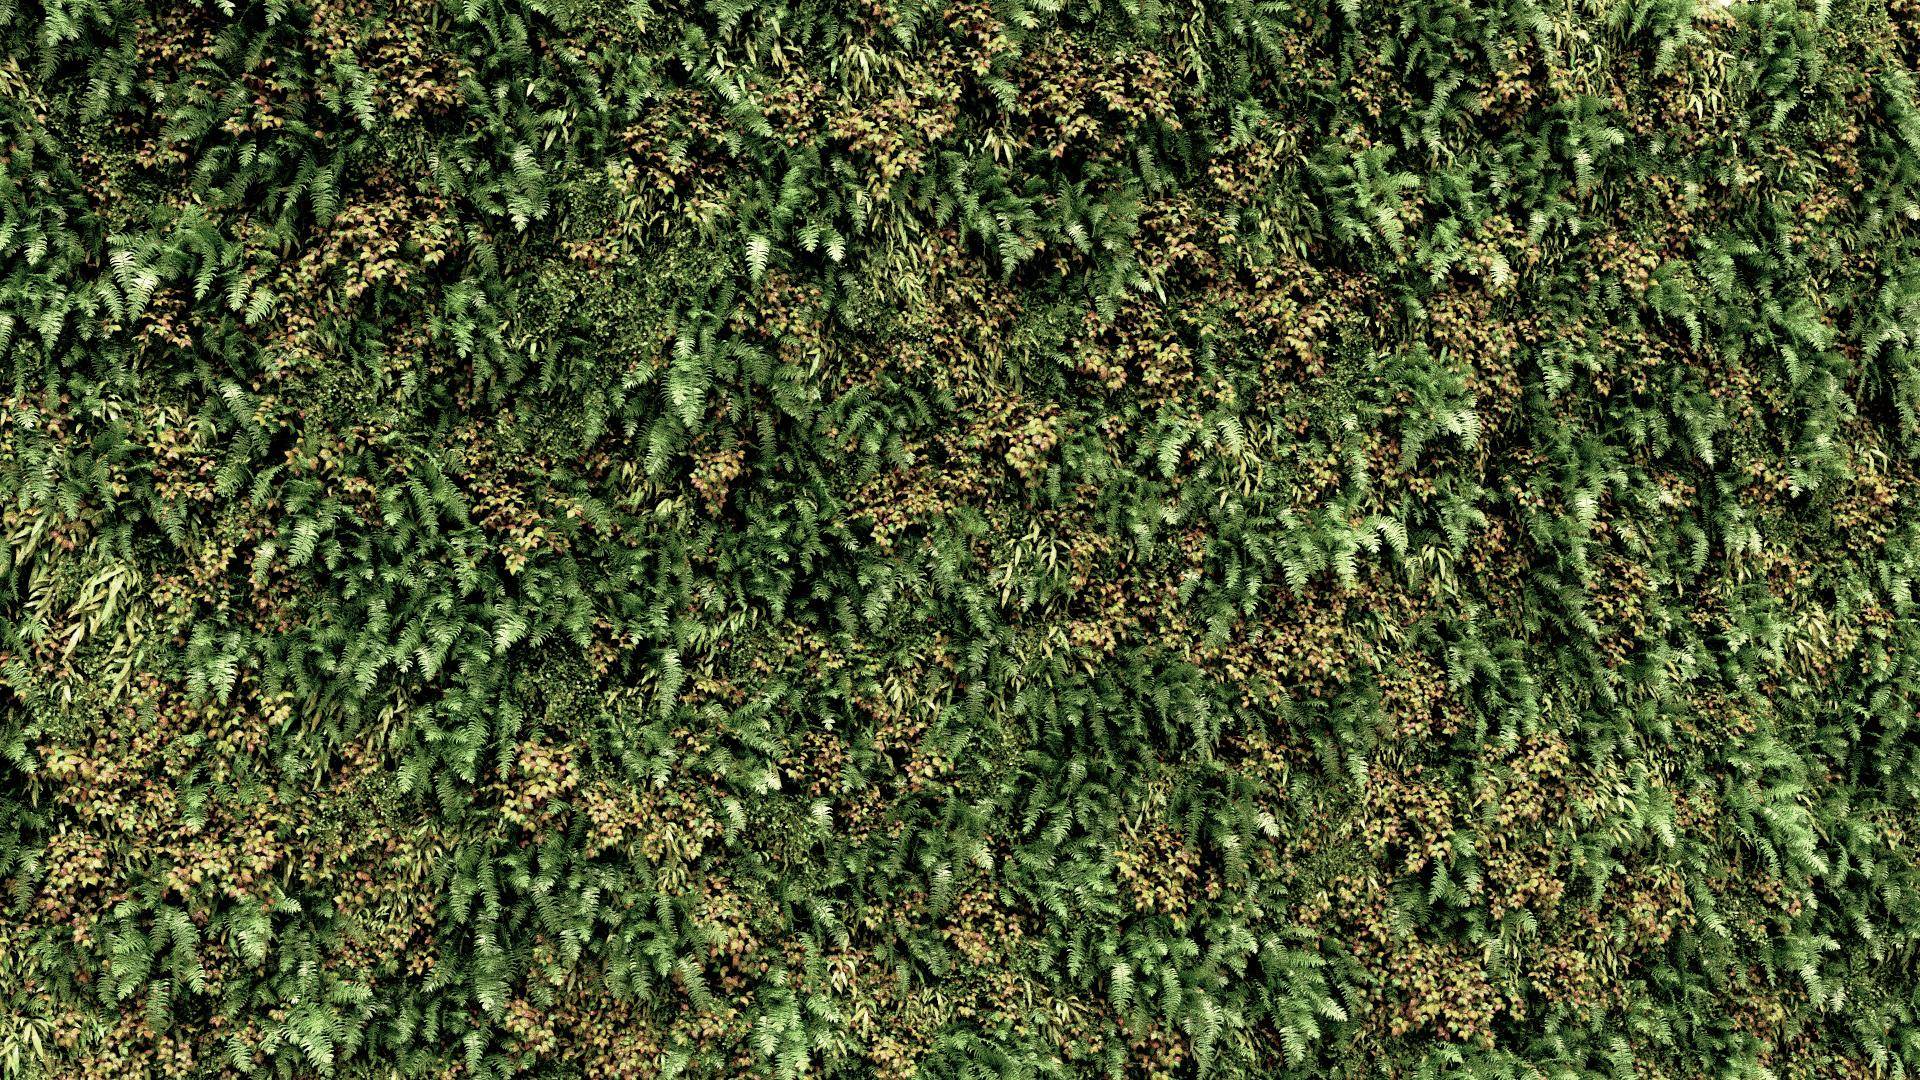
Welcome to another instalment of our regular tips and tricks episodes. In this tutorial we'll address a question we often get asked - how do you scatter items on a vertical surface? We'll demonstrate how this is done using an common usage, the creation of green walls. Though is a specific example, the same principles can be used whatever it is you'd like to scatter. We'll also look at how to use coloured maps and paint planting patterns as well as an automatic clustering feature that create a similar effect without the hassle.
By completing this tutorial you will be able to:
- Correctly align Forest Pack objects and surfaces for vertical scatters
- Use transform randomisation to create variety in green walls
- Create planting layouts using coloured bitmaps
- Paint planting layouts using Viewport Canvas
- Use the clustering features
- Use Forest Pack with a surface RailClone
Axis Alignment
There are actually two ways to create vertical scatters. First, for simple planar areas you can simply rotate the Forest object. Secondly, for more complex surfaces, you can use UV mode to scatter on any arbitrary shape. Let's start by taking a look at how to scatter of vertical planar areas, which has the advantage of retaining all of Forest Features including edge mode, spline painting and more.
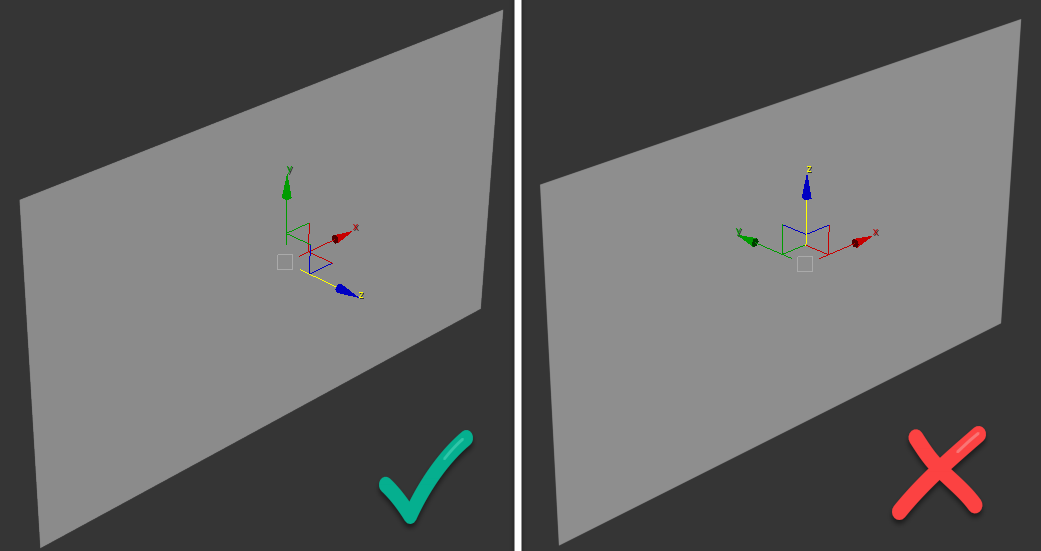
The most important thing to understand is how to orientate the Axes of the Forest Object, the surface and the scatter geometry. Forest Pack expects the local Z axis of the surface and Forest Pack's local Z axis to be aligned. Any deviation from this and you'll start to encounter issues. In normal use, if you create a new Forest Pack object by selecting a surface, it will inherit the transformation matrix of the selected object. In this case correct alignment is automatic but only if the surface's coordinate system is already oriented correctly, with the local Z axisperpendicular to the plane. You can see this is the case for this surface if you change the Reference Coordinate System to Local.
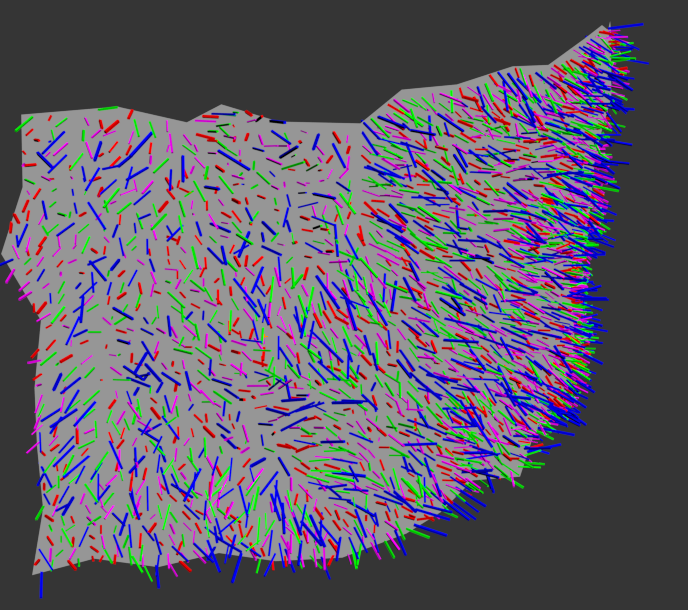
If you create a new Forest Pack object by selecting this you'll see that it works correctly. If you then delete the Surface from the Surface List you can see from the Forest Logo that it is aligned to the surface object.
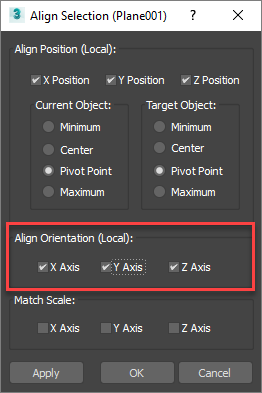
If your Forest Object is not aligned correctly with the surface, perhaps because you have already created it or your duplicating an existing Forest object then the easiest way to orientate it correctly is to use the Align tool, making sure that Align Orientation (Local) is enabled for all 3 axes.
Just because the axes must be aligned does not mean that the geometry itself must be perfect flat, it can of course bend and undulate. But the axes must remain aligned even if the geometry does not. Surface normals should also face towards the Forest object or they'll be ignored.
What about splines?
So that's surfaces, what about splines? Well the good news is that splines are a little bit easier. If you're using spline areas you only need to worry about the orientation of the Forest Object, the spline's axis is not at all relevant. Forest projects trees along the Z axis to fill the spline area, using the closest vertex to define the location of a flat plane.

Scatter Item alignment
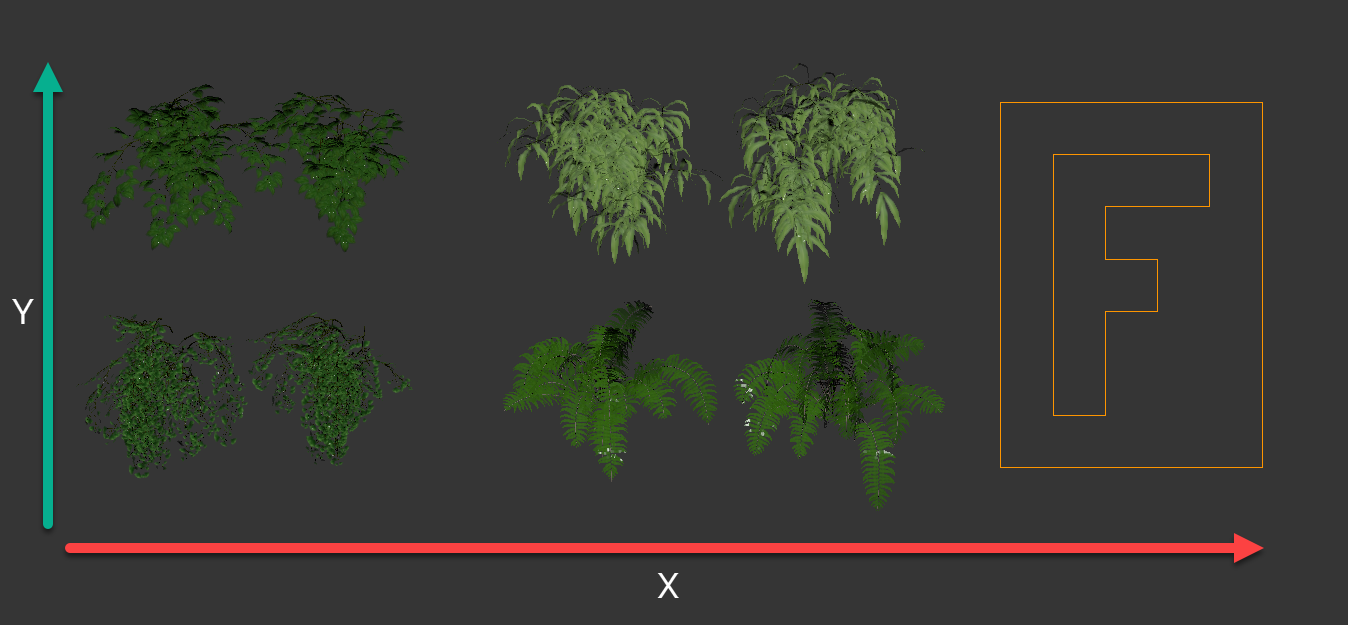
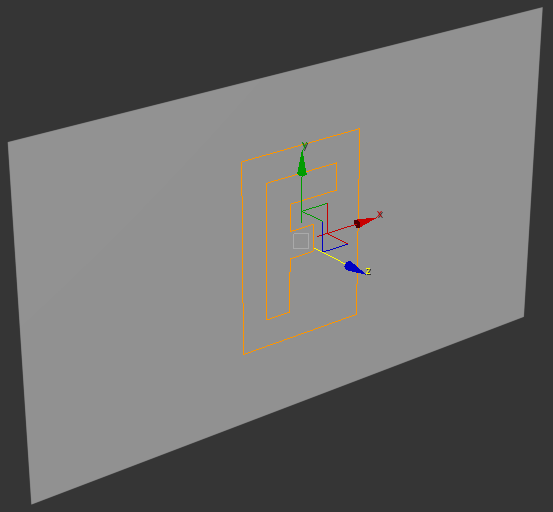
Also Important is the alignment of the objects you are scattering. Let's take a look at the plants for our greenwall, obviously they have a particular way they must hang - it wouldn't work if the leaves were drooping upwards or sideways! Forest uses their orientation in world space to align them with the Forest Object's local Axes (World X = Forest X and World Y = Forest Y). So to align correctly when applied to the wall the plants should therefore hang on the Y axis, as shown in the above image . This has the added benefit of allowing you to use Enable Horizontal Mirroring to get a little more variety from your models.
Randomisation
That's the basic principles, let's put them into practice and make a green wall. In this first section we'll focus on the basic setup and adding variation. We have to be a little more careful than usual when randomising these objects because they need to stay hanging in roughly the correct direction. Normally you can just turn on the Rotation randomisation and be done with it but this will result in some of the plants drooping upwards or sideways which clearly isn't right! The trick is to carefully limit randomisation within a sensible range, keeping in the back of your mind how the items align with the Forest Object's local axes. Before we do that ... we need to create a new forest object.
- Create a new Forest object by selecting the surface. The surface's axes are already correctly aligned, so the Forest will be automatically be correct too.
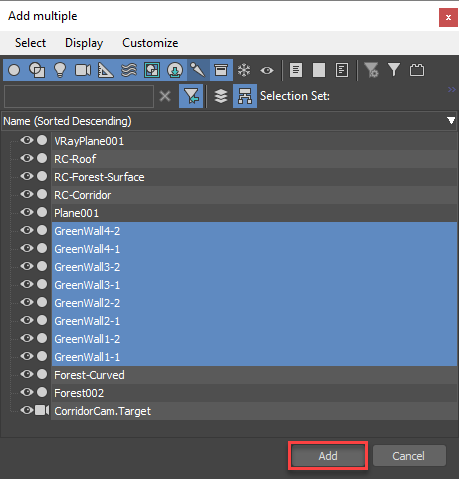
- To add plants, go to the Geometry rollout and click Add Multiple
![Scattering on Vertical Surfaces-image2016-9-28 17:26:7.png]() . This saves you from having to add items one at a time and it can be a huge time saver. Pick the greenwall models and click Add. When you're done, delete the original Default item or you'll be left with a billboard in the scatter.
. This saves you from having to add items one at a time and it can be a huge time saver. Pick the greenwall models and click Add. When you're done, delete the original Default item or you'll be left with a billboard in the scatter.
![Scattering on Vertical Surfaces-image2016-9-28 17:27:28.png]()
- Green walls are usually planted in a regular, dense grid-like fashion. To achieve this, go to the Distribution Map rollout and change the map to Full. Adjust the Density value until there are no gaps between the plants - about 2400cm works well for this scene, but you can judge it by eye.
- Now we're ready to add some randomisation. Go to the Transform rollout and turn on Translation. This will allow you to slightly break up the grid for a more natural appearance, but not too much. -5 to 5 works well for the X and Y axes. I would try higher values like -30 to 30 for the Z axis to create the illusion that plants protrude different distances from the wall. Scale will help here too...
- Turn on Scale and experiment with the settings. I found that 85% to 140% worked well.
- Turn on Rotation too. This time we need to be careful not to rotate the objects too far so that they're defying gravity. For the Z and Y axis -30 to 30 looked about right, but for the X I went for -10 to 30 to make sure the plants didn't stick straight out of the wall.
- Finally, as mentioned earlier, you can turn on Enable Horizontal Mirror to randomly flip the plants over the Y axis to create more variety and hide visible repetition as much as possible. If you render this now you should have a nice chaotic green wall!
 . This saves you from having to add items one at a time and it can be a huge time saver. Pick the greenwall models and click Add. When you're done, delete the original Default item or you'll be left with a billboard in the scatter.
Creating Patterns
So now we have a green wall with a random distribution of plants. If you like, you can adjust the composition of these plants by changing the Probability values in the Geometry rollout but what we're really interested in is creating patterns. Green walls are rarely random, often plants are grouped together into clusters using a specific planting plan. Forest allows you to do this by following these steps.
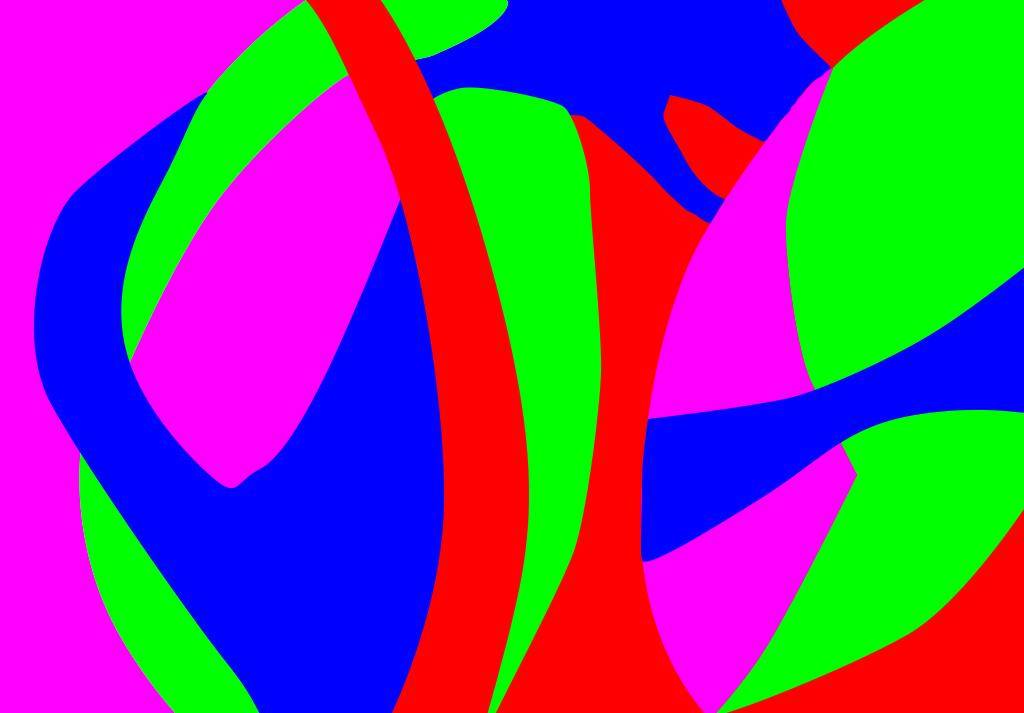
- First of all you'll need to create a map that illustrates the planting plan. In this scene I have 4 species of plants so I've used the same number of colours and created a coloured bitmap for the pattern in photoshop. Each colour relates to one species of plant and for clarity I've used red, green, blue and magenta but you can use any colours at all.
![Scattering on Vertical Surfaces-diversitymap.jpg]()
- Go to the Distribution rollout and turn on Diversity > Match Color ID on Bitmap. This feature allows you to place items by matching their Color IDs to the colours painted in Photoshop. Click on the map slot and add this bitmap from the scene files for the tutorial,or if you prefer you can paint your own!
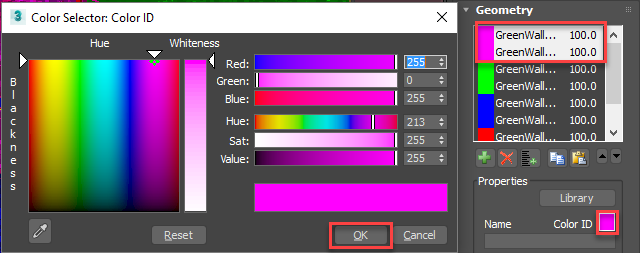
- To find and edit a plant's colour IDs you go to the Geometry rollout. If you select each plant you'll see it has a randomly assigned color ID. To see these in the viewport you can go to the Display rollout and turn on Use Color ID. We want to group together plants of the same type by assigning them the same color so that they will be distributed in the same region. To do this, go back to the Geometry rollout and select the two greenwall1 plants and change their Color ID to Red, change the next two plant's IDs to blue, change greenwall3's color to green and then the remaining two to magenta.
![Scattering on Vertical Surfaces-image2016-9-28 18:16:17.png]()
You will notice in the viewport and when you render that these items are now distributed according to the distribution map! (Note that this is a new feature of Forest 5. In previous versions only one item could be assigned to each colour group and any others with the same color value were ignored.)
Painting Patterns
If you prefer something a little more interactive, it's also possible to paint the pattern onto the surface directly in 3ds Max. To do this:
- Select the surface and open Viewport Canvas.
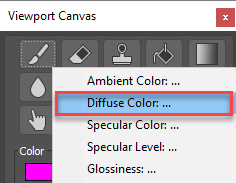
- Click on the Paint button. You'll be asked to assign a material and which map you wish to Paint. In this example we'll paint a Diffuse map.
![Scattering on Vertical Surfaces-image2016-9-28 18:19:4.png]()
- Next choose a save location and resolution and you're ready to start painting, but first we need to assign the same map to the Forest Object.
- Open the Material Editor and pick the material assigned to the surface. Next select the Forest object and instance the Diffuse Map to the Forest Object's Distribution > Diversity > Match Color ID on Map slot. Often it is easier to see the surface you're painting if you change the display mode from points cloud to Thin Box.
- Now this is set up we can go back to the surface. In Viewport Canvas, use the paint tools to create your design. To see the changes reflected in Forest Pack just deselect the tool, this writes the image to disk and updates the distribution.
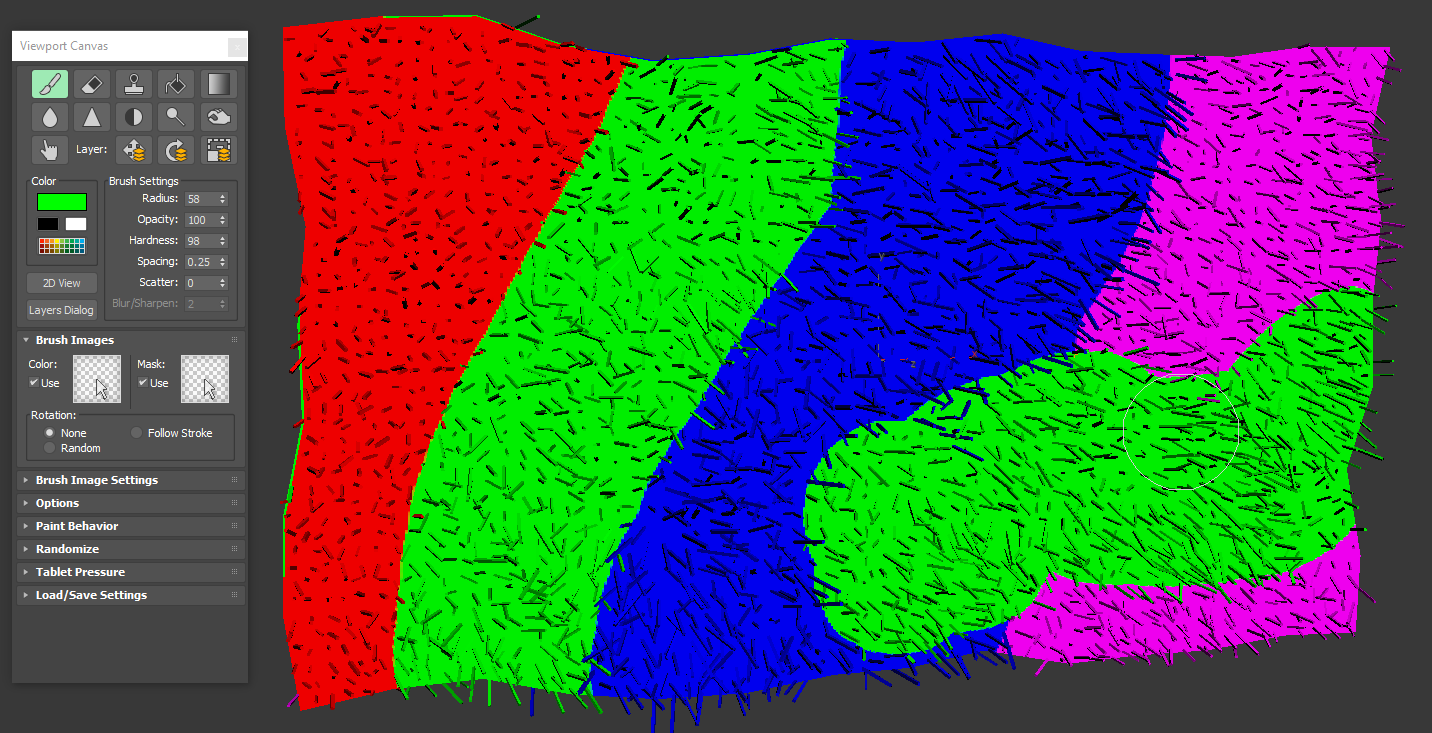
Unlike spline painting this technique can also be used on surfaces when UV mode is used and it can be very useful for painting many other types of map used by Forest including distribution and transform maps.
Non-planar surfaces.
If a wall is substantially deformed or faces in multiple directions you may need to use a different approach that scatters objects using the surface's UV channel. In this technique the axes alignment of the Forest Object and the surface are not important, but the source objects should be oriented exactly as described earlier. This is important because now the X/Y axis of the scatter objects will be aligned to the U/V axes of the surfaces texture space. To illustrate how this approach works we'll apply our green wall to a curved corridor.
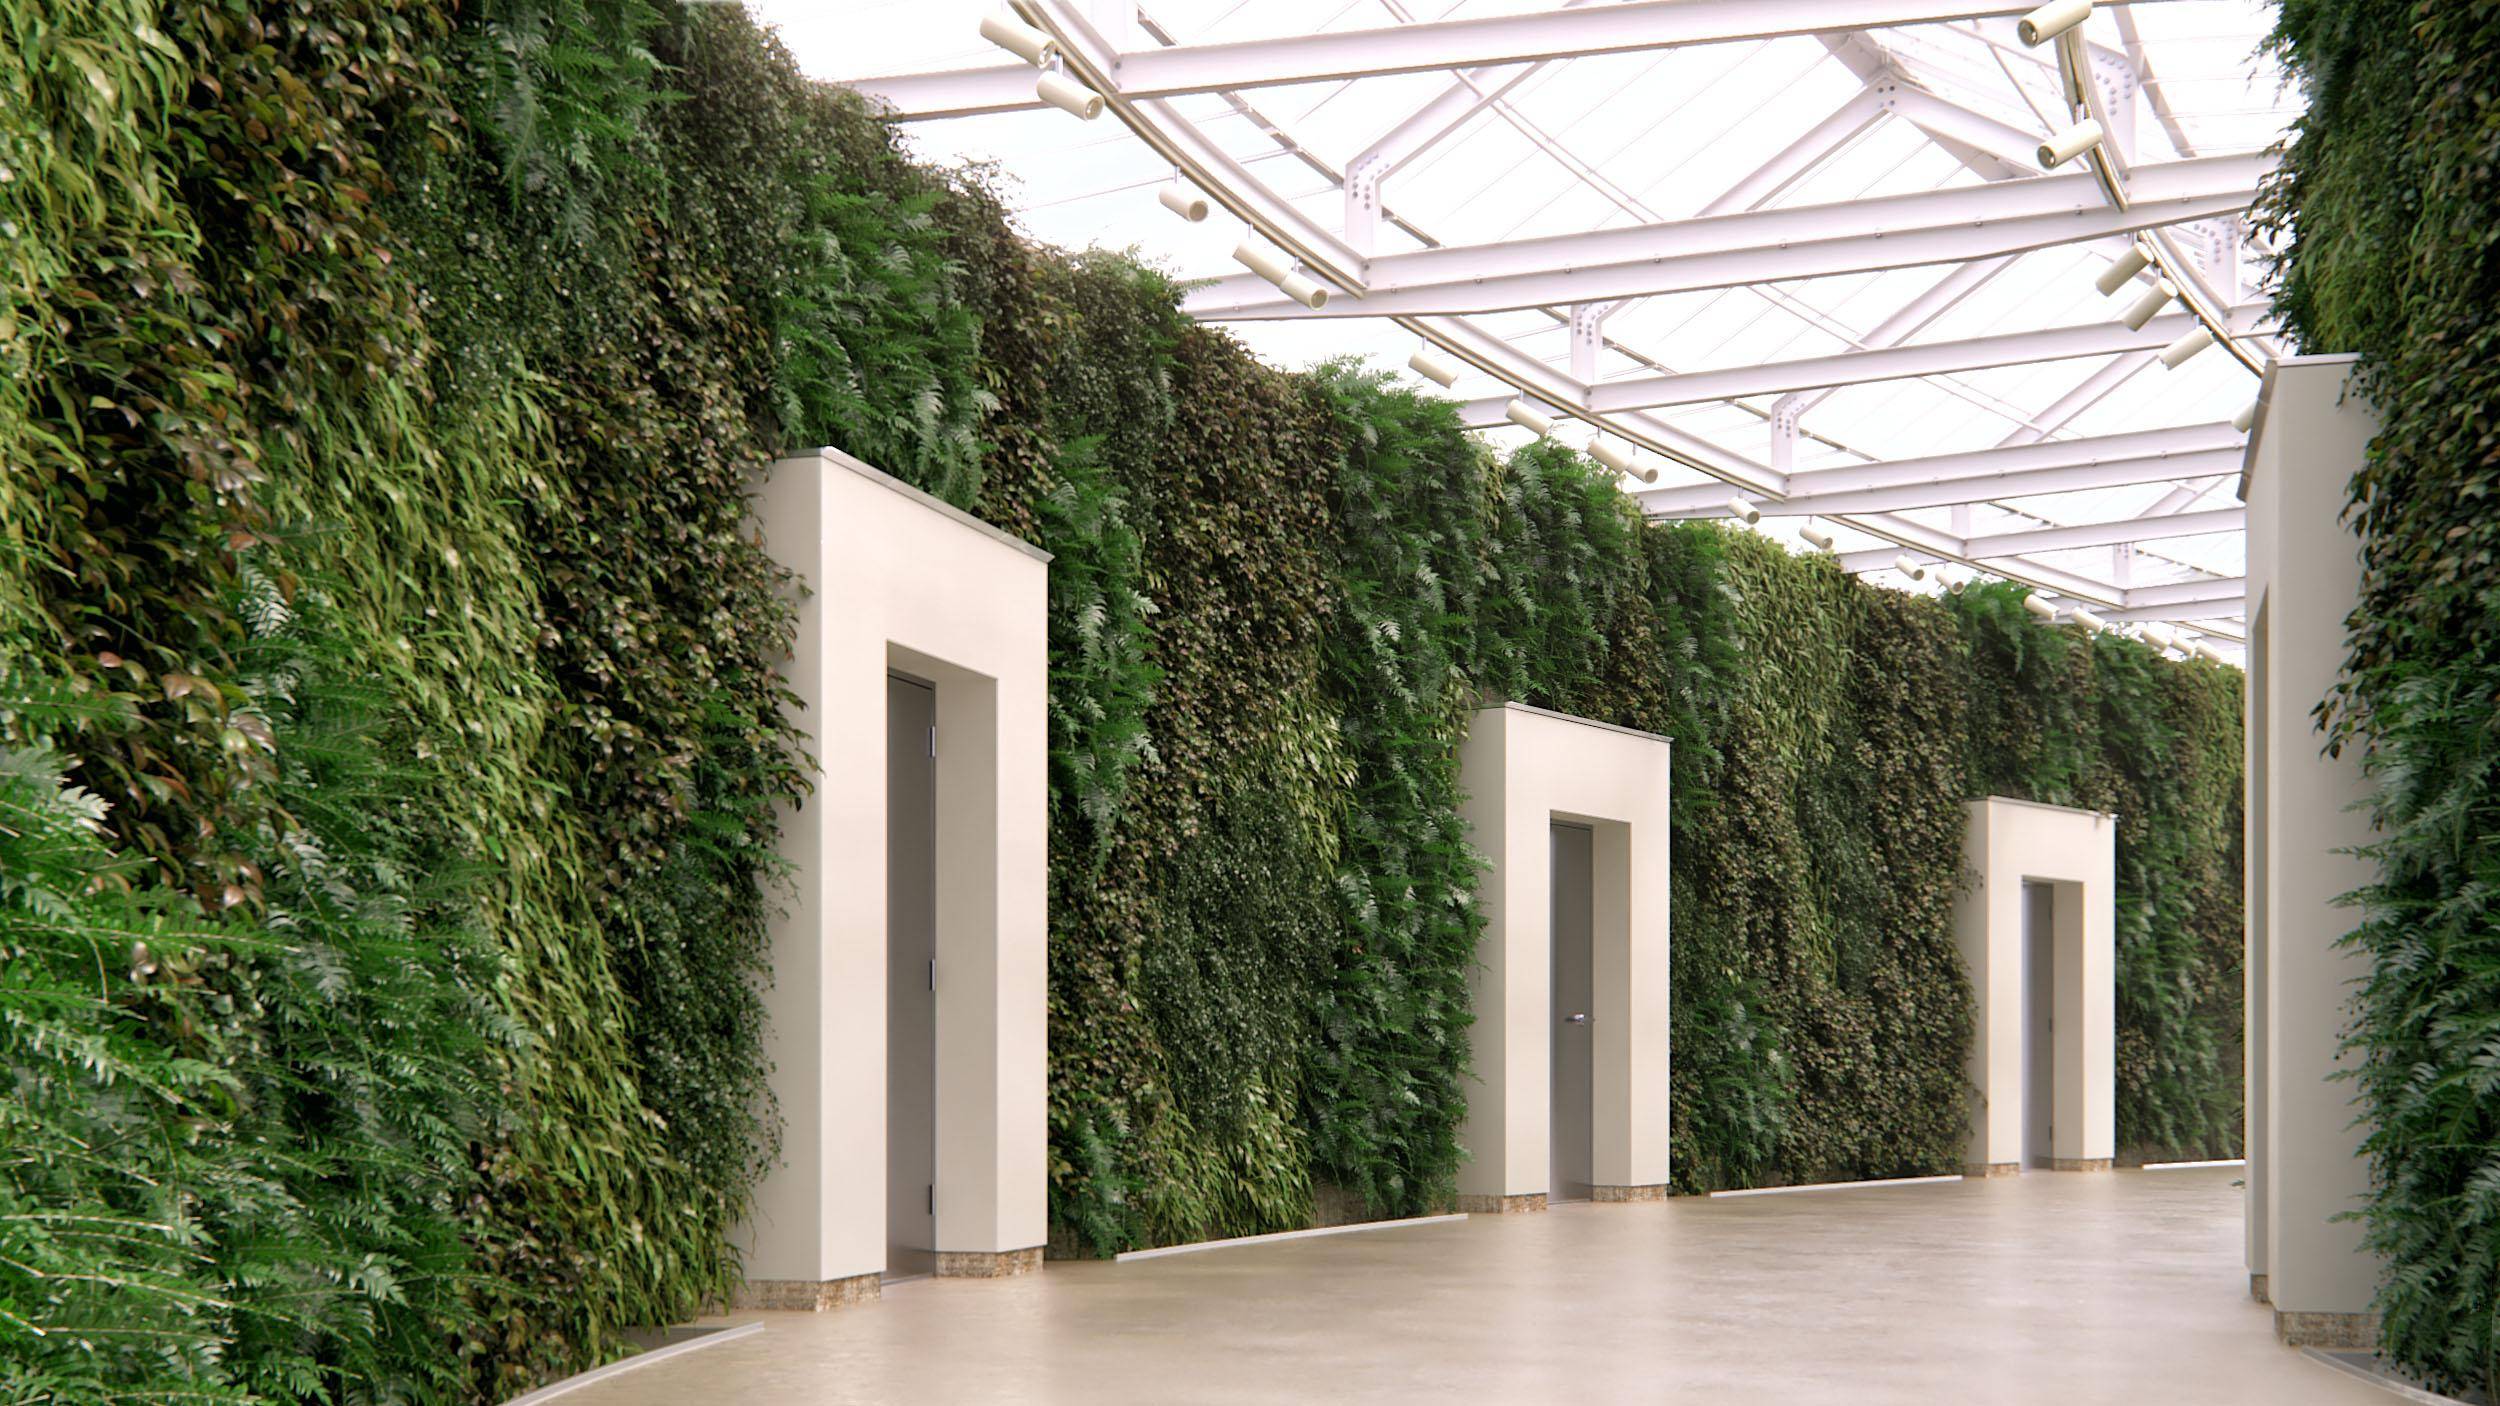
- In the scene files for this tutorial, unhide the layer called Corridor Scene. This is the geometry that we'd like to add a green wall to. These models were originally created with our sister plugin RailClone and they're all fully parametric and driven by a single spline. Moving the spline affects the roof, floor, and walls so it's great for rapid iteration. There's also a separate non-renderable object called RC-Forest-Surface that we'll use as the surface for our green wall. If you turn on the UV Checker Material Override you'll see that the U axis is aligned horizontally and the V axis is vertical. This will make sure that the hanging plants are correctly aligned because XY = UV. This surface is also a RailClone object and it allows me to parametrically adjust the spacing around the doors so that the plants don't intersect. If you don't have RailClone though, don't worry! Any geometry is valid and you'll find collapsed versions of these models in the RC-Forest-Surface-collapsed layer.
![Scattering on Vertical Surfaces-image2016-9-28 18:45:49.png]()
- Let's add our existing Forest Object to this wall. Select it and open the Surfaces rollout. Delete the existing surface, click the Add button and then select RC-Forest-Surface. If you want toupdate Forest automatically if the surface changes, turn on Auto.
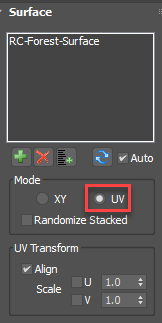
- Still in the surfaces rollout, change the mode to UV.
![Scattering on Vertical Surfaces-image2016-9-28 19:6:19.png]()
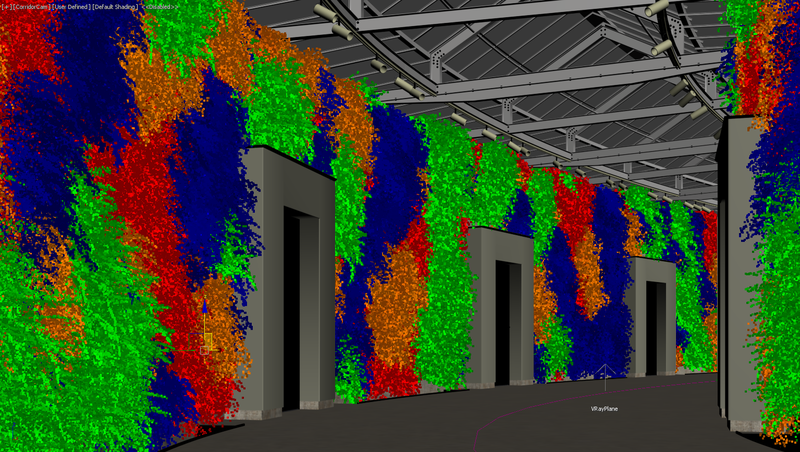
- You will now have a green wall inside the corridor. You may find you need to adjust the Density slightly. If so, go to the distribution rollout and edit the Density value.
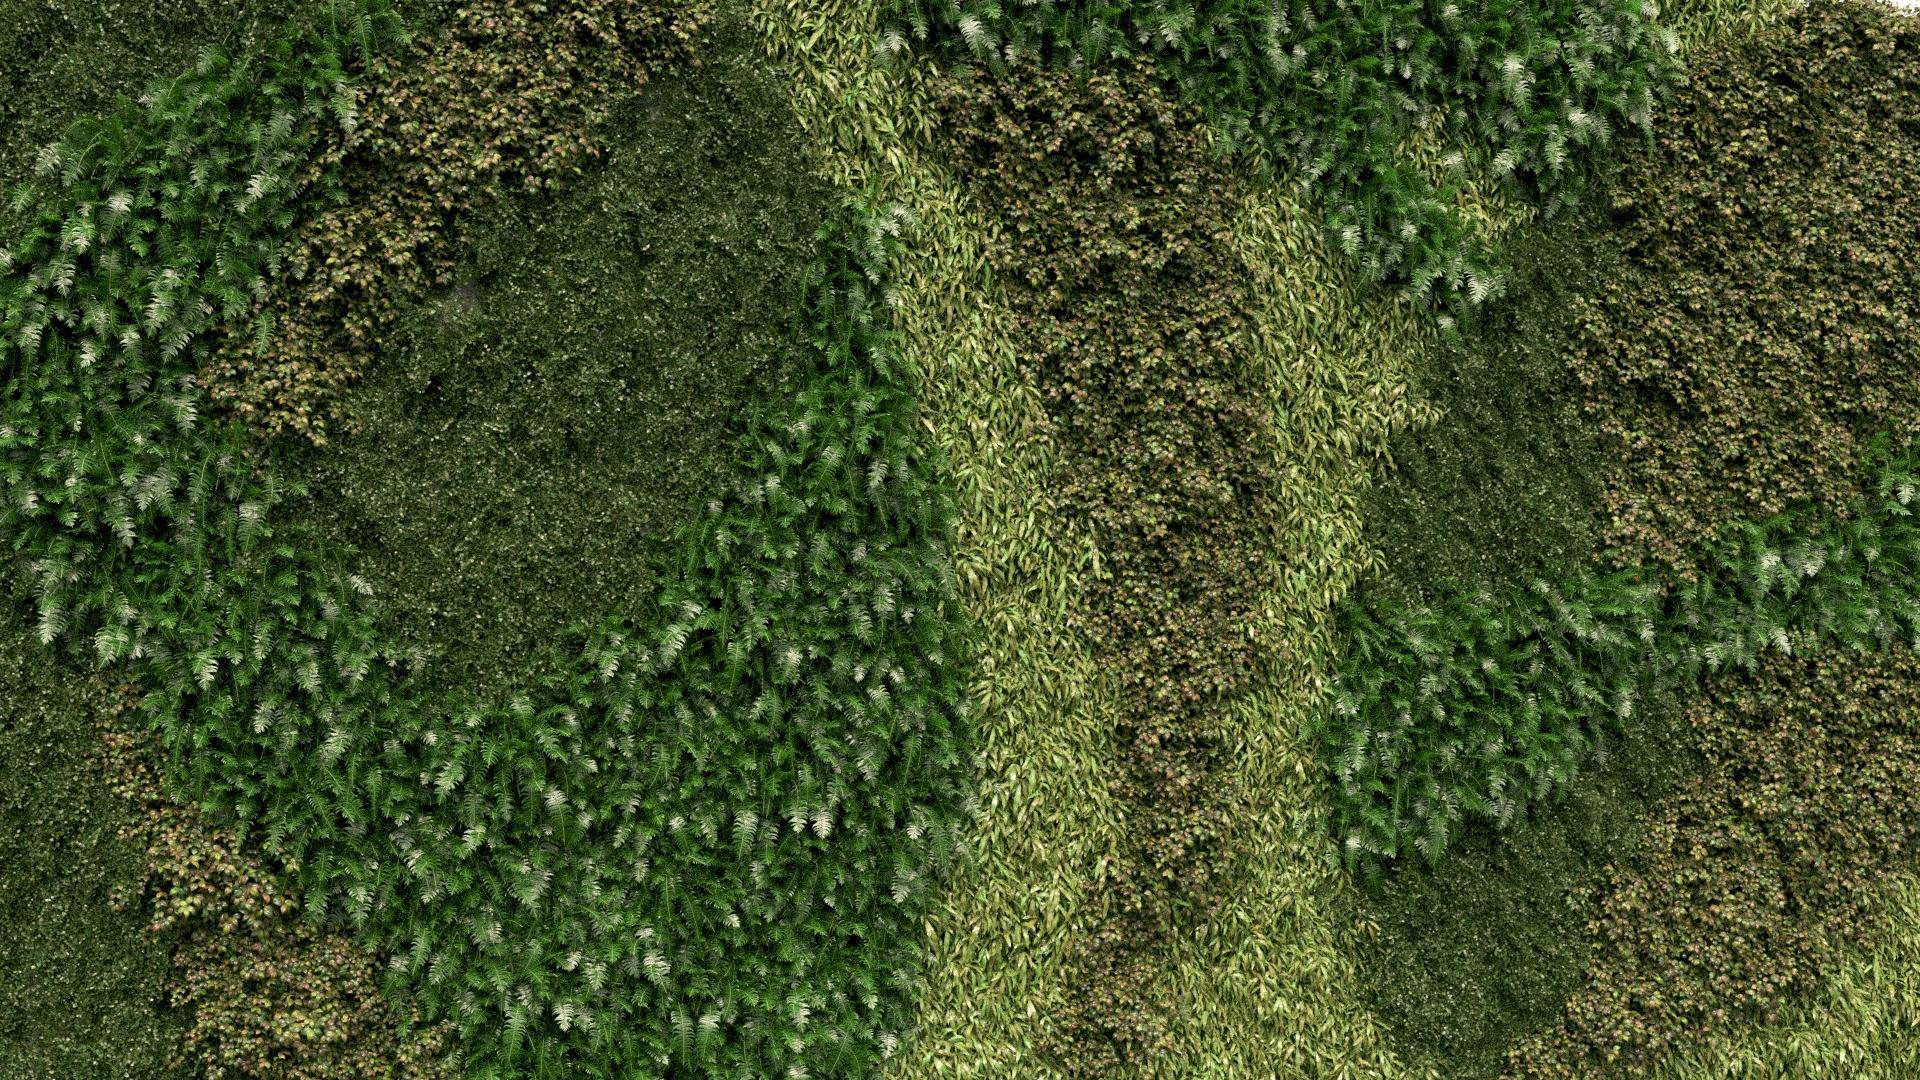
- In this example we'll do something slightly different to create the pattern. Forest Pack has a clustering facility that can be used to group together items. Just like the map matching technique described above, this feature groups together plants using their Color IDs but this time it does it automatically using an algorithm with several controls for size,shape, noise and blending. It can be really helpful for quickly creating green walls and other patterns without the need to hand paint a map, and it's particularly suitable when you need to create the illusion of planting plan but you don't actually require a specific pattern. Here's how it works.
- Open the Distribution rollout and change Diversity mode to Clusters. You'll see in the viewport immediately a non-tiling clustering arrangement of the plants.
![Scattering on Vertical Surfaces-image2016-9-28 19:14:40.png]()
You can now change the Size and Roughness of the clusters as well as whether they're clearly defined of bleed together by using the Blurry Edge property. If you want to randomly distribute a few rogue plants in the middle of a cluster you can do this too using the Noise parameter, though this is better suited to wild plants where this is more likely to occur than a man-made green wall design. - If you're using RailClone you can also adjust the spline and the whole corridor, including the green wall, will update making this a really flexible and intuitive system.

Conclusion
That's our scene finished and you can hit render to see the how it looks. In this tutorial we focused on green walls but the same principles can be applied any time you need to scatter on a vertical or arbitrarily oriented surface. We also looked at a couple of really useful diversity features that have a huge range of applications for randomising clusters or for creating and painting very specific patterns. Until next time if you'd like more information about surfaces and diversity settings please see our reference section, or for more training please visit the tutorials page for more Tips&Tricks videos and in-depth tutorials.