Fichiers de ressources
Conditions
- info Forest Pack Pro
In this tutorial, we’re going to explain how to use the Tint By Boundary feature to colourise grass where it meets an edge. This is commonly seen in real life when there’s heavy footfall or the conditions mean that there’s less water available near the edges of a lawn because of the poorer quality of the substrate.
Let’s start by adding the grass:
- Open the Library Browser and select one of the Layered Lawns presets. This is a quite small area so I’ll use the Ground Base Layer 2 Detail option.
- Click Load Selected and pick a Spline area and it’ll be automatically populated.
- To ensure the grass grows right to the edges of the path, go into the Areas rollout and change the mode to either Point or Edge.
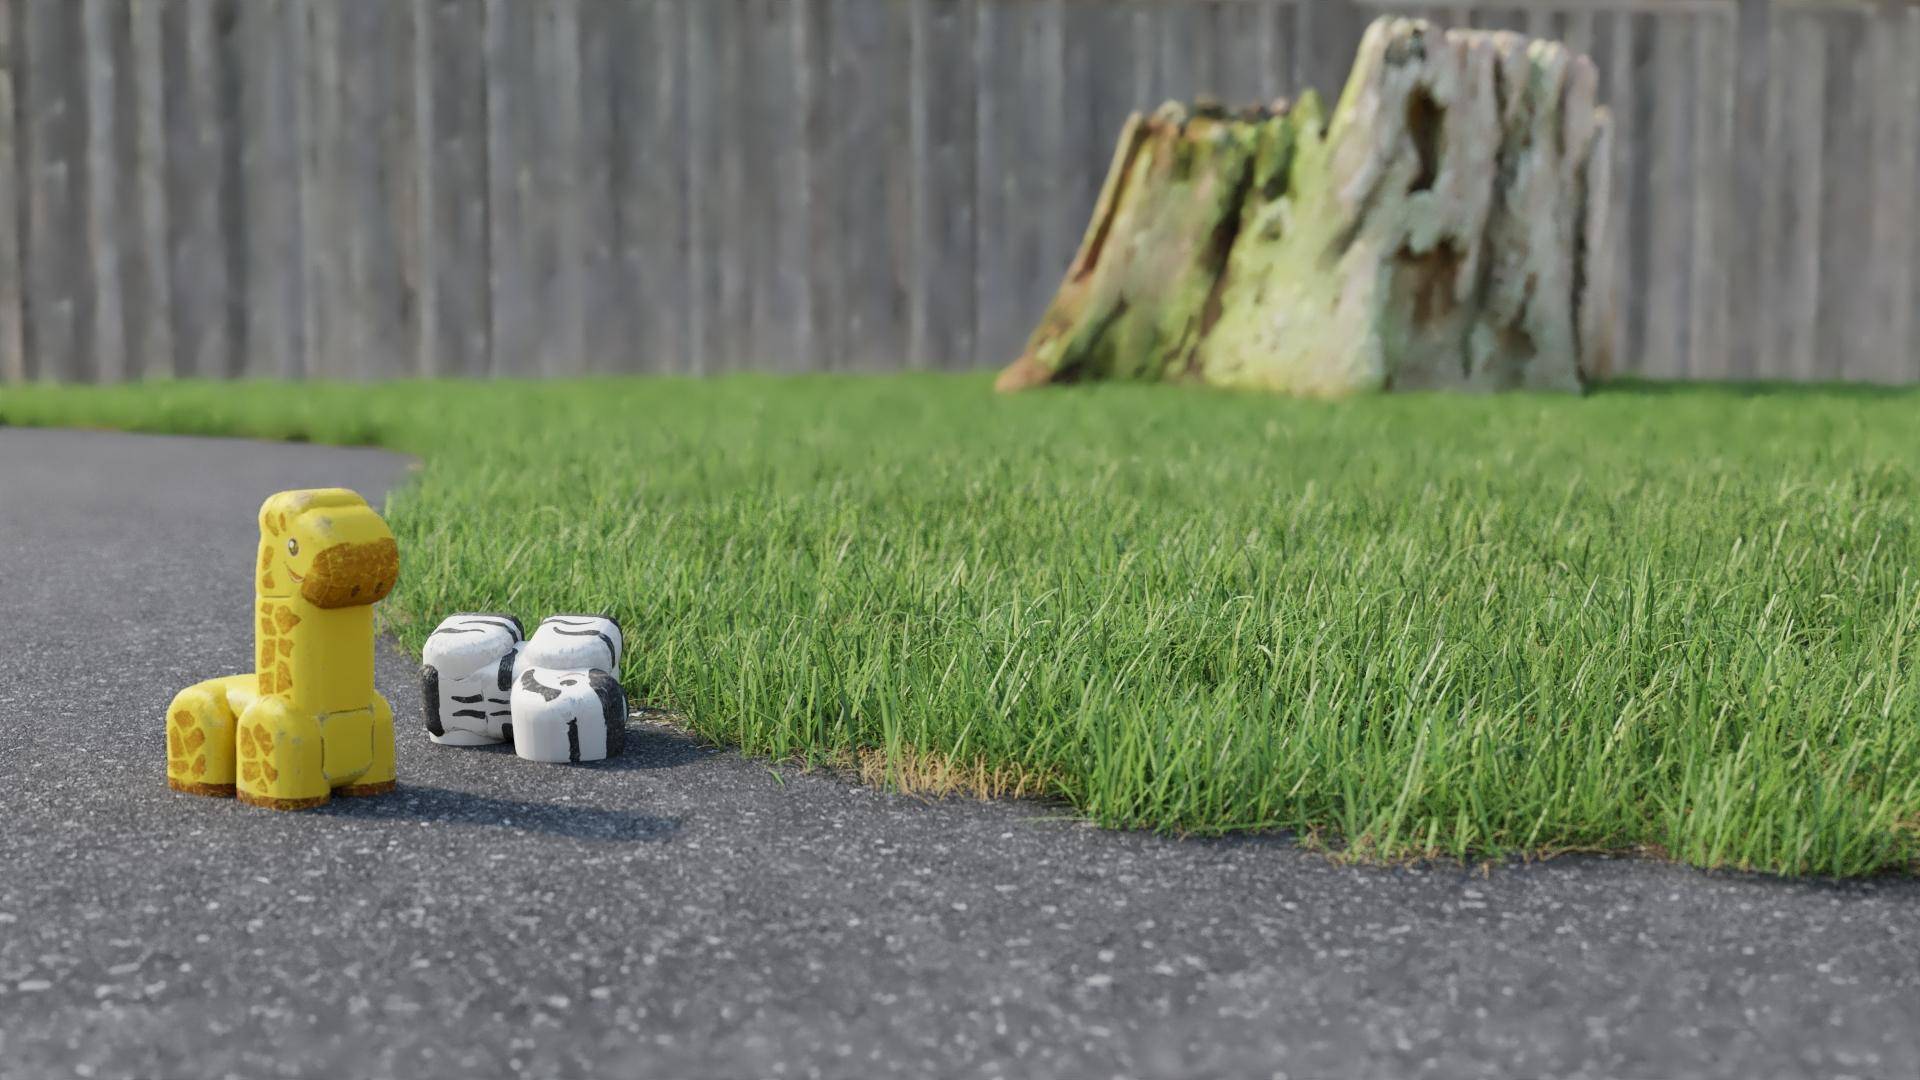
Render now and we have a nice even sea of grass, but in reality, where it meets the path due to footfall and other factors the grass can get flattened and grow less vigorously. To simulate that, let’s use Forest Pack’s falloff options.
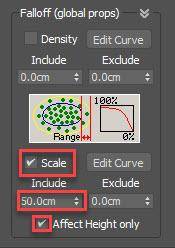
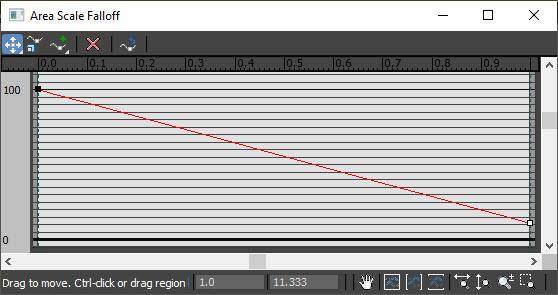
- Enable Scale Falloff.
![]()
- Increase the size of the Include area. I will use a value of about 50cm for my scene.
- We don’t want the grass' size to get so small that they disappear, so open the graph editor, and move the point on the right-hand side of the graph up a bit.
![]()
- As you can see, this scales the grass patches on all 3 axes creating the characteristic dotty pattern you sometimes see when people use this feature. In this case, I just want the grass to be shorter. To do that, enable the Affect Height Only option.
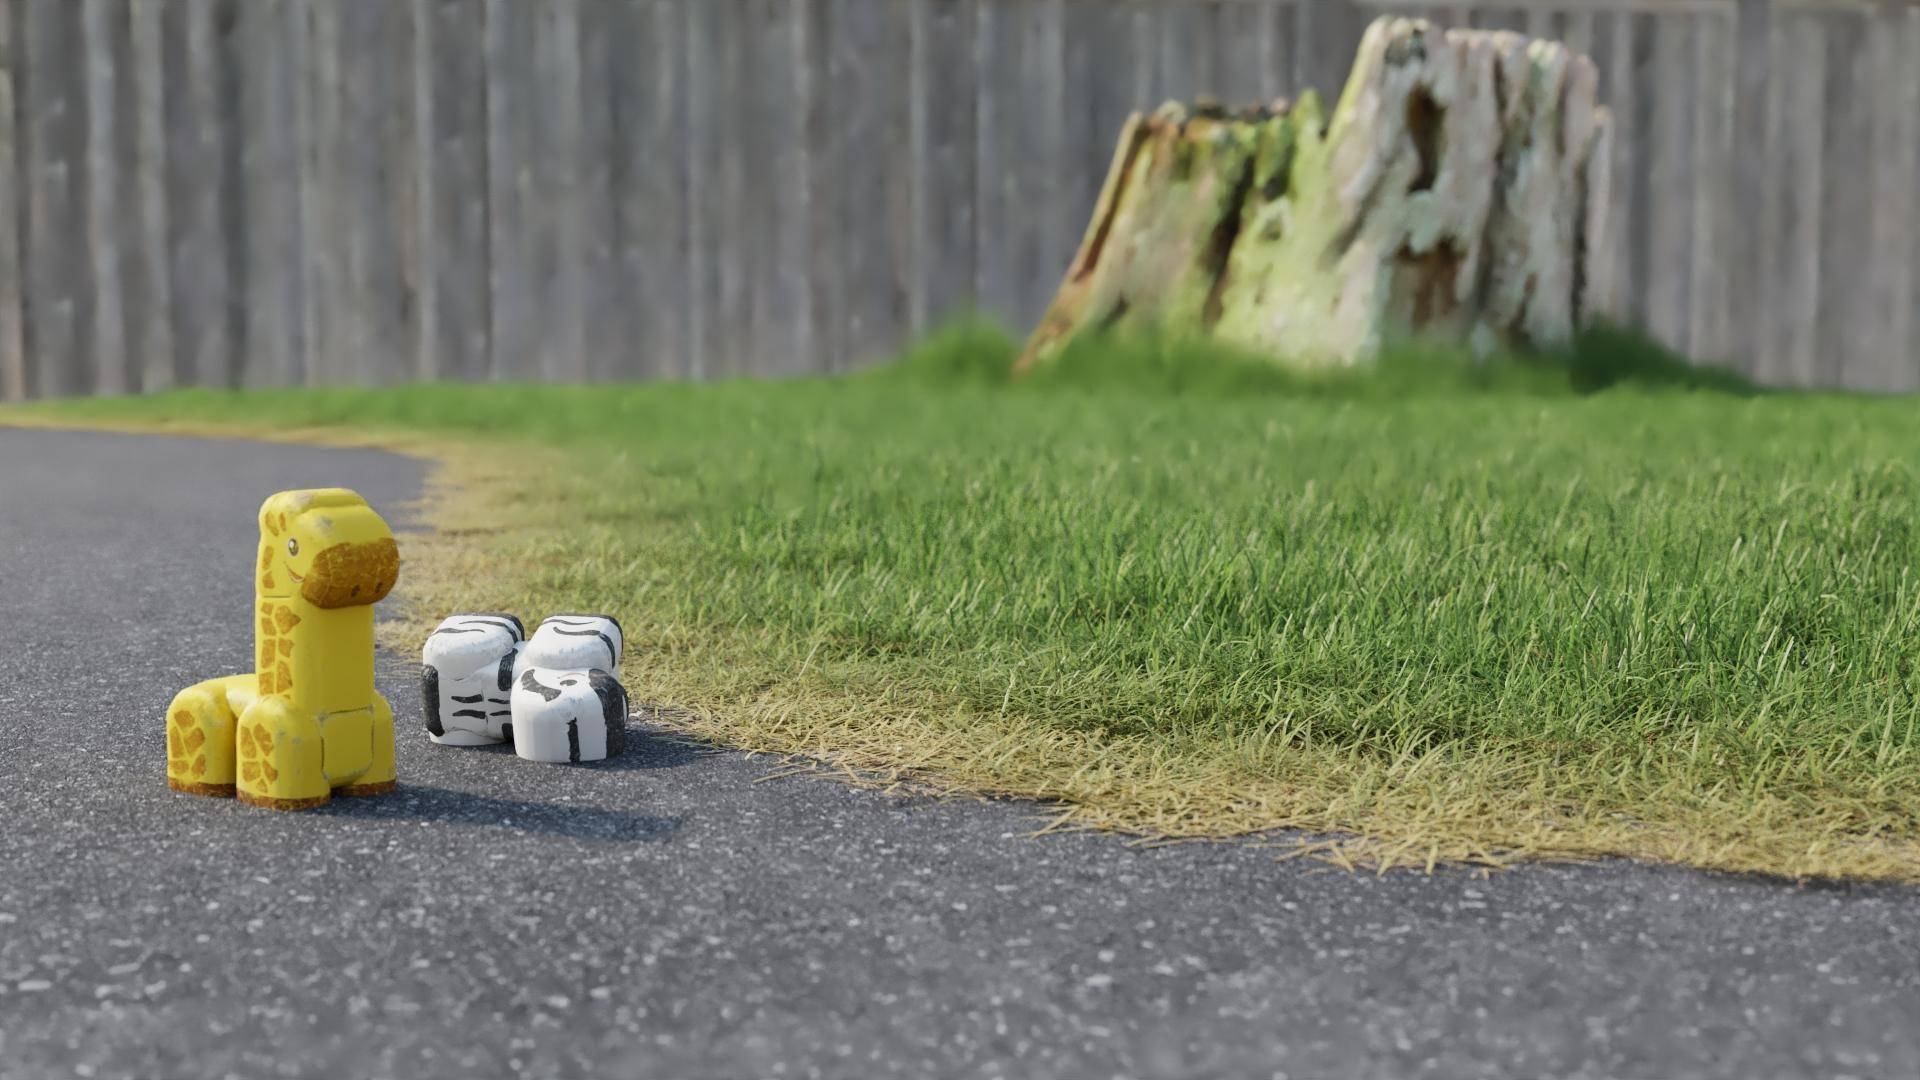
Render now and the grass is shorter as it approaches the path. But it looks a bit too green for a plant that’s regularly trampled. Let’s use an effect to make it less healthy
- Go to the Effects rollout.
- Click on + to add a new effect.
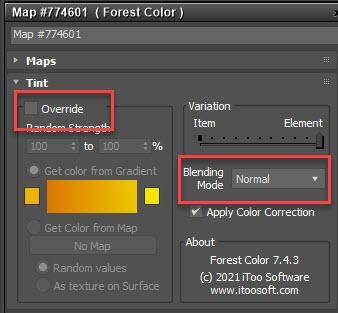
- Click on the Wand icon to open the Effect Library and in the Color category, select and load Tint by Boundary.
- This effect can control the output of a Forest Colour map provided, and this is important, that the Tint Override option in the map is not enabled
![]()
- When Tint Override is disabled in the map, the values set in the Forest Object control the tint settings. In this case, the Effect will add a gradual scale from white by the boundary to pure black a set distance away. This can be used to mask between different materials.
- The effect has just one parameter which controls this distance. I’ll use 50CM in this example.
![]()
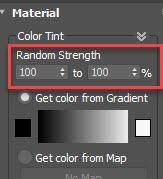
- To enable the Effect to work it’s necessary to go to the Material Rollout and turn the Random Strength Start and End both to 100%.
![]()
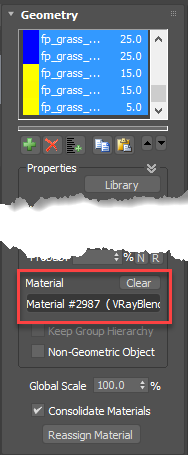
If you change the Display mode to Points-cloud then you should see a preview in the viewports of what’s happening. - So far this isn’t actually affecting the material itself. Let’s change that. Go to the Geometry rollout. Fortunately, all of the items use the same material in this case. Select them all, and then instance the material to the Material Editor.
![]()
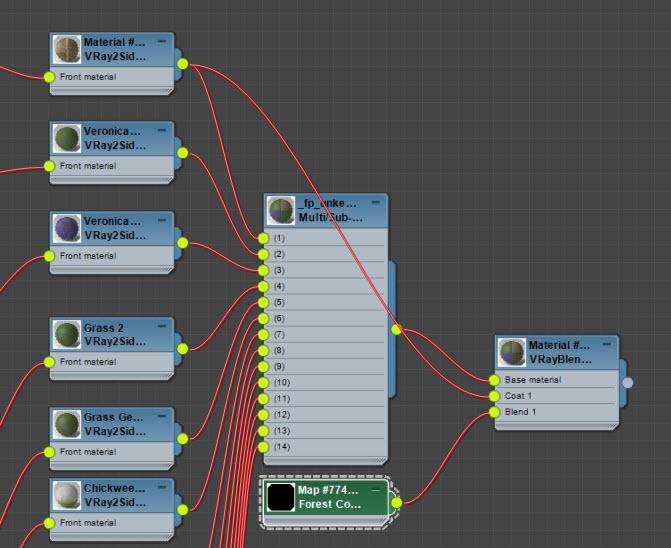
- It’s quite a complex multi-sub object material, so rather than editing each sub-material which would be laborious, let’s take the lazy route and wire the whole thing to a new V-Ray Blend material.
- Instance the V-ray Blend material back to the Forest Pack material slot, replacing the existing material.
- Now we want to create a brown dry grass material for the first coat. Fortunately, there’s one already in this material wired to material ID 1. Just find this and wire it to the Blend material's Coat 1 input.
- Now create the mask. Add a new Forest Colour Map and wire it to the Blend1 input. Make sure you do not enable Tint override but do change the Blending mode to Normal.
![]()

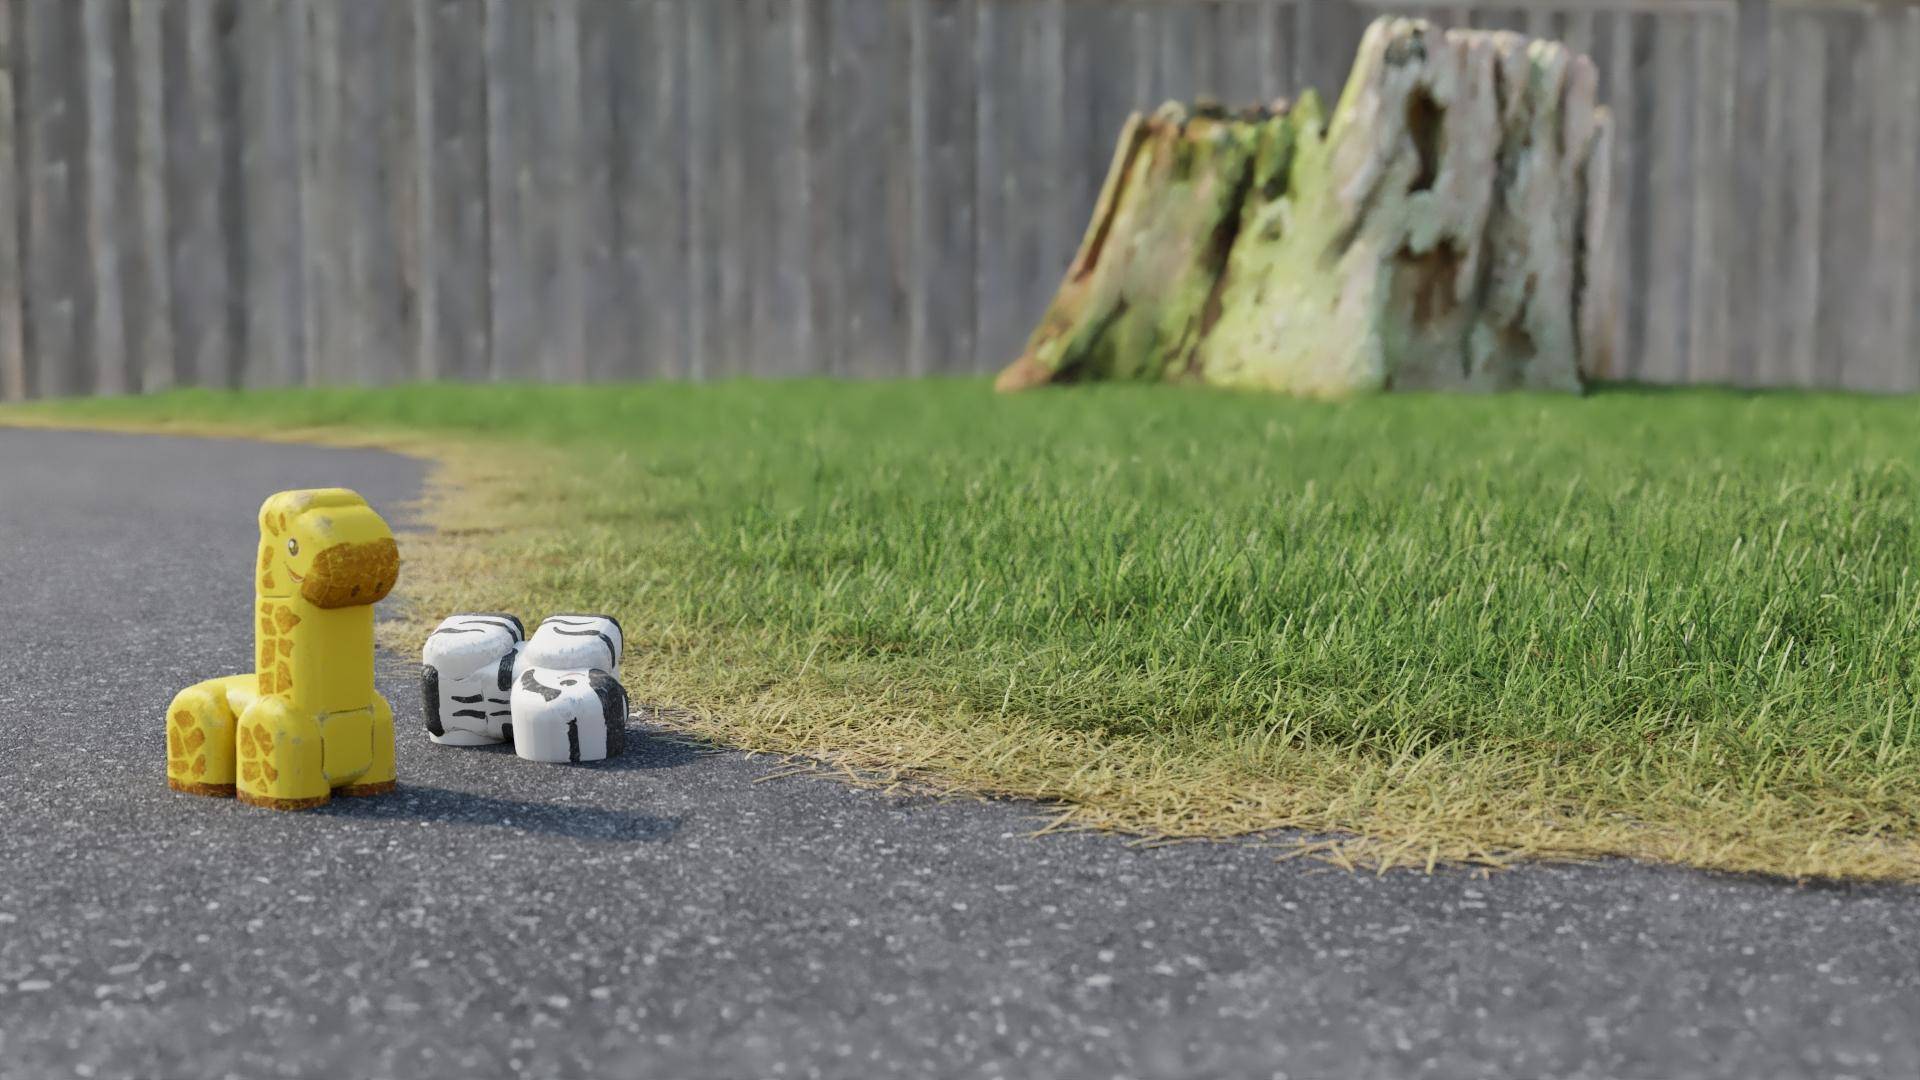
Now render again and you’ll have a nice falloff from dried grass near the path to healthy grass further away. That'll really help to make your grass areas more realistic!
Let’s add one more thing before we finish this tutorial. In the middle of the grass is an object. Typically in real life, this wouldn’t be so easy to mow around and the grass will be longer in this area.
If you recall we used a scale effect to reduce the size of the grass near the Include boundary. Now we want to do the opposite for an Exclude boundary. Unfortunately, there’s only one graph shared between include and Exclude, so we’ll have to use a different technique - and this is where Forest effects can help again.
- Go to the Areas rollout and add the Object as an Exclude area.
- Add a new Effect and open the presets browser.
- Select and load Z Scale by Exclude Boundary.
- This work pretty much the same as a regular scale falloff. Set a Distance, I’ll use 40cm.
![]()
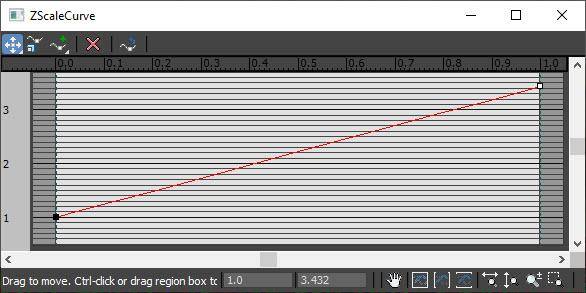
- Next, open the graph, and this time move the final point in the graph upwards to make the grass longer around the trunk.
![]()

These two effects combined allow you to add lots of handy details to your grass to really help bring the scene to life.