Fichiers de ressources
Conditions
- info 3DS Max 2011, RailClone 2.x
In the first part we'll be using some of the default library styles that are included with RailClone 2, looking at how they can be used out-of-the-box, or adapted to solve individual problems.
All the necessary scene files for this tutorial can be downloaded from iToo software's website or from the links on the left of this page. To get started open "stadiumStart.max", or to see the end result open "stadiumEnd.max". The starter scene contains all the geometry and splines necessary to follow the tutorials.
Creating the full height railings: using built in styles
RailClone2 comes with a comprehensive library of objects. In this scene we'll start by adding some railings from an included style.
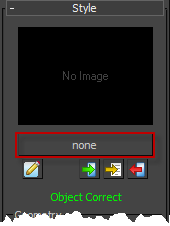
- Create a new RailClone object in any viewport. Go to the Style rollout and open the Library Browser
![Barriers-1.png]()
- Go to the Bleachers category and double click on the "Railing High" style to load it into the scene.
![Barriers-2.png]()
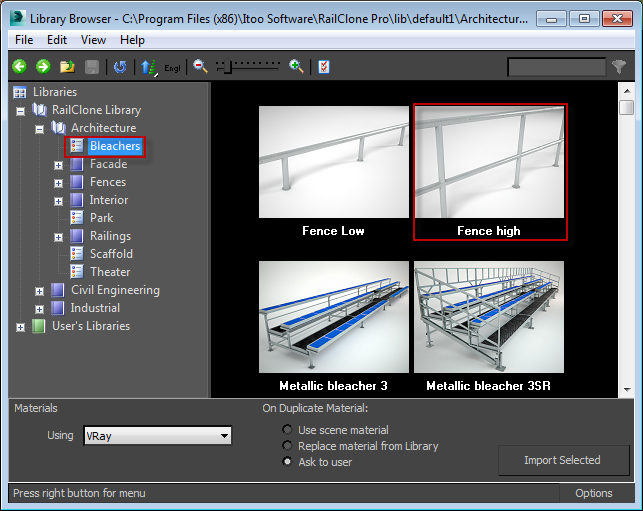
- Linear styles need a single spline as path to create the geometry, to pick it from the scene, go to the Base Objects rollout, pick path from the list and select the spline called "Spline_Railings". In the viewports you should now see a railing running along the back of the stands and around the entrance ramps
![Barriers-3.png]()
Creating the front wall and guard rails: adding to existing styles
It is also possible to use the library items as a starting point for your own custom styles. In this example we'll add a wall to the "low_railing" style.

- Create a new RailClone object and pick "Low Railing" from the library.
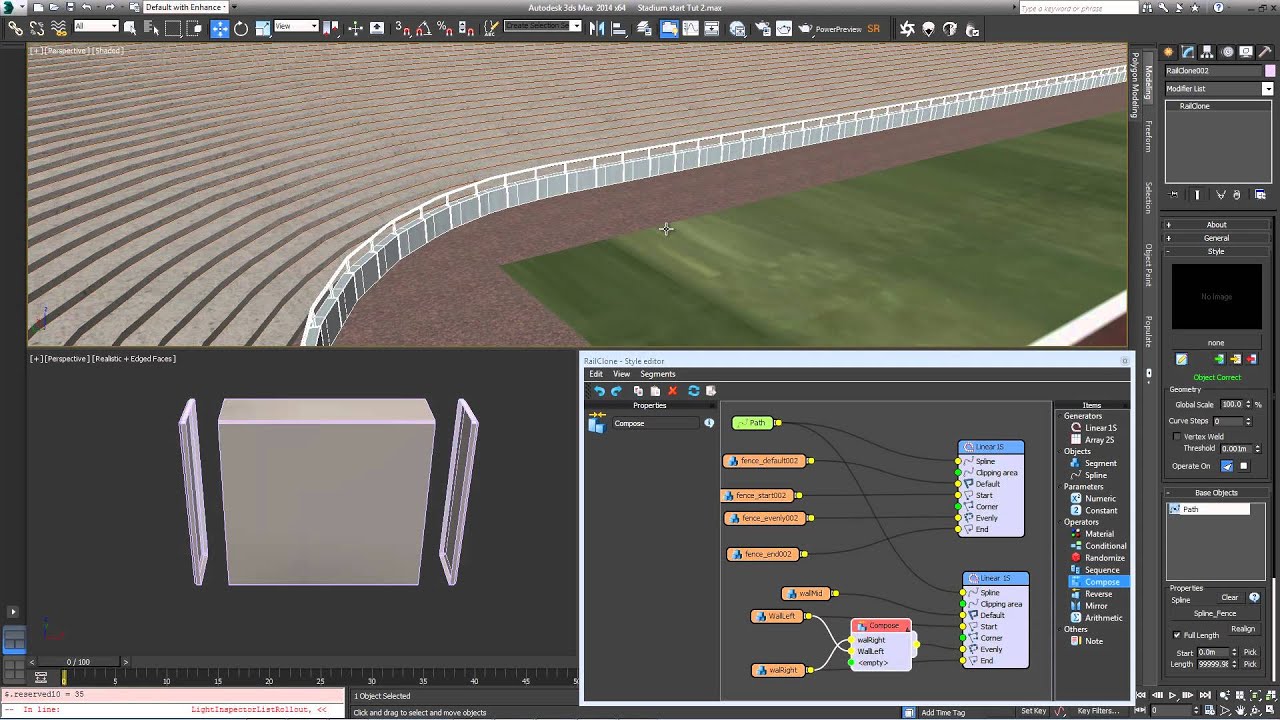
- Allocate "spline_fence" as a base object then open the style editor.
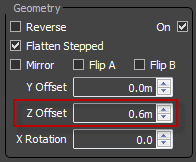
- Adjust the starting height of the railing by selecting the generator and changing Properties>Z-Offset to 0.6m
![Barriers-5.png]()
- Next create a concrete wall below the railing to use on the front of the stands. Add a second L1S generator and attach the same spline to the input. To create the wall add 3 new Segments and allocate "wallLeft" "wallRight" and "wall_mid" to each.
- Create the style by adding "wallmid" to the default input, "wallleft" to the start and "wallRight" to the end.
- We now have an enormous cast-in-place wall. To add joints create a composite segment using the Combine operator and attach "wallright" and "wallleft" in that order. Attach this to the evenly input (see the node tree image above).
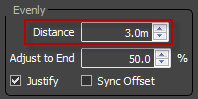
- To set the distance for each wall section, select the generator and go to Properties>Rules>Evenly Distance and set the value to 3m.
![Barriers-6.png]()
We now have a finished wall style, but to simplify reuse it is possible to add parameters to easily adjust the position on the Y-axis. We could open the style editor and manually adjust the two styles' Y-offset property; as styles become more complex though this can be a little laborious. It's far easier to wire together these parameters so that they can be easily adjusted from a single node.
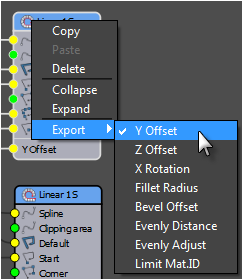
- The Y-Offset value is not currently exposed as an input for either of the generators. To enable this, right click both generators and go to Export>Y-Offset.
![Barriers-7.png]()
- Now create a new Numeric node, set the type to Scene Units and wire it to both Y-Offset inputs.
- The value can now be adjusted from the parameters rollout. To finish this style, duplicate it and change the base parameter of the new RC object to Spline_UpperFence and adjust the Y parameter to -0.1m
Creating the glass walls: extracting and modifying a library objects geometry
RailClone segment's geometry is embedded in the object in a similar fashion to Max's compound objects. However these can be extracted and edited allowing you to easily modify existing styles. In this example we will create the glass wall between levels by modifying an existing curtain wall style.
- First create a new RailClone object and select "Architecture>Facade>Curtain Wall>Curtain Wall 07" from the library. Allocate "Spline_glasswall" as the base object. Open the style editor and select the Segment node wired to the generators default input.and press Extract Segment
![Barriers-segextract.png]() . The geometry will be placed at it's original location (somewhere in the middle of the pitch).
. The geometry will be placed at it's original location (somewhere in the middle of the pitch). - In the current style the transom is in the middle of the window, We'd like it nearer the top. Since the geometry is now instanced, if we change the extracted mesh the RC object will update automatically.
- Select the extracted wall geometry and add an Edit Poly modifier. In vertex mode move the transom vertices to about a 1/4 of the way down from the top of the wall. Notice the style updates live in the viewports. Once you're happy with the changes , the geometry can be safely deleted and RailClone will retain an updated copy internally.

That concludes the first part of the stadium tutorial In the next tutorial we'll look at how to add billboards to the walls, and randomise materials to select from 6 possible textures.