Файлы ресурсов
Требования
- info RailClone 6 Lite or Pro
Рекомендуемые продукты
Получить продукты
With the release of RailClone 6, we've added numerous usability improvements to the Style Editor, designed to help advanced users work more quickly and efficiently. Here are 10 small changes that can make a big difference:
1: More control over segment renaming
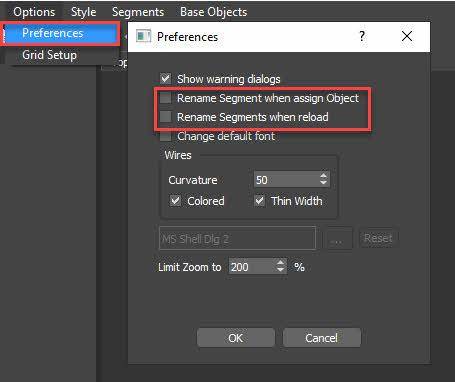
We have introduced an option in the Preferences menu that allows you to decide whether segments will be renamed to match the source object. For instance, if you have assigned segments specific names to assist in identifying their function within the graph, RailClone 6 now allows me to maintain these names even when selecting new geometry. In previous versions of RailClone, when selecting new geometry, the names would be overwritten.
2: Shift and Drag to duplicate nodes
You can now duplicate nodes and wires using Shift and Drag. This function simplifies the creation of node and wire copies. Less obviously, but perhaps even more useful, you can also clone a wire in the same way. Simply select a wire from the input, hold down Shift, and drag to a new input. It's a small detail but a real time saver!
3: Window or crossing marquee selection
The introduction of window or crossing marquee selection of nodes is another added feature. It makes it much easier to select multiple nodes at once. When this mode is activated, only nodes fully within the marquee will be chosen.
4: Save drop-down lists as presets
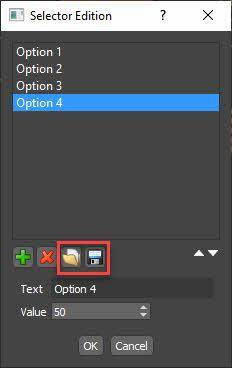
To further streamline your workflow, you can now save presets for drop-down lists, making it easier to reuse common settings. To use this, create a new drop-down list in a Numeric node, then save it as a preset by clicking on the Save icon. You can then load the list into a new Numeric node by clicking on the Load button and importing the file. You could create a folder full of extensively used lists and save a great deal of time!
5: Change wire thicknesses
This one is more about aesthetics - we've added the ability to change the wire thickness using a new option in Preferences>Wires, which allows you to customise the appearance of wires by choosing from two different thicknesses to suit your preferences.
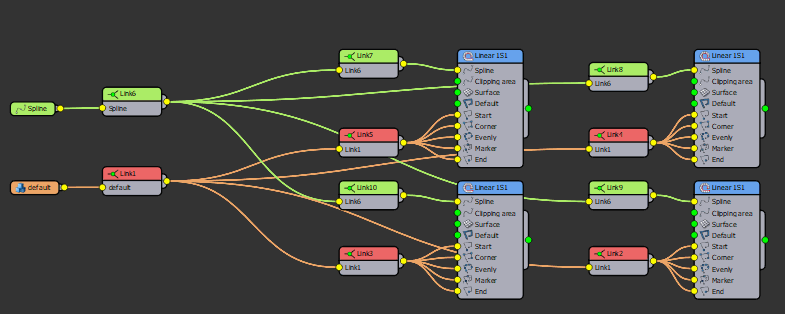
6: Import scene selection
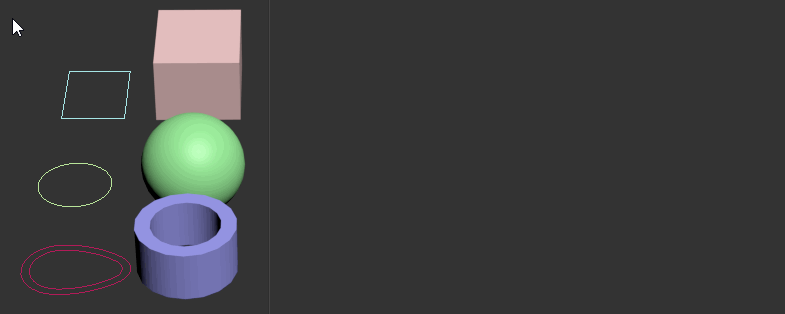
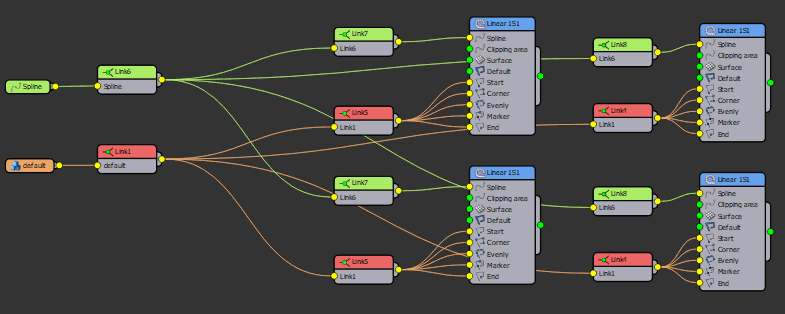
Next, and this is a big one made possible by the always-on-top style editor. We've added an option to import the current scene selection to the Style Editor as new segment and spline nodes. This feature allows you to quickly create new nodes from existing selections, saving you the hassle of manually creating each node from scratch. Just select geometry or splines from the scene, right-click in the Style Editor and choose Import Scene Selection. A new base object node of the correct type will be created and the objects assigned accordingly.
7: AND/OR options in the Conditional operator
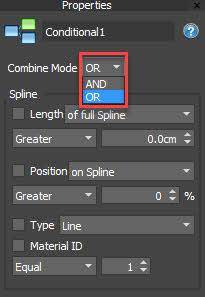
The Conditional operator can now test for multiple conditions using AND/OR logic. This makes it easier to create complex conditions and streamline your workflow.
8: Hide wires
We've added a new option to hide all the wires, except for those connected to the currently selected node. You enable this in the View menu, or using the keyboard shortcut Ctrl + W. This feature reduces visual clutter, allowing you to focus on the node you are currently working on.
9: Improved Randomisation node
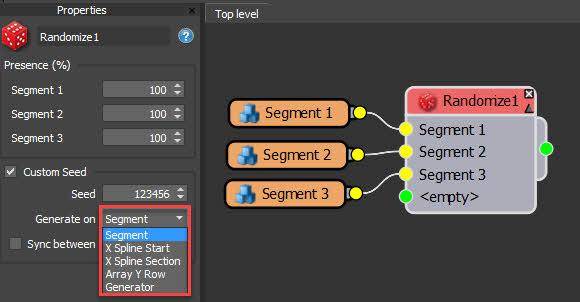
We've added several new Seed options to the Randomise node, providing you with much more control over when a new random segment is generated. This simplifies graphs as it's no longer necessary to create this effect using a Selector node with a Random number node wired to the Index input. You can now simply use a single Randomise geometry node instead.
You can choose to generate a new random object per Segment (which is how this Random node worked in the past) or use one of the new options. These include Per Spline Start, which when using multiple splines will randomly select one segment to be used for each sub-spline, per section which you might use to randomise a section between evenly or corner segments. In an A2S array, this is also randomised differently for each row. The next option is Per Y row, which would choose a new segment to use for each different row in an A2S array, and finally Per Generator which is primarily used when nesting generators. This improvement makes it much easier to determine when a new segment is randomly generated and gives you a lot more control.
10: New Sync Between options

Finally, for even more control, both the Randomise segments and Random number nodes' Sync between Generators option has been renamed to simply Sync between, and it now provides several brand-new options. These allow you to further determine how to coordinate randomisation between various parts of an array. For this example, if you set the Seed options to Randomise per segment. Normally this would result in total randomisation, but what if I wanted to maintain randomisation, but ensure all the rows matched? To do that you can now change the Sync Between mode to Array Rows. If you'd rather create a randomised pattern that repeated for every section of the array, instead you could choose X Section.
Say you want a randomised pattern for each row, but that I want it to match on all the sub splines. You can now do that using Sync Between X Splines.
These options make the Randomise Segments operator much more flexible. And if you want to use these settings to randomise other parameters of a RailClone Style, you can do that too. The Randomise Number node also has the same settings.
That concludes our tour of some of the style editor changes that might be easy to overlook in a big release. We hope these improvements will help you work faster and more efficiently.