Resources
Requirements
- info Forest Pack Pro

Introduction
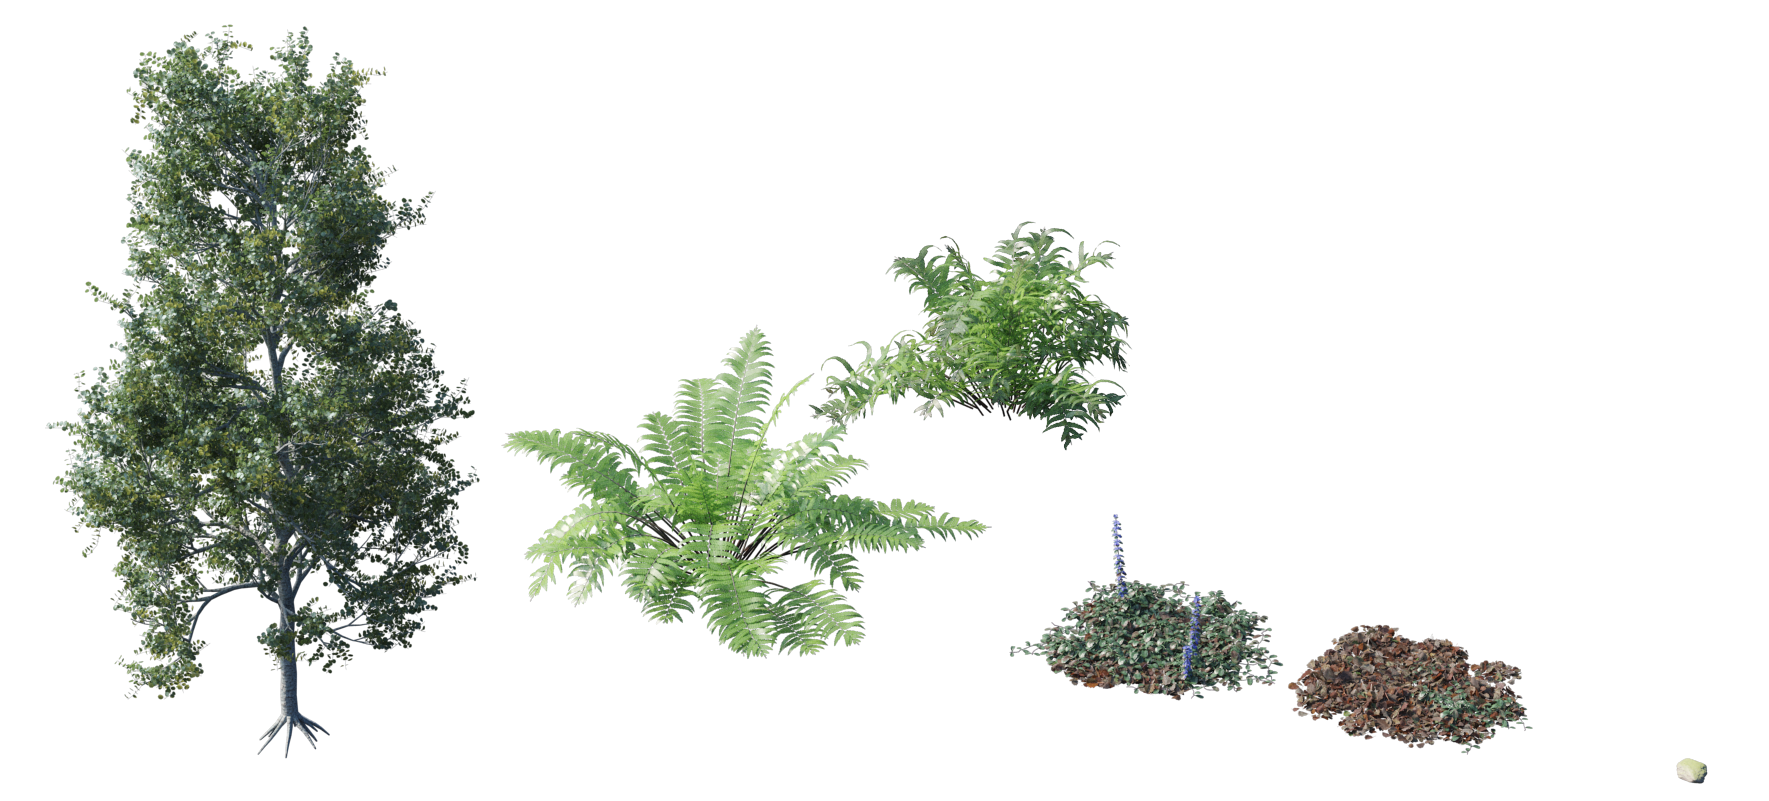
In this Tips and Tricks episode we'll look at how to use Forest Pack's animation tools to re-seed other parametric modelling plugins, like GrowFX, to create tree and plant variations without having to store and maintain many source objects in your scene. In our example we have used only one stone, one tree, two ferns and two ground cover patch objects.
For some jobs you need as much variety as possible, and though repetition can be disguised by randomising materials, textures and transforms, occasionally you'll just need more diverstity in the meshes too. This would normally involve importing or x-reffing lots of different models, which are hard to manage and difficult to update if you make changes, but by coupling Forest Pack with other parametric modelling tools it's possible to create variations without needing to import loads of objects. Here's how:
Download Contents
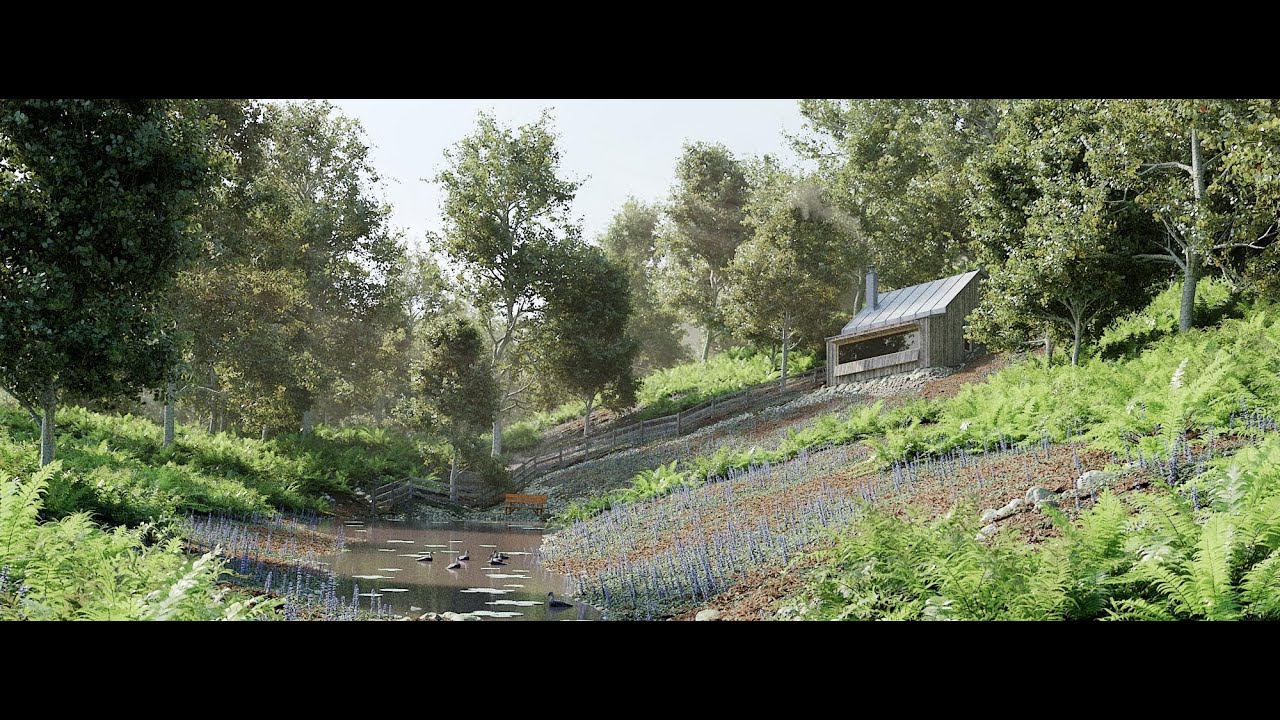
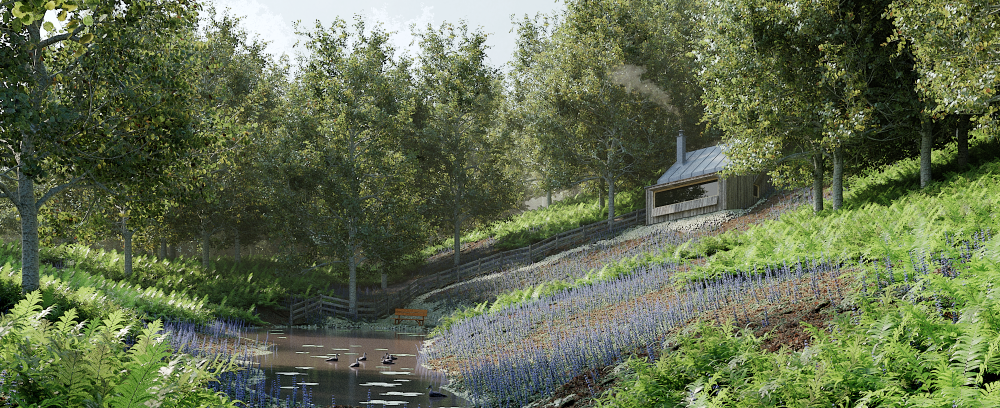
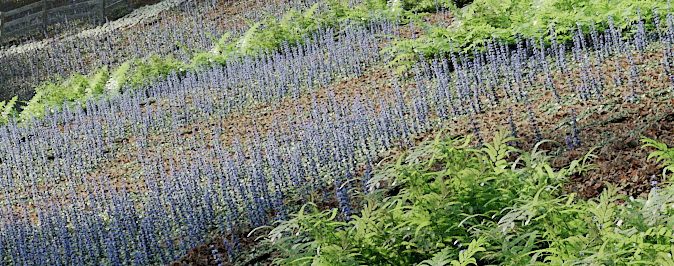
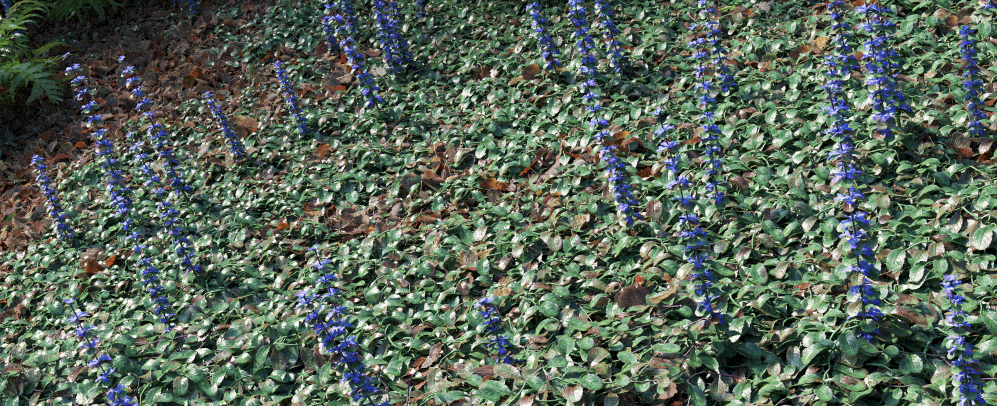
We start with a scene that already contains all of the Forest Pack Pro objects you need, but no randomisation has yet been applied. In this tutorial we'll look at how to sample the source objects to get different meshes and then add some further randomisation using transforms.You can see in the before image that all of the trees, ferns and ground cover plants clearly use the same model. By the end of this tutorial this kind of visible repetition is considerably more difficult to spot.
Before Randomising Objects
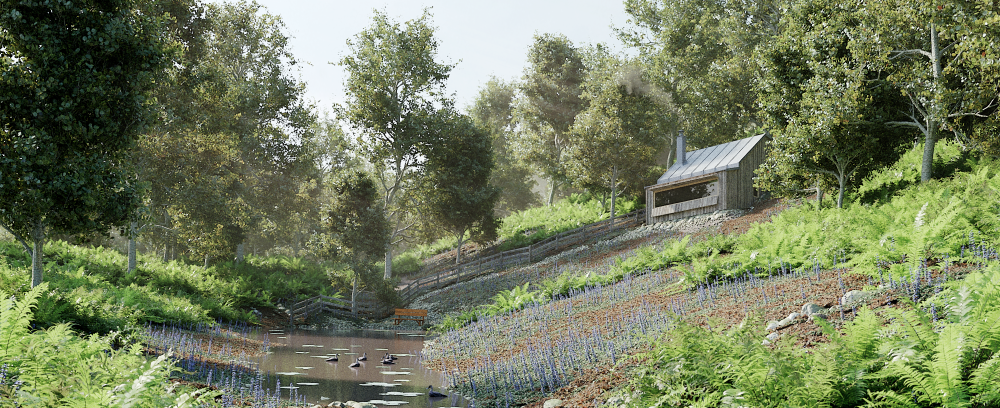
After Randomising Objects
The exercise files for this tutorial includes the following .max scenes compatible with Max 2010 and V-Ray.
- forest_variations_start.max The starting file if you want to follow the tutorial.
- forest_variations_start.max The result of the completed tutorial

The scene files included in the downloads for this tutorial use some meshes created with the GrowFX plugin by Exlevel. GrowFX greatly simplifies the process of creating parametric plants, trees, flowers and other nature models. If you'd like to follow this tutorial but you don't have GrowFX, a 30 day trial can be downloaded by following the links in our store.
Theory: Using Animation Controls
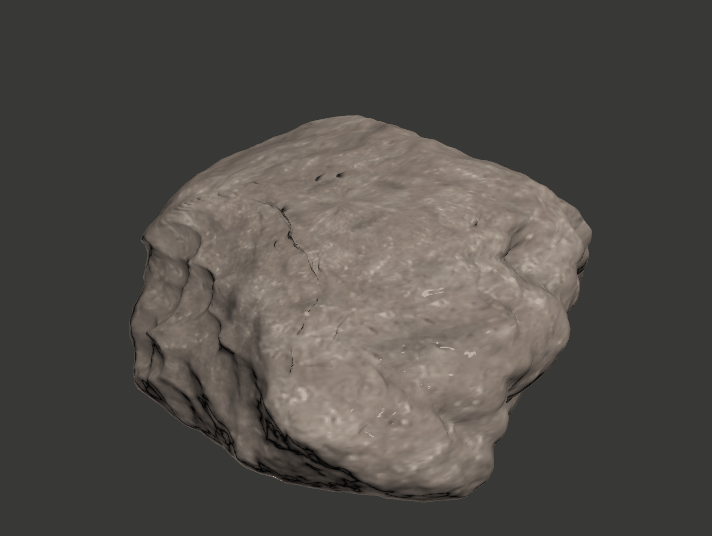
The principle is actually very straightforward. Forest Pack's animation controls allow you to sample geometry at regular points along the timeline. Ordinarily we use this to create animations that are offset in time to create variety (you can read more about this in our Animating with Forest Pack tutorial), but as well as scattering animated models, we can also use this tool to sample single static models from different points in time and scatter them to create variations in geometry. Couple this with other parametric tools that have an animatable seed value, and we're able to create completely different model on each frame. For example, in the sample scene we have a stone object. It's been created parametrically using displacement maps and noise modifiers, both of which are animated so that each frame creates a differently shaped rock.
All we need to do is add this Forest Pack and edit some animation settings to scatter samples of this object. For clarity I'll work on a small patch so we can see clearly see the effects of this approach.
- Select fp_rock_patch, this is a small sample area with Display set to Mesh to better see the outcome of our changes.
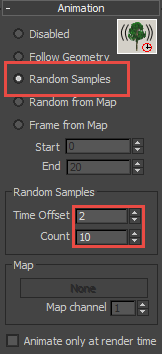
- At the moment the same rock is obviously repeated. To add greater variety let's grab some more rocks from the timeline. Go to the Animation rollout, and here you'll see 4 animation modes. The first of these, Follow Geometry, is used when you want all items to stay in sync, so it's no use for our purposes today. Random from Map chooses the sample point based on a greyscale texture and may be useful too, but Random Samples, is what we're after. It enables you to define set sample points and then randomise them at the start of the scatter. To do this it has two parameters: Time Offset and Count.
![Randomising Procedural Objects-image2016-2-26 16:31:3.png]()
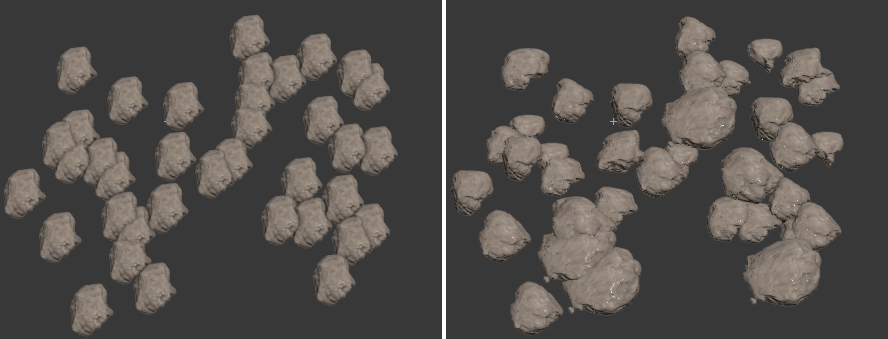
The Time Offset value determines the number of frames between samples, starting from frame 0. For example I'll set this value to 2 so I get samples from frames 0,2,4,6,8 etc. The Count parameter defines the total number of Samples, in this example that would equate to the total number of different Rock variations I want to create. So, If you gradually increase the count value you'll see that more rock variations get added to the scatter. In this example I think 10 rocks will be enough..![Randomising Procedural Objects-stones.png]()
Before and after applying and animation controlsCache Sizes
The number of samples in the cache is the number of objects in the items list multiplied by the count number. so for example If I had three animated rocks in the Items list and a count value of 10 I'd have cached 30 rocks for Forest Pack to scatter. It's something to be aware of because the greater the caches, the more memory you're using.
- This is looking much better already, but for even more variety we can also randomise the transforms. To do this open the Transforms rollout where you'll find controls to randomise the Translation, Rotation and Scale of objects. Turn on the checkboxes for Rotation and Scale and leave the minimum and maximum values at their defaults. They work well for many purposes.
![Randomising Procedural Objects-image2016-2-26 16:43:2.png]()
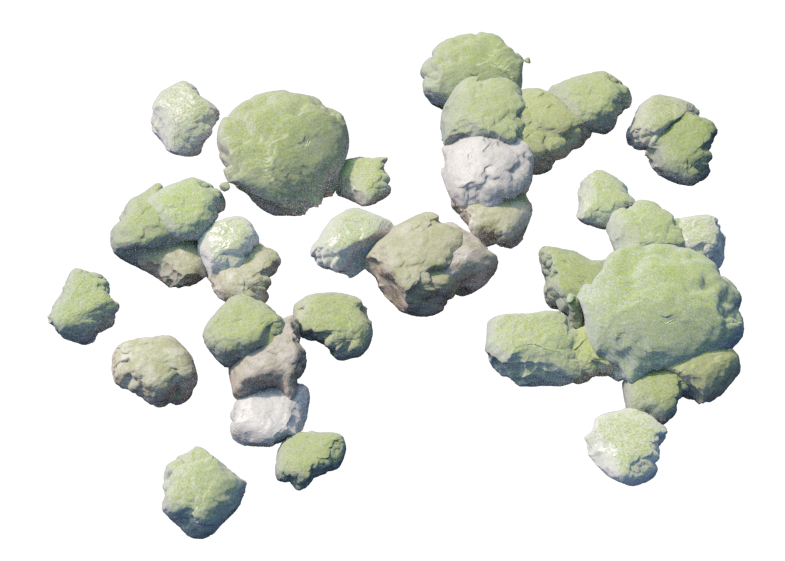
To add further variety you can subtly randomise the tint colour and textures using Forest Colour, you can find out more about this powerful map in our Autumn Parks tutorial. The final rocks look like this, remember this is still just from one single object in the scene.![Randomising Procedural Objects-rocks.png]()

Animating Seed Values - Nested Forest Pack Objects.
So that's the basic principle, now let's look at another example, this time with nested Forest Pack objects. When you create or purchase individual plants, in order to keep the number of scattered items to a minimum it is often necessary to combine them into larger "patches" to cover large areas. For even greater variety and more realistic results you'd expect to to create multiple patches so that visible repetition is reduced. In the included scene there are already two patches for the ground cover, one of leaf mulch and another of leaves combined with a Bugle flower. Here's how these look in the scene using only a single patch:
Not bad but you can see that the distribution of the flowers appears very regular and the repetition is quite obvious. Let's fix it!
- Select FP_Creeper_Patch.
- Turn on Autokey.
- Move the playhead to frame 100.
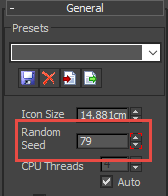
- In the Forest Pack object's General rollout, enter a new Seed Value.
![Randomising Procedural Objects-image2016-2-26 17:1:23.png]()
- If you scrub the timeline now, just like the rocks get a new random version for each frame!
- Turn off Autokey.
Changing the Ratio of plants in patches.
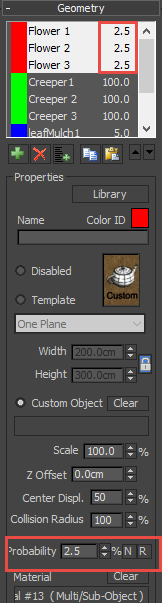
The change the ratio of plants in the patch you can adjust the Probability values of items in the Geometry rollout. By editing these you can get some different effects. I've set them up so that some patches will not have flowers.
![Randomising Procedural Objects-image2016-2-26 17:4:28.png]()
- Now we can do the same for the leaves patch, select FP_Leaf_Patch.
- Turn on Autokey.
- Move the playhead to frame 100.
- In the Forest Pack object's General rollout, enter a new Seed Value.
- Select FP_Ground_Cover. These two patches are nested inside this third Forest Pack object which is used to scatter them on the terrain. We now need to turn on this FP object's animation controls and set it up to sample random frames from the patches.
- Go to the Animation menu and check Random Samples.
- Set Time Offset to 1 and Count to 10. There are two patches used so we're actually creating 20 samples of the ground cover object.
- Finally, let's add some more variation, go to the Transform rollout and enable Rotation. The default settings are fine.
- Turn on Scale randomisation as well, this time change the Min value to 100% and the Max value to 110% so that the scale effect is more subtle.
With the randomisation applied, repetition is much less obvious and the changes in flower density are more believable.
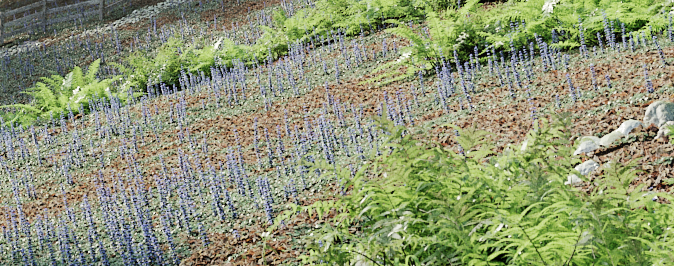
It's hard to see at this distance so here's a close up:
Using GrowFX
The great this about this technique is that it works with nearly any parametric tool, for example we can also use it with GrowFX to create variations of a tree species sampled from a single object. Instead of duplicating and editing the object, just animate the seed value and let FP do the selecting for you. This has distinct advantages, imagine that I'd created a plant and I wanted 20 variations. First of all it would be a slow process to clone and reseed the plant model 20 times, but also means if I want to change the ruleset that drives the GrowFX object I'd have to do all of this again because the changes won't cascade through all my cloned versions! That's an inefficient way to work. Instead with this workflow all you need is a single GrowFX model which makes refining the look of the trees a cinche.
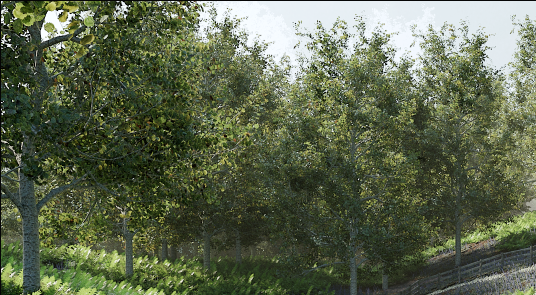
So let's prepare the tree in our sample scene. At the moment we're scattering a single model and again the repetition is obvious:
To fix it:
- Select the GrowFX Aspen model from the scene.
- Turn on Autokey.
- Move the playhead to frame 100.
- In the Aspen object's Main Parameters rollout, Click the New Seed button.
- Turn off Autokey.
- If you move the play head you should now get a different tree variation for each frame. (The types of variations you get will depend on how your growfx model has been built which is beyond the scope of this tutorial, if you're interested we recommend checking out some of Exlevel's tutorials.)
- Now we need to update the Forest Object to take sample from this tree. To do this select FP_Trees.
- Open the Animation rollout and and activate Random Samples. Set the Time Offset value to 1 and Count to 10. The cool thing is we can easily choose how many tree variations we need just with this value. 20 trees? No problem, just update the count.
- Finally, let's add some transform variation too. Turn on Rotation and accept the default values.
- Turn on Scale and let's create some smaller trees by setting the Min value to 60% and the Max value to 120%.
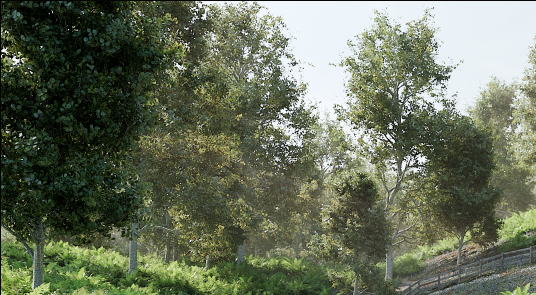
If you render now you'll see there's substantially more variation in the tree models.
Locking samples with Forest Effects
There is of course a drawback to this approach, it only works for still images. An animation of this scene would result in all the trees, rocks and plants changing on each frame as their seed values animate throughout the render. Foruntately, there's a workaround using Forest Pack 5, as long as you don't need the scattered objects themselves to be animated. Let's use the final object in the scene, the ferns, as an example:
- Select FP_Ferns.
- Open the Animation rollout and turn off Animate Only at Render Time.
- Move the timeline. Even in points-cloud mode you'll see that the ferns are changing on each frame.
- Forest Pack 5, has a new feature called Forest Effects that allows you to extend the functionality of the plugin by loading effects files. In this case I can load an effects file that randomises the samples, as we did with the trees, but stops them from animating from frame to frame. To use it you have to configure the animation settings slightly differently.
- Open the Animation rollout and change the mode to Frame From Map. Unlike the other 3 modes this prevent the animation from automatically playing. It's intended for use when you want to control an object's animation with a grey scale map, but in this case we're going to randomise those samples instead to create something similar to Random Samples mode, but with the advantage of holding the same model from frame to frame.
- Frame From Map mode use two parameters to define the range of frames to be sampled. Set the Start frame to 0 and the End frame to 9 to capture 10 different versions of the Fern models, Remember we're actually scattering 2 fern models so that will be 20 samples in total.
- Open the new Effects rollout, only available in Forest Pack 5. Click
![Randomising Procedural Objects-image2016-2-26 13:47:42.png]() to open the Effects Editor. We'll be loading a pre-made effect so you don't need to worry too much about this interface for now.
to open the Effects Editor. We'll be loading a pre-made effect so you don't need to worry too much about this interface for now. - Click
![Randomising Procedural Objects-image2016-2-26 13:48:39.png]() and select the fEffects_lock_animation_frames.eff file from the downloads for this tutorial. The Effect script will load into the editor, as you can see it's a nice simple one!
and select the fEffects_lock_animation_frames.eff file from the downloads for this tutorial. The Effect script will load into the editor, as you can see it's a nice simple one!
![Randomising Procedural Objects-image2016-2-26 13:49:58.png]()
- Click
![Randomising Procedural Objects-image2016-2-26 13:50:22.png]() to run the script.
to run the script. - In the Effects rollout you'll have a new parameter. The value needs to be set to match the number of samples created by the Frame From Map settings. Remember we're sampling frames 0 - 9 in this example, which is 10 samples in total, so set the NumberSamples value to 10.
- Now if I scrub the timeline you can see the forest object remains unchanged from frame to frame, but if you toggle animation on and off, you'll see that the samples are indeed still randomised.
 to open the Effects Editor. We'll be loading a pre-made effect so you don't need to worry too much about this interface for now.
 and select the fEffects_lock_animation_frames.eff file from the downloads for this tutorial. The Effect script will load into the editor, as you can see it's a nice simple one!

 to run the script.
Speeding Up Render Time
To finish up I want to mention a quick tip to help speed up rendering times. You may find that some procedural objects take a little time to build. For example, if you select the Aspen tree model and turn on GrowFX's metamesh feature so that the trunk and first level of branches seamlessly blend, the object looks much better, but the build time for each frame is considerable longer. This can delay renders starting, because Forest Pack must wait for each sample to build to create its animation cache. A solution is to write out the animations to Proxies which generally load much faster than a complex GrowFX model will build. For example, if you did want to use a Metamesh trunk for the Aspen tree model you could do the following:
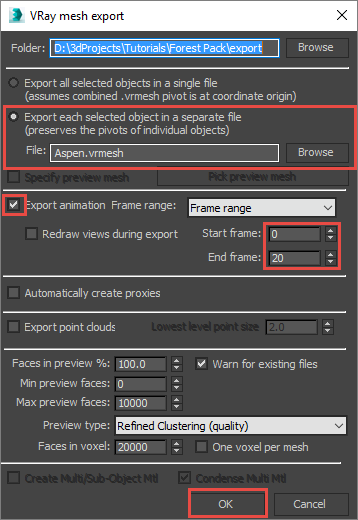
- Select the GrowFX object and turn on meta-mesh. To export this object to a Proxy you'll also need to turn on Convert to Mesh.
- Right click on the object and select the save as proxy option for your chosen renderer. Here I'm using V-Ray so I'll select V-Ray Mesh Export and use the following settings (other renderers will have something similar). Even though I'm only using 10 models in this scene, I've exported 20 so that I can increase the number of variations if I need them.
![Randomising Procedural Objects-image2016-2-26 14:39:33.png]()
- Once the Proxy has been created you can now disable the GrowFX object. Keep it in the scene though, so that it's easy to make changes if necessary.
- Go to Create > V Ray and select VRayProxy. Click in the scene to place the objects and load the Aspen.VRmesh exported in the previous steps.
- You'll now have a proxy version of your Growfx animation in the scene. You can then select fp_trees, open the Geometry rollout and replace the GrowFX object with the Proxy. You'll find that renders now start much faster than when Forest was having to sample the procedural objects every time. Also, this is still convenient if you want to edit the GrowFX object. All you need to do is make your changes, resave the VRMesh file, and everything updates automatically.
Conclusion

Click for large view
In this tutorial we looked at an easy way to randomise and manage variations on objects using Forest Pack's animation controls. We also touched upon a number of different areas that you might be interested to explore further. If you'd like to know more about the Animation Controls then we have an Animating with Forest Pack tutorial that covers them in a lot of detail. If you'd like to know more about Forest Colour then check out the Autumn Park tutorial. And finally, for a more in depth look at transform randomisation, I recommend checking out Modern Barns. We also have documentation for the new Forest Effects feature and we'll be releasing more tutorials about that very soon. Until then, stay tuned for future training, or for more information about many aspects of Forest Pack's features please see our reference section, the forum or visit the tutorials page for even more Tips&Tricks videos and in-depth tutorials.