Resources
Requirements
- info 3DS Max 2010, RailClone Pro 2.x
Introduction
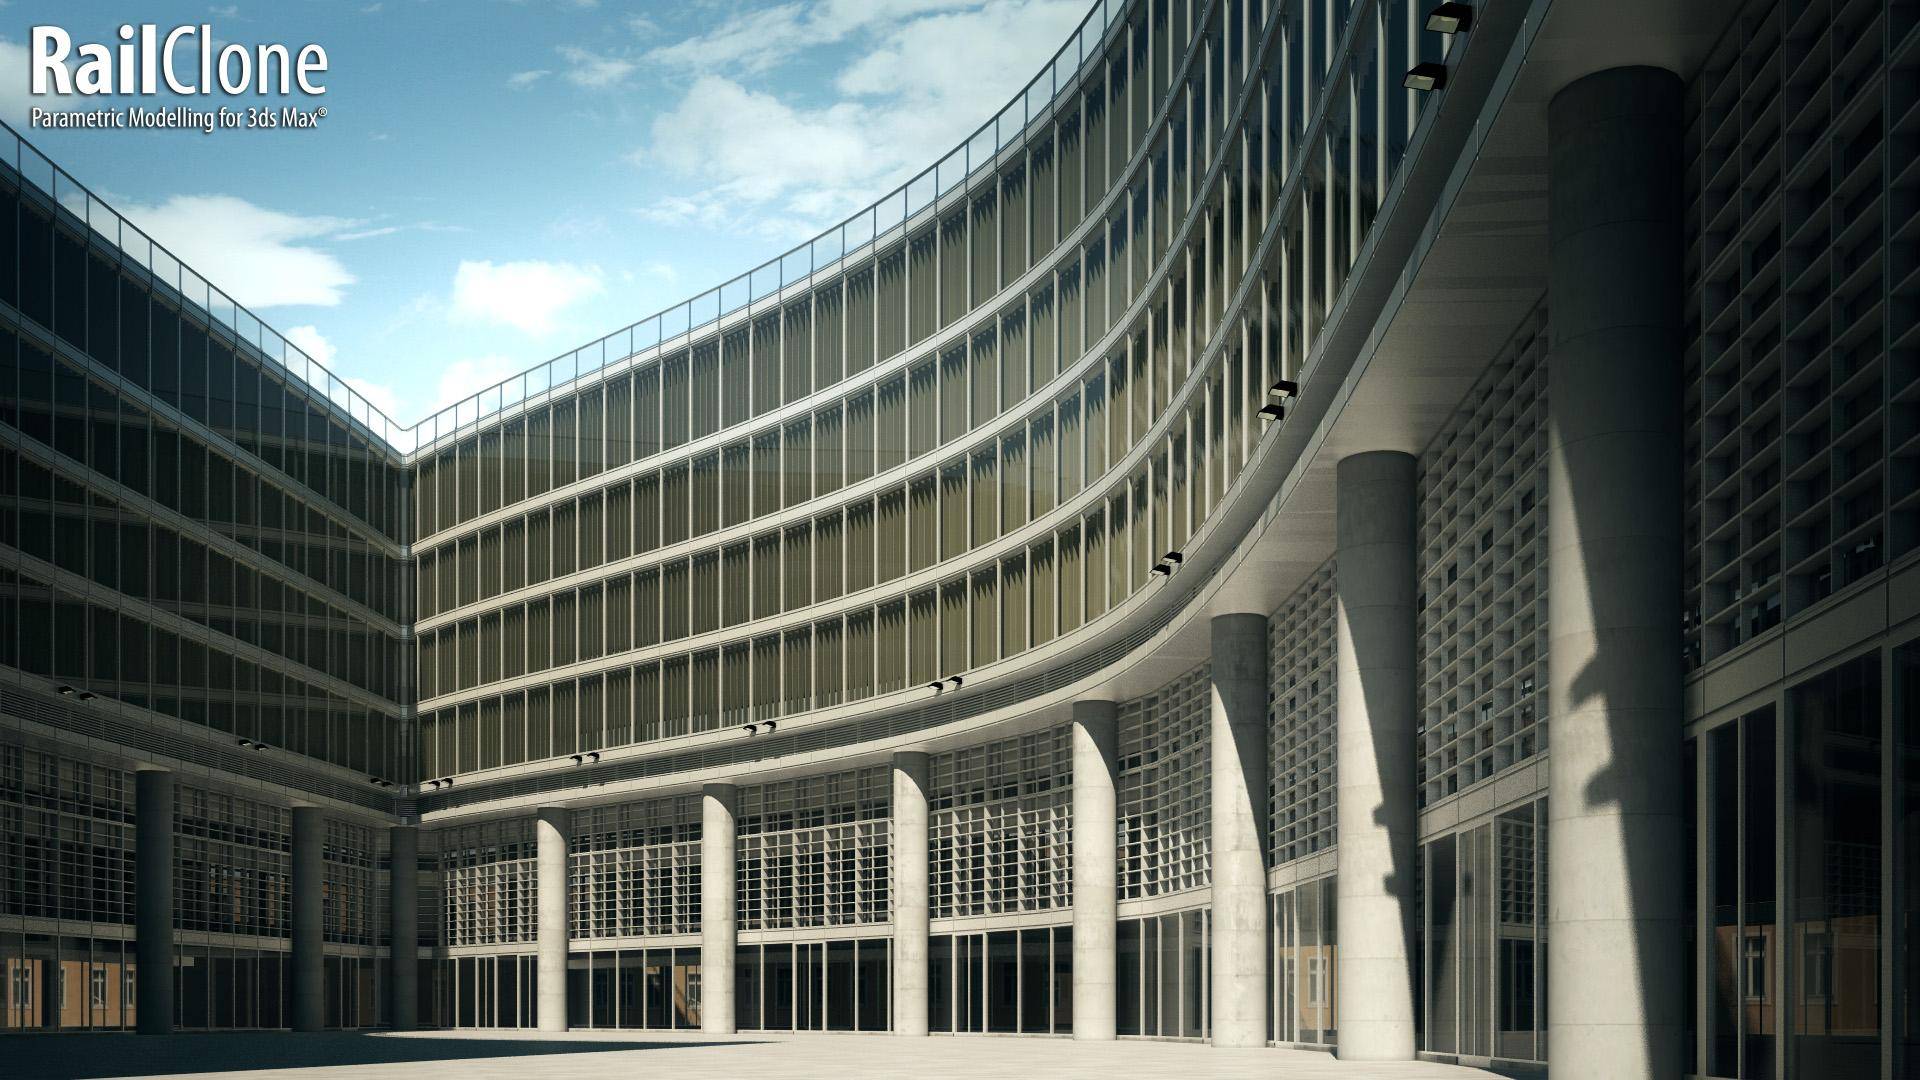
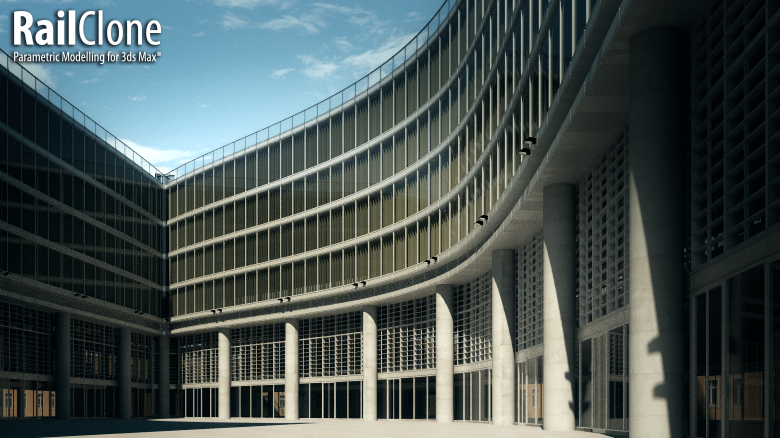
Using RailClone it is possible to make sophisticated two dimensional arrays using rule sets that allow you to allocate different geometry segments to each part of the array. The size of the array can be entered manually in scene units for the X and Y dimensions, or splines can be used to define paths for both axes. When using curved splines, the geometry will be deformed to follow the path, creating single and double curved geometry. In this example we will create a simple curtain wall style as shown below.
This tutorial uses more than three segments and requires RailClone Pro. See the differences between Lite and Pro versions.

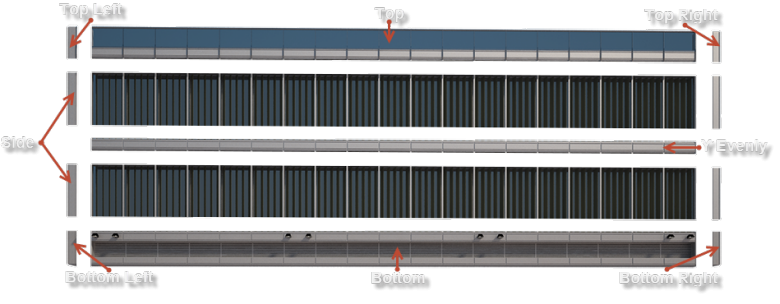
This style demonstrates the majority of the inputs of the Array 2S generator. This Generator has input slots for each part of the array, the exploded view of the curtain wall example shows the names of these slots and the geometry applied to each part (note that there is also an X-Evenly option that is not used in this example).
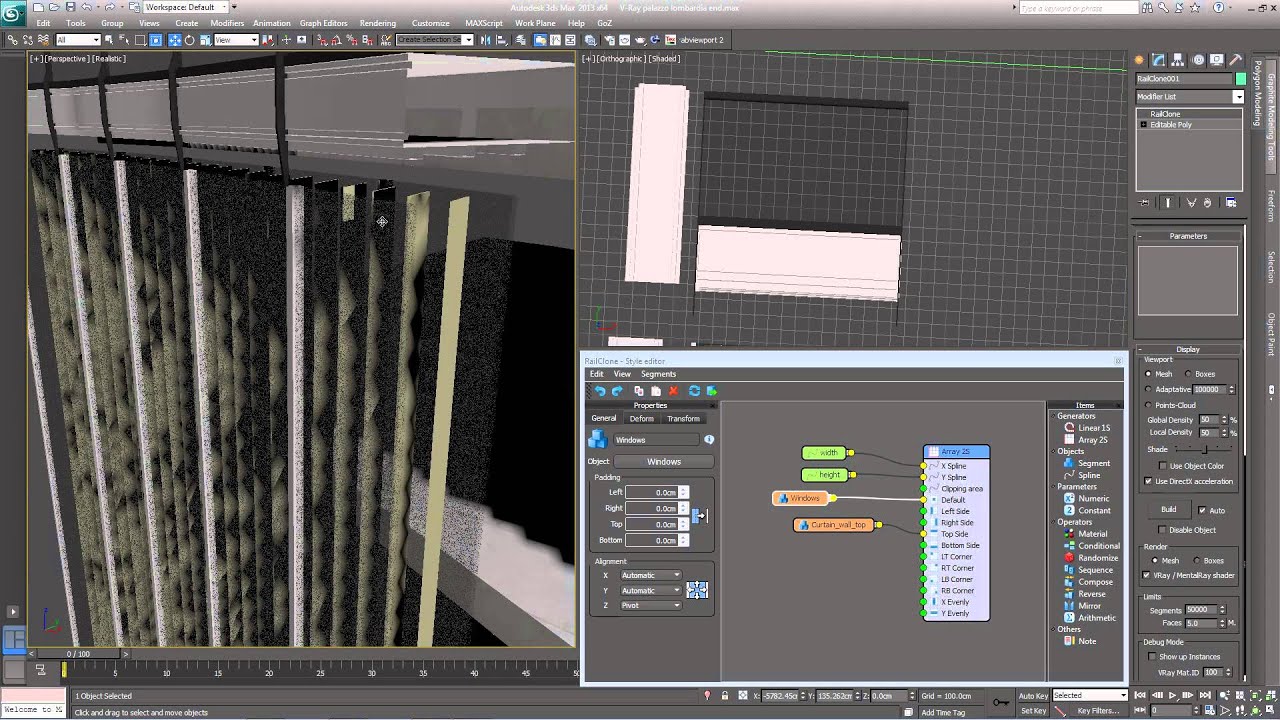
The scene.
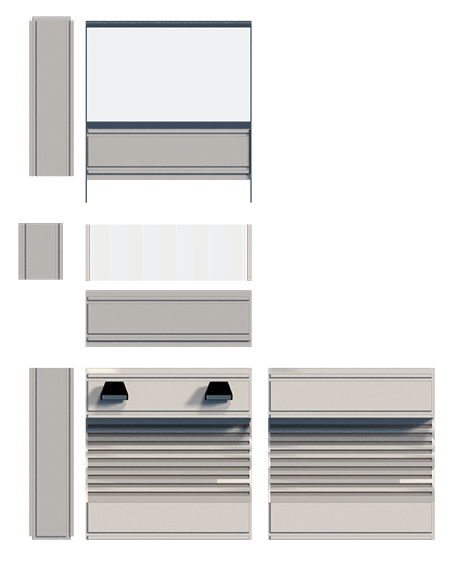
The exercise files contain all the geometry and splines required to complete this tutorial. The final wall comprises 8 small modular elements as shown below. The windows have been constructed in such a way that the the floor-to-floor height to be easily adjusted simply by repeating the window element.
There are also two splines in the scene. "Baseline" is used to determine the width of the curtain wall and was derived from the top edge of the first floor. "Wall_height" governs the height of the wall and the profile, should you want it to be curved.
Tutorial Steps.
Create a new RailClone object
To add the top segment:
With the default segments established we'll add the top to the curtain wall, this incorporates a glass railing with brackets that descend onto the windows below. We'll use the segments Transform parameters to move the geometry and create an overlap.
To add the bottom segment:
To create evenly spaced transoms:
To add the sides:
The side are now working but because the top and bottom segments are different heights, they are not aligning properly. To fix this we'll use different geometry for the top and bottom corners
This completes the curtain wall style, to see the full effect turn back on Full Length from the Base Objects rollout. To try the wall in another context there is some other geometry in the scene. To use it, try the following
- To get started we'll create a new RailClone object by going to Create>Geometry>Itoo Software>RailClone and dragging out a new RailClone icon anywhere in the viewport.
- To create a new Style go to the modify panel and find the Style rollout. Click on the Open Style Editor button (
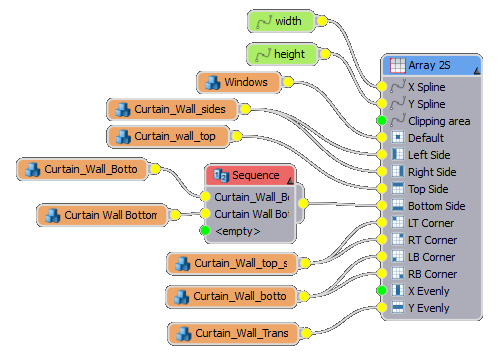
![Create a curtain wall building-rc_button_editstyle.png]() ) The image below illustrates the node tree we are going to create.
) The image below illustrates the node tree we are going to create.
![Create a curtain wall building-rc_cw_node_tree.png]()
- In the Style Editor create a new Array 2S Generator (
![Create a curtain wall building-btn_array_2s.png]() ) by dragging its icon from the Items List to the Construction view
) by dragging its icon from the Items List to the Construction view - In this example we are going to use 2 splines to determine the height and width. Drag two new Spline objects (
![Create a curtain wall building-btn_Spline.png]() ) into the Construction view.
) into the Construction view. - Rename the Spline nodes from the properties panel on the right of the Style Editor. Name one "Width" and the other "Height".
![Create a curtain wall building-cw_5.png]()
- Connect the "Width" spline node to the X Spline input and connect the "Height" to the Y Spline input of the A2S Generator node.
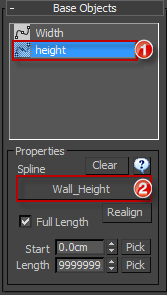
- The spline will now be visible from the Base Objects rollout in the Modify Panel. To pick a spline from the scene, click on the input name from the Base Objects list, click the Pick Spline button, then simply pick a spline from the scene. In this example, Assign the "Baseline" spline to "Width" and "Wall_Height" to "Height".
![Create a curtain wall building-cw_7.png]()
To add default geometry
Default geometry displays in the event that another input slot is not being used. In this example we'll use this slot to add the window panes to the style first.
- Drag a new Segment object (
![Create a curtain wall building-btn_segment.png]() ) from the Items List to the Construction view and connect it to the Default input slot of the A2S Generator
) from the Items List to the Construction view and connect it to the Default input slot of the A2S Generator - To see a little clearer how this style should look we'll apply the appropriate material. Open the material editor and apply the "Curtain Wall" material to the new RailClone object.
- Before going any further we'll limit the RailClone object to a small portion of the "Baseline" Spline this will restrict the amount of geometry being generated and allow the style to update responsively in the viewports while we create the style. To do this, go to the Base Objects rollout and select the "Baseline" spline. Turn off Full Length and set the Length to 500cm
![Create a curtain wall building-cw_10.png]()
- Add a new Segment node (
![Create a curtain wall building-btn_segment.png]() ) to the Construction View and choose "Curtain_Wall_Top" from the scene. Connect this to the Top Side input of the A2S Generator
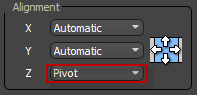
) to the Construction View and choose "Curtain_Wall_Top" from the scene. Connect this to the Top Side input of the A2S Generator - The windows and top don't align. This is because they have different depths. The Window geometry's pivot point has been positioned to align these segments but the Style is not currently using it, instead aligning to the bounds of the geoometry. To use the pivot point select the "Windows" node, go to Properties>Alignment>Z and set it to Pivot.
![Create a curtain wall building-cw_12.png]()
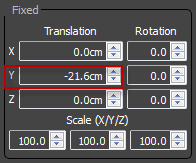
- To close up the gap between the top segment and the windows, select the "Curtain_wall_top" node, go to Properties>Transform>Fixed>Y and set the value to -21.6cm
![Create a curtain wall building-cw_13.png]()
- Create a new Segment node, pick "Curtain_wall_bottom" from the scene, and connect it to the Bottom input slot.
- To line up the segment with the floor level we need to move it down. Since we want the adjacent geometry to move as well use padding instead of transform. Go to Properties>Padding>Bottom and set it to -130cm
- There are two bottom segments in the scene, one with lights and one without. To create a pattern whereby we get a light every 6th segment we can use a Sequence node.
- Drag a new Sequence node (
![Create a curtain wall building-btn_sequnce.png]() ) into the Construction View and connect the Bottom node we just created to it.
) into the Construction View and connect the Bottom node we just created to it. - Duplicate the segment node by right clicking and selecting Copy. Right click anywhere and select paste. In the properties panel, change the new Segments geometry to "Curtain Wall Bottom 2" by picking from the scene. Wire the new segment to the second slot in the Sequence node. Now wire the node into the Bottom input Slot of the A2S generator. This will create an alternating pattern between these to items.
![Create a curtain wall building-cw_18.png]()
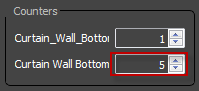
- To repeat the second segment 5 times, click on the Sequence node, go to properties and change the second segments Count to 5.
![Create a curtain wall building-cw_19.png]()
- Create a new Segment and pick "Curtain wall transom" from the scene. Wire this to the Y-Evenly slot of the generator.
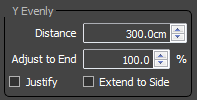
- Regularly space rows will now appear, but they're too close together. To change this click on the generator and go to Properties>Rules>Y Evenly and set the distance to 300cm to match the spacing of the floors.
![Create a curtain wall building-cw_21.png]()
- Turn of Justify to stop the first and last spaces from being equal. In this case it prevents the transoms from lining up with the floor correctly. Set Adjust to End to 100% to stop a transom from appearing close to the top of the curtain wall and turn off Extend to Side to stop them from continuing right to the edge when we add the sides later.
- Create a new Segment and pick "Curtain_wall_sides" from the scene. Connect this to the Left Side and Right Side inputs
- Go to General>Alignment>Z and set it to Pivot to correctly align the segment
- Add new Segment and pick "curtain_wall_bottom_sides" from scene, set the Bottom Padding to -130cm and ensure the Z Alignment is set to Pivot.
- Wire this to the Bottom Right and Bottom Left input slots.
- Create another new segment and select "Curtain_wall_top_sides" from the scene and wire this to the LT and RT input slots. Adjust the Y Fixed Transform settings to -21.6cm to close up the gap caused by moving the top section down in the step earlier.
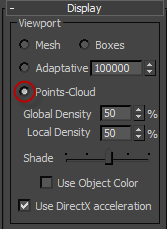
- Go to Display>Viewport and set the mode back to Points_Cloud, the other building is much larger so it's probably not wise to display the full mesh.
![Create a curtain wall building-cw_28.png]()
- Go to the layers palette and unhide the "Building 2" layer. This reveals a simple building to try the style on, there is another RC object creating a Curtain wall for the first 3 floors, we'll complete the model by adding our new wall to the upper floors.
- Ensure your curtain wall is selected and go to the Modify panel, from the Base Objects rollout select the "Width" spline.
- Click on the spline picker and select the "Cresent_baseline" spline. Your Curtain wall should update to cover the new object. Change the Viewport to "Camera_Building_2" and render to see the results.
 ) The image below illustrates the node tree we are going to create.
 ) by dragging its icon from the Items List to the Construction view
 ) into the Construction view.
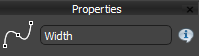
 ) from the Items List to the Construction view and connect it to the Default input slot of the A2S Generator
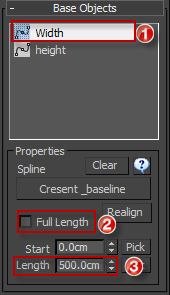
 ) into the Construction View and connect the Bottom node we just created to it.
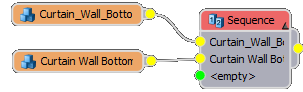
Conclusion
Having completed this tutorial you should have a good understanding of the main input slots of the A2S generator and how they relate to the finished array. You should also be able to overlap segments using fixed transformations, move segments using padding, and create sequences. For more information about every aspect of RailClone's features please see our reference section or visit the tutorials page for more advanced videos.