Requirements
- info 3ds Max, Forest Pack Pro
Welcome to a spooky Halloween edition of our Quick Tip tutorials. In this episode, we’re going to use the holiday as an excuse to explain a couple of Forest Pack tricks and hopefully a few treats!
This is an intermediate tutorial, so we’re assuming some existing knowledge of FP and cutting straight to the interesting bits! The scene starts with several Forest Pack objects already placed, they all use simple Map distribution mode and are assigned to the same surface. Each of these has been layered by using different map settings, but otherwise, there are no other fancy tricks being used.
In this tutorial, we’ll use these to demonstrate how to create rules between Forest objects so that they can react to one another. For example, in this scene, we don’t want the graves or the scrub to intersect the trees. To fix this, it’s possible to add one Forest object to the Areas list of another, and use it to exclude items from the scatter. To fix this, you would select the Graves FP object and go to the Areas list.
Next click on the little trees button to add a new Forest Area and select the trees from the scene. You will see that the graves are now excluded from around the trees.
But maybe it’s excluding too far. Forest Pack generates a spherical collision volume that’s based on the size of the tree, which may be too large if you’re really only trying to avoid intersection with the trunk. To reduce the size of the collision volume you decrease the Scale property, and that’s all there is to it! In this way, you can exclude one Forest Object from around another, and best of all, this is a live link. So if you update the tree scatter, the graves are updated too.
You can add as many exclude areas as you need. For example, the scrub in this scene used the trees as an Exclude area, and also the graves. In the latter case though we did something a little different. Instead of decreasing the Scale value, you can increase it to clear the scrub further from around each headstone.
Next let’s look at another way to use Forest Exclude areas, this time with Falloff curves to create patches of long grass that surround the trees and headstones where they’d be hard to mow.
Once again we’ll start with a scatter that’s applied across the whole surface with the trees as an Exclude area to removes the grass from around that trunks
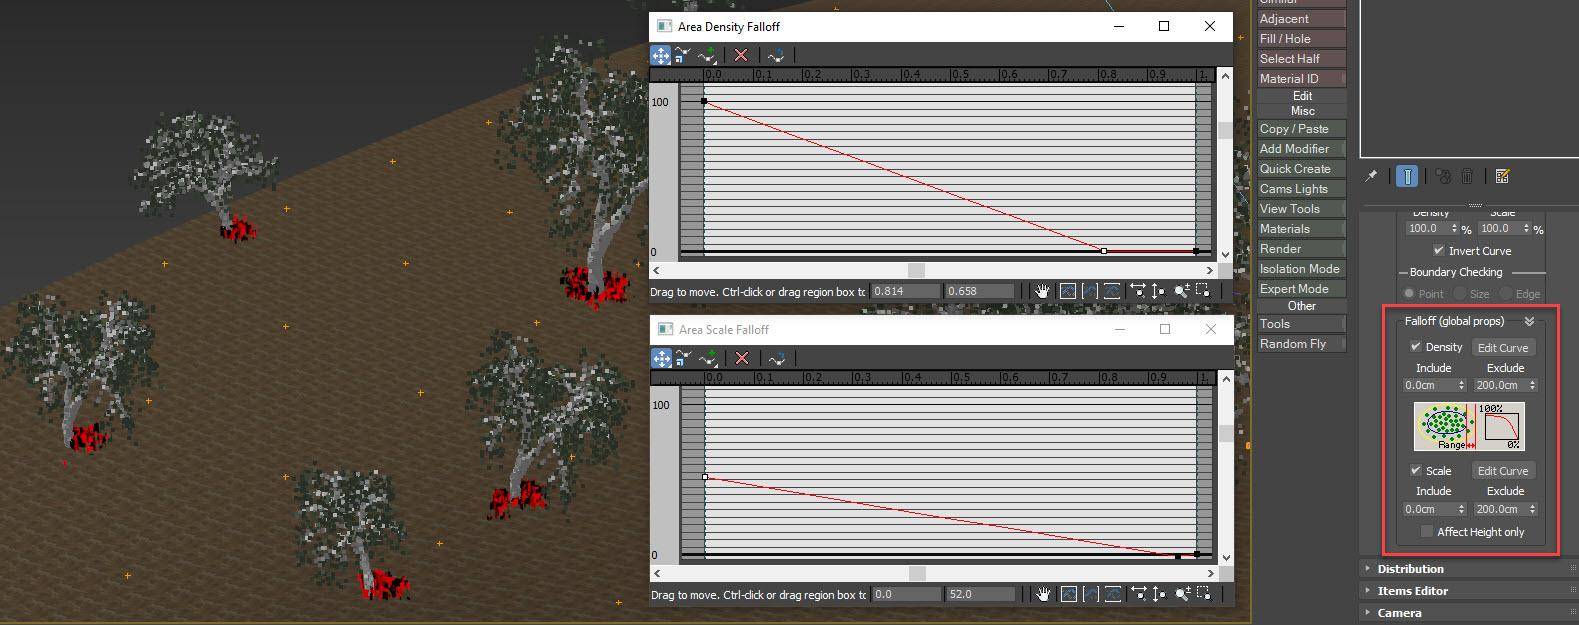
Now here’s the fun part. Instead of an abrupt stop, we can gradually lower the density of items as they reach the tree. To do that you enable Density Falloff and add an Exclude Distance value. This is the distance over which the falloff effect takes place. You would then open the Falloff Curve editor and lower the right-hand side of the graph to reduce the density of the grass at it approaches the trunk.
Exactly the same thing is possible for Scale, allowing you to decrease the grass in size as it approaches the trunk too. To create this effect, enable Scale Falloff, set an Exclude Distance, and then open the Falloff Curve Editor. Once again the right-hand side of the graph controls the size as it approaches the exclude objects.
Now here’s a handy trick. you’ll see there’s an Invert Curve option. Clicking this will reverse the density and scale curves, effectively creating the opposite effect. Now the long grass ONLY grows around the base of the trees.
By adding the Graves as another Exclude Area and inverting the curves, you can also grow long grass around the gravestones. Here’s another handy tip though: the falloff distance for each area can be controlled individually using the Falloff Affect settings. For example, to add less grass around the graves, you can simply reduce the Density percentage.
We added a grass preset from the built-in Forest Library across the surface. In this case, we only needed to remove it from the path in the foreground. To do this you go to the Areas Rollout and add a Spline area. Set the mode to Exclude and then increase the Thickness property until the grass is removed from the path. Easy as that!
Talking of this path, the last thing we’re going to talk about are the pumpkins, which use a different distribution mode that allows you to scatter items at regular intervals along a path. Let’s explain this one from the start.
- First, create a new Forest object in Icon mode.
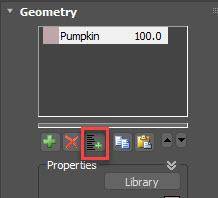
- Go to the Geometry rollout. The pumpkin is actually a group that contains lights and geometry. In order to add a group to the Items list, the easiest way it to click on the Add Multiple button to open the object picker. Find and select the group you wish to select.
![]()
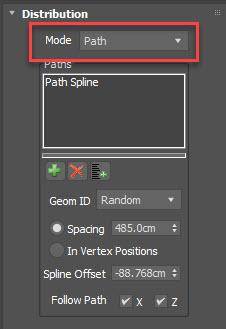
- Go to the Distribution rollout and change the mode to Path. Click on the + icon and select the splines you’d like to use from the scene. The distance between objects is then set using the Spacing property (or you can also choose to put items only on Vertices if you prefer).
![]()
- You can also offset the items, in this case, to move them to the side of the path.
- Finally, Add some randomisation by enabling Transform>Random Rotation and Scale.
- That creates one side of the path. To create the other, simply duplicate the Forest Object, making sure that it’s a copy, and then negate the Offset value. That’s the pumpkins and the rest of the scene, done!
One final thing though … There was a not too hidden clue in what we just discussed about one of the features coming soon for Forest Pack. Did you spot it?
Until then. thanks for watching and stay tuned for more exciting news (and tutorials) coming soon.