Requirements
- info Forest Pack 7
From Forest Pack 7 and onwards, Corona users can now scatter and randomise animated objects. All 4 of Forest Pack’s animation modes are supported so users can scatter items that follow the source geometry, randomise the starting point of animations, offset them using a map, and control the absolute frames using a texture. Let’s take a closer look at how these work
Follow Geometry
The first thing you need to do is select an Animation Mode. To do this, open the Animation rollout and . We’ll activate the first option, called Follow Geometry. In this mode, the items scattered with Forest Pack simply match the source geometry. All items will move at the same time.
Random Samples
The second option randomises the starting frame of the animated objects. This will allow you to use a single animated model to create a lot of variation by starting instances playing from randomly selected points offset along the timeline.

You'll notice when you activate Random Samples mode that the Time Offset and Count parameters become available. These are used to control the number of sample points and the distance between them along the timeline. To create these points, the Count parameter defines the total number of samples, while Time Offset determines the number of frames between them, starting from frame 0.
Random from Map
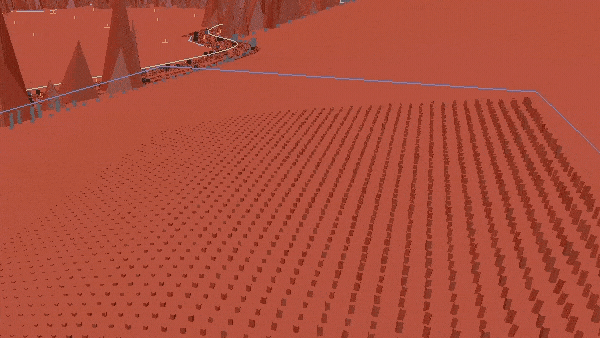
The next mode uses the same settings, but this time a map can be used to precisely specify the placement of a sample point from which the animation will start.
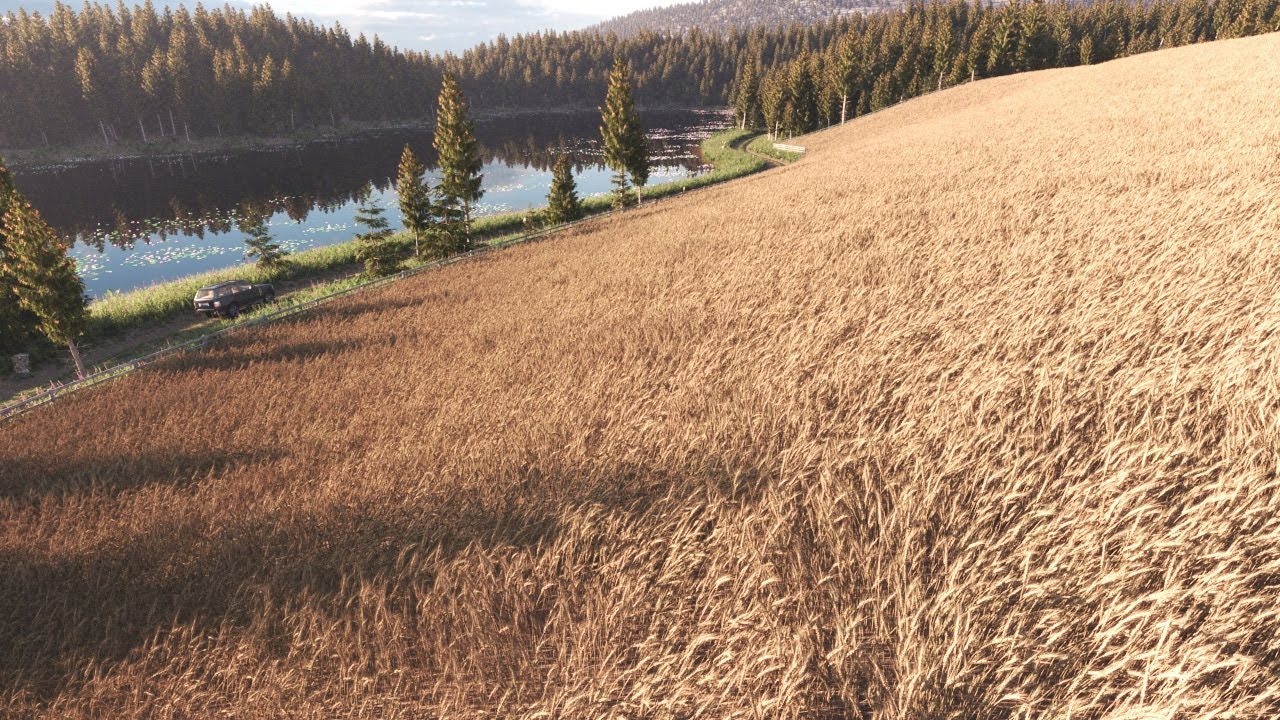
This can be useful in many situations for example, in the demo scene we used a simple noise map to create the effect of wind blowing across the field of wheat in waves.
Frame from Map
The final mode works a little differently. Instead of creating a number of equally spaced sample points along the timeline from which the animation will start playing, Frame from Map mode allows you to define a range of frames using the Start and End parameters. A grayscale map is used to control the absolute frame displayed from this range, based on a grayscale value.
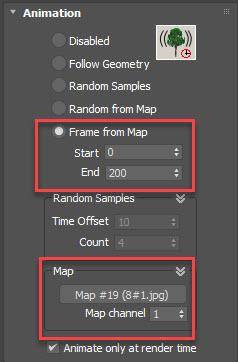
Scrubbing the timeline in this mode will not result in animation playback. Instead, to control the animation the grayscale value itself needs to be animated. This can be useful for things like growth animations or when you want animations to look as though they are reacting to other events in the scene.
We hope you agree that Animation modes are an incredibly powerful tool, we’re delighted that users will now have access to them whether they use Corona, V-Ray, or both.