Resources
Requirements
- info RailClone Lite or Pro
In this introductory tutorial, we’ll build a fully parametric balustrade system using RailClone in 3ds Max. If this is your first time working with RailClone, the goal is to help you understand how the plugin works - how it distributes geometry, how segments behave, and how to keep things modular, reusable, and editable.
RailClone is available in two editions: the free Lite version, which includes a limited feature set, and the fully-featured Pro version. Both can be used for this tutorial. Where there are differences between the two, we’ll point them out during the relevant steps.
Segments and Base Objects: The Building Blocks
Before we look at the RailClone setup, it's important to understand the components that make up a procedural style. At its core, RailClone is about combining geometry which we call Segments along Splines using a set of Rules to generate a parametric object. Let’s look at each of these in more detail
Segments
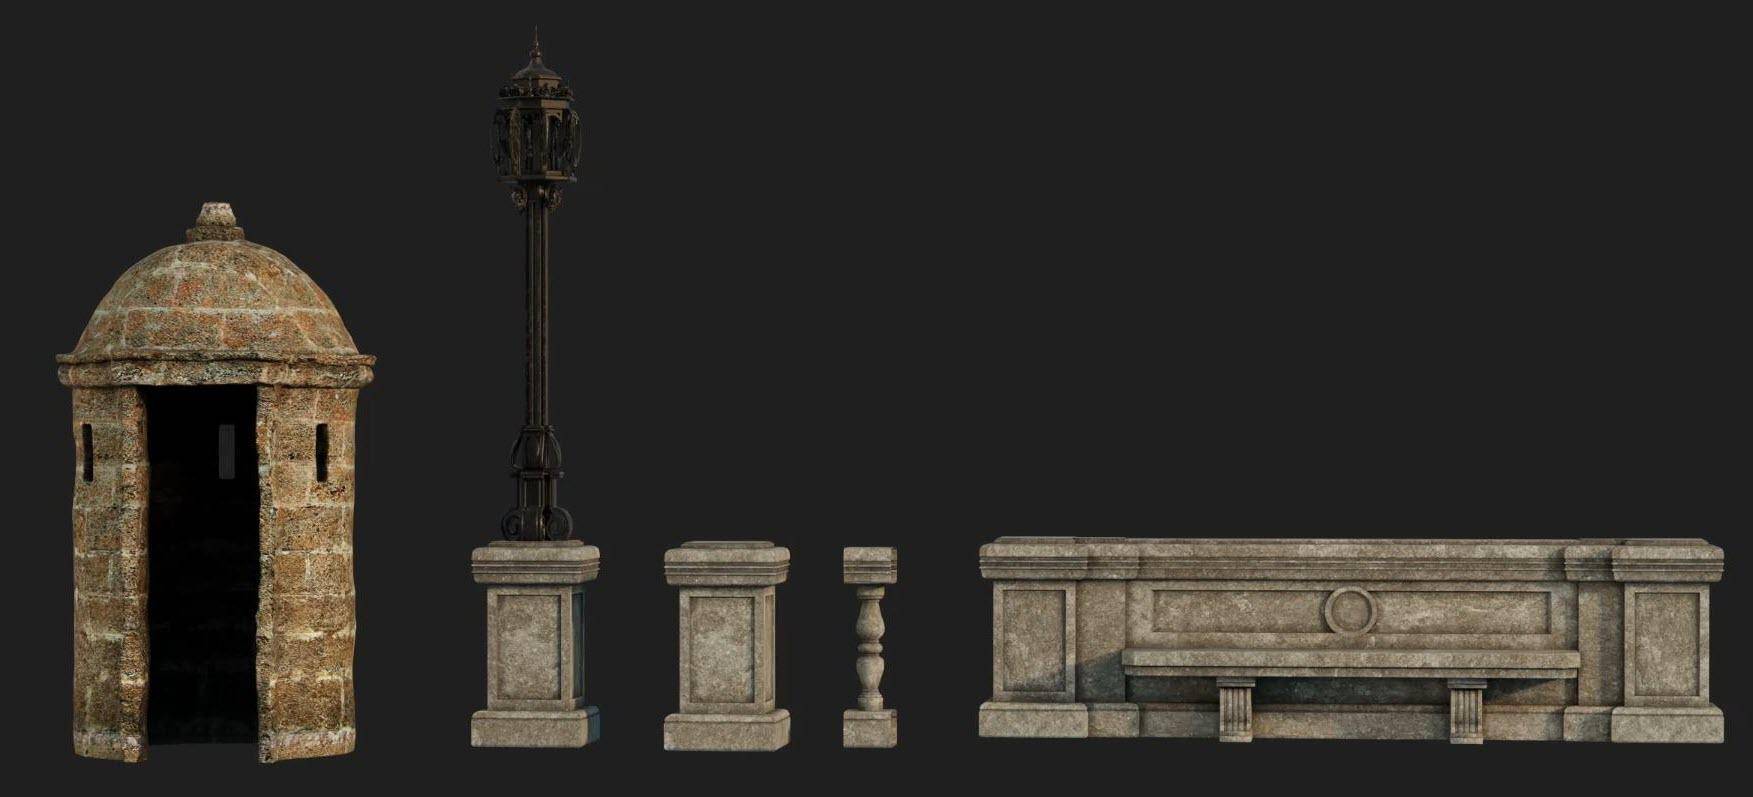
Segments are the mesh objects that RailClone distributes along a path. Each one is a piece of geometry from your 3ds Max scene. In this tutorial, we use several segments:
- A Balustrade which is the main repeating section.
- A Post which is placed at the start and the end of the spline.
- A Streetlight which is placed at evenly spaced intervals. (Pro Only)
- A Lookout Post which will be placed on the corner knots of the spline.(Pro Only)
- And finally, a Bench, which can be placed at specific locations using markers
To get started we need to import these objects into a new RailClone graph by doing the following:
- Create a new RaiClone object by clicking the toolbar button, or using the Command panel
![UI Toolbar]()
- Drag a RailClone icon in the scene.
- Go to the Modify panel and open the Style rollout
- Enable Use Segment Material so that RailClone renders the material on the source objects rather than directly applied the RailClone object
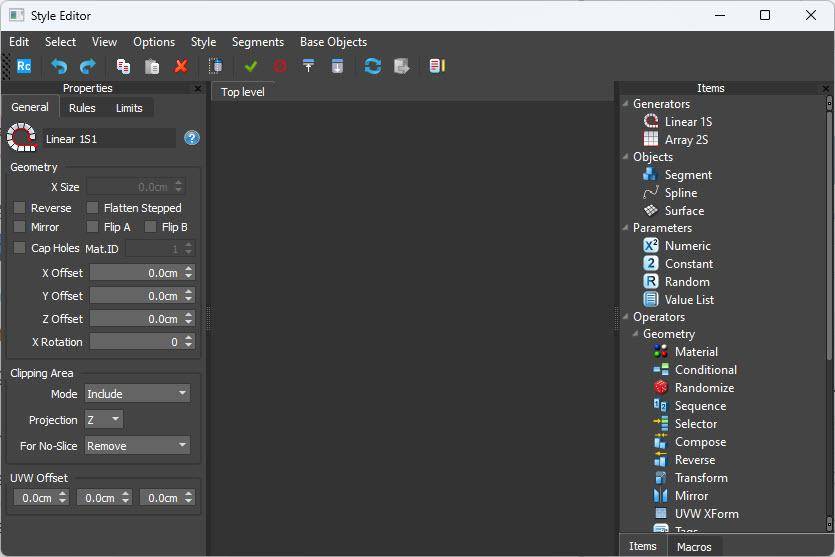
- Click the button to open the node-based style editor.
- This editor is easy to understand, on the right you have all the available nodes, on the left you can view and edit the parameters of a selected node, and in the middle is where you construct your graph.
![UI Graph Editor]()
- To import multiple segments from the scene, the easiest way is to select them in the viewport. Then Right-click in the style editor and select Import Scene Selection.
![UI Import Scene Selection]()
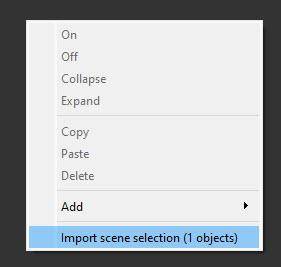
(Note that Lite users have a maximum of 3 segments they can import and should choose the balustrade, post, and bench to follow this tutorial.)
Splines
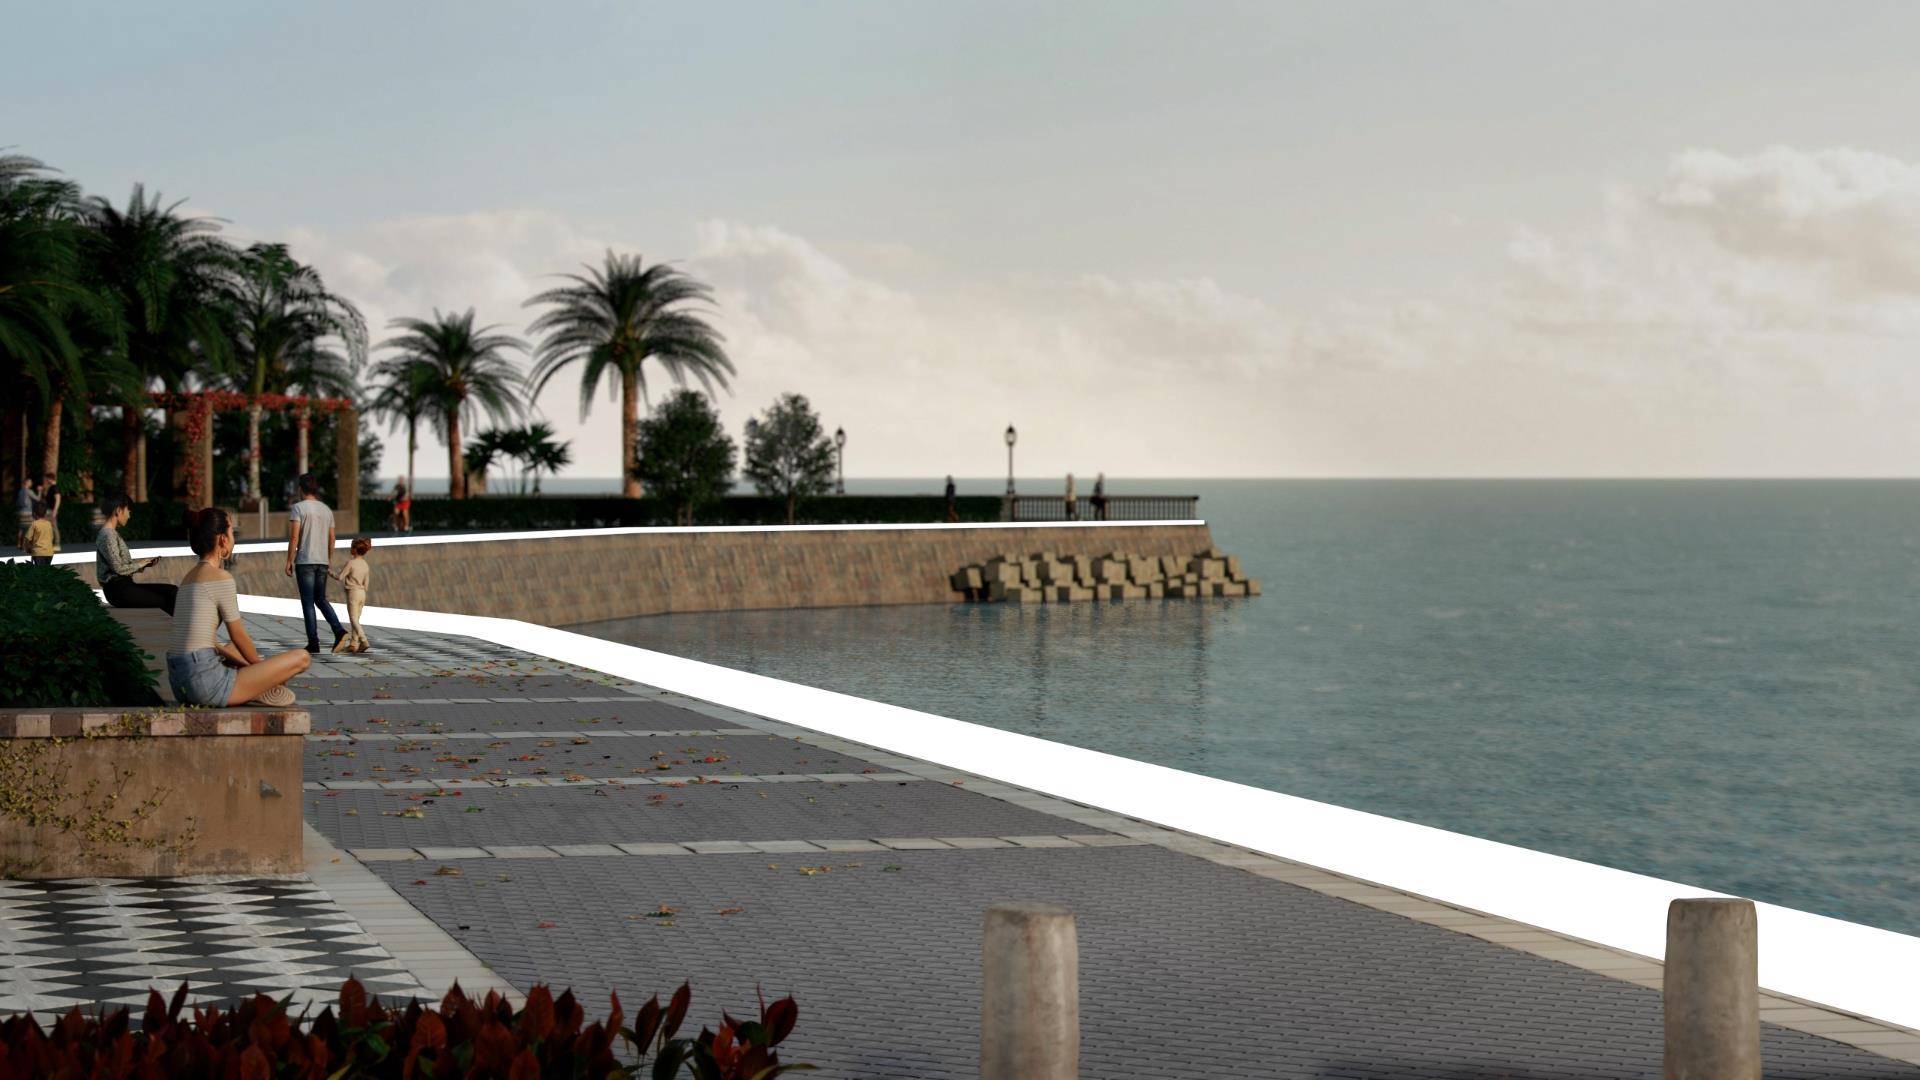
The Path defines the route along which all the segments are arranged and deformed. In our example, the path follows the edge of the promenade. Let’s import it into our graph
- Add a new Spline node in the RailClone graph.
- Go to the Properties panel and use the Object Picker button to select the Spline from the scene.
Collectively we call segments, splines (and surfaces though they are not used in this tutorial) Base Objects. Now we have them in the graph we can start creating the rules that govern how the geometry is assembled using a new type of node called a Generator.
Creating Rules: Generators

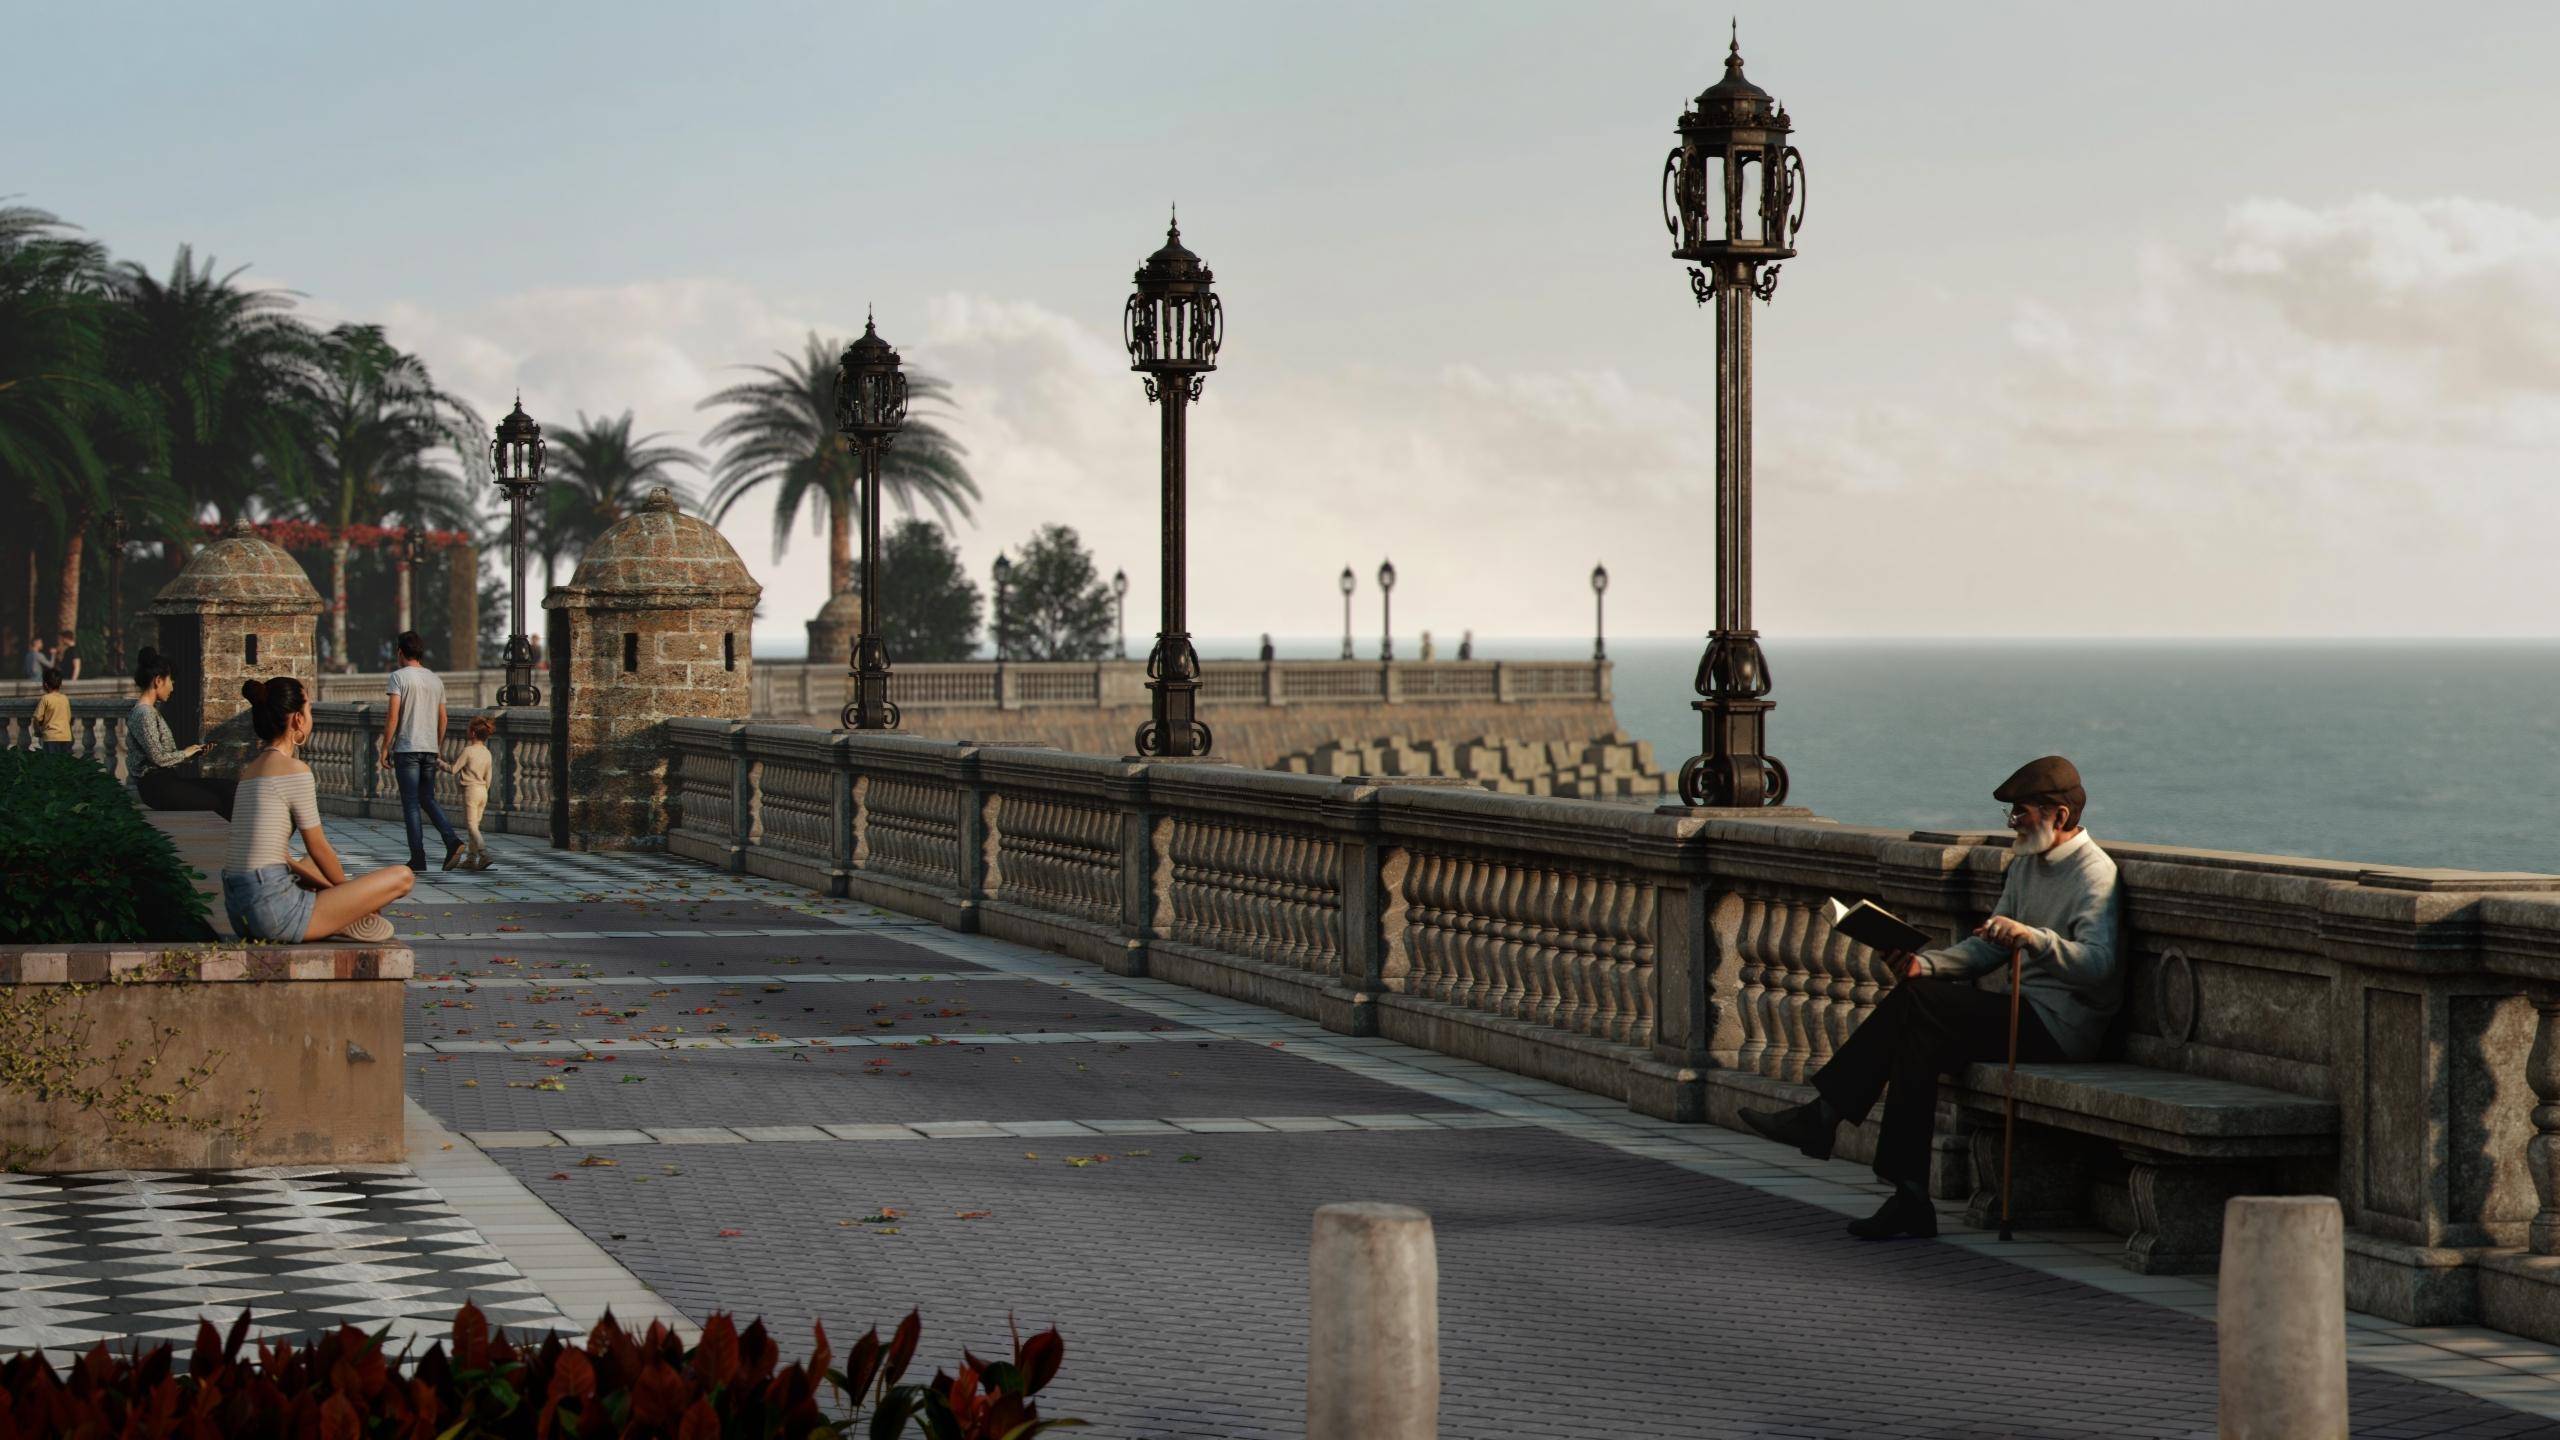
Generators are the core of a RailClone style. They take a spline and use it as a guide to distribute geometry based on a set of rules. In this scene for example we have a continuous balustrade, punctuated by posts and lights at regular intervals, with guard houses on the corners. There are only two types of generators to learn, and for this tutorial, we’ll use the simpler one: the Linear (or L1S) Generator.
Let’s connect our segments and adjust the settings to see how it works.
Adding the Balustrade
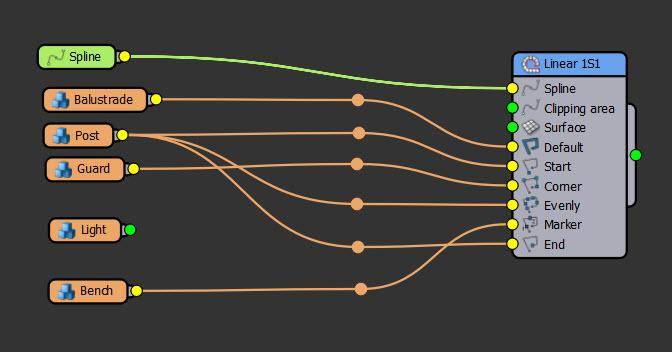
Add an L1S Generator and then connect the balustrade segment to the Default input. This tells RailClone to repeat it continuously along the entire path. You can control how this Default segment is distributed using the Rules tab in the generator’s settings. If you’re looking for layout options for any of the specific inputs, then this is always the place to find them.
At the top of the Rules tab, you'll find four Default Modes that control how the segment is placed along the path:
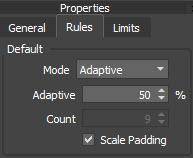
- Tile repeats the segment without scaling. When segments reach a corner or the end of a path, they are sliced to fit.
- Adaptive automatically scales segments so they fill the spline section exactly. This avoids slicing and is more efficient, as it allows more geometry to be instanced.
- Scale stretches a single segment to fill the spline section.
- Count fits a specified number of scaled segments along the spline section.
For this example, Adaptive is likely the best choice, as it avoids partial balustrade elements and optimizes instancing.
Adding Posts with the Evenly Input
Next, add the Posts segment to the Evenly input. This input distributes segments at regular intervals along the path which is ideal for elements like posts or supports that appear at fixed points rather than continuously.
Once connected, you can adjust the spacing and other properties from the generator’s Rules tab:
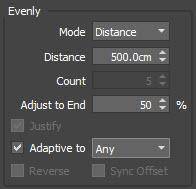
- Mode controls how spacing is calculated. Choose Distance and adjust the value to place a segment every set number of scene units, or Count to define a fixed number of evenly spaced segments along the spline section. We’ll use Distance in this example.
- Justify redistributes the segments along the spline so the first and last in each section are equally adjusted, with the rest spaced exactly using the distance value.This creates a symmetrical distribution that avoids the final section being larger or smaller than the start.
- Adaptive is similar to justify, except this option subtly adjusts the spacing of all the segments slightly to maintain an even spacing. For most uses this is the most suitable unless the Distance value must be retained perfectly.
You can experiment here - it’s all fully parametric, so you’ll see instant updates as you tweak values.
Adding Posts at the Start and End
To place a post at both ends of the spline, connect the segment to the Start and End inputs of the generator. These inputs are used to add specific geometry, once at the beginning and once at the end of each spline section.
These inputs don’t have any specific rules in the generator’s tab.
Segment settings
If you look closely at the posts, you might notice that the balustrade doesn’t align cleanly where they meet. This often happens when the handrail or another part of the geometry has a specific shape or offset that leaves a visible gap or overlap.
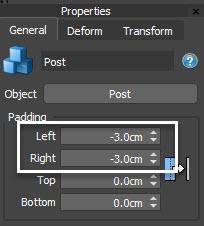
To fix this, we can use Padding, a setting found in the segment’s Properties rollout. Padding lets you adjust the spacing at the start or end of a segment, effectively adjusting how it connects to the surrounding pieces.
To fix the alignment using padding:
- Select the post segment in the RailClone style editor.
- In the Properties panel on the left, look for the Padding section.
- Decrease the Start and End Padding value slightly. This causes the posts to slightly overlap with the balustrade, closing up the gaps caused by the shape of the moulding.
Adding Corners
Now let’s wire a segment at the corners of the spline.
For Lite Users:
Since RailClone Lite has a restriction on the number of segments, you’ll need to reuse the same Post segment for the Corner input.
For Pro Users:
Pro users can add a different segment to the Corner input - in this case a kind of battlement, or gatehouse.
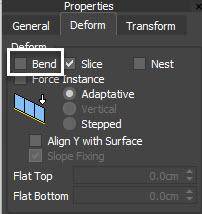
Once a segment is connected to the Corner input, RailClone will attempt to deform it to follow the curve by default. To stop this:
- Select the Corner segment node.
- In the Properties panel, open the Deform section.
- Disable Bend to stop the segment from curving around the corner.
![UI - Deform Options]()
- If there’s a visible gap between the corner and adjacent segments, you might also want to adjust the Padding values on the segment to bring them closer together, just like we did with the posts earlier.
Once the corner piece is connected and the segment configured, a few key settings in the generator’s Rules tab can be edited to further control how the geometry behaves:

- Vertex Type should be set to Corneror Bezier Corner. This tells RailClone which vertex types to consider as corners and place the attached geometry.
- Align to Path should be enabled to make sure the segment’s orientation bisects the angle of the corner. If this is disable the segment follows the direction of the preceding spline section.
- Finally, Bevel Mode should be set to None. This prevents the Default segments from continuing through to the corner, so only the corner segment appears there. The other modes allow the default segments to continue to the corner and give you options for how to slice the segment.
Placing Benches with Marker Input
There’s one last input we haven’t used yet - Markers. This input allows you to place a segment at any position along the spline, independent of the evenly spaced or corner rules.
To use it, apply the RCSpline modifier to the spline. This modifier lets you define custom positions directly in the viewport by clicking on the spline and adding markers. It’s ideal for placing items like benches, signs, lights, or any feature that needs manual positioning.
To add benches using markers:
- Connect the bench segment to the Marker input of the generator.
- Select the spline in your scene.
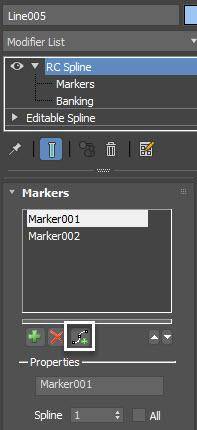
- Apply the RCSpline modifier (found under the Modifier list).
- In the modifier’s settings, click the Add Multiple Markers button and click on the spline where you want a bench to appear. If you want to edit the location of a bence, you can go to the Markers sub object level and use Max’s Select and Move tool to easily make adjustments. You can move, delete, or reposition markers at any time in this way to fine-tune the layout.
That wraps up the different inputs you can assign geometry to in a Linear Generator. But we’re not done yet there are two more key node types to explore: Operators and Parameters.
Using Operators
Operators are a central part of RailClone’s workflow. They control how segments are combined, repeated, or modified - much like modifiers in 3ds Max. You can use them to group items, create patterns, randomize geometry, adjust UVs, process splines, and more.
In this section, we’ll use one of the simplest and most commonly used nodes: the Sequence operator. It’s ideal when you want to create a repeating pattern and in this example we’ll use it to alternate between posts and lights at regular intervals:

Setting up a post-light pattern with the Sequence operator:
- Drag a Sequence operator between the Post and the Evenly input of the generator.
- Wire the Post and Light segments into the Sequence node, in the order you want them to appear.
This will create a repeating pattern along the spline - Post, Light, Post, Light, and so on.
Adding parameters for easy reuse
Now that we’ve created a basic style using inputs and operators, let’s make it more user-friendly. To do that, we’ll use Parameters - a category of nodes that let you control values from the Modify panel, without needing to open the Style Editor.
Parameters can be used to adjust numeric values, toggle geometry visibility, change materials, and much more. They’re especially useful when you want to share a RailClone object with someone who doesn’t need to edit the style itself.
In this example, we’ll add a Numeric parameter to control the Evenly spacing.
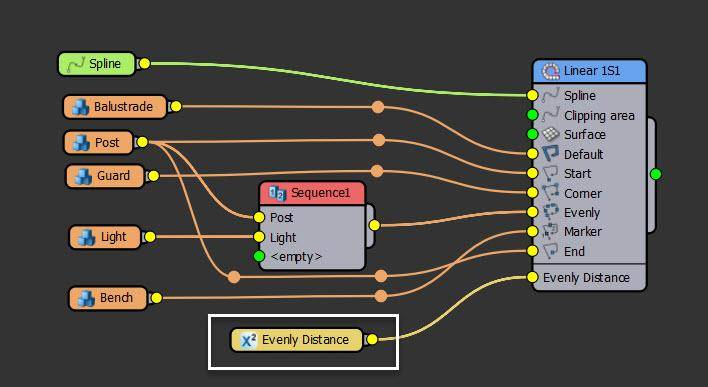
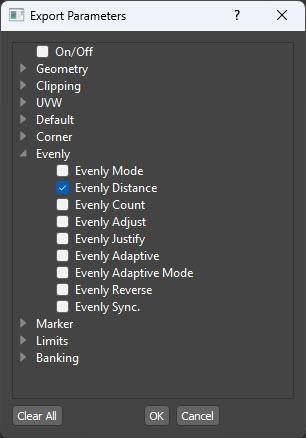
- Right click on the Generator and go to Export Parameters. Navigate to Evenly > Evenly Distance, tick it and click OK. This will add a new input to the generator.
![The Export Parameters UI]()
- Add a new Numeric node to the graph, and wire it to the new input.
- Set the type to Scene Units.
- Give it a name like Evenly Spacing.
- If you check the Modify panel, (click the red RC logo to reselect the RailClone object) you will see this new value in the Parameters rollout.
![UI the Parameters rollout]()
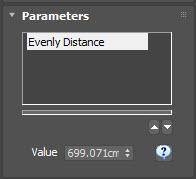
You can now change this value directly from the Max interface. You can also edit the spline or the markers - the whole thing can be updated as your project evolves!
In this tutorial, we’ve built a complete parametric balustrade using RailClone - from importing segments and defining layout rules, to using operators for patterns and exposing parameters for easy control.
Want to go deeper? Check out our other tutorials for more in-depth training and stay tuned for many more new tutorials coming soon.