Requirements
- info 3ds Max, RailClone Lite or Pro, Forest Pack Pro
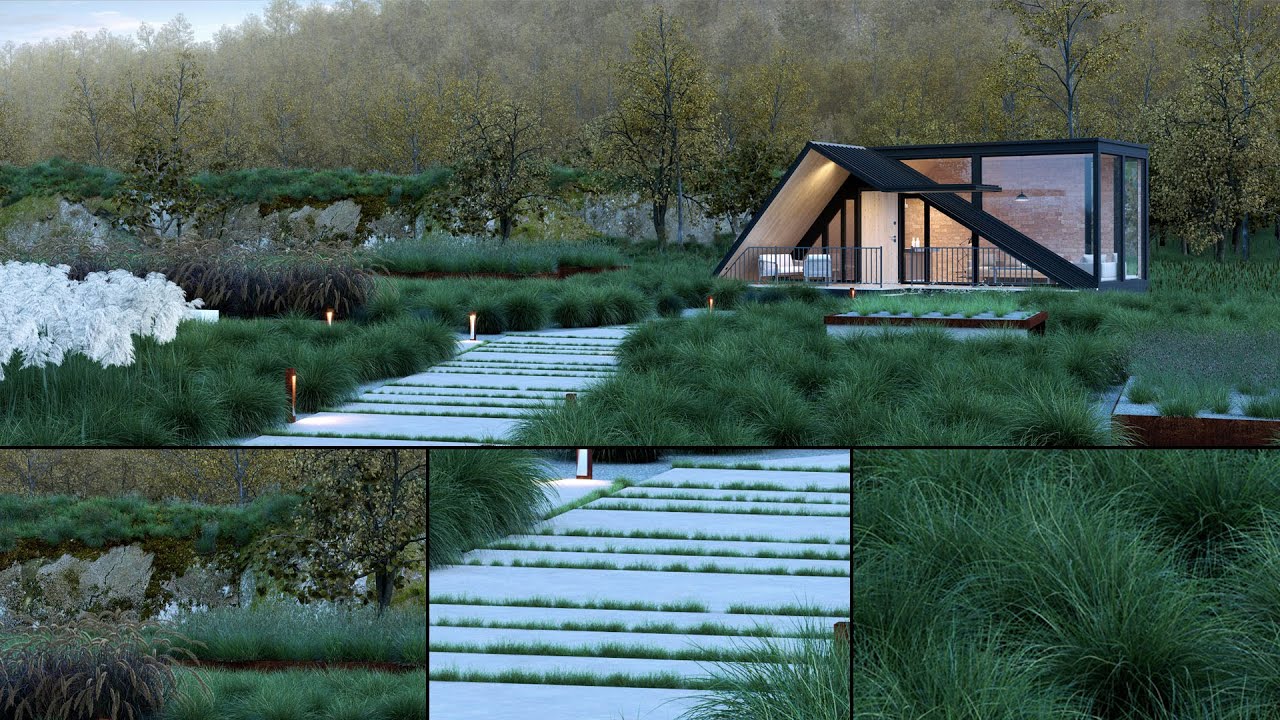
In this making-of tutorial, we’re going to demonstrate how you can use the Field Grass and Plants library by The3DGarden to quickly create impressive environments. This library includes 75 plants and 24 presets all designed to integrate with Forest Pack to easily create fantastic environments in very little time.
In this tutorial we’ll demonstrate :
- How to use the ground cover presets
- How to use overlay presets
- How to create your own custom scatters and use the brush tools
- Scattering different plants per area
- How to use RailClone to create a rock face that can be scattered on by Forest Pack
- How to add grass between the paving and more.
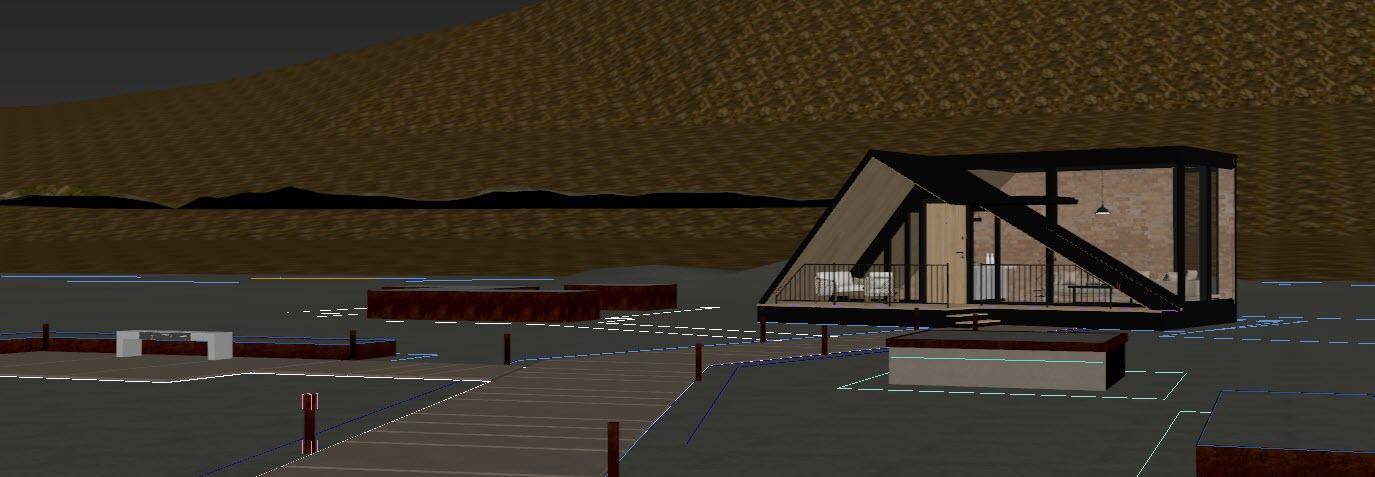
This tutorial is a making-of for the scene created by The3DGarden team, so we won’t be showing every step. Also to save time the tutorial starts with the bare bones already in place. We'll start by explaining how to add the plants in the easiest way possible … using presets.
Using Field Plants and Grasses presets
Presets are the simplest way to use Forest Pack. All the hard work has already been done for you, and all that you need to do is pick the style you like from the library and tell it where to scatter. To illustrate how presets work, we used a grass preset to cover the large area in the foreground of the image.
There are two ways to select a preset, either before or after you’ve created a Forest object. To start by picking the preset first:
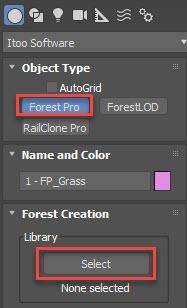
- Go to the Create panel and find the Geometry > iToo Software group.
- Select Forest Pack.
- Press the Library > Select button to open the Library Browser.
![Library button]()
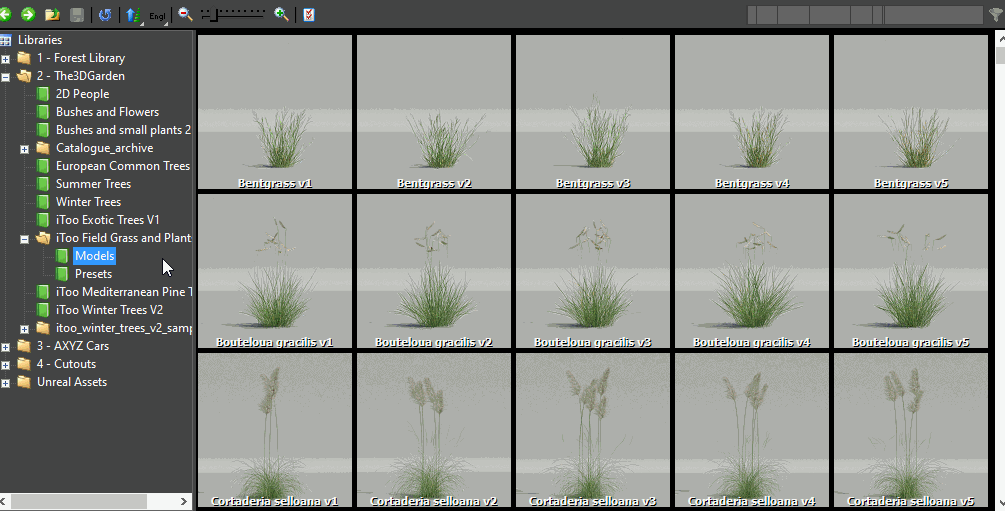
- Select a preset. This library is split into two folders, one for individual plants, and a second that includes 24 presets. These are ready-made collections of models with all the scatter settings already configured.
![LIbrary Contents]()
- In this scene, we started with the Common Grass preset. Select it and click Import selected.
- Now select a spline from the scene and that’s it! The preset is now scattered inside the spline.
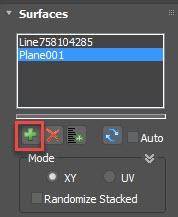
- If you picked a spline but you need to follow an uneven terrain, you may need to go to the Surface rollout and add the terrain to the Surfaces list.
![Surfaces]()
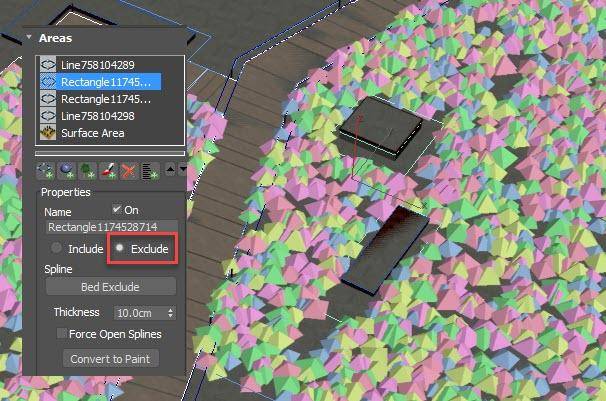
- You can add as many additional Areas if necessary. Here, for example, we added the spline areas that surround the raised beds. By setting these to Exclude we removed the grass. We also added the area in the front left side of the path. As you can see, very quickly we were able to populate this whole area with grass.
![Exclude Areas]()
Now let's use another preset to fill in the other side of the path. This time we’ll demonstrate how to select a preset after the FP object has already been created
- Go to the Create panel and find the Geometry > iToo Software group
- Select Forest Pack
- If you right-click on the Library Select button, it ensures that no items that were previously selected in the library are used.
- Click in the scene to select a spline or a surface. We selected a spline to the left of the house.
- We also removed items from around the raised beds by adding this existing spline and setting the mode to Exclude.
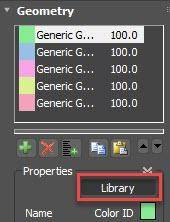
- Now let’s load a preset. Open the Libary Browser from the Geometry rollout. Select a preset and click import selected.
![Library Button]()
As you can see, using presets is straightforward and if you want to swap a preset, you can do so at any time by simply loading another from the library. All the new assets and settings will be imported, replacing the existing. Existing Areas, however, are retained, so there’s no need to update them again.
Also, remember these presets can also be used as a starting point so you can go in and edit any attribute. For example, in the foreground, we removed some of the items being scattered so that we are left only with one type of grass.
Several other presets are used in the scene, for example, the raised beds each use a different preset. The only difference was that this time instead of selecting a spline we selected the surface the defines the top of the bed.
Using Overlay Presets
Some of the presets have been designed to work as an overlay, you can generally tell these by the amount of space between the plants. These work great when added as a new layer on top of another Forest Pack object, in that way you can build up really nice grass mixes while retaining a high level of control. To demonstrate, in this scene we added some taller grass varieties to the right of the building. The process is more or less the same.
- Create a new Forest Pack object by clicking a spline in the scene. Add other areas as required
- Open the Library Browser and select an Overlay Preset.
- That’s it. When this combines with the existing grass in this area you get a more convincing mix of species.
Creating your own mix of plants
Sometimes instead of using a preset, you might want to create a custom mix of plants. To do that:
- Create a new Forest Pack object, this time we picked the terrain.
- Open the Library Browser. We used the Field plants and grasses Models library. Here you will find 75 individual plant models in 15 species you can use to create your own bespoke scatters.
- Pick the assets you want to use, holding down Ctrl while you click to select multiple items. When you are done, click Import Selected.
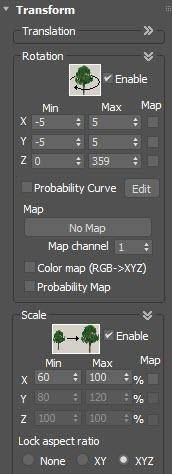
- Next, go to the Transform rollout and enable Scale and Rotation randomisation. Change any settings as desired. For example, here we slightly widened the range of Scale randomisation.
![Transform Settings]()
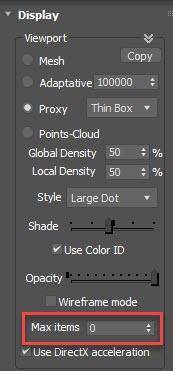
- Next, we set the density. Go to the Distribution rollout and pick a scatter pattern. Decrease the Density value to increase the number of items scattered. Remember that Forest Pack limits the number of items previewed in the viewport. The number of items that can be shown is set in the Display rollout (it doesn’t affect the number of items rendered). Setting this value to 0 removes the limitation completely, but use it with caution!
![Display Settings]()
- So far so good, but the grass is scattered on the entire terrain. In this example, we used Forest Pack's Brush tools to paint these plants precisely where we wanted them. To use these tools, go to the Areas Rollout
- Disable the Surface Area.
- Add a new Paint Area
- Click on the Paint button and draw on the terrain to place items. To increase the size of your brush, open the Painter Options and increase the Max size.
![Paint tools]()
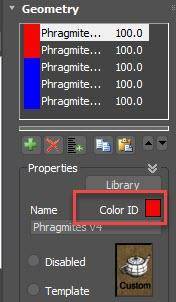
- Sometimes you might want to see more clearly which models are being scattered. One way to do this is by tinting the Points-Cloud or proxy using the Item’s Color ID. To do this, give each model or group of models you’d like to identify a distinct colour. We used Red and Blue.
![Colour ID]()
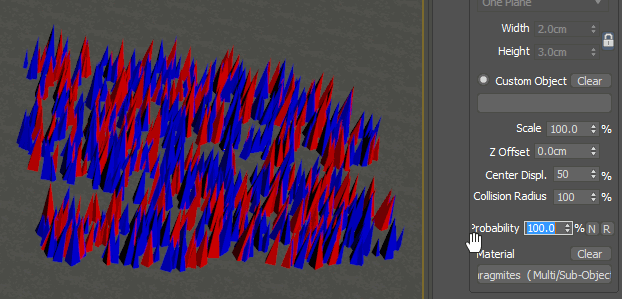
- Next, go to the Display rollout and enable Use Color ID. This makes it much easier to see what’s going on in your scatter. For example, we can now visualise the effect of changing the item’s probabilities much more easily.
![Probability]()
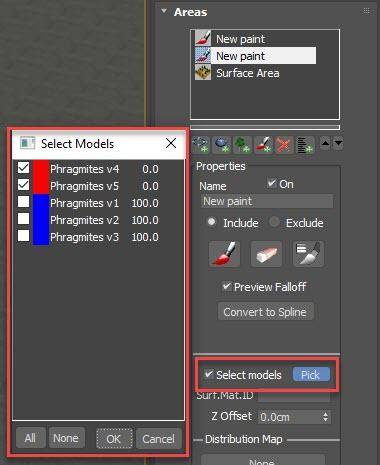
- While we’re here, we’ll just demonstrate another handy but often overlooked feature of Include areas. When you have multiple models like this, it’s actually possible to select which items are scattered per area. For example, if I only wanted to scatter one species in the area we just painted, we would turn on Select Models and click Pick to open the Select Items dialog. Just check the items you wish to display in this area.
![Selecting Models]()
- We added another paint area, enabling Select Models and choosing the other species. In that way, you can paint two different species exactly where they are needed but using just one Forest object. Pretty useful!
Scattering on RailClone objects
For a bit of fun, we wanted to demonstrate how the rockface in the background was created using RailClone, combined with Forest Pack to add some grass to the ridge. This part of the scene uses several rock assemblies from Quixel’s Megascans collections. They have been rotated into a vertical position and positioned so that their tops more or less align. We then reset the XForms and set all their pivots to a common point on the Z- Axis. We also combined the Materials into a multi-sub object material and reassigned IDs accordingly.
We can now use RailClone to deform these assets to follow a spline. Here’s how we did it:
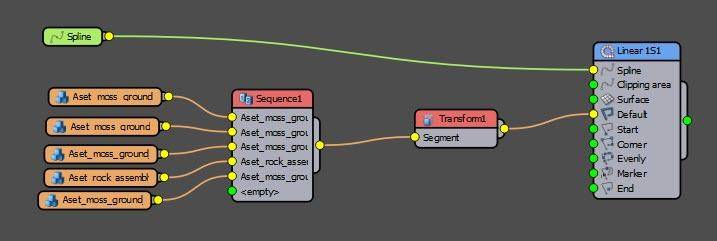
- First, create a new RailClone object
- Open the graph editor and add a Segment node. Right-click on the Segment node and select Clone Multiple.
- Pick the rock assemblies from the scene.
- To avoid immediate repetition and because this is a short run, we ran these through a Sequence Operator. This creates a simple repeating pattern along the spline.
- Next, Create an L1S generator, wire the Sequence operator to its Default input.
- Create a Spline node, wire it to the Generator’s Spline input and select a path from the scene. The rocks now deform along the path, but we need to adjust the pivots and overlap them. Instead of doing this for each Segment Node, we can add a Transform node after the Sequence operator. This allows us to make changes to all the items in one place.
- To overlap the geometry, we enabled Padding and used a negative value.
![Padding]()
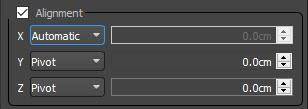
- Finally, we enabled Alignment and changed the Y and Z axes to use the Pivot we set up earlier.
![Alignment]()
- Assign the material.
- We wanted to hide the top of the ridge a bit by scattering some grass on it with Forest Pack. That’s no problem, all we needed to do was to make sure to disable RailClone’s instancing engine. In this case, it won’t make any difference anyway since the geometry is being deformed to follow the spline.
- We’ll demonstrate how to add some grass to the top of this using this existing grass Forest Pack object.
- Open the Surface rollout in Forest Pack
- Add the RailClone object to the Surface list. Items are scattering on the entire cliff face, but we can limit this in a couple of ways.
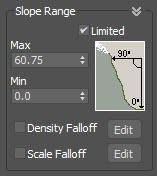
- First of all using Slope Angle, which will allow you to stop the grass growing on areas that are too steep
![Slope Angle Settings]()
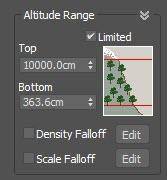
- And secondly, by Altitude, so we can have the grass growing only on top of the rocky outcrop.
![Altitude Settings]()
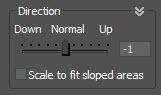
- Another setting you might want to consider in a situation like this is the Normal slider. Moving this to the centre will cause the grass to align the surfaces normals.
![Normal Slider]()

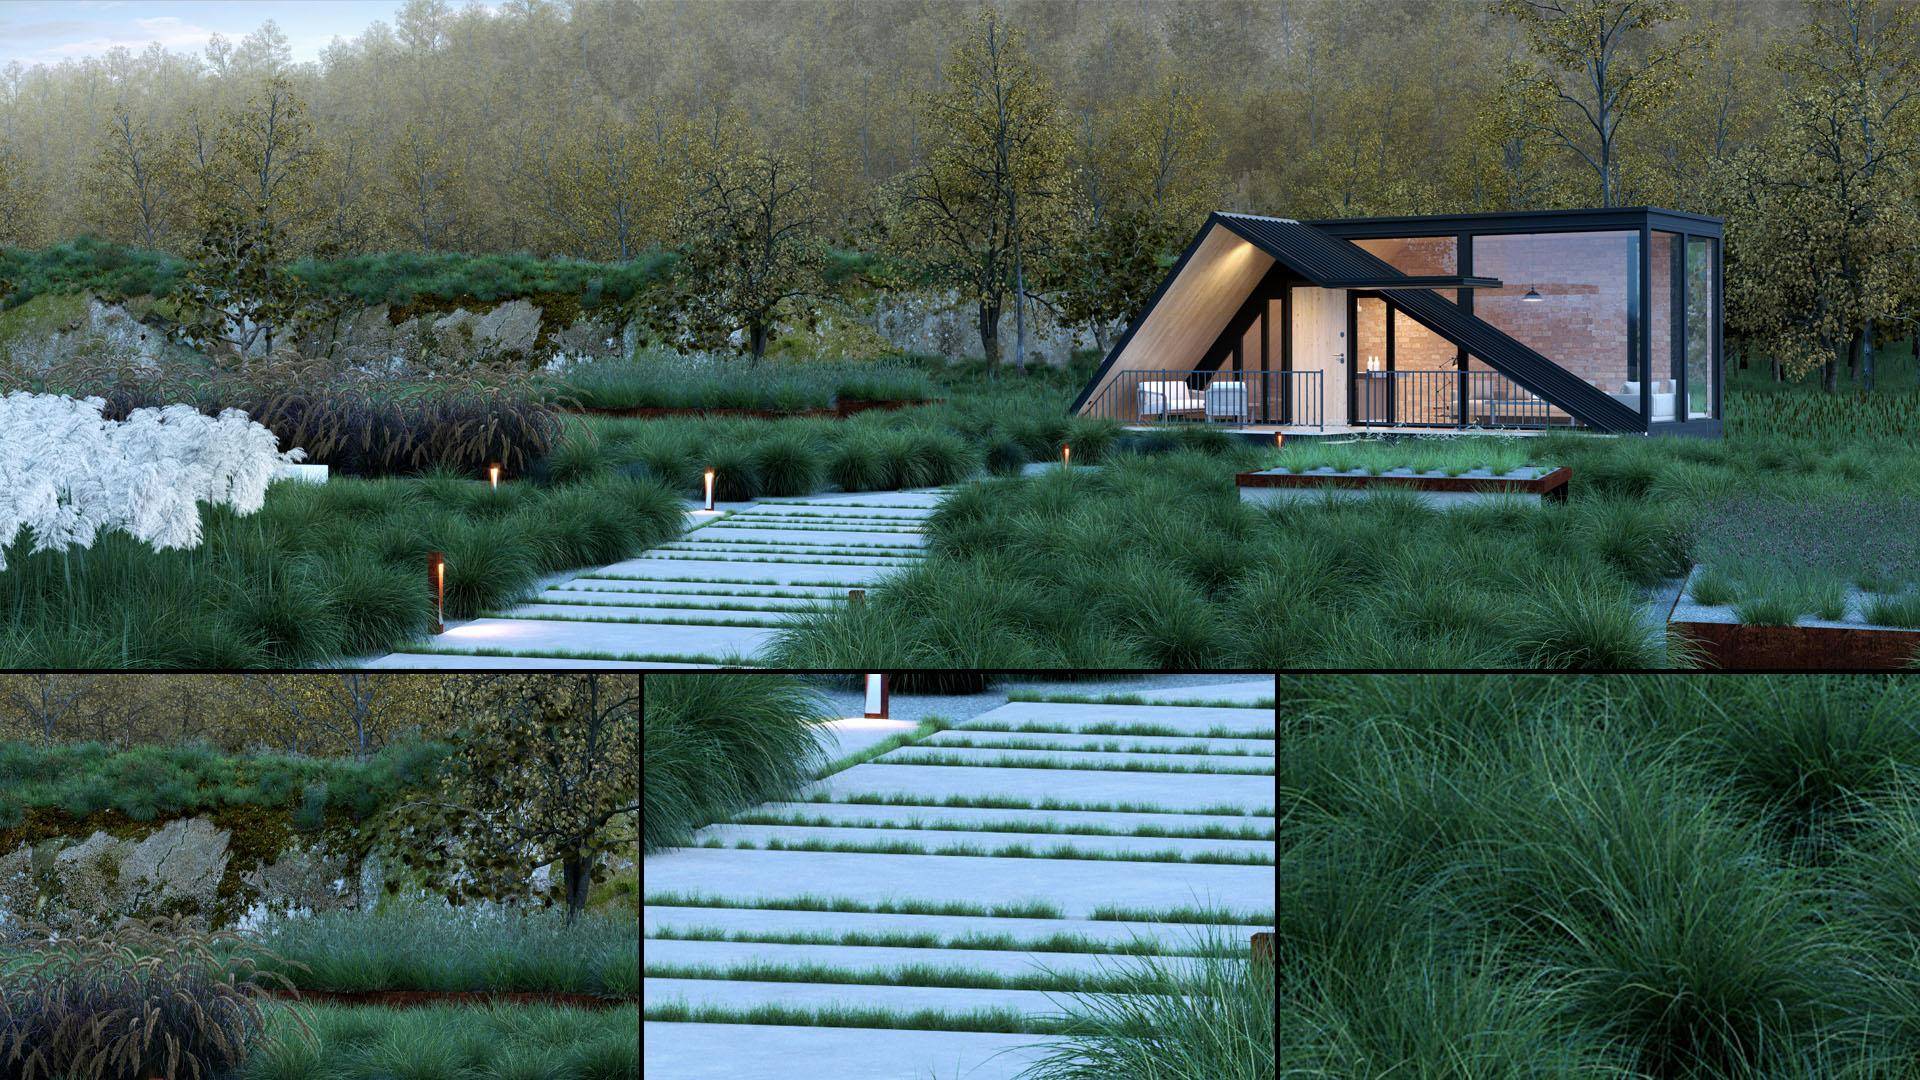
Growing grass between the paving
In the final section, we’ll take a look at the grass growing between the concrete slabs. To achieve this we created a new Forest Object using the Common Grass Field preset. We used a spline that encloses the path to define the area for the scatter.
- The first thing you’ll notice is that the grass is much too large. As I mentioned before, these presets are a great starting point, but can always be modified. In this case, we decreased the size using the Global Scale parameter found in the Geometry rollout
- To compensate for the smaller size, we also needed to adjust the distribution settings by changing the Density.
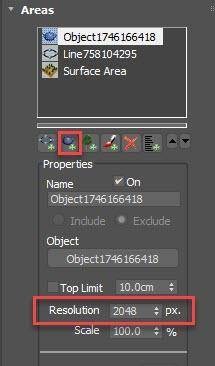
- Now we can remove the grass from under the slabs. To do that we’ll use an Object area. Add one and pick the slab geometry from the scene
- This works by creating a black and white map projected along the world’s Z-axis. By default that map’s resolution is 512px, but by increasing this value, you will improve the accuracy of the collision detection.
![Object Resolution]()
- Finally, to remove those stray plants from the side of the path, we added a little bit of Density falloff.
The last thing that we did to wrap this scene up is to add some trees from The3DGarden European common trees collection to fill in the background.
And that pretty much wraps up this making of. We hope you can see how easy it is to use the Field Plants and Grasses collectionfrom The3DGarden to quickly bring scenes to life. If you’d like to download a free sample from this, or any of our other collections, please check out the collections on out website, and if you have any questions about this tutorial, our plugins or The3DGarden collections, please let us know on the forum.