Requirements
- info 3DS Max 2010, Forest Pack Lite
Chapters
- toc Introduction
- toc Forest Pack Intermediate Course: Rendering a Modern Barn Scene - Part 1
- toc Forest Pack Intermediate Course: Rendering a Modern Barn Scene - Part 2
- toc Forest Pack Intermediate Course: Rendering a Modern Barn Scene - Part 3
- toc Forest Pack Intermediate Course: Rendering a Modern Barn Scene - Part 4
- toc Forest Pack Intermediate Course: Rendering a Modern Barn Scene - Part 5
Creating the track.
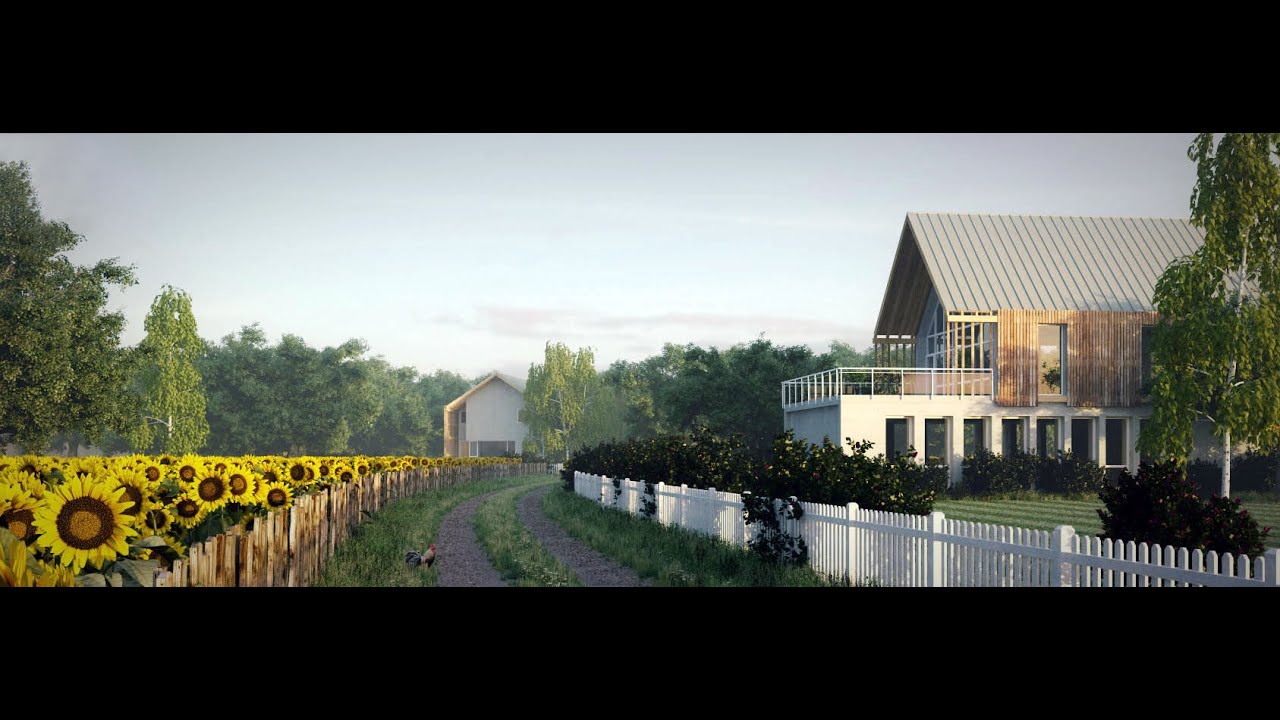
In this tutorial we will create the road seen running through the centre of the image. Having completed this tutorial you should be able to:
- Use custom falloff curves to control distribution
- Using probability curves to control scale variations
We will use these techniques to easily create an overgrown track with areas where vehicles have worn away the grass.
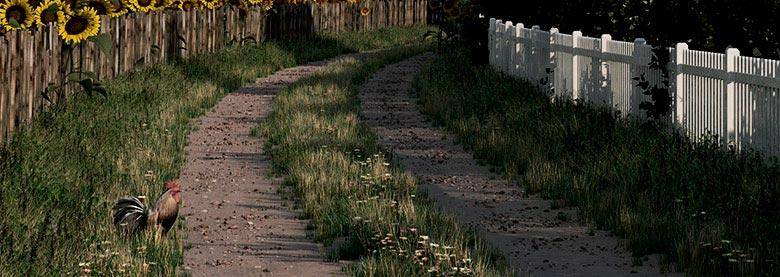
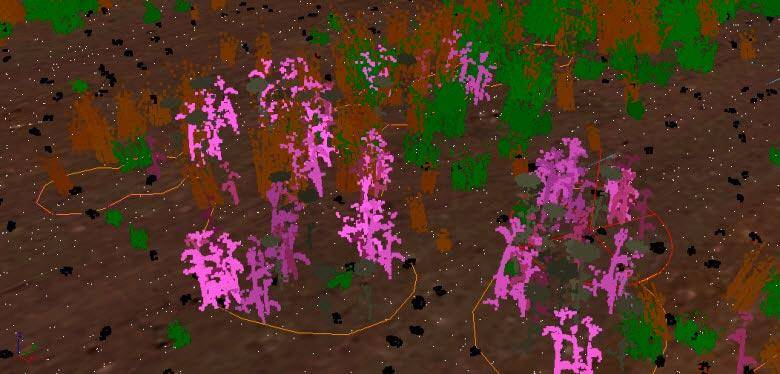
This effect is achieved using 3 forest objects: a grass object, stones, and wild flowers. Below is a blowup of the road area to better illustrate the final effect.
Creating the grass using falloff curves
The grass area is created using only one include area. The tracks are formed using a custom falloff map with a range set to approximately half the total width of the track.
- To get started create a new forest object using "spline_road" as the distribution area.
- Use "grass01" and "grass02" as geometry objects. Set the distribution map to "dense" and the density to 4500mm
- In the transform rollout set the following parameters (note the much higher x property in the translation section to help to roughen the edges of the track):
Translation
X: 50%
Y: 20%
Z: 0%
Rotation
X minimum: -15 | X Maximum: 15
Y minimum: -15 | Y Maximum: 15
Z minimum: 0 | Z Maximum: 359
Scale X minimum: 70 | X Maximum: 130
Falloff Curves
The ability to control size and density with falloff curves is a powerful feature of Forest Pack. Typically we use it to create natural transitions around boundaries but with a little creative control other interesting effects are possible.
- Distance affected by the falloff curve is controlled by the range values, with separate controls for include and exclude areas.
- The amount the falloff affects individual areas can be controlled by the falloff affect percentage spinner, enabling a degree of control over the strength of the falloff for each area independently.
- The invert curve button flips the falloff curve, this is a fast way to create items that only spawn around the perimeter of areas.
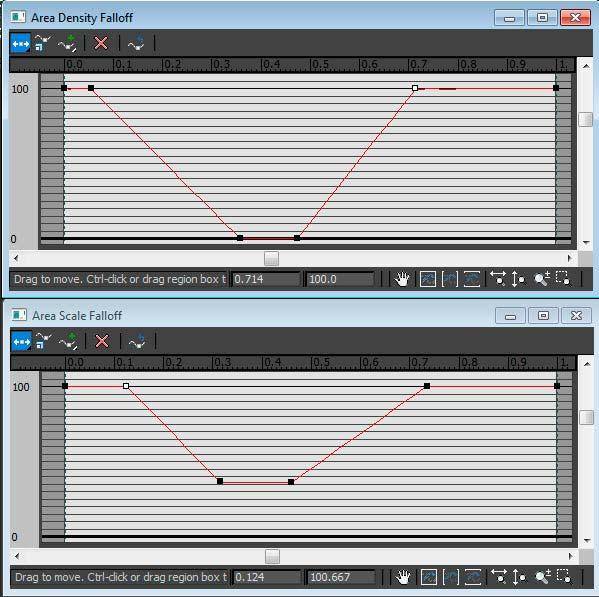
- In the areas rollout, tick to turn on falloff control for density and scale
- Set the include size to about 2000mm, approximately half the width of the track.
- Now we want to create the distinctive double trough of the rough track. Click on edit curve for both density and scale - it's helpful to be able to see the affect of these at the same time. Create a shape similar to the one shown in the figure below.
Creating the stones using inverted falloff maps and scale probability
When you're happy with the effect duplicate the forest object as a copy and rename it "forest_stones". We'll adapt this new Forest to create the stones on the track.
- In the geometry rollout change the custom objects and select "stone 1", "stone 2", "and stone 3".
- In the distribution map rollout change the density to 3000mm
- In the areas rollout turn off enable scale falloff. We don't want the stones to get smaller as they approach the edge.
- Currently the stones occupy the same space as the grass. To get the stones to appear only in the troughs we need only flip the falloff by clicking on invert curve.
We've now created stones in the tire tracks, in the next step we are going to create occasional larger stones. Instead of adding a bigger mesh to the geometry list we will accomplish this by controlling the probability of the transform>scale parameter with a curve.
- Open the transform rollout and set the following settings:
Translation
X: 20%
Y: 20%
Z: 0%
Rotation
X minimum: -15 | X Maximum: 15
y minimum: -15 | y Maximum: 15
Z minimum: 0 | Z Maximum: 359
Scale
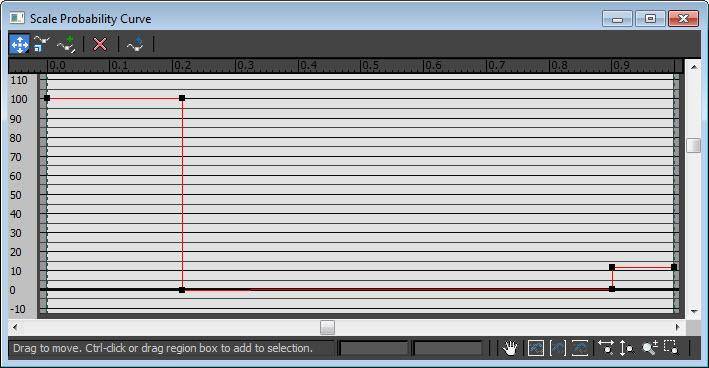
X minimum: 80 | X Maximum: 220 - We want the majority of the stones to be in the 80 to 120% scale range with occasional larger stones at about 200 - 220%. To achieve this turn on probability curve for the scale controls.
- Click on edit probability curve and create a curve that looks like the one below:
Probability curves
When creating probability curves the x access relates to the minimum and maximum range parameters and y axis represents the probability. The graph above represents a 100% chance of creating a small stone and a 12% chance of creating a large one.
As always in forest pack probabilities are normalised, there is no need to ensure they add up to 100% manually.
Creating the flowers using paint areas
Finally in this section we will add some wild flowers to the scene. However we will create small patches of growth rather than filling a whole area as in the previous two examples. To achieve this we can use Forest Pack's new Paint Area mode to easily draw where we would like flowers to grow.

Paint Areas
Paint areas are a new feature of Forest Pack that allow you to paint splines using a mouse or tablet.
- Before using this feature it is always necessary to have created an XY surface. This determines a plane, based on the local coordinate system of the surface, onto which the splines will be drawn.
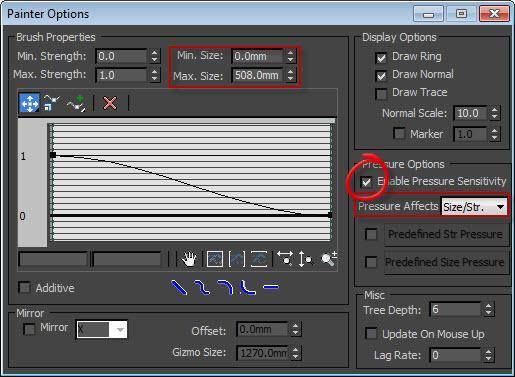
- To create splines use two tools, Paint and Erase. When in these modes the size of the brush can be controlled from the painter options menu (shown below), accessible by selecting the brush options button. Control the size of the brush by changing the minimum and maximum size.
- If you have a tablet you can use pen pressure to control brush size by turning on enable pressure sensitivity and setting the pressure effects drop down menu to size
- Paint areas can be converted to splines by clicking Convert to Spline. This enables you to use Max's built in spline editing tools.
- Any spline object can be converted to a Paint Area for further editing by clicking Convert to Paint.
- Like spline areas, paint areas can be set in either include or exclude mode.
Paint brush settings
- Create a new Forest Object named "Forest_flowers" selecting the "ground" and "road" as surfaces. This will allow us to paint flowers anywhere in the scene.
- In the Geometry rollout add "flower1", "flower2", and "flower3" as custom objects. In the Transform rollout enable Translation, Rotation, and Scale. For this example we'll just use the default settings.
- Set the distribution map to "dense" and the density to 4000mm
- Now we are ready to start painting. Go the the Areas rollout and click Add New Paint Area.
- Adjust the brush size to 400mm
- Use the mouse or a tablet to create patches of flower growth down the center and the side of the track.
Positioning flowers using the painting tools
This completes the track, in the next section we will explore paint areas in more detail to create the overgrowth and bushes and use custom edit mode to make the fence on the right hand side.