Requirements
- info RailClone Pro

We recently released a 10-Second Tip featuring a parametric table style to illustrate how to render using the materials applied to the source geometry. This is particularly handy when you're constructing style using several assets from stock libraries and you don't want to have to manually create a multi-sub object material and remap all the IDs.
To use this feature. there's a simple checkbox in the style rollout, but following the tutorial, we did get some additional questions asking for more information about how to create the actual style itself. In this tutorial, we'll explain how it was done.
First of all, you'll need to source your assets. For this demonstration, we used a table, a chair and several other related accessories from the Chaos Cosmos library.
Next, we need to prepare our geometry for RailClone. The only thing we need to adapt is the table, which we'll cut into two segments using Slice modifiers. To do this:
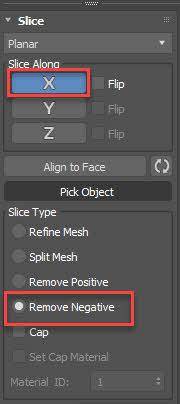
- Select a table and add a Slice modifier. Enable X Axis, change the mode to Remove Positive and then move the slice plane gizmo so only one end is remaining.
![]()
- Now we need to create the middle of the table. To that, duplicate the table object as a copy.
- Select the existing Slice modifier and change the mode to Remove Negative.
- Copy and paste the existing Slice modifier, change the mode to Remove Positive, and move the slice plane so that it's at the other end leaving just the middle section.
With that do you'll have two sections a Start (which will also be used for the end), and the middle section. Now let's create the RailClone object.
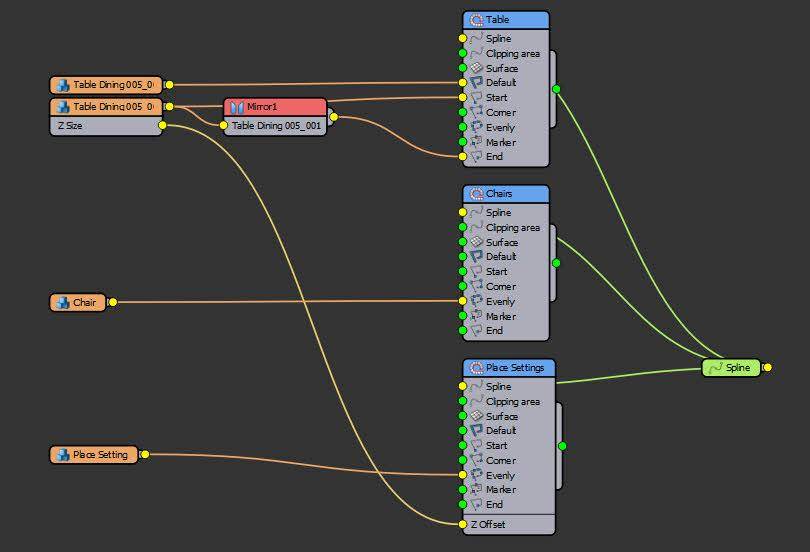
- Create a new RailClone object and open the Style Editor
- Add a new L1S Generator.
- Add a Spline node and then pick a spline from the scene. Wire it to the Generator's Spline input.
- Add a Segment node and pick the table start geometry. Wire it's the Generator's Start input.
- To reuse the same segment for the end, wire a Mirror operator to the end input and attach the existing Segment.
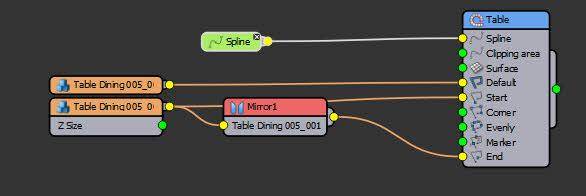
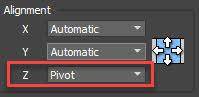
- Add a new segment node, pick the Middle table section as a source, and wire it to the Default input. Change Z Alignment to Pivot.
![]()
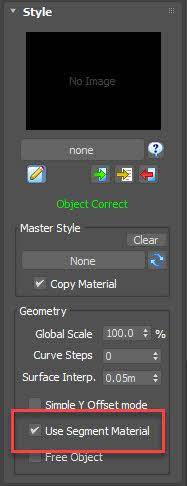
- To enable the materials applied to the source geometry to be used when rendering, enable the Use Segment Material option found in the Style rollout.
![]()
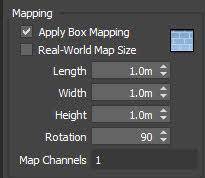
- When you render you might still see an issue. Where the end segments meet the middle, there's a cut where the UVs no longer line up. We can get around this by re UV mapping inside of RailClone using the Apply Box Mapping options. Just set a Length, Width and Height and if necessary, rotate the map so the woodgrain orientates correctly.
![]()
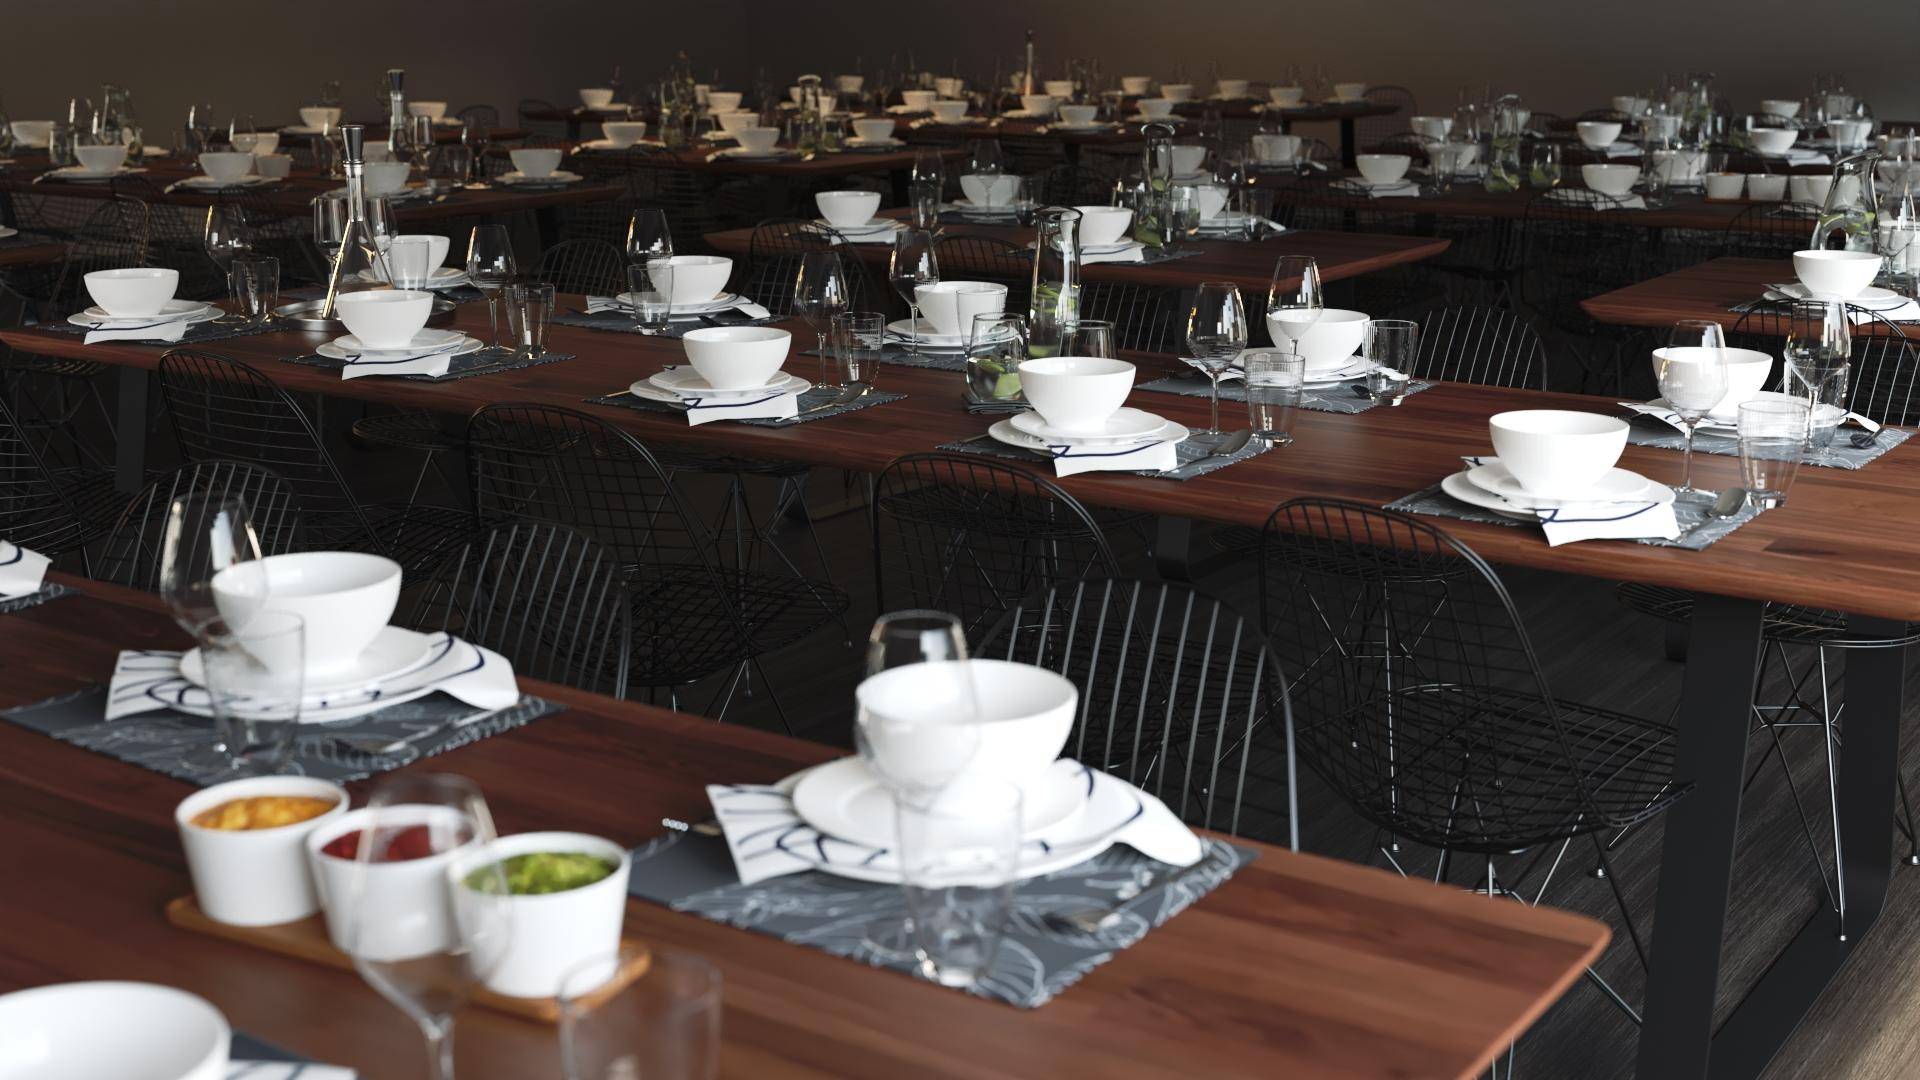
That takes care of the table, which can now be any length just by adjusting the spline. Now we want to add the other items such as the chairs, place settings and other accessories.
We'll start with the chairs.
- Copy and past the existing generator.
- Add another Segment node and pick the chair from the scene. Wire the node to the Evenly input.
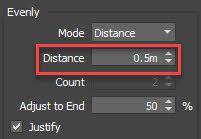
- To change the spacing between the chairs go to the Generator's Rules tab and change the Evenly Distance value.
![]()
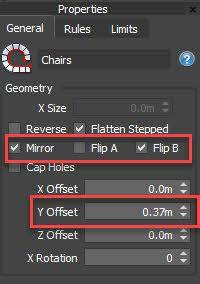
- The chairs will be centred on the spline. To move them to one side use the Generator's Y Offset parameter.
![]()
- The chairs are very tidy looking. That's not really how things look in real life. So let's mess it up a little bit by going to the Transform settings for the Segment and enabling Translation Randomization using small values for Min and Max X and Y parameters.
![]()
- Enable and randomize the Rotation a bit too
- One side of the table is now done. To do the other side, just enable the Mirror option in the Generator's General settings. You can also flip the geometry itself using the Flip A and Flip B checkboxes.
To create the place settings:
- Clone the chair Generator and Segment.
- Select the new Segment, and swap the geometry for the place settings.
- You'll see that they're on the ground. To fix that, export the Generator's Z Offset property.
- The value I need to input here is the height of the table. Rather than enter it manually. you can export the Z Size of one of the table pieces by right-clicking on a segment and selecting Export Attributes.
- Wire the Segment's Z Sizeoutput to the Generator's Z Offset input. The placemats move up to the height of the table automatically.
- Adjust Flip A and Flip B so that the place settings are facing the right way.
- Change the Segment's transform randomisation if necessary and adjust the Generator's Y Offset so that they are correctly placed on the table
Finally, we'll add some additional accessories down the centre of the table using another generator:

- Create a 4th Generator and wire it to the same spline node
- Add a new Segment node and pick an accessory from the scene.
- Wire it to the Evenly input.
- Once again it's on the floor, so we'll go through the same procedure as we did for the place settings and export the Generator's Z Offset input. Wire it to the Table's Z Size output.
- You will now have an accessory in the middle of the table. To add a few more, change the Generator's Evenly Distance.
- Add some variety using the Segment's Transform Randomisation settings if desired.
- To add additional accessories to the table, wire a Randomize node between the existing segment and the generator.
- Copy and paste the Segment, PIck a new accessory from the scene and wire it to the Randomise node. Repeat for as many accessories as you want to add to the style.
- Finally, you can add occasional gaps instead of populating every Evenly segment with an object. To do this, just add a Segment to the Randomise node but don't select any geometry.
We now have a finished style with one Generator used for the table, another for the chairs, a third for the place settings, and finally, a fourth for adding accessories. If we close the Style Editor now, we can assign this easily to multiple splines just by going to the base objects rollout.
We hope you found this quick tip useful. Stay tuned for more videos to help you get the most from RailClone coming soon.