Resources
Requirements
- info 3DS Max 2011, RailClone Pro 2.x

Introduction
In this tips and tricks tutorial we're going to look at the different ways segments can be deformed on the Z-Axis. In addition to the default behaviour - in which the segment adapts to follow the tangent of the path - It is also possible to step segments or deform them so that their verticals remain upright, but horizontal elements follow the spline. A hybrid stepped/vertical option is also possible to maintain a flat area measured from either the top or bottom of the segment, as in the example below. Using these techniques we can create complex structures like railings and balustrades, or even a complete staircase.
By completing this tutorial you will be able to:
- overlap adjacent segments using Padding.
- change a segments alignment positions.
- use vertical deform modes.
Download Contents
The exercise files for this tutorial includes the following .max scenes.
- simplestairsStart.max The starting file if you want to follow the tutorial.
- >simplestairs.max The result of the completed tutorial
Creating the style.
Creating the Treads
- Create a new RailClone object and open the Style Editor.
- Add a new L1S generator.
- Add a new Spline base object and pick the "Spline_stair_path" from the scene. Wire this to the spline input of the generator.
- Add a new segment and pick "Tread" from the scene. Wire this to the Default input.
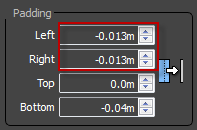
- The tread's overhanging nosing causes gaps to appear between segments. To remedy this, change the Left and Right Padding to -0.013m.
![Creating stairs-padding.png]()
- To align the segments so that the spline defines the right hand side of the stairs, change the Y-Alignment to Bottom. To ensure the spline is the topmost part of the tread, change the Z-Alignment to Top.
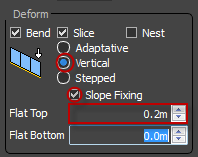
- Set the segment's deform mode to Vertical, turn on Slope Fixing and set the Flat Top parameter to 0.2m.
![Creating stairs-vertical.png]()
Creating the Balustrade
- Next we'll add the balustrade. In the same style create a new L1S generator and wire it to the existing spline node.
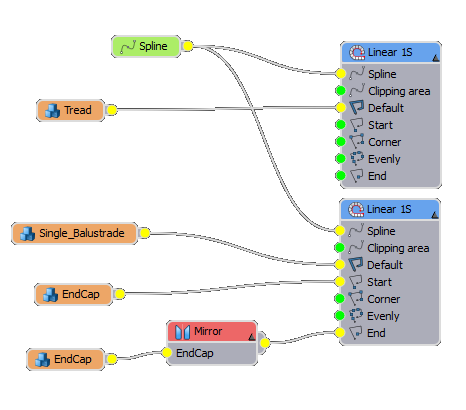
- Add a new segment object and pick "Single Balustrade" from the scene, wire this to the default input.
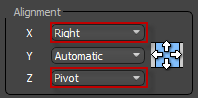
- Set the Z-Alignment to Pivot.
- Turn on Vertical Deform>Vertical, set the Flat Bottom distance to 0.8m and turn Slope Fixing on.
- Now add another two segments and pick "End Cap" from the scene for both. Set their Z-Alignment to Pivot. Wire one of these to the Start input and change the X-Alignment to Right. Wire the remaining segment to the End input and change the X-Alignment to Left.
![Creating stairs-pivots.png]()
Conclusion
In this example we used the Vertical deformation mode in conjunction with slope fixing and flat top/bottom mode to create a simple staircase. This technique could be extended to add Newel posts and much more. For more tutorials on RailClone2 please visit our tutorials page.