Requirements
- info Forest Pack 8
Forest Pack 8 came with 4 new effects that add new features to Forest Pack’s already useful path distribution mode.
Before we get to the effects though - here’s a quick recap on path distribution. You use this mode when you want to distribute objects along a spline.
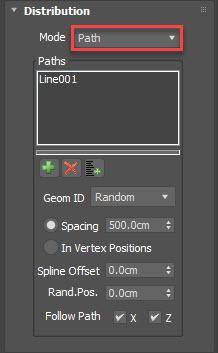
To use Path Distribution mode, go to the Distribution rollout and change the mode to Path. Click on + and add your paths to the list. It's as easy as that! You can then change the Spacing distance and add a bit of Randomisation to break up the regularity if needed
You can use this in conjunction with surfaces. To project the items onto a terrain for example, just go to the Surfaces rollout and add the terrain to the list of the surfaces in the normal way.
When we released this feature we had several requests to add additional controls that allow you to combine path distribution with include and exclude areas, as well as using Spline and Surface material IDs. To accomplish this, Forest Pack 8 included 4 new effects - here’s how to use them.
Using the Include and Exclude area effects
There are two effects that allow you to combine Path distribution mode with Include and Exclude areas.
To demonstrate I’ll show you how to use a closed spline to remove some items from a path.
- Go to the Effects rollout and add a new Effect
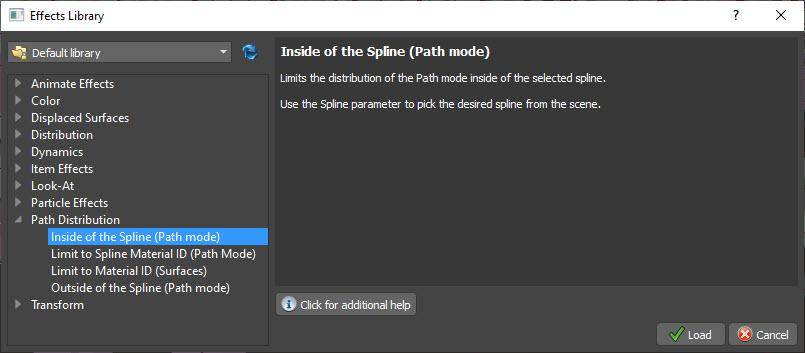
- Open the Effects Library and find the Path Distribution group
![]()
- There are two related effects here called Inside of Spline and Outside of Spline. The one you choose depends on how you want to use a closed spline to affect the path distribution.
To keep the items that fall outside of the spline - choose the Outside Spline option.
To keep the items that fall inside of the spline - choose the Inside Spline option. - We want to use a spline to remove a section of trees for the driveway so we’ll choose Outside Spline.
- In the Parameters list, choose the spline you wish to use to exclude objects.
- That’s it! If you want to add additional spline you can either attach them together or add multiple effects.
Spline Material ID
It’s also possible to limit the path distribution to splines or parts of splines based on their material ID. To do this you'll need to be using a spline object with multiple IDs assigned, then follow these steps:
- Add a new effect and open the Effect library. Pick Limit to Spline Material ID.
- In the Parameters list, you can now control the Material ID that is used to add objects. For example, if you set it to 1, it removes items from the parts of the spline that use any other ID.
Surface Material ID
The final effect allows you to remove plants based on a material ID assigned to the surface. To use this, you'll need a mesh in the Surfaces list that uses multiple material IDs. Then follow these steps:
- Add a new effect and this time open the effect browser and choose Limit to Material ID (Surfaces).
- In the Parameters section, you can now choose which material ID will be used to retain objects. For example, setting this to 1 will use the polygons with the corresponding materials ID.
- To target multiple IDs, you can add additional Effects.
Path Distribution was already a handy way to create scatters, but with the addition of these 4 effects, we hope you’ll find the mode is even more flexible. If you have any other suggestions for Path Deform effects, please let us know!
This render uses the model "Abandoned farmhouse " (https://skfb.ly/otJDD) by sr-prod which is licensed under Creative Commons Attribution (http://creativecommons.org/licenses/by/4.0/).