At ITOOSOFT, we are always excited to showcase the creativity and dedication of the next generation of 3D artists. The following case study has been prepared by students from New3dge, one of our ATCs based in Paris.
In their own words, the students on the project's environment team walk us through their process, sharing insights into environment creation, stylization choices, and technical solutions. It’s a fascinating look at how ForestPack was used in combination with other industry-standard tools to bring a rich, stylized world to life.
We’ll now hand over to the team to tell the story of LUMA.
Introduction
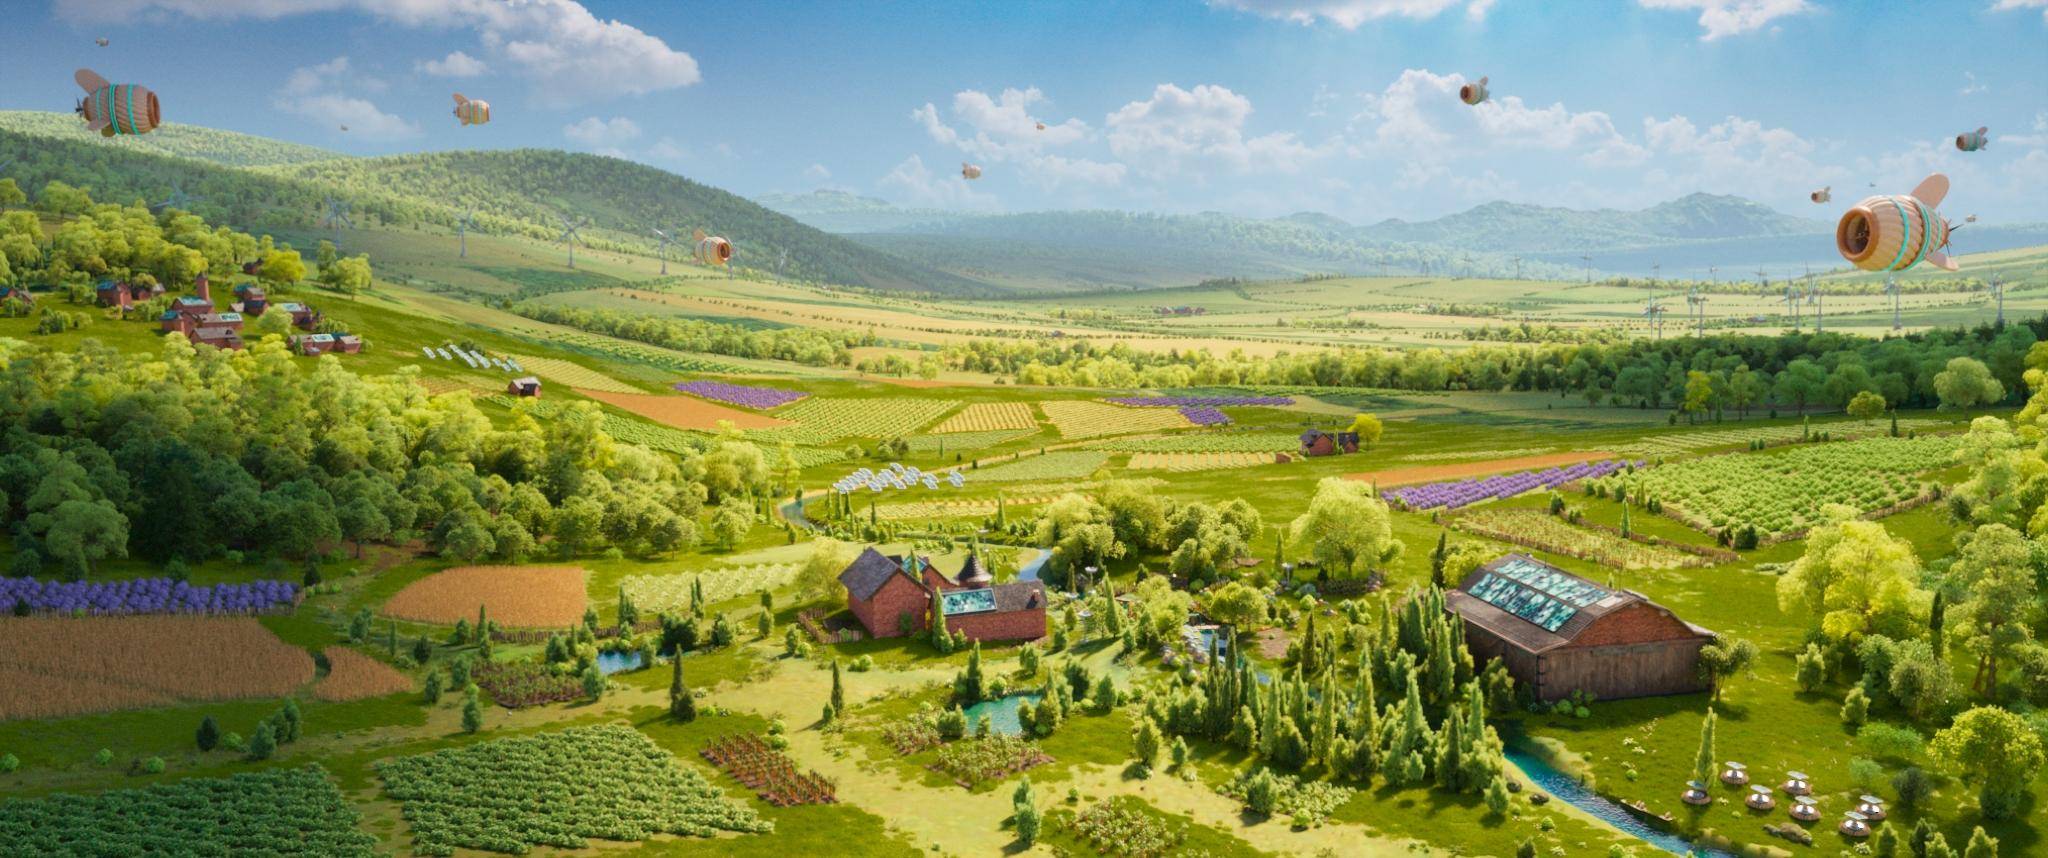
LUMA is our graduation short film, created during our final year at New3dge in 2025. It’s a Solarpunk-inspired project that we produced over nine months as a team of nine artists, from previs through to final color grading.
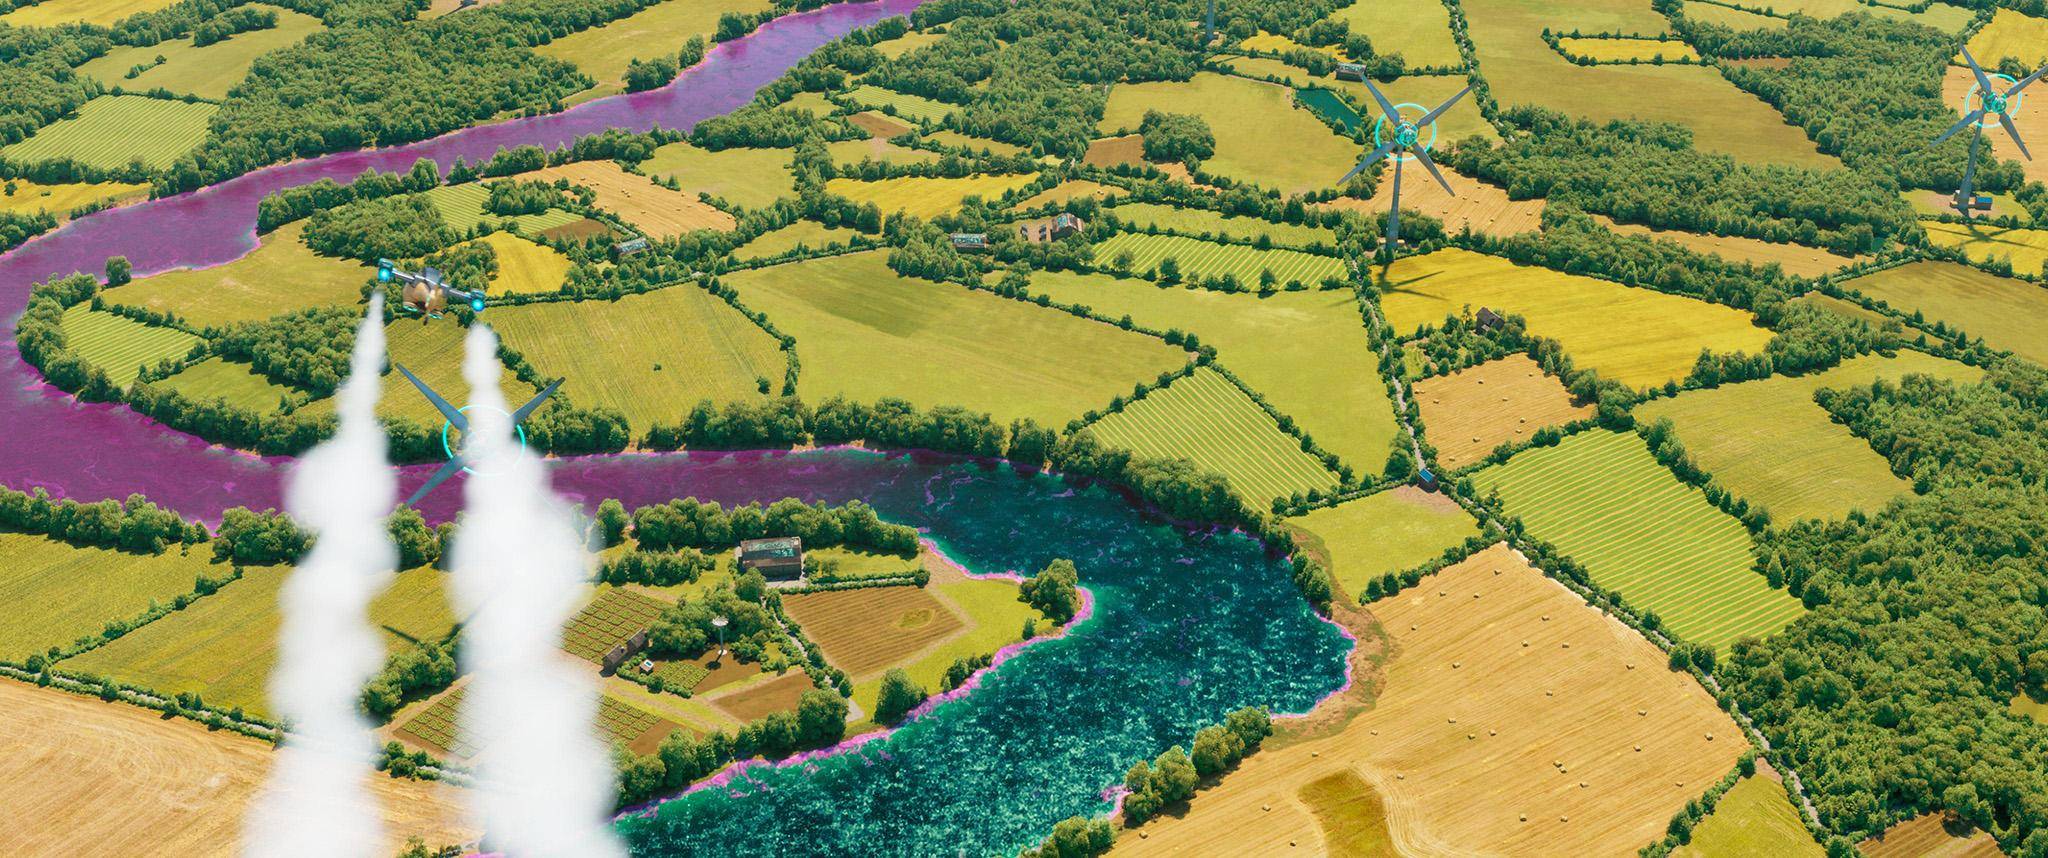
Set in a Solarpunk universe, the film follows Ren and Cora, whose peaceful life is disrupted by a mysterious phenomenon spreading through water. Their journey to uncover its source reflects the balance between nature and technology that defines the world we wanted to create.
From September to November, we focused on research and development, producing a previsualization based on a storyboard provided by the school. During this stage, we worked to define the visual style, settling on a Disney/Pixar-inspired look with soft shapes, exaggerated proportions, and detailed textures. In November, New3dge’s concept art students joined the project, providing designs that allowed us to move into full production of environments, characters, FX, assets, and scenes.
Our main challenges were time and team size: nine months and nine artists to complete a three-minute short film. On top of that, none of us had previously worked on a stylized production or integrated motion capture animation, so every stage came with new hurdles.
Our pipeline was based primarily on 3ds Max and V-Ray, but we also used Nuke, ZBrush, Houdini, Substance Painter, DaVinci Resolve, Photoshop, SpeedTree, and more. ForestPack was essential for all the scattering work throughout the project.
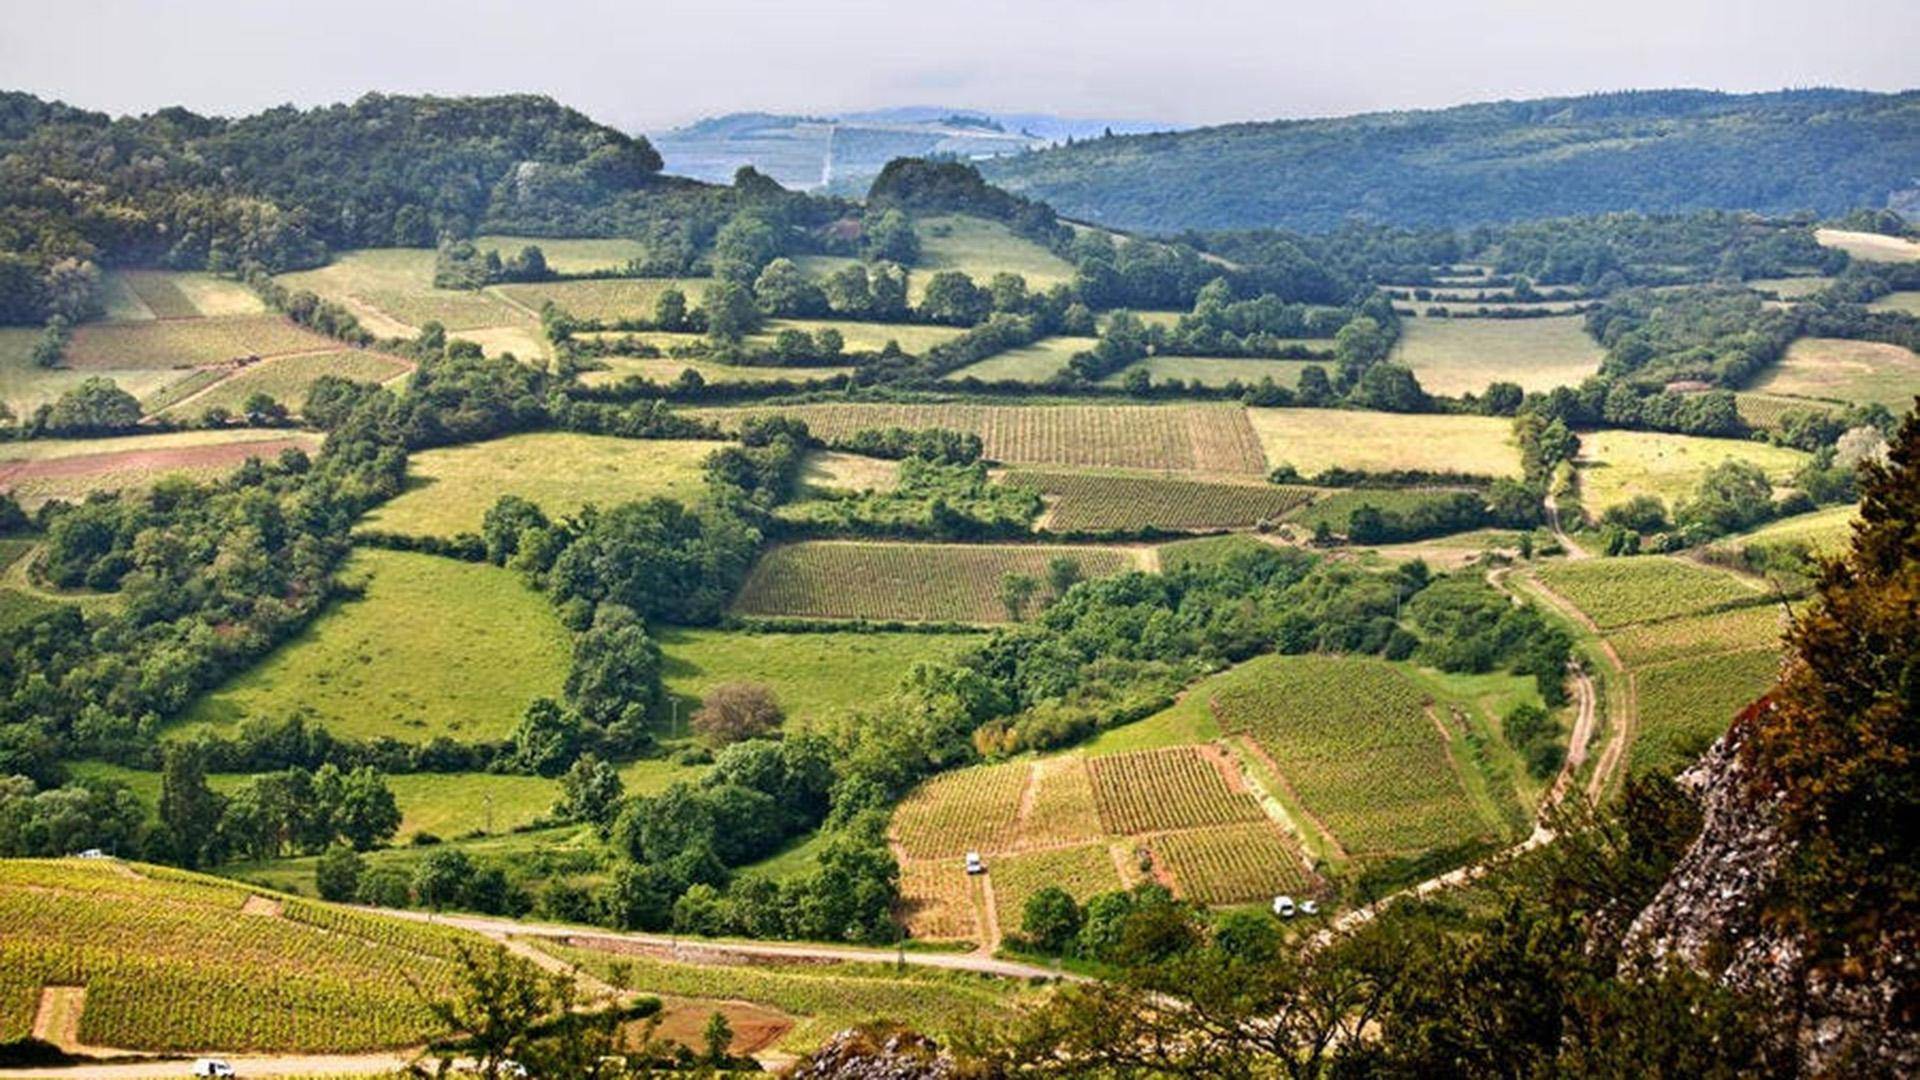
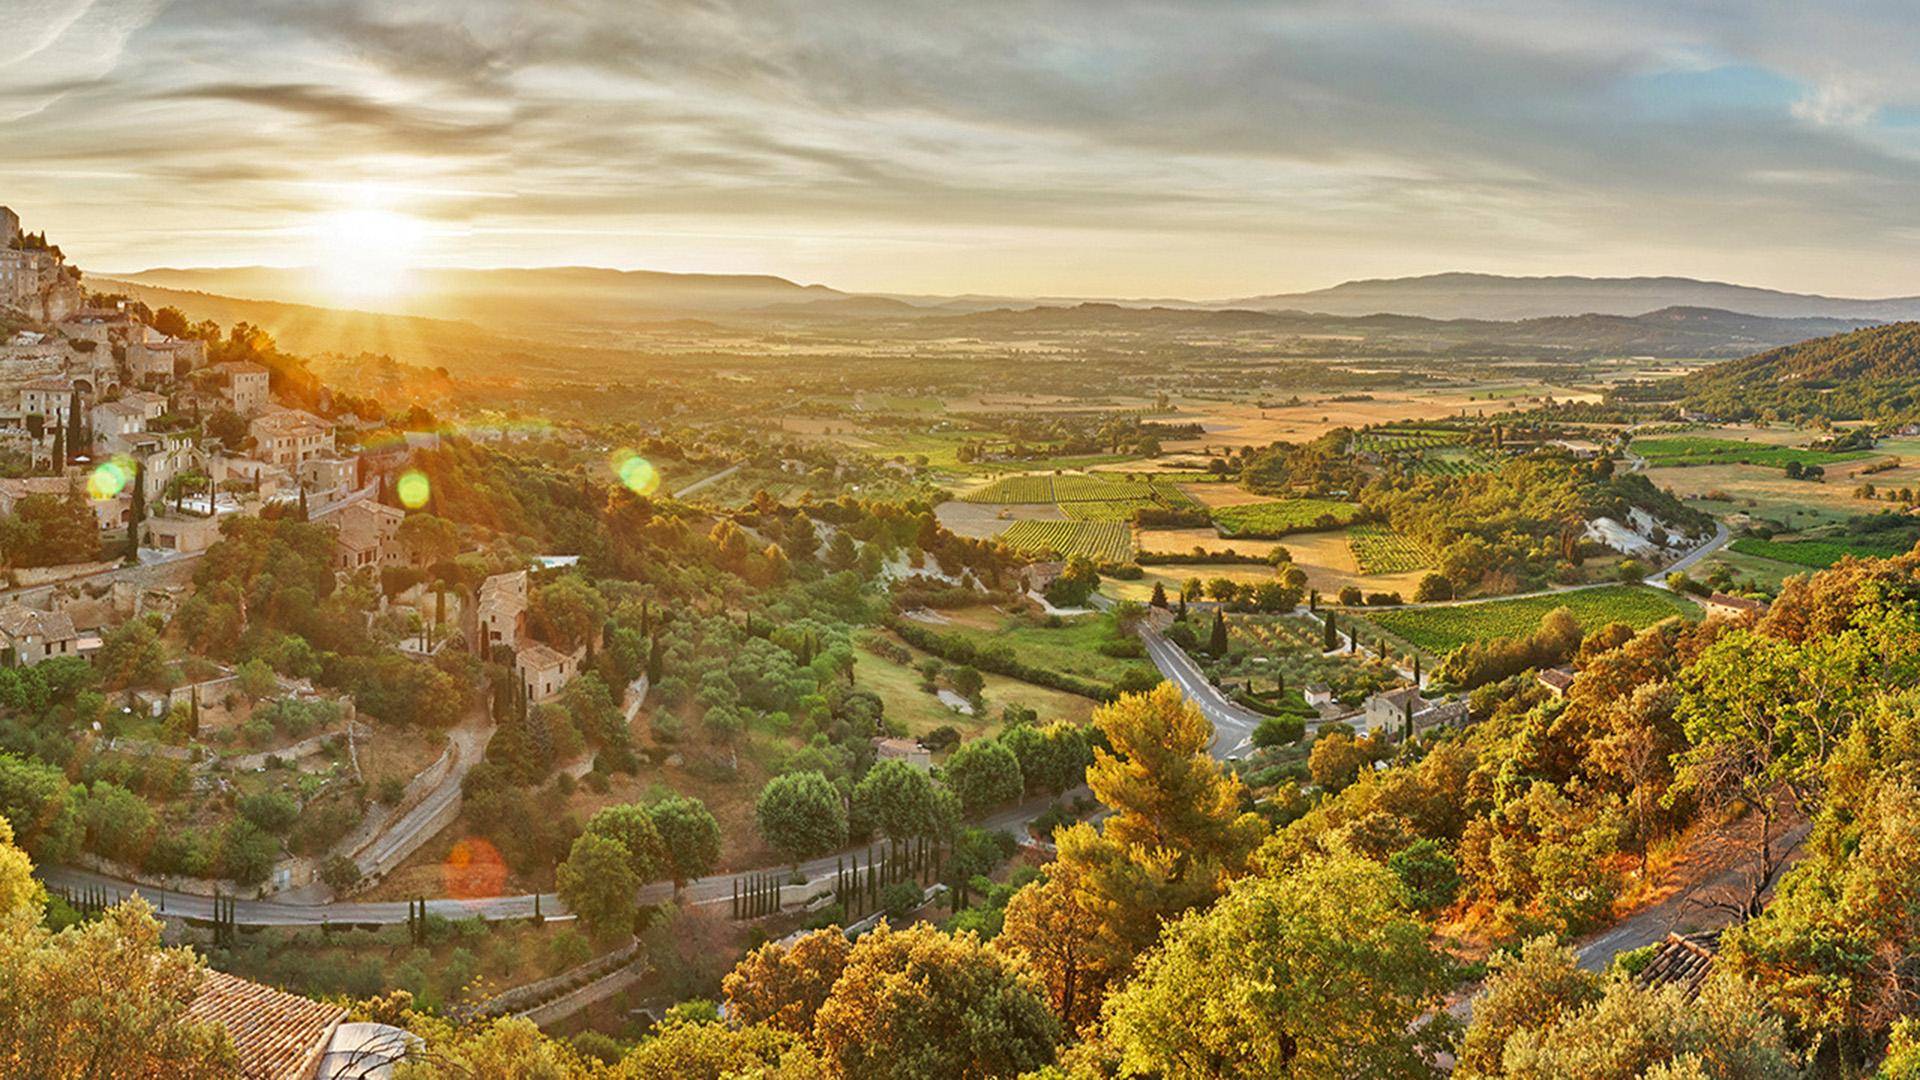
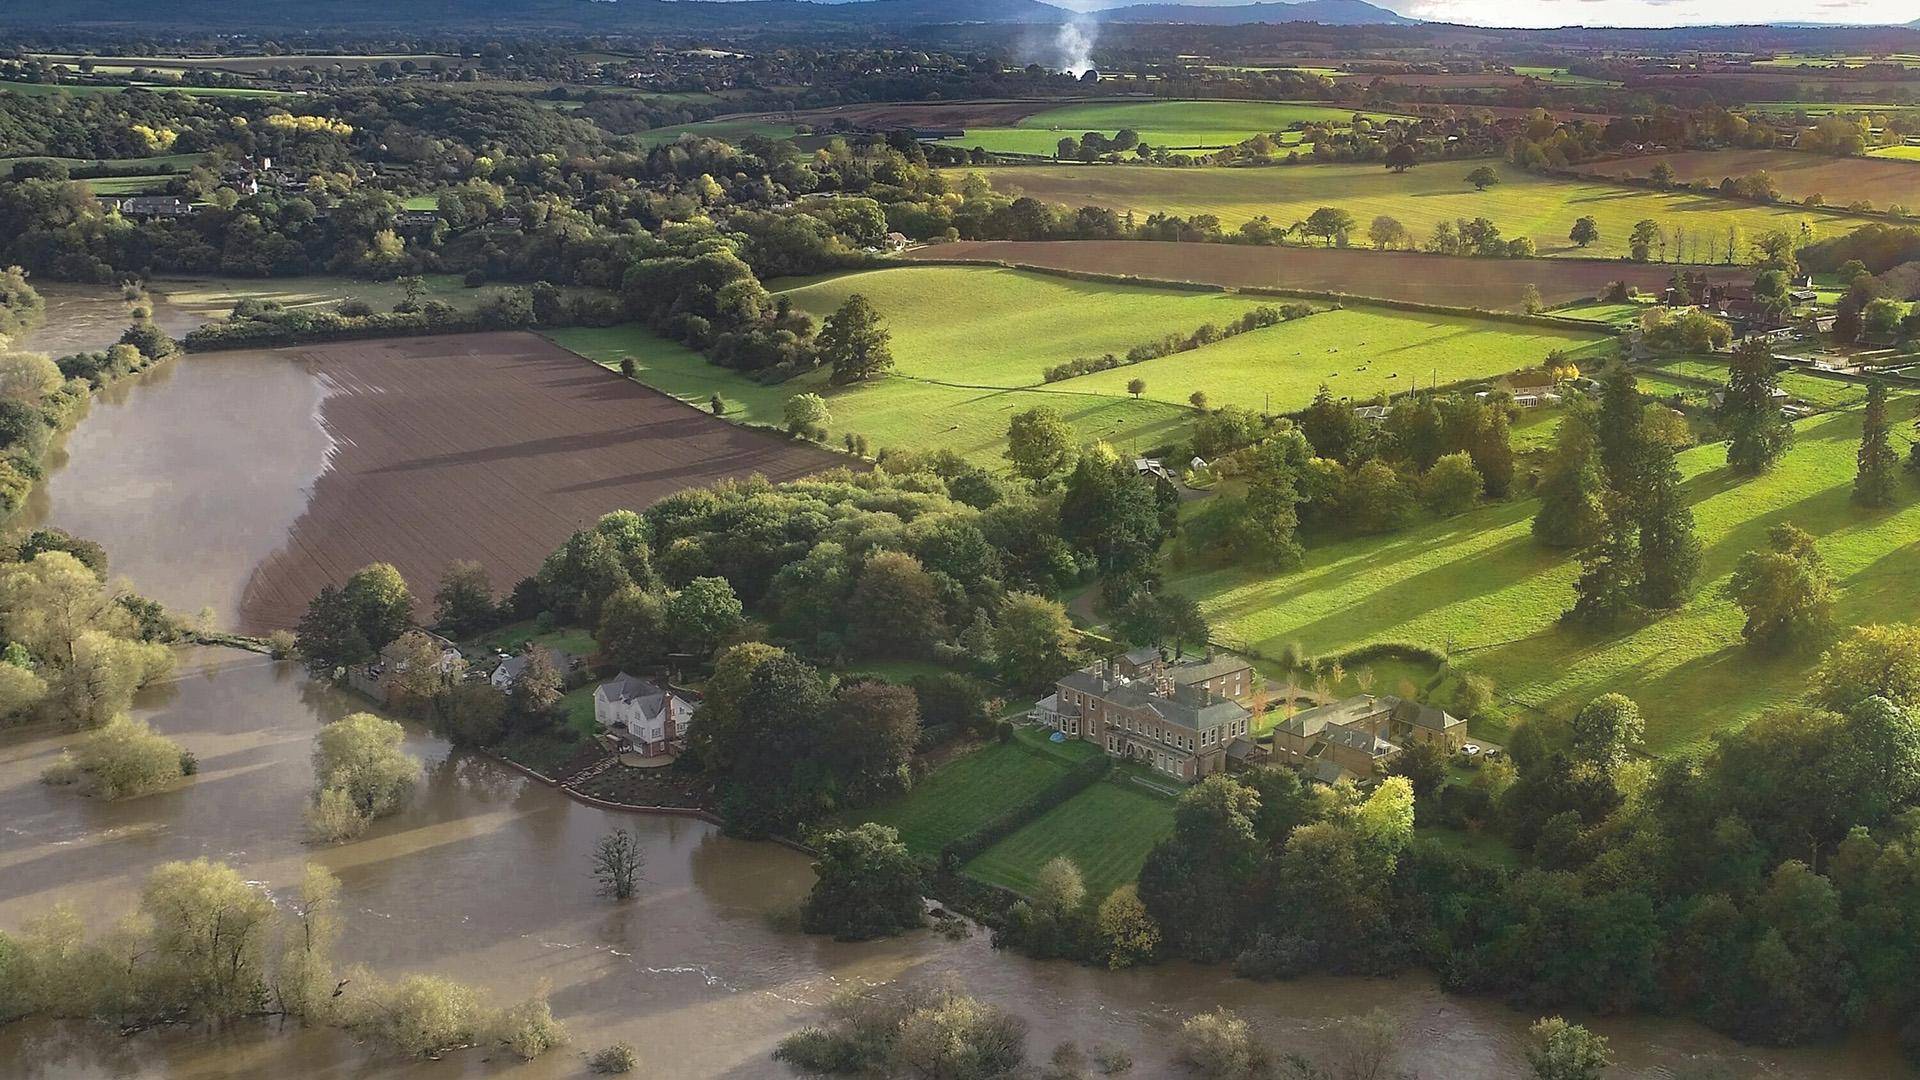
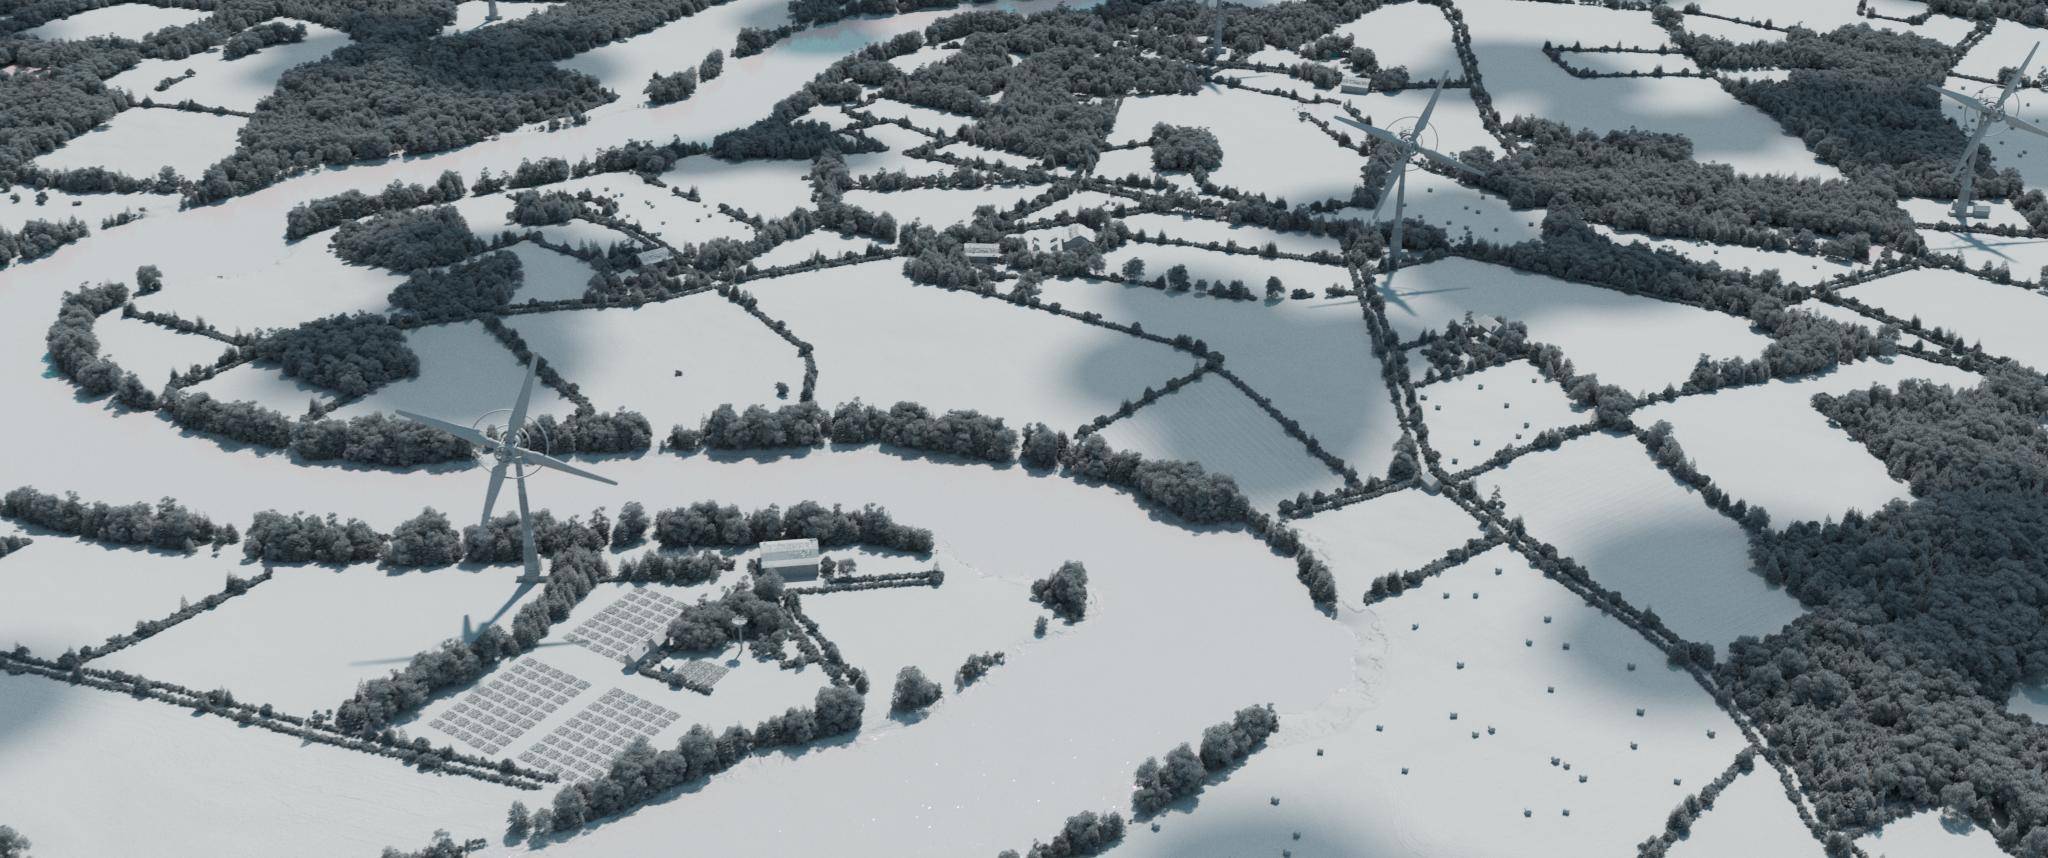
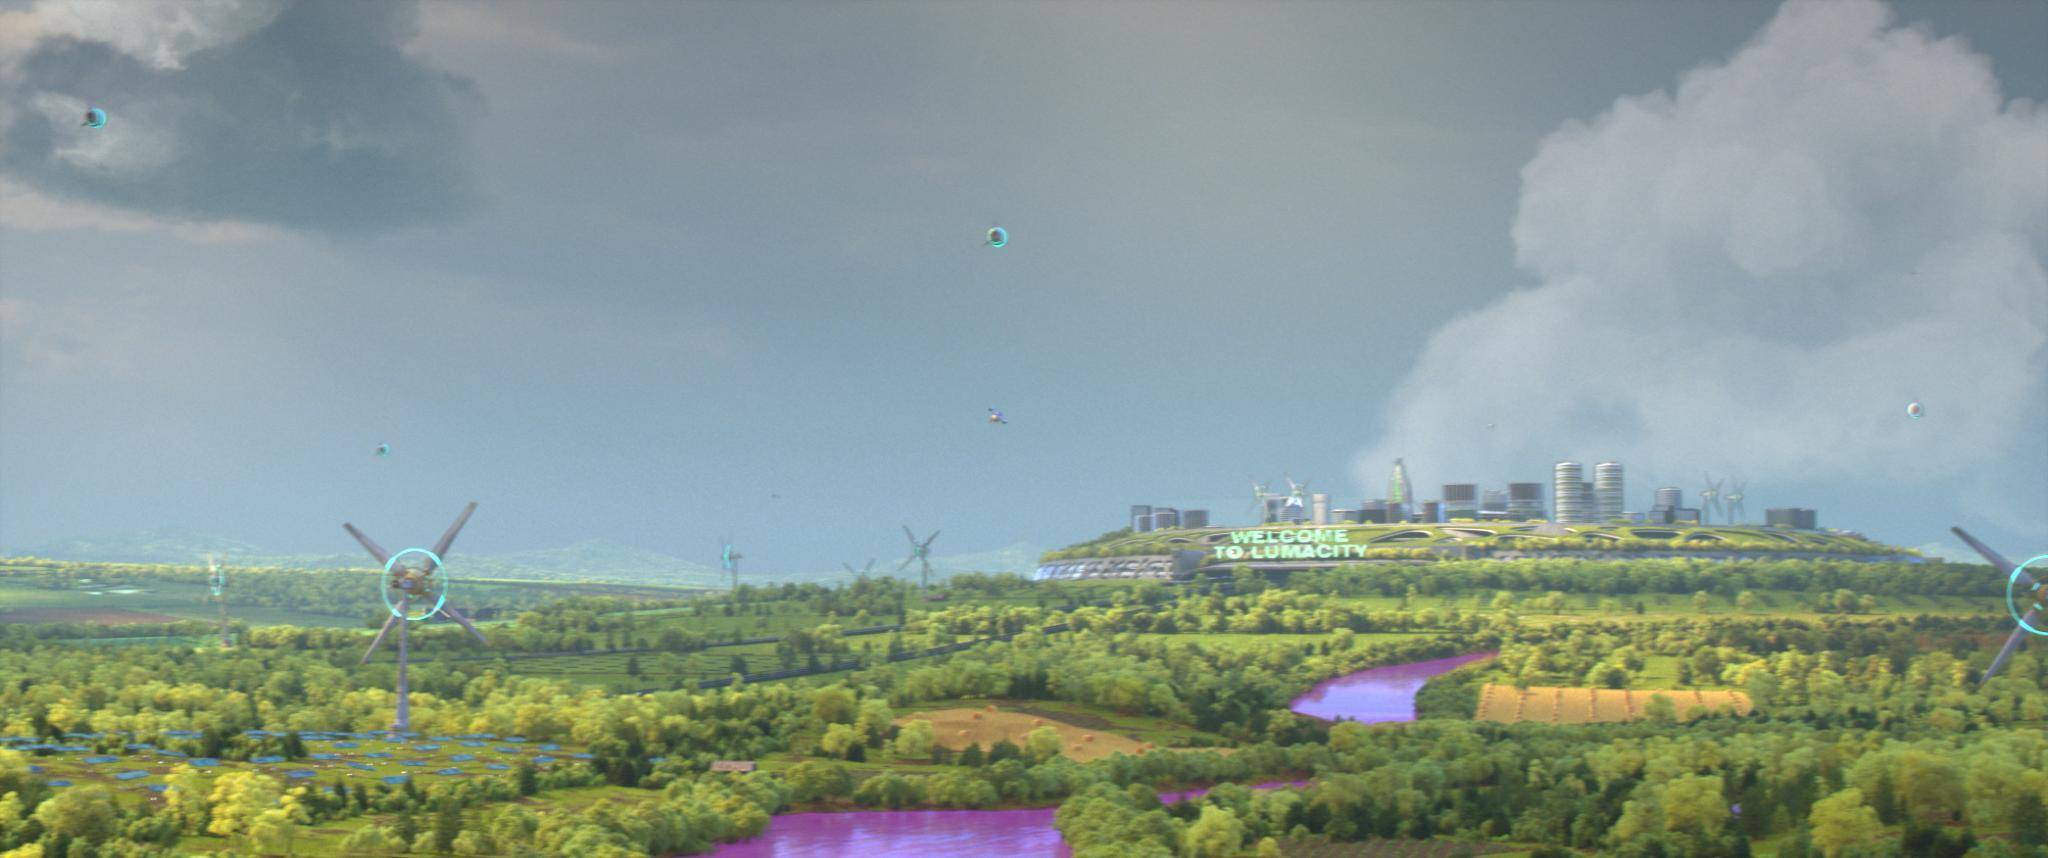
Four of us focused on environment art, creating six main locations: the Farm, Riverside, City, Pipe Interior, Sewers, and Laboratory, across a total of thirty-four shots. We used ForestPack extensively for the countryside exteriors, scattering forests, fields, and grass, as well as elements like houses, wind turbines, gravel, and props. For the biomes, we drew inspiration from the French countryside, blending expansive natural forests with cultivated fields to create landscapes that feel organic yet thoughtfully shaped by human presence, a balance that captures the aesthetic of Solarpunk.
Eva Pringault was responsible for the Farm environment, Arthur Pezi for the Riverside, and Mehdi Kaouane for the City. We each used ForestPack in different ways, but with shared methods that helped us maintain a consistent final look.
The Farm (Eva)
Composed of large landscapes, medium shots and close ups, this zone was a real challenge to achieve. It extends to twelve shots. Here are some of them and some tutorials about how ForestPack was used to create them.
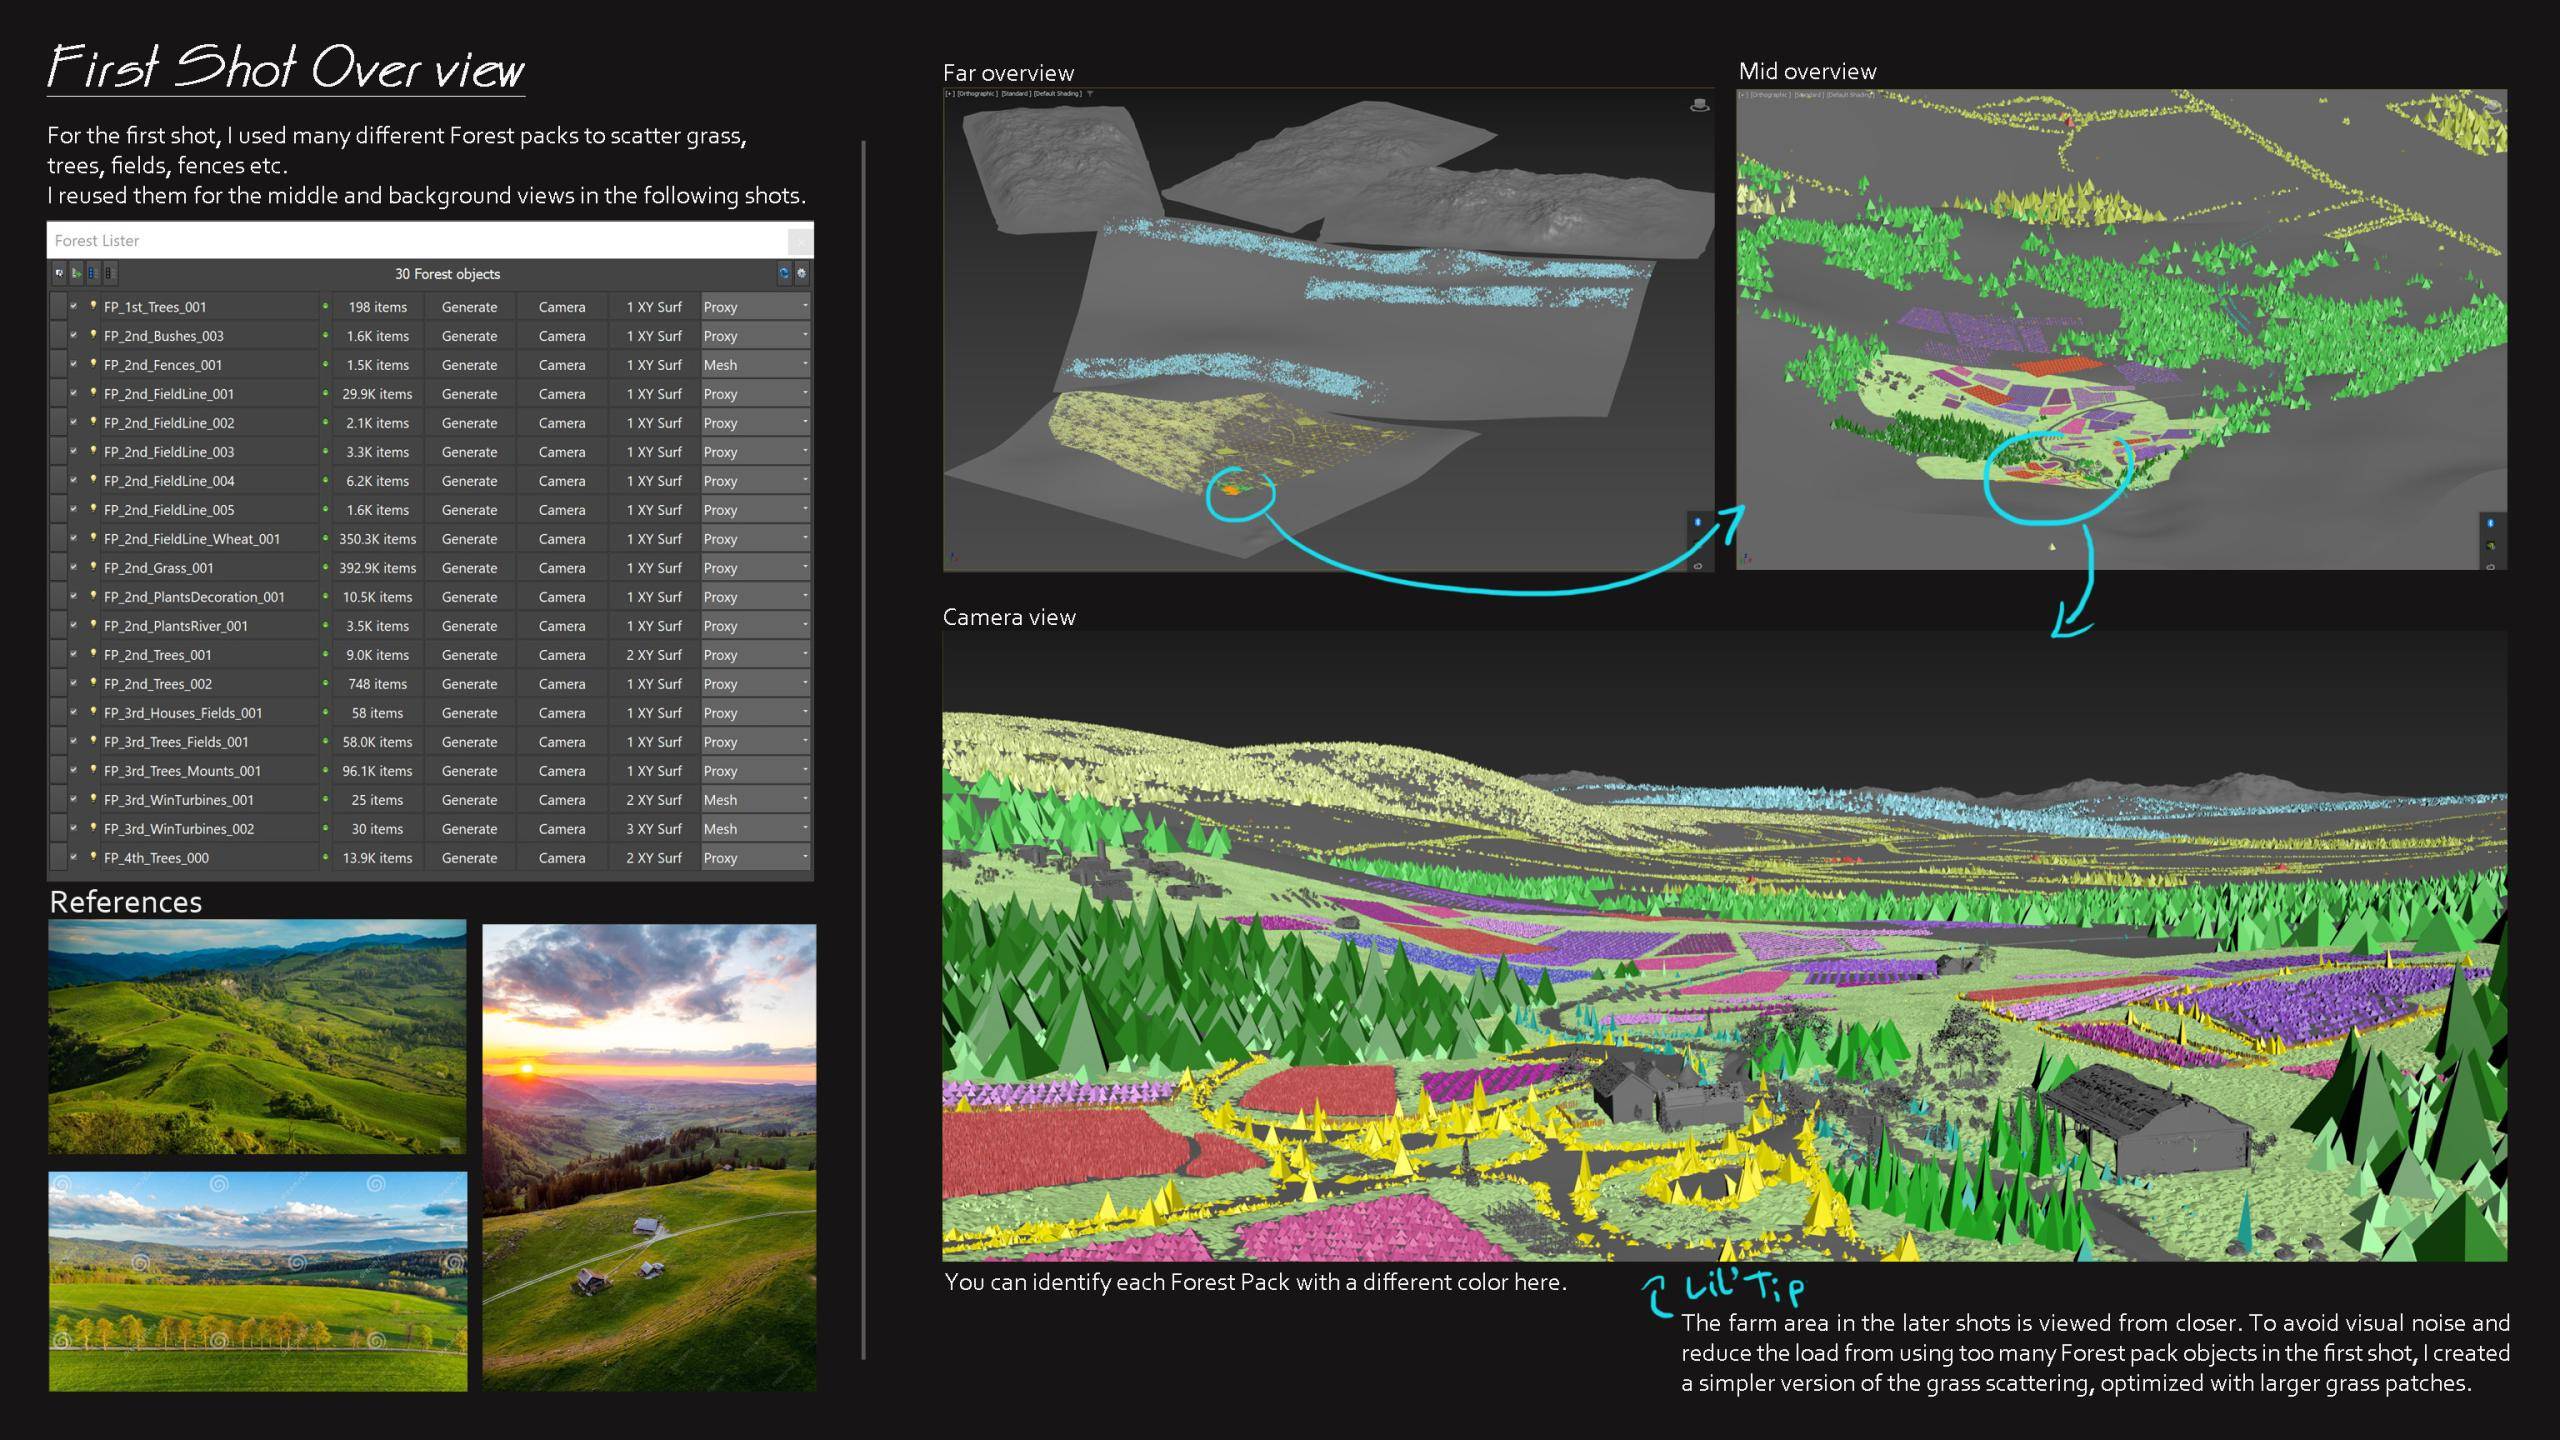
First Shot Overview
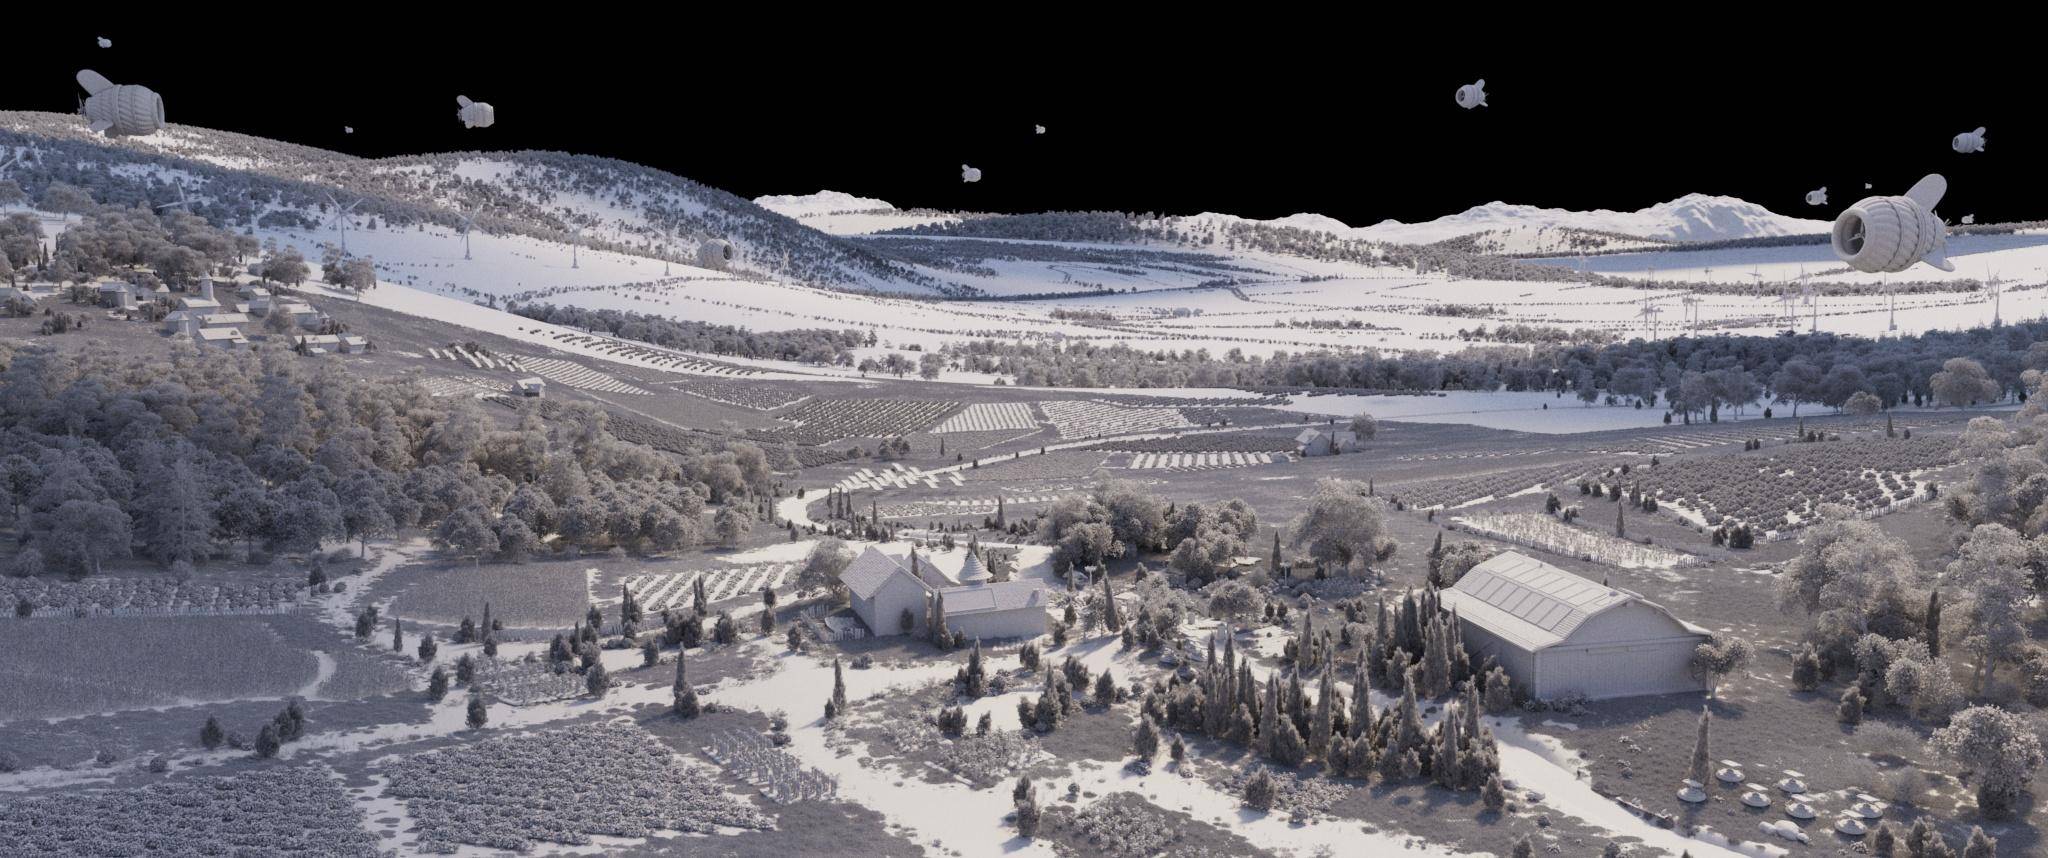
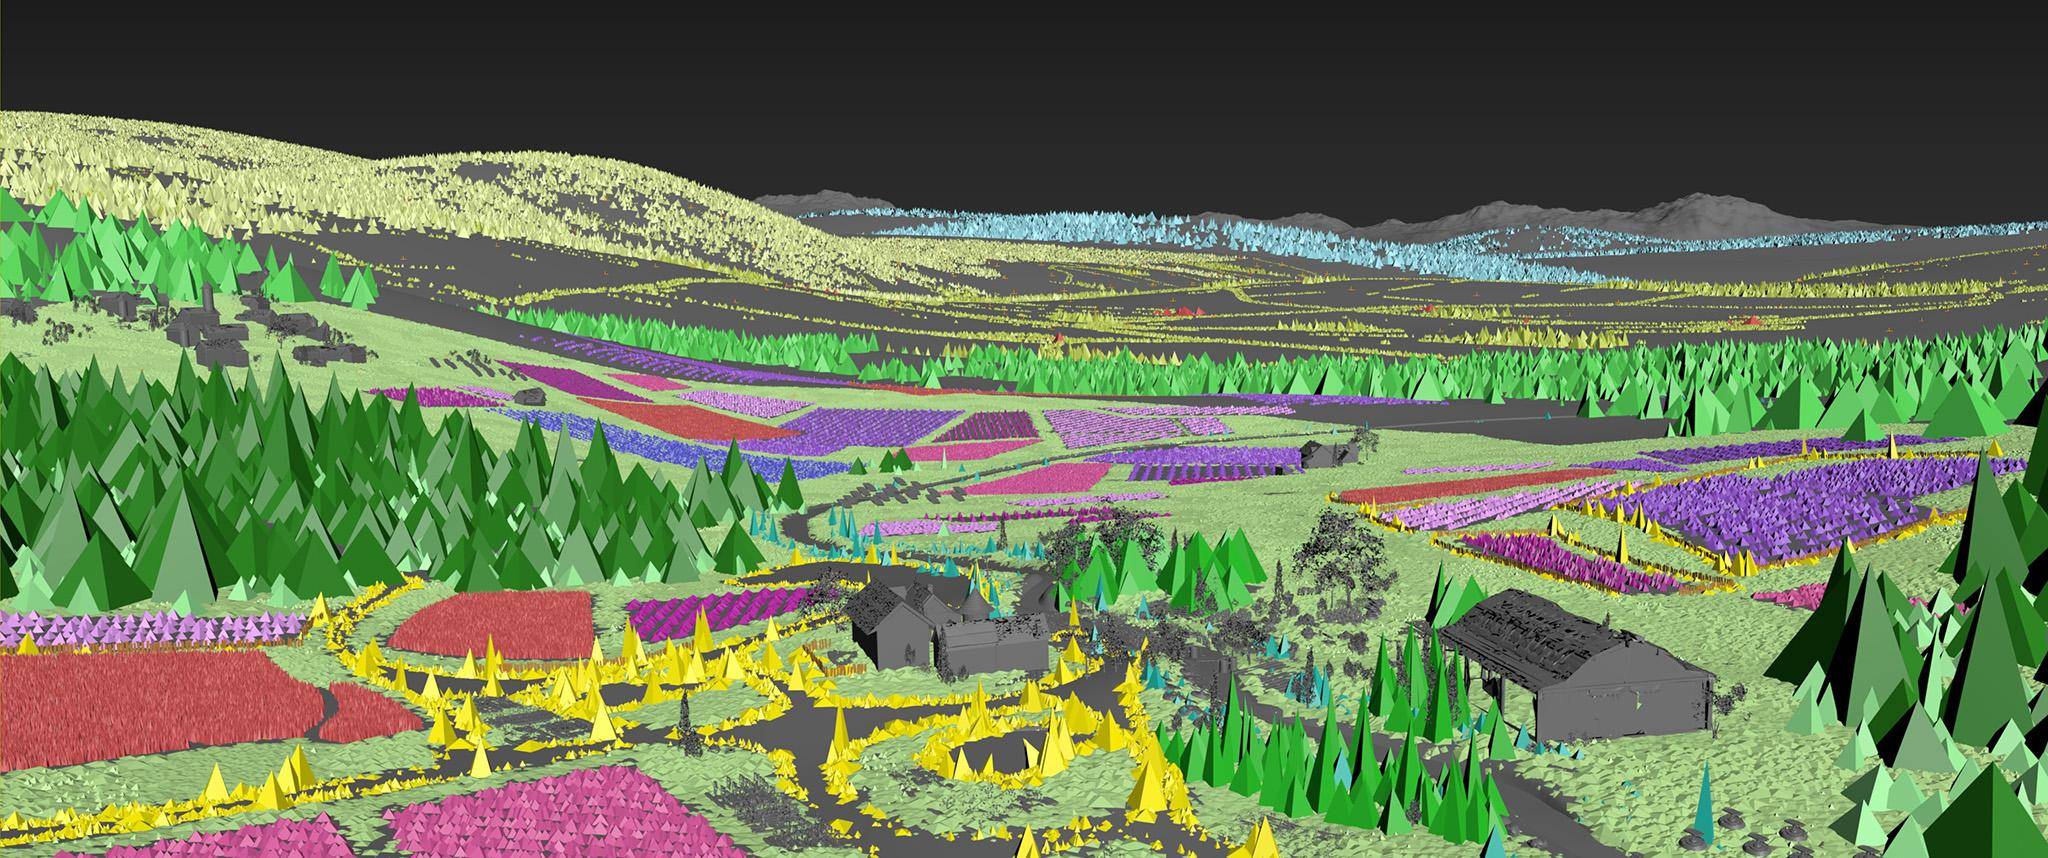
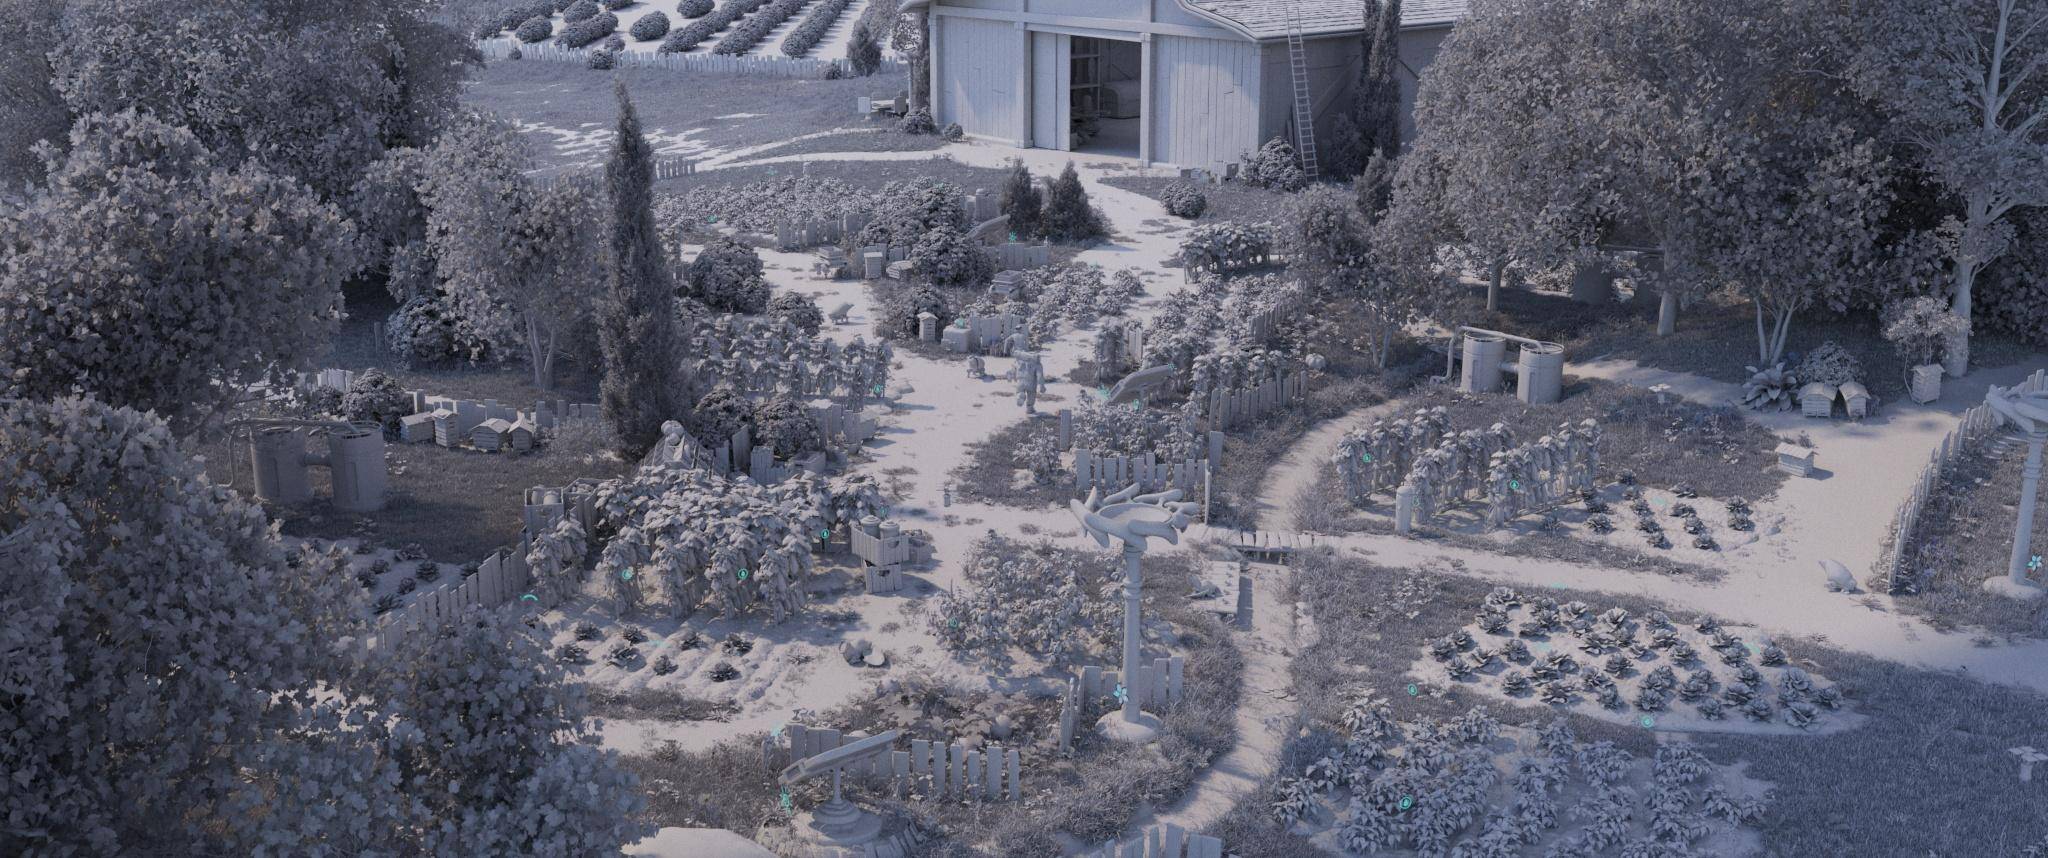
For the opening sequence, I relied on multiple ForestPack objects to scatter a wide variety of elements, including grass, trees, fields, fences, and props. Using ForestLister, I managed dozens of layers efficiently, reusing the same setups across middle and background shots to maintain consistency.
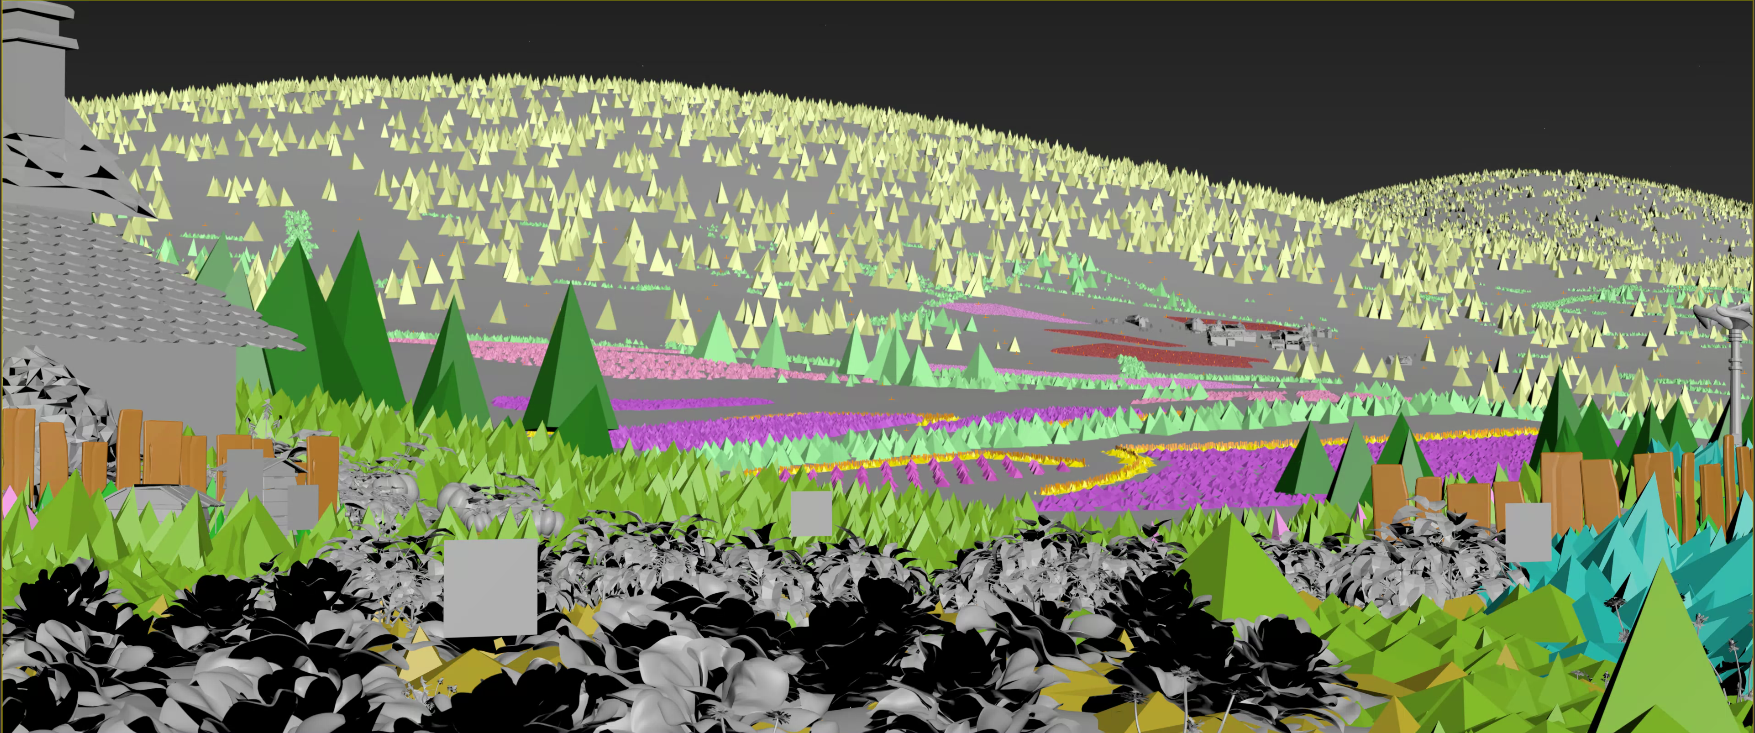
To optimize performance and keep the scene manageable, larger patches of grass were scattered in simplified setups, reserving more detailed distributions for closer views of the farm. You can see each ForestPack object color-coded in the viewport capture below , so you can easily identify the different layers such as crops, tree clusters, or architectural details.
This structured approach ensured that the composition read well from far, mid, and close-up distances, while minimizing visual noise and keeping the project lightweight enough to handle in 3ds Max and V-Ray.
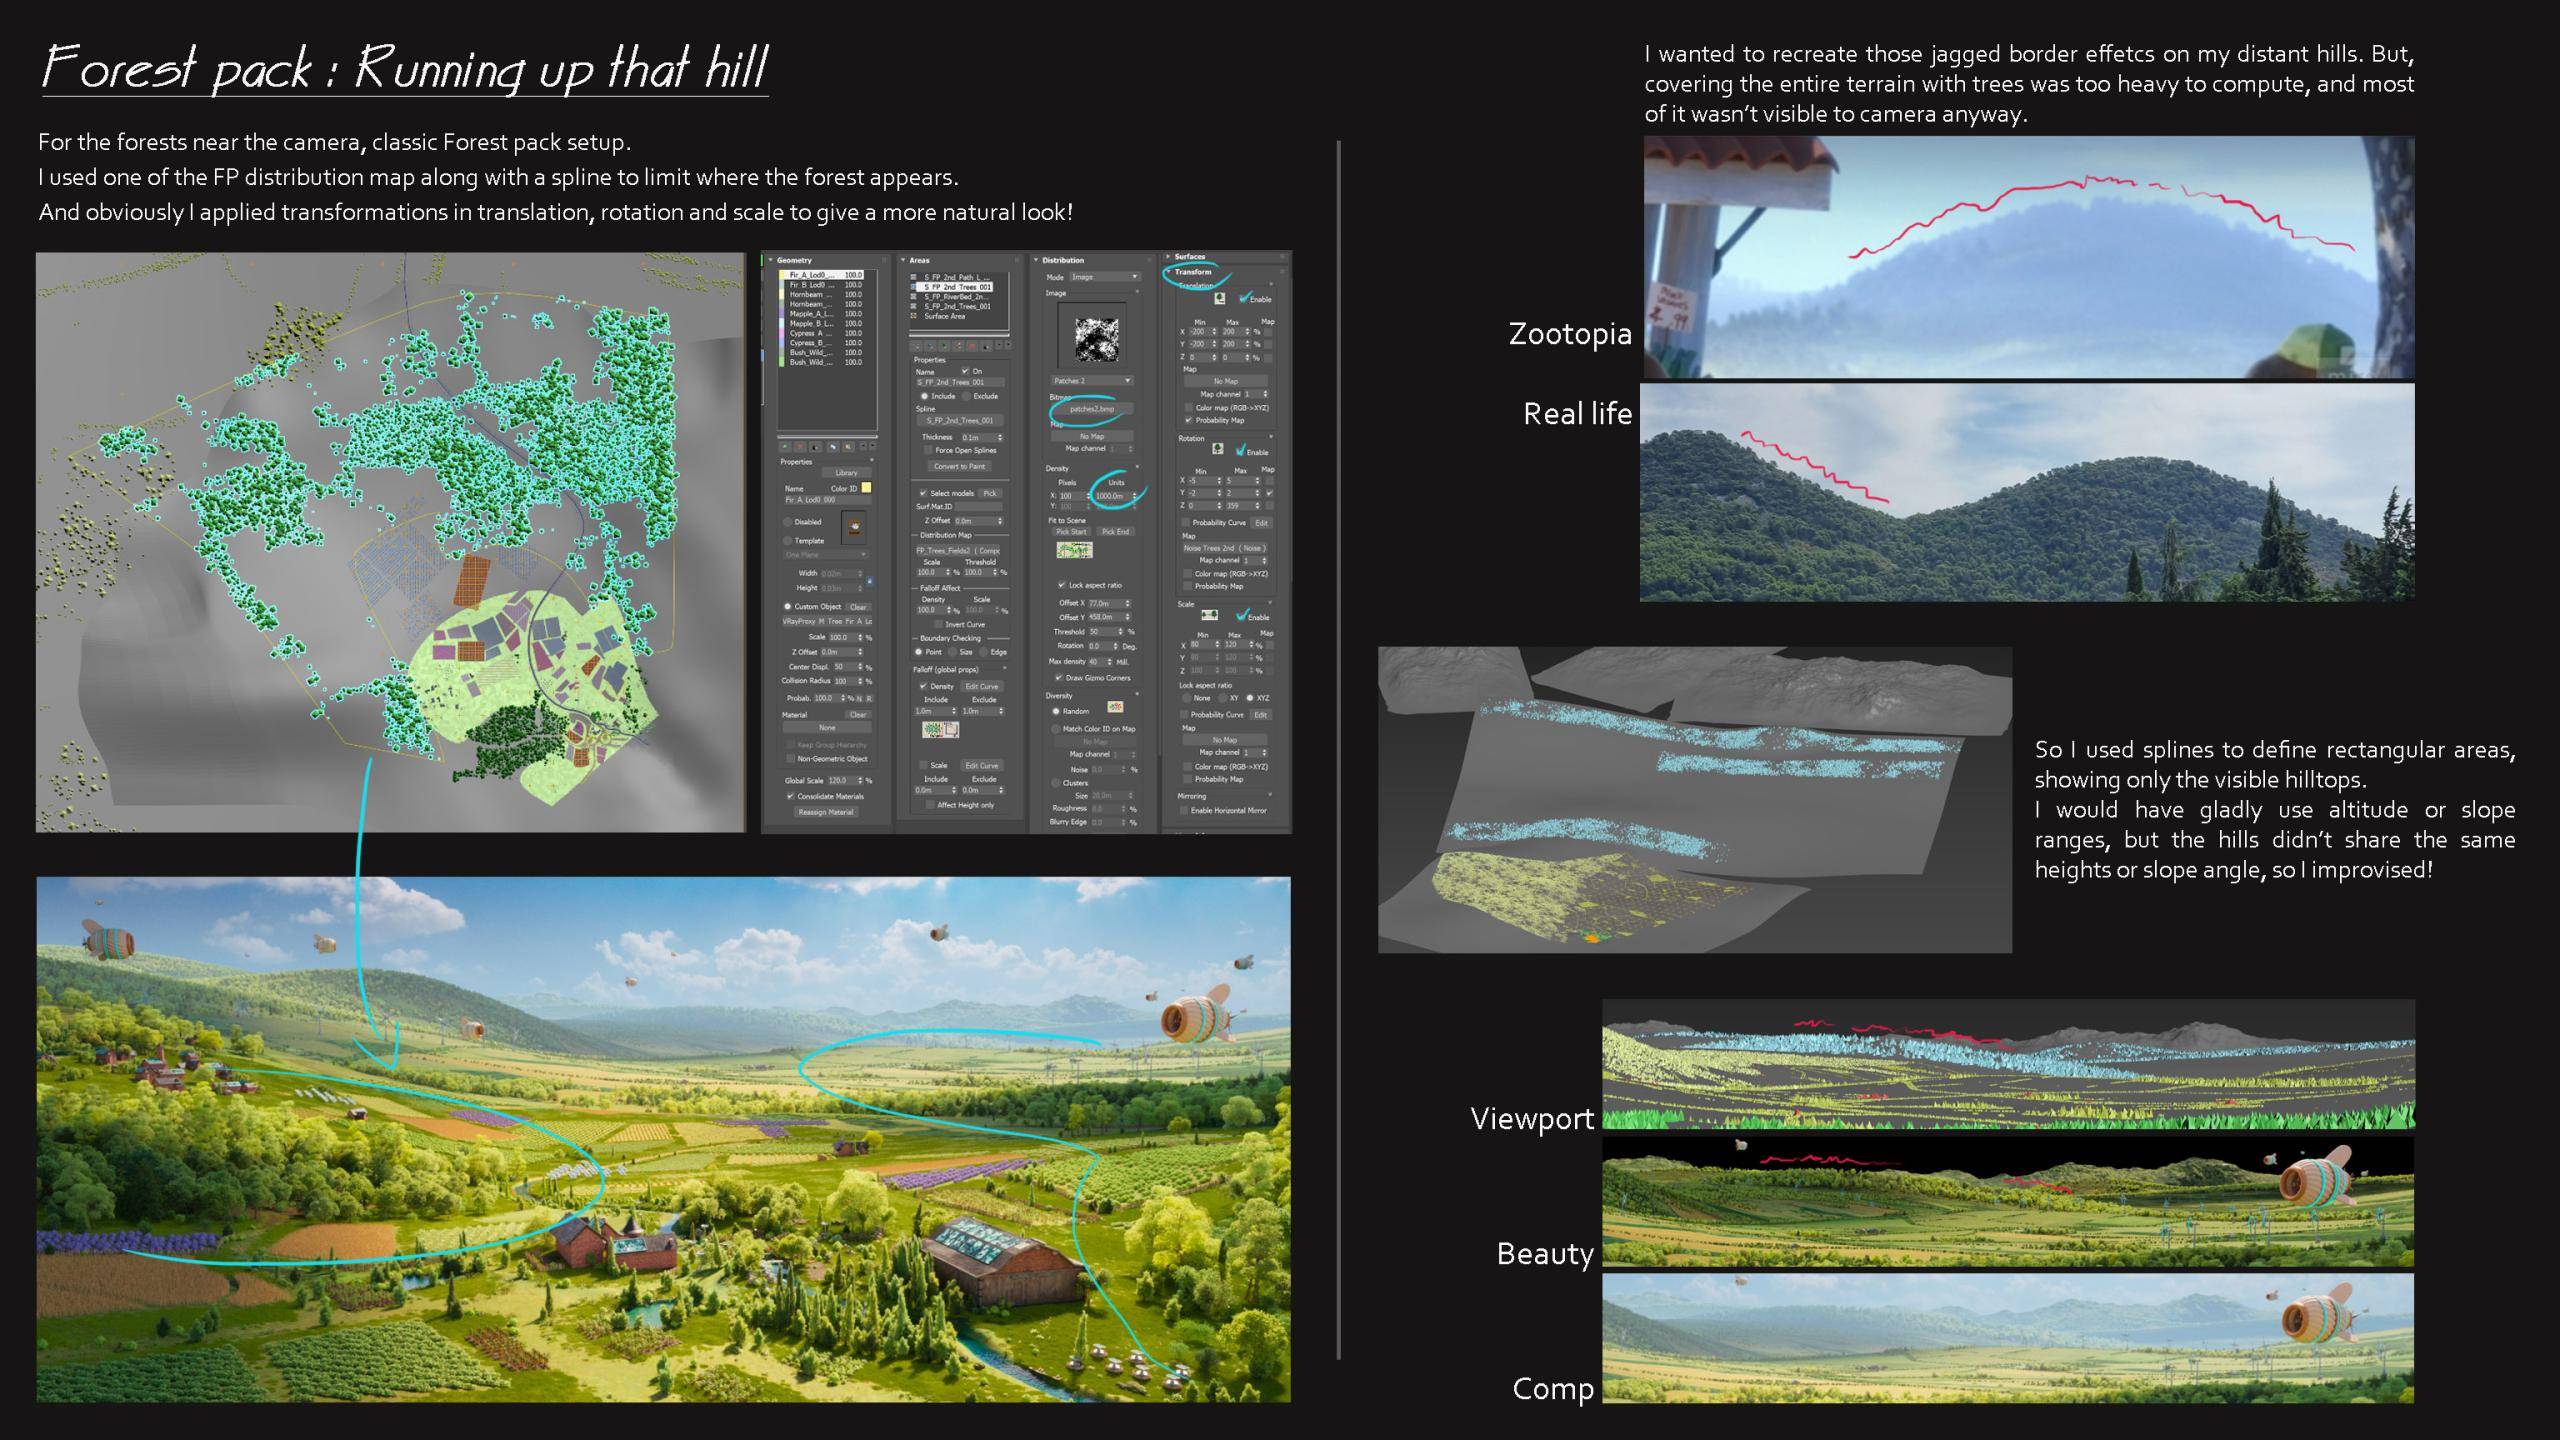
Running up that hill

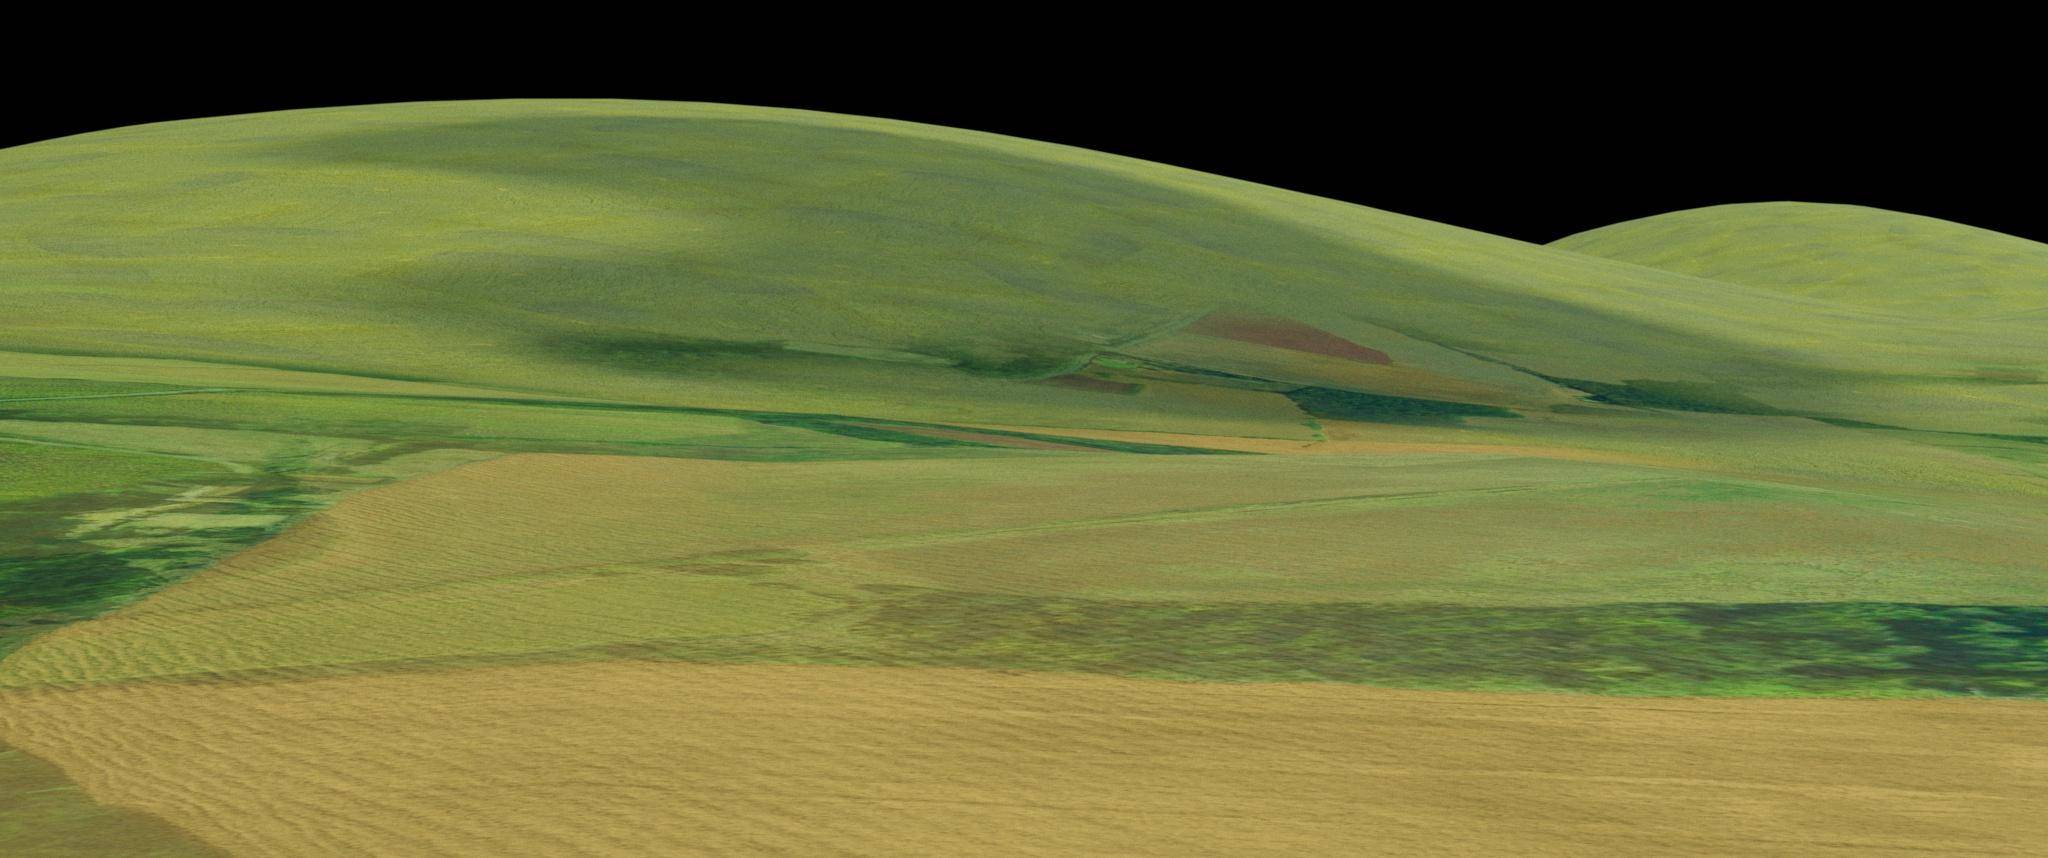
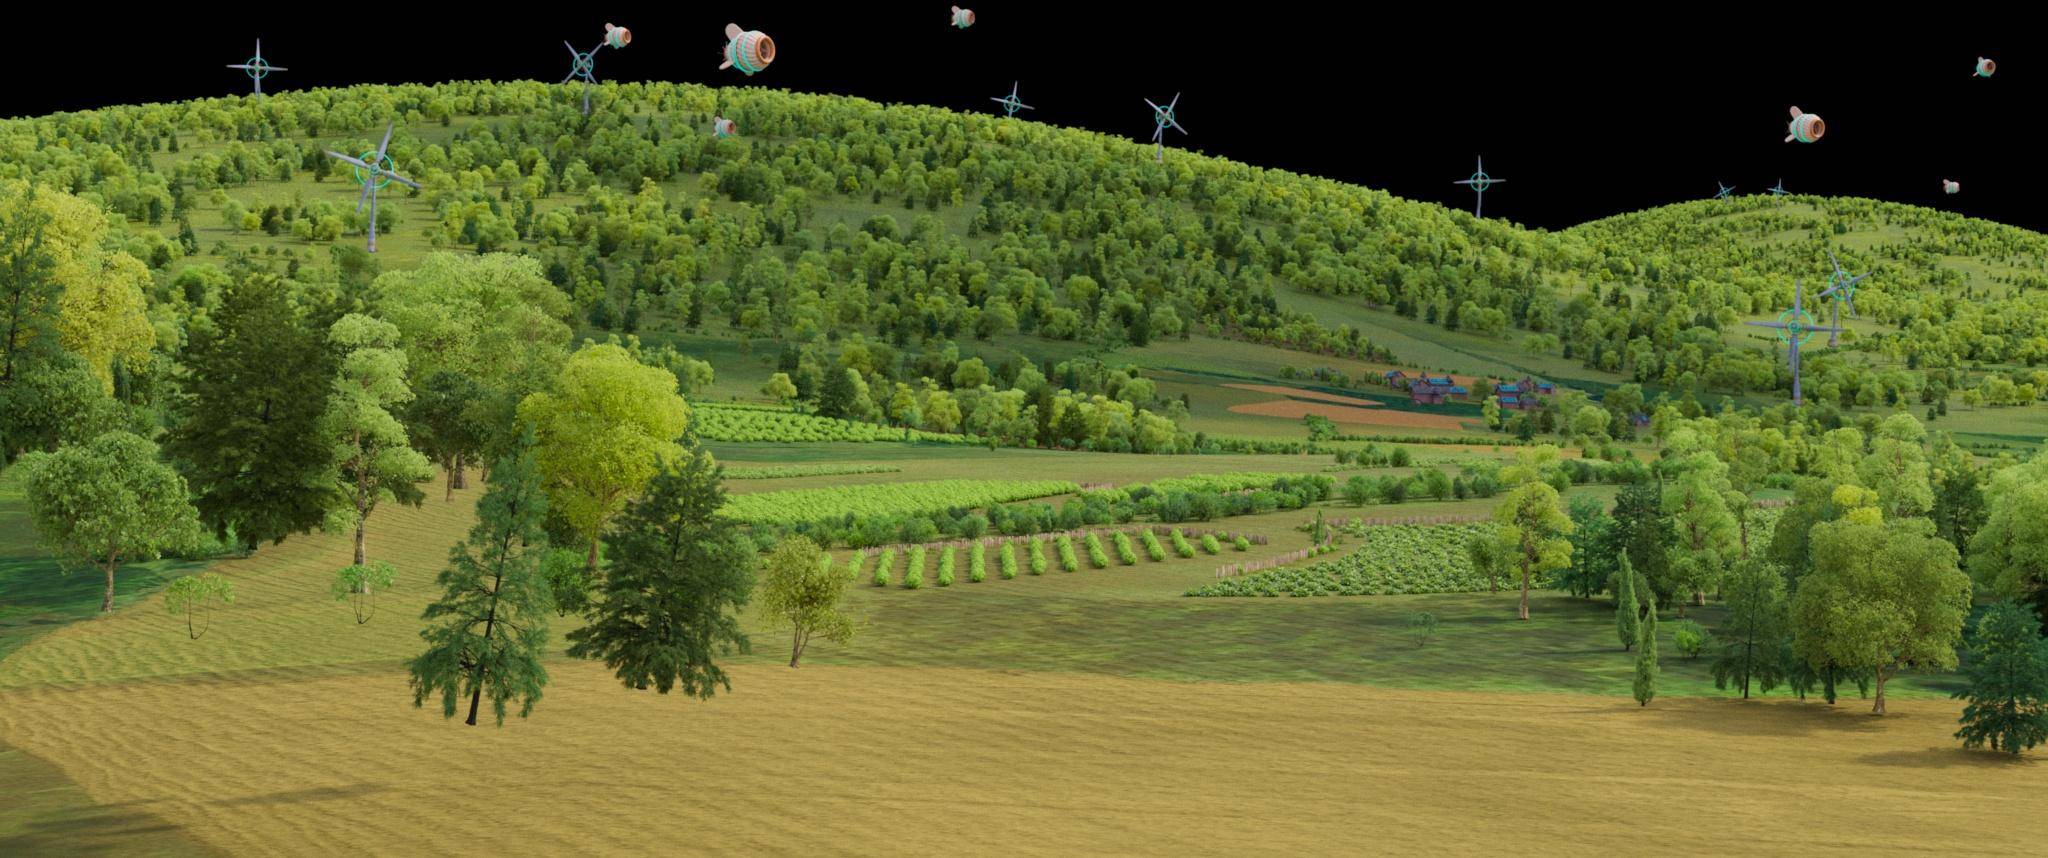
For the forests near the farm, I used a classic ForestPack setup in 3ds Max. I combined a distribution map with a spline to limit where the trees appear, and added random transformations in translation, rotation, and scale to keep the result looking natural.
One of my goals was to reproduce the jagged silhouette you see on real hillsides and in animated references like Zootopia. Filling the entire terrain with trees was too heavy to compute, and most of it wasn’t even visible to camera. To solve this, I drew splines only around the visible hilltops. I would have preferred to use altitude or slope ranges, but the hills didn’t share consistent heights or angles, so this improvisation worked best.
By focusing only on what the camera could see, I achieved a believable treeline without overloading the scene. This way, the environment looks detailed where it matters most while staying efficient for rendering.
Trees Look Development
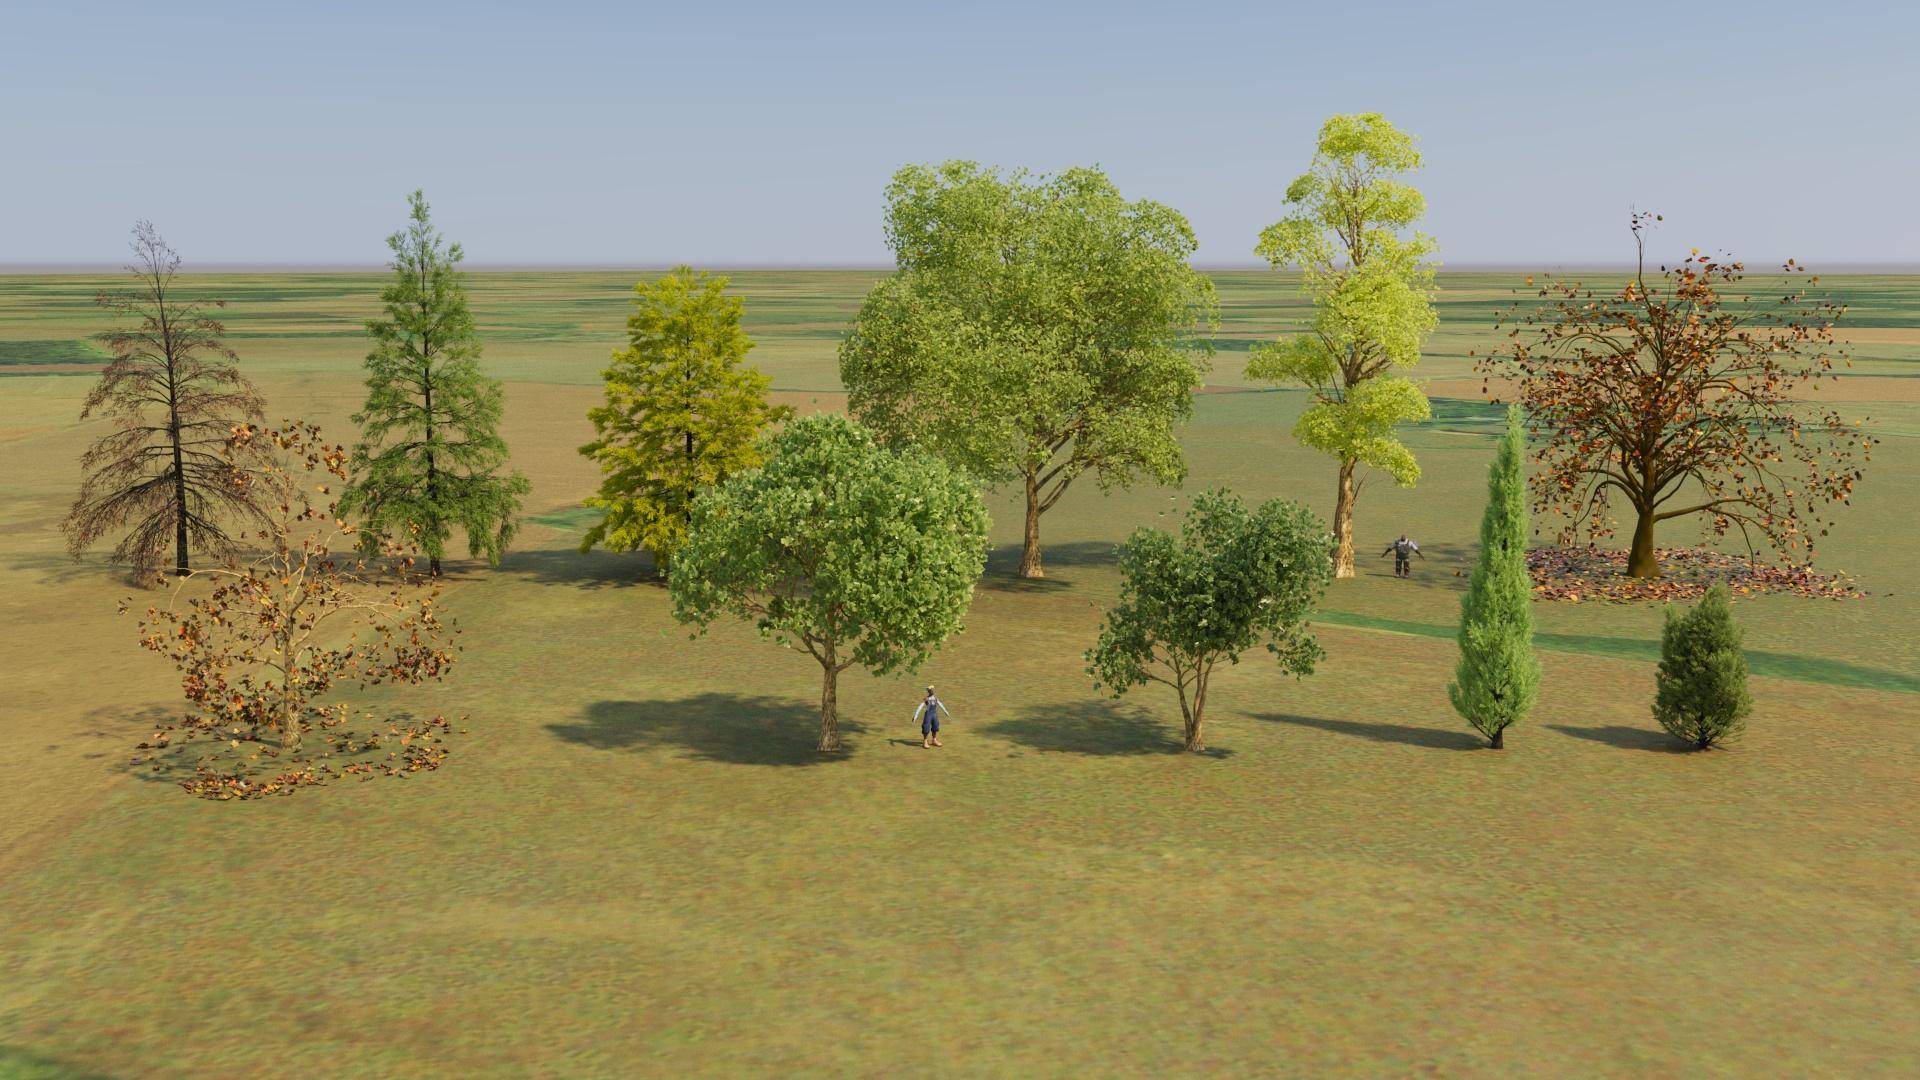
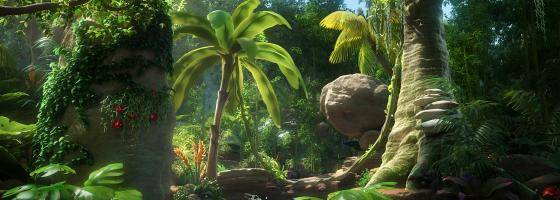
To have a stylized feeling from the trees, I created a library with speedtree of different species with bubbly and conic shapes. They are used in the whole movie to keep the coherence between the shots.
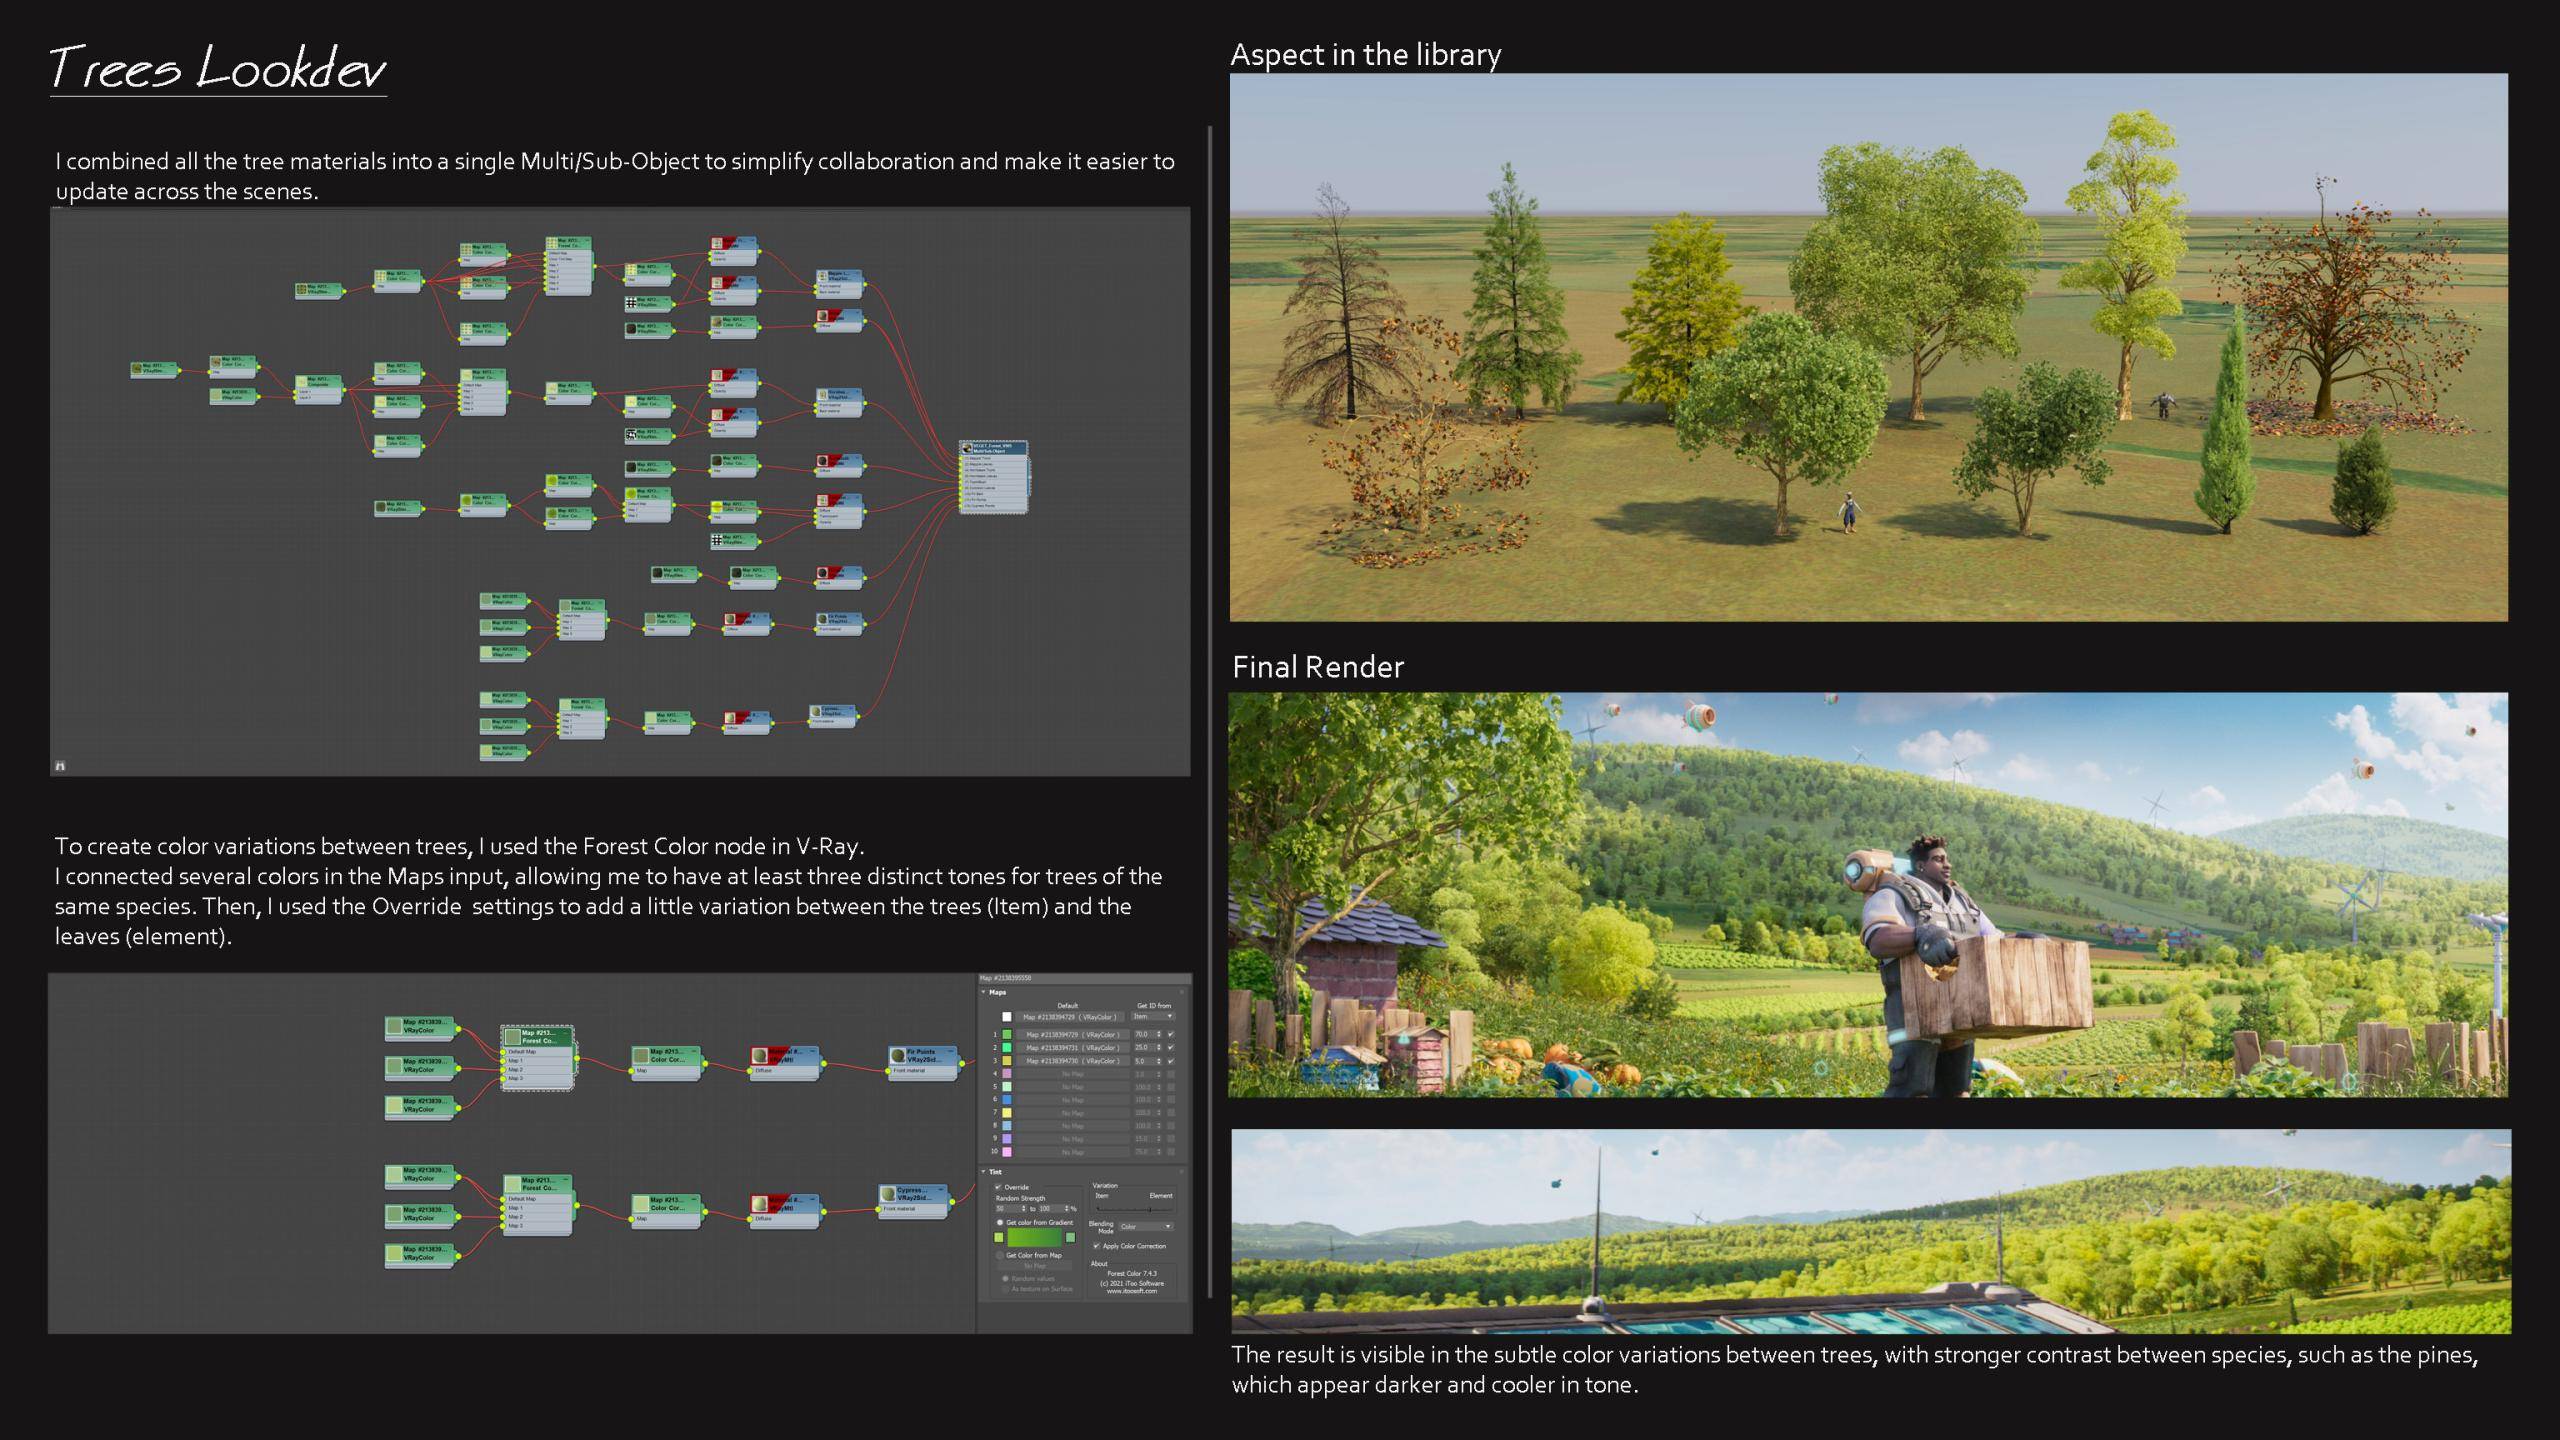
To keep the project organized, I combined all the tree materials into a single Multi/Sub-Object material. This made collaboration easier across the team and allowed me to update shaders consistently throughout the film.
For variation, I relied on the ForestColor node. By plugging several different tones into the Maps input, I could generate at least three distinct shades for trees of the same species. On top of that, I used the Override settings to create subtle differences not only between individual trees but also between the leaves.
This setup gave me finer control over the look of the vegetation. The result is visible in the final renders, where you can see nuanced color shifts between trees. Pines, for example, appear cooler and darker, creating stronger contrast with the warmer deciduous species. These small details helped the stylized environments feel more natural and believable.
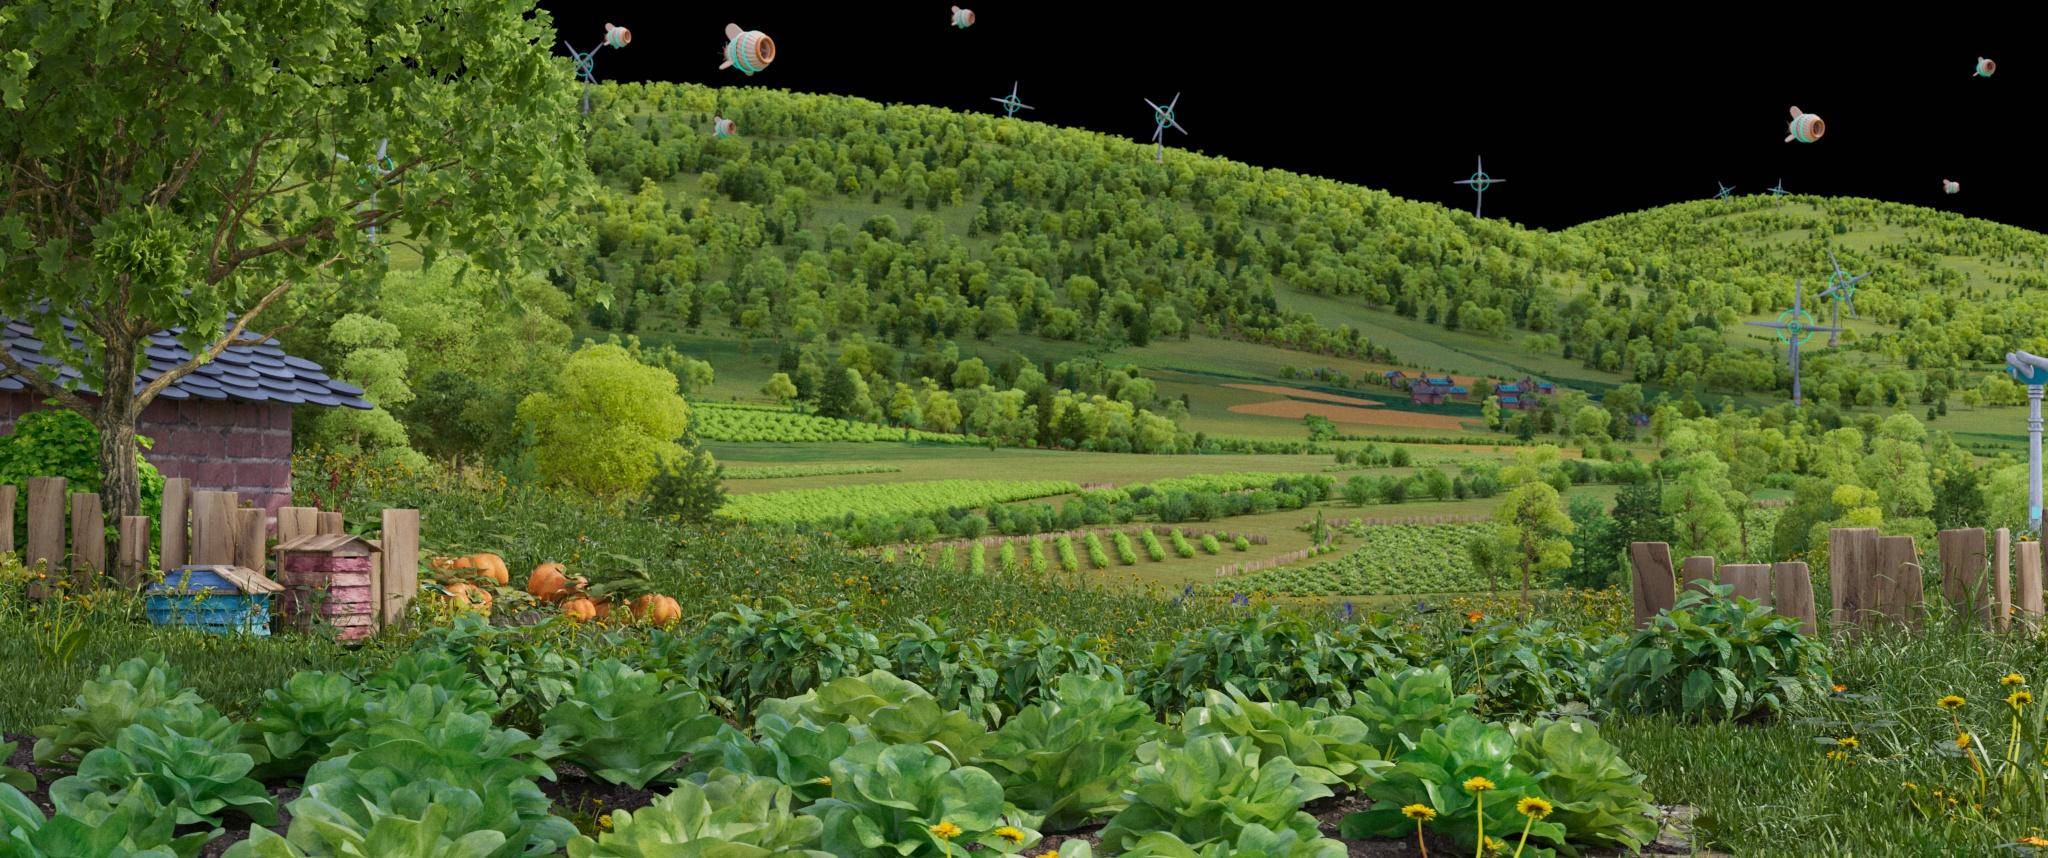
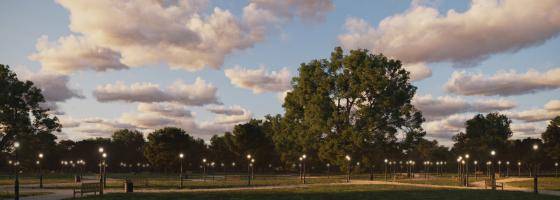
Farm Overview and Grass
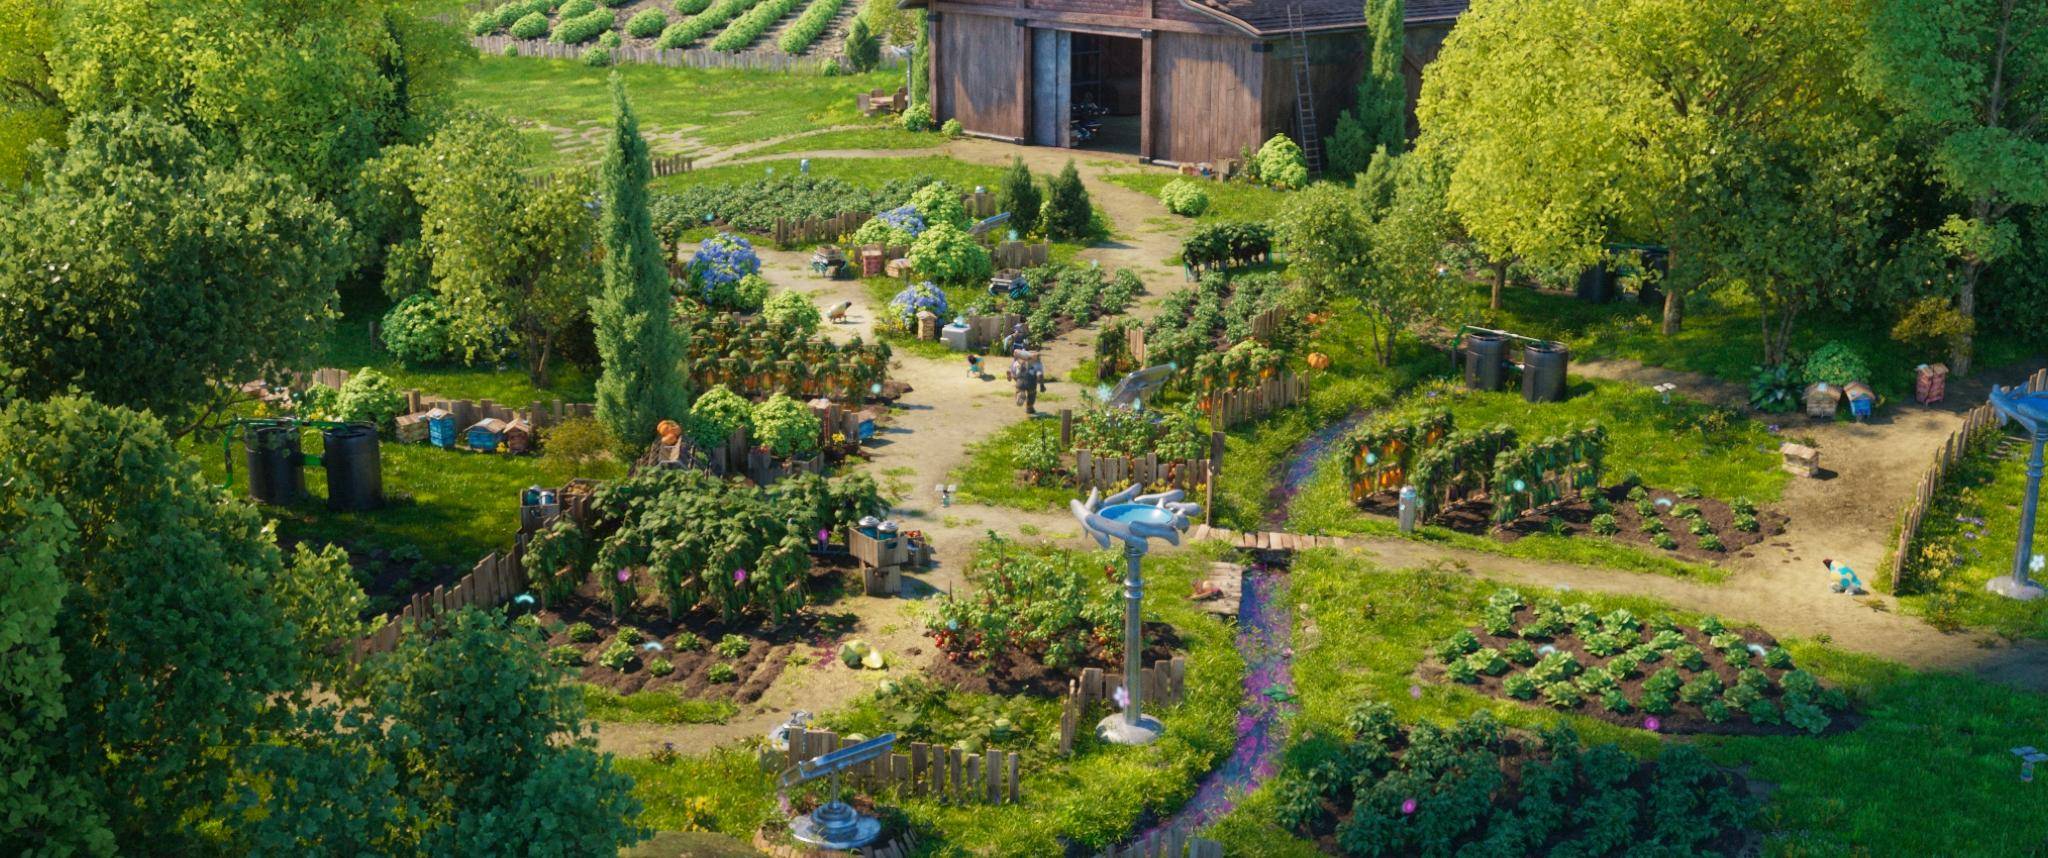
For the farm environment, I created a dedicated ForestPack setup for the close-up shots where the robots walk. This area needed more detail than the general fields, so I used higher-density grass scattering and added control over flower placement to make sure the composition looked appealing at camera level.
For the wider farm scenes, I relied on splines to define the main grass areas and set up exclusion zones for paths, the river, and other specific spaces. This gave me precise control over the distribution and kept the scene clean. Once the main layout was in place, I used ForestPack’s Painting Areas to refine the scattering, adding variation and polish where it was most visible.
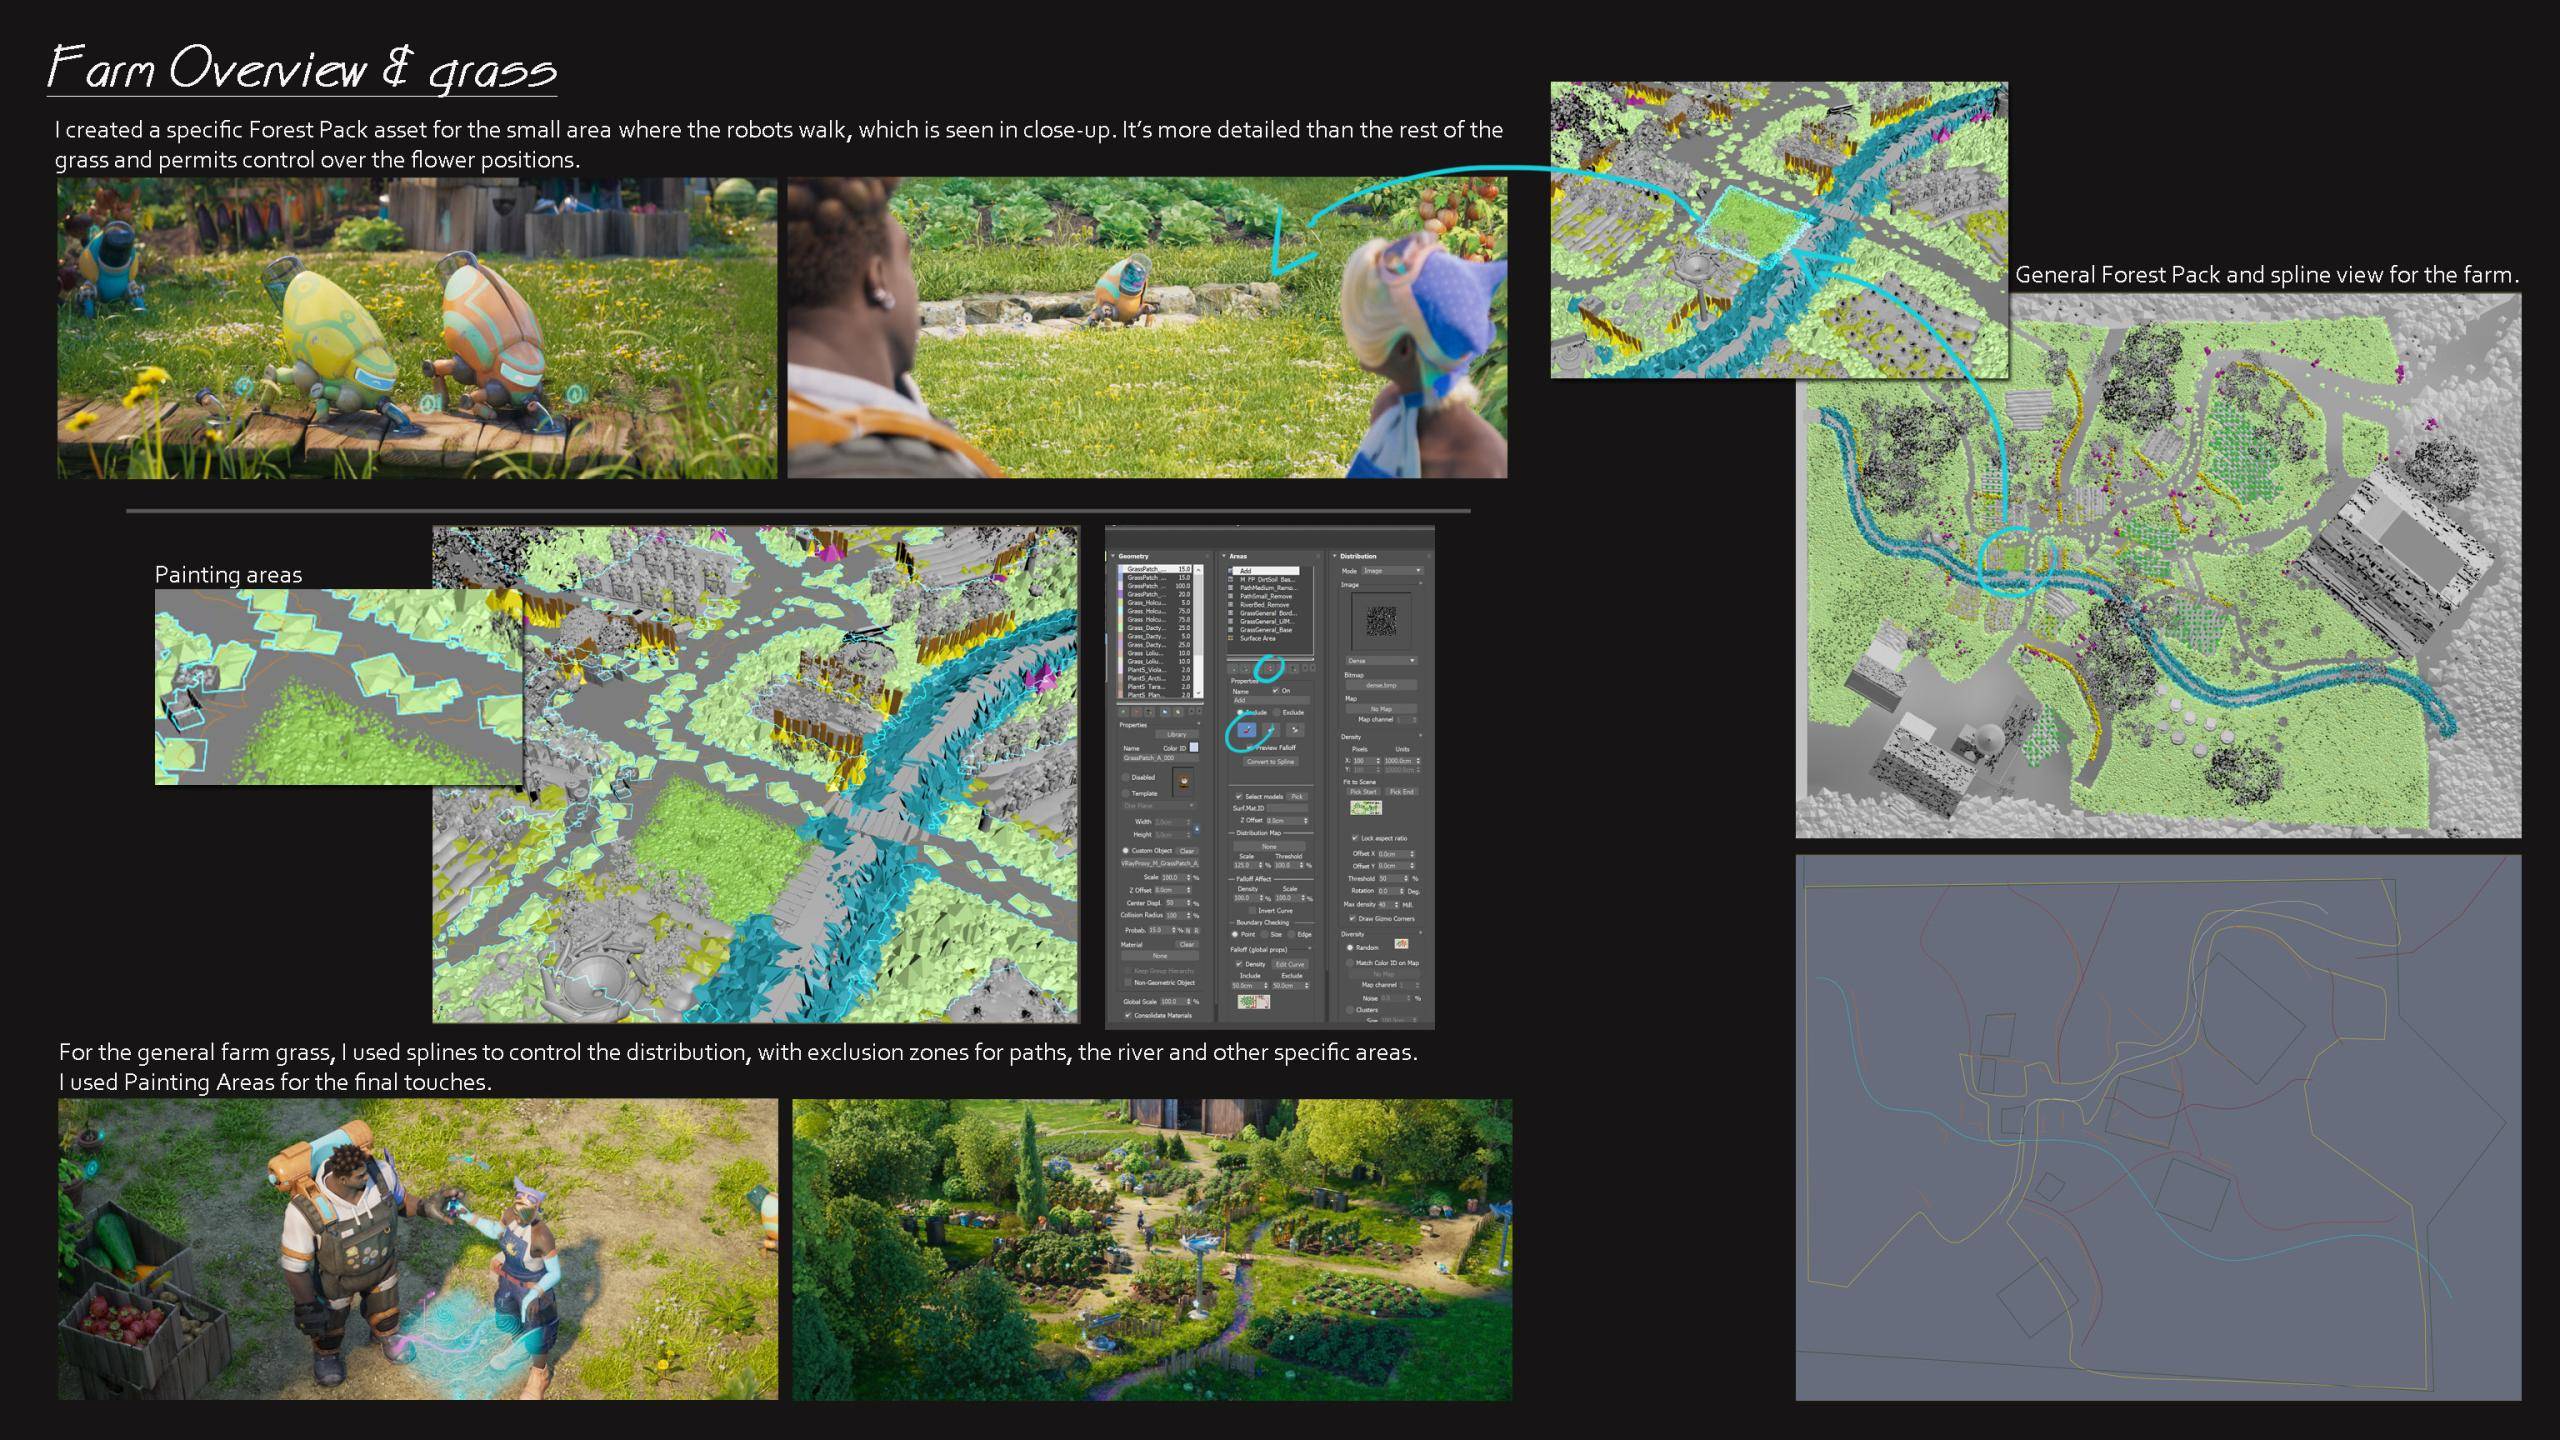
This combination of splines for structure and painting tools for detail allowed me to balance efficiency with flexibility. The result is a farm that feels stylized but still grounded, with grass and flowers that respond naturally to the scale of the shots.
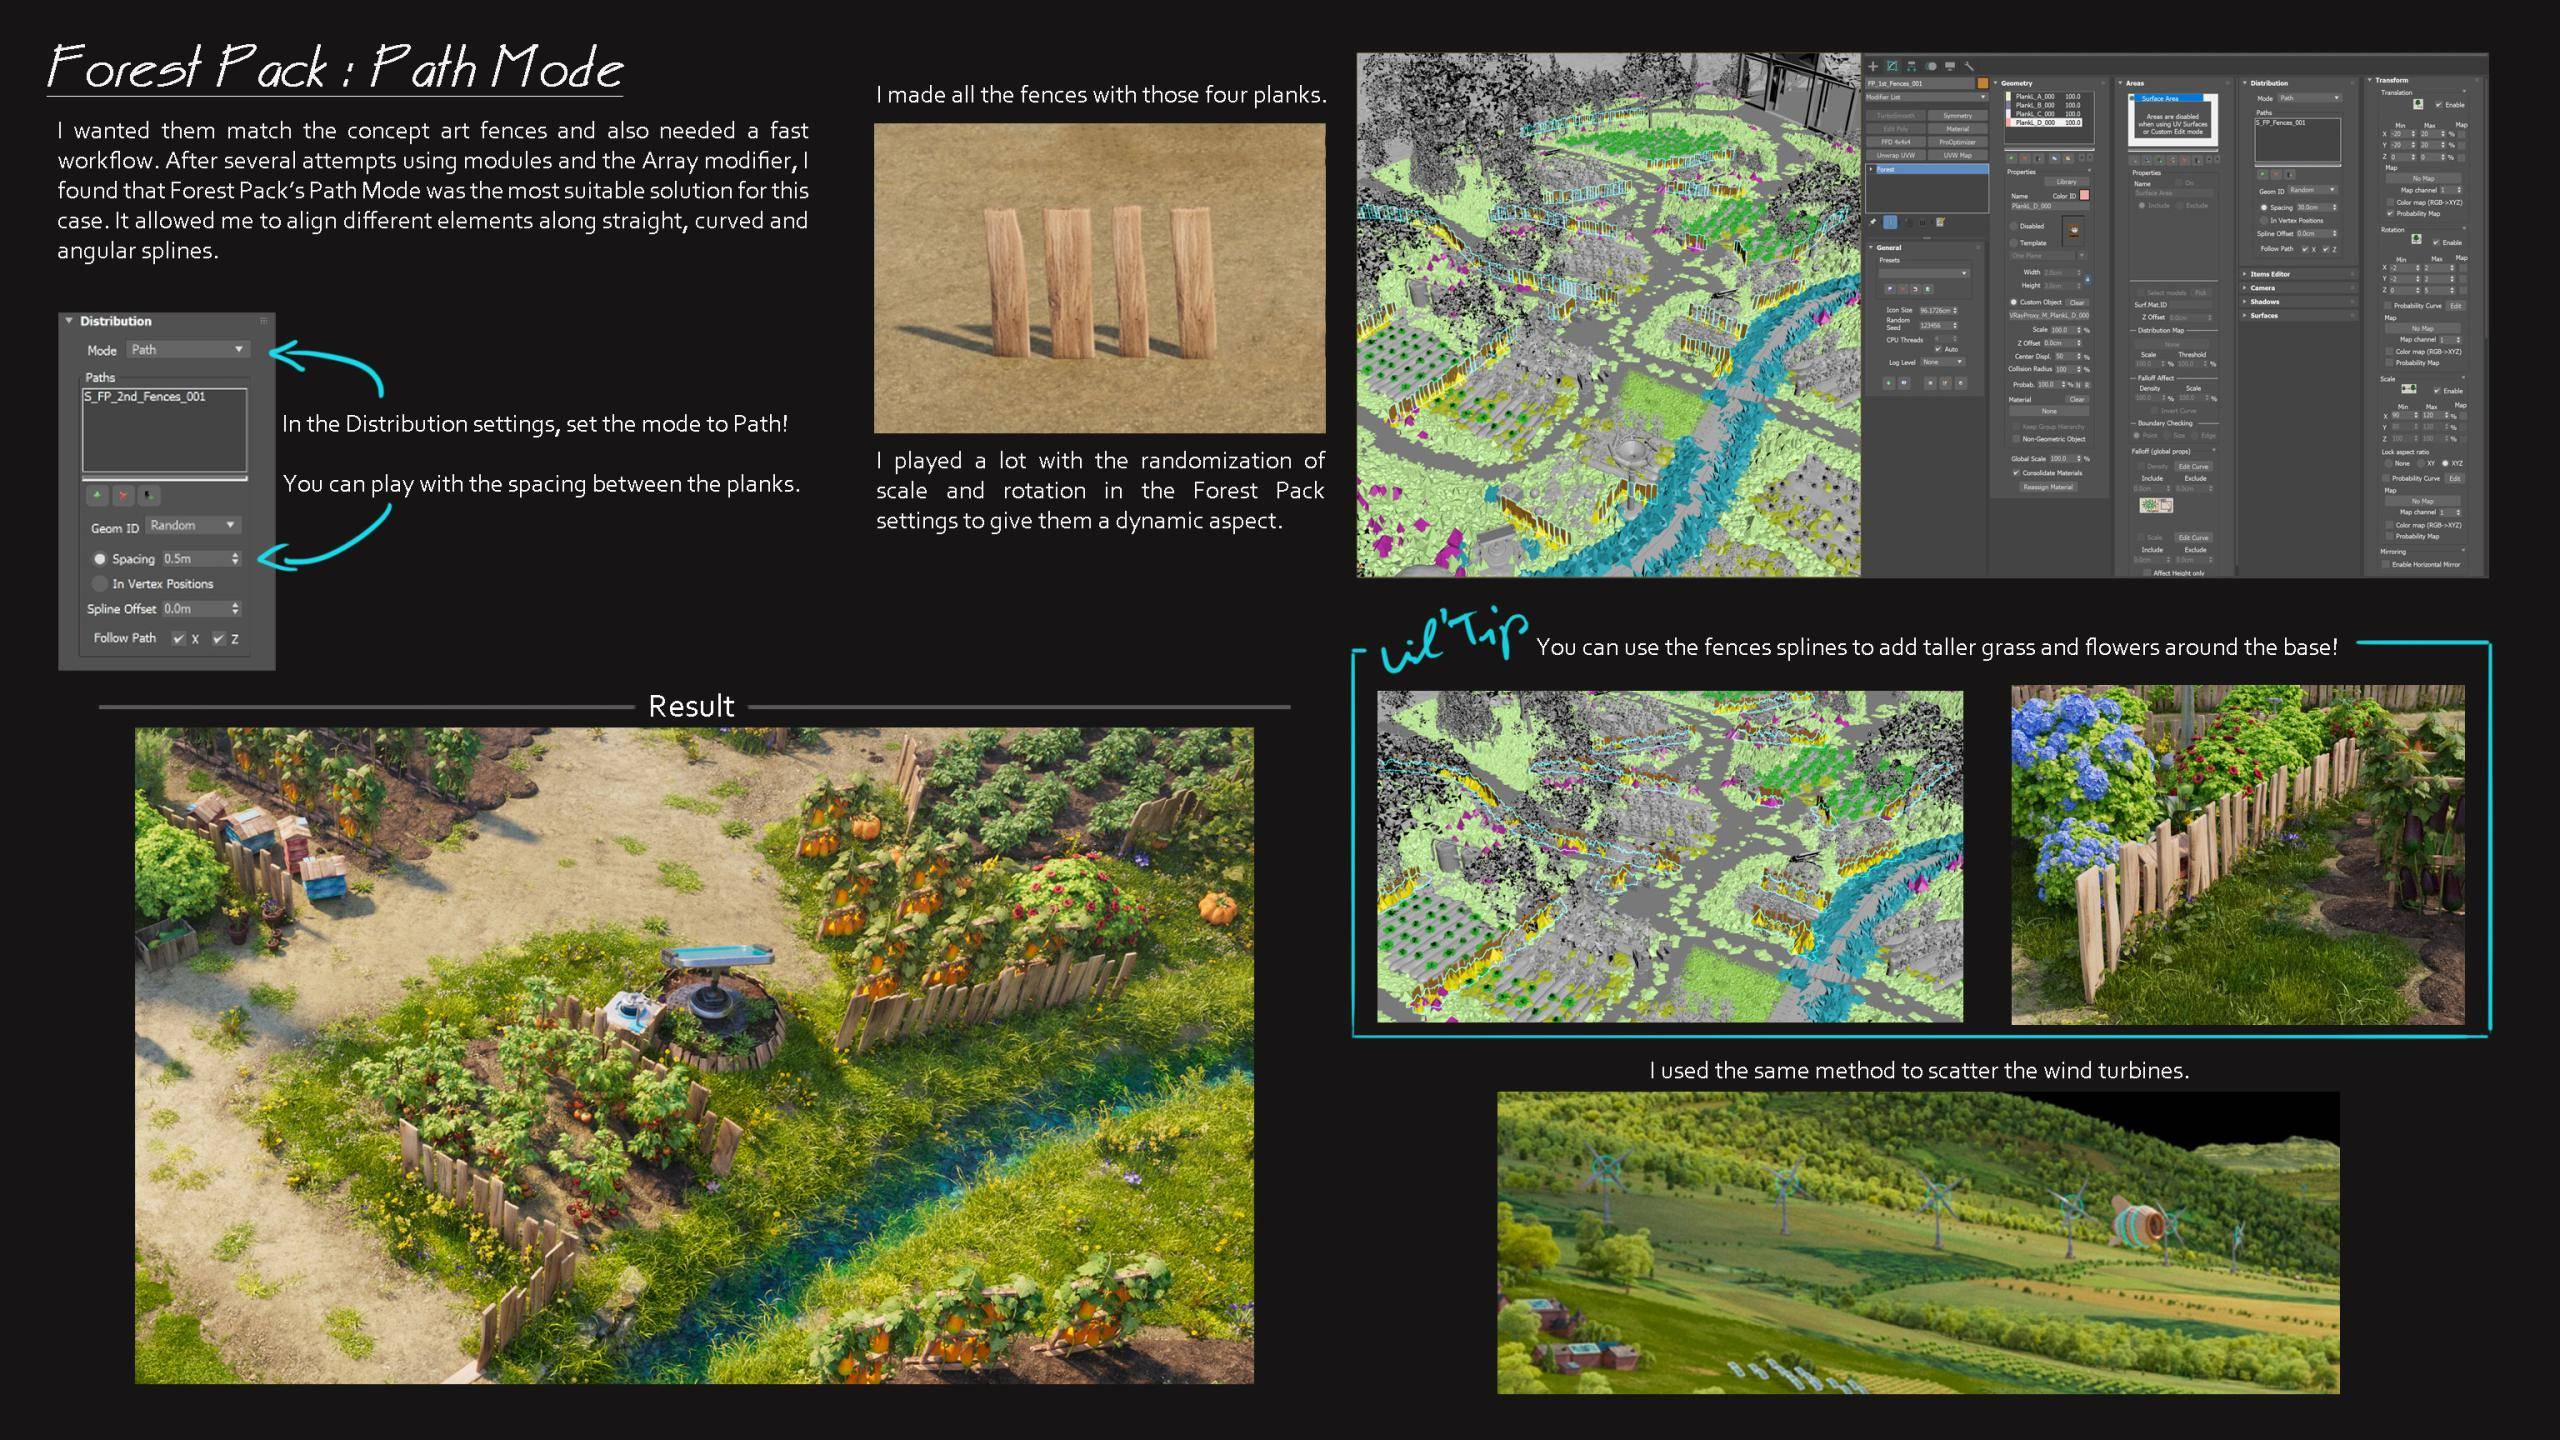
Path Mode for Fences and Wind Turbines

For the fences, I wanted to stay faithful to the concept art while keeping the workflow efficient. ForestPack’s Path Mode allowed me to align planks along splines of any shape, from straight to curved. I created all the fences from just four planks and used ForestPack’s randomization settings to vary scale and rotation. By adjusting Distribution spacing, I controlled how tightly the planks were placed.
As a finishing touch, I used the same fence splines to scatter taller grass and flowers around the base, which helped integrate them into the environment. The exact same method was used to place other repeating elements, such as the rows of wind turbines on the hillsides.
This workflow was quick, flexible, and gave me a natural result that fit perfectly with the stylized look of the project.
The Riverside (Arthur)
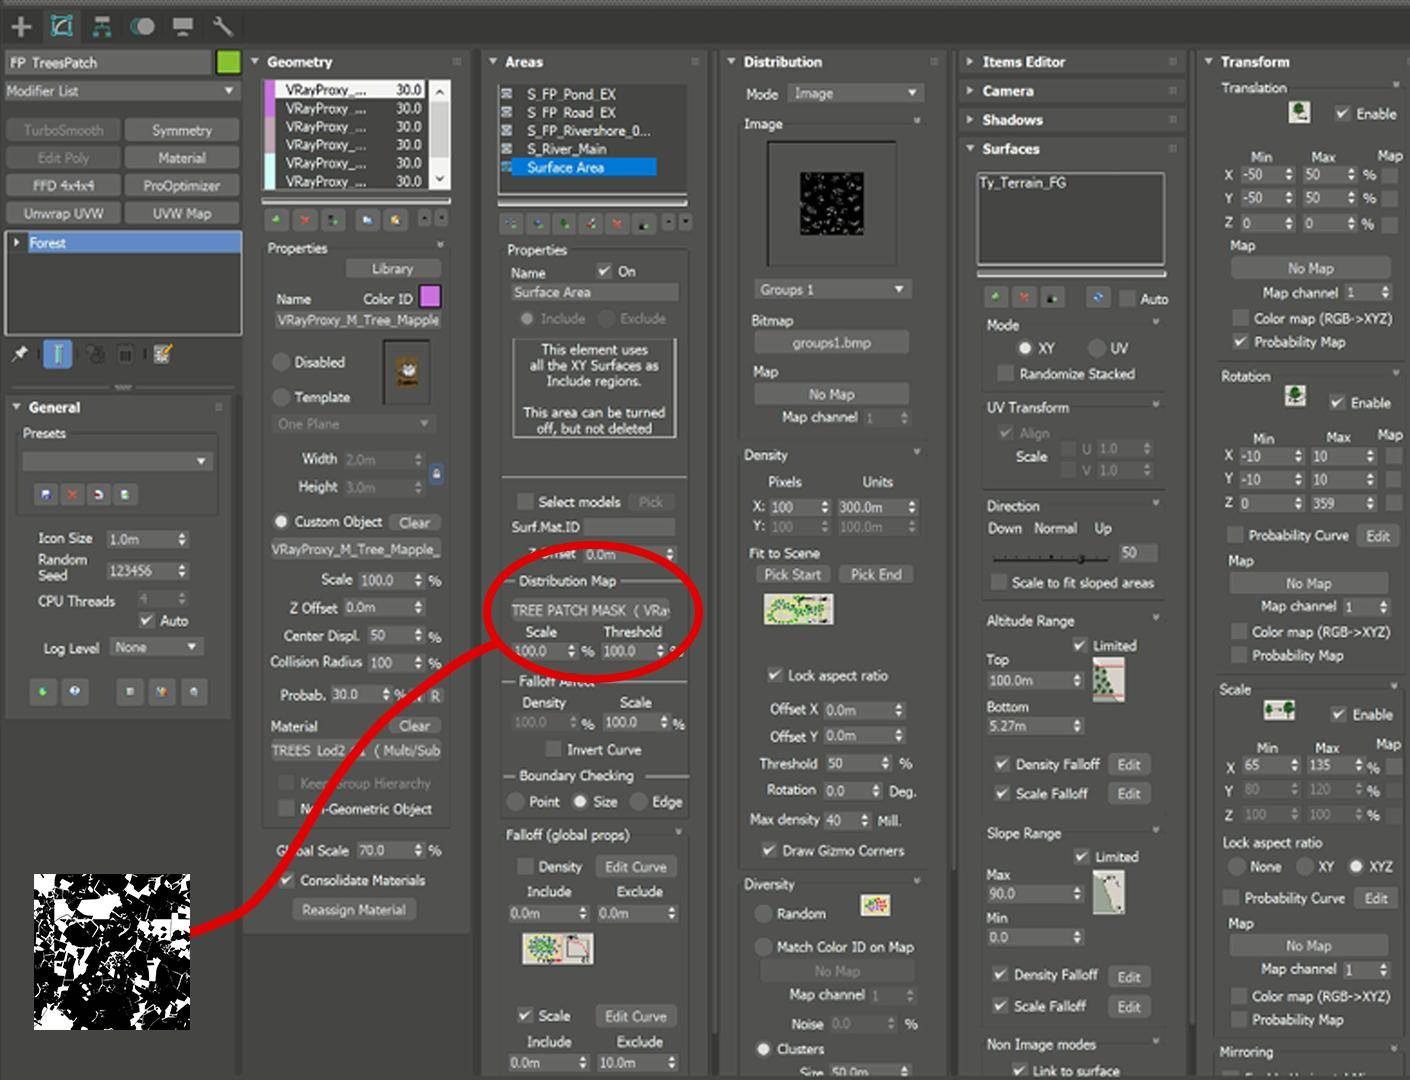
For this scene, I used a workflow based on masks painted in Photoshop directly on the terrain’s diffuse map. These masks defined vegetation zones and gave me precise control over the distribution of assets in ForestPack.
For the fields and grass, I kept the setup lightweight by using Bump and Normal maps instead of scattering dense geometry. This saved both time and resources while still producing a convincing look that matched our references.
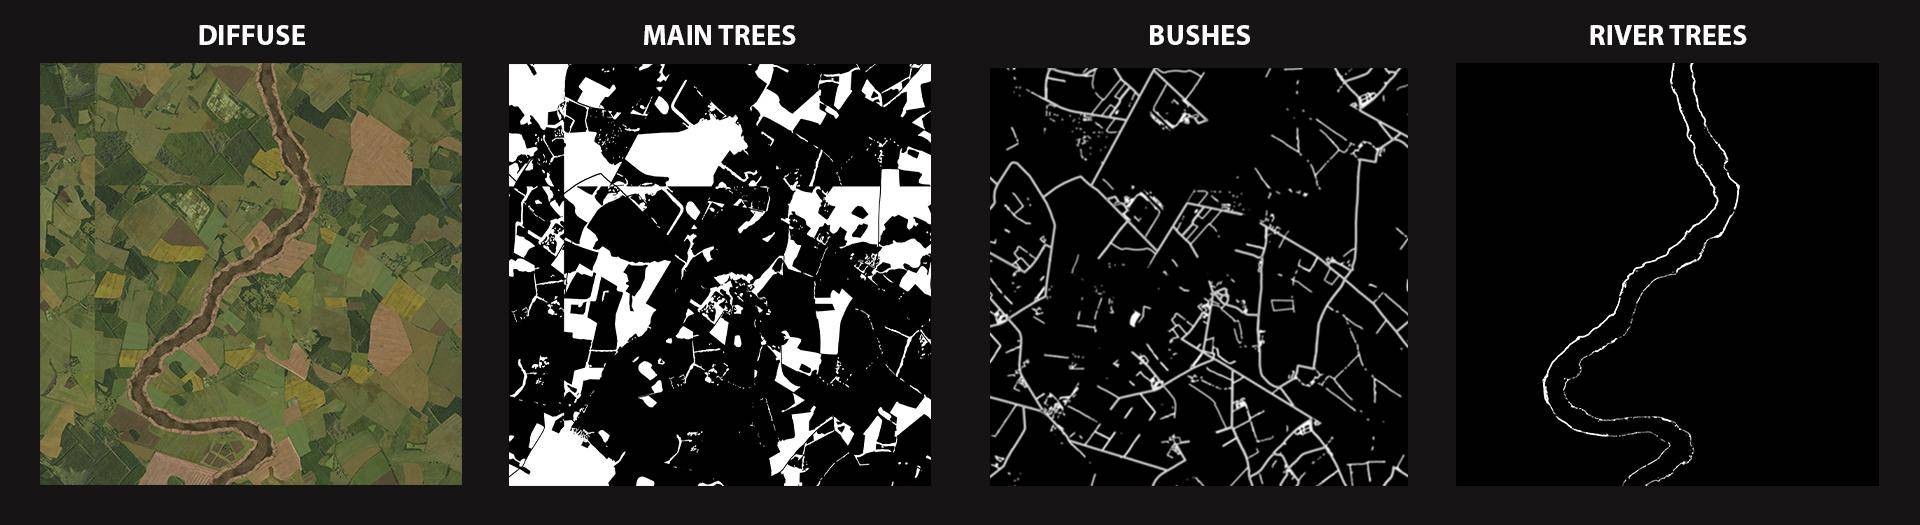
Once the masks were complete, I connected them to the Areas rollout in ForestPack to control the placement of instances. From there, I only had to adjust scale, density, and clustering to finalize the scene.
For this shot, I only needed three ForestPack setups:
- One for the main tree clusters
- One for bushes, mainly along roads and field borders
- One for the riverbanks
This workflow shows how good mask preparation, combined with smart resource management, can deliver detailed environments in ForestPack without overloading the scene.
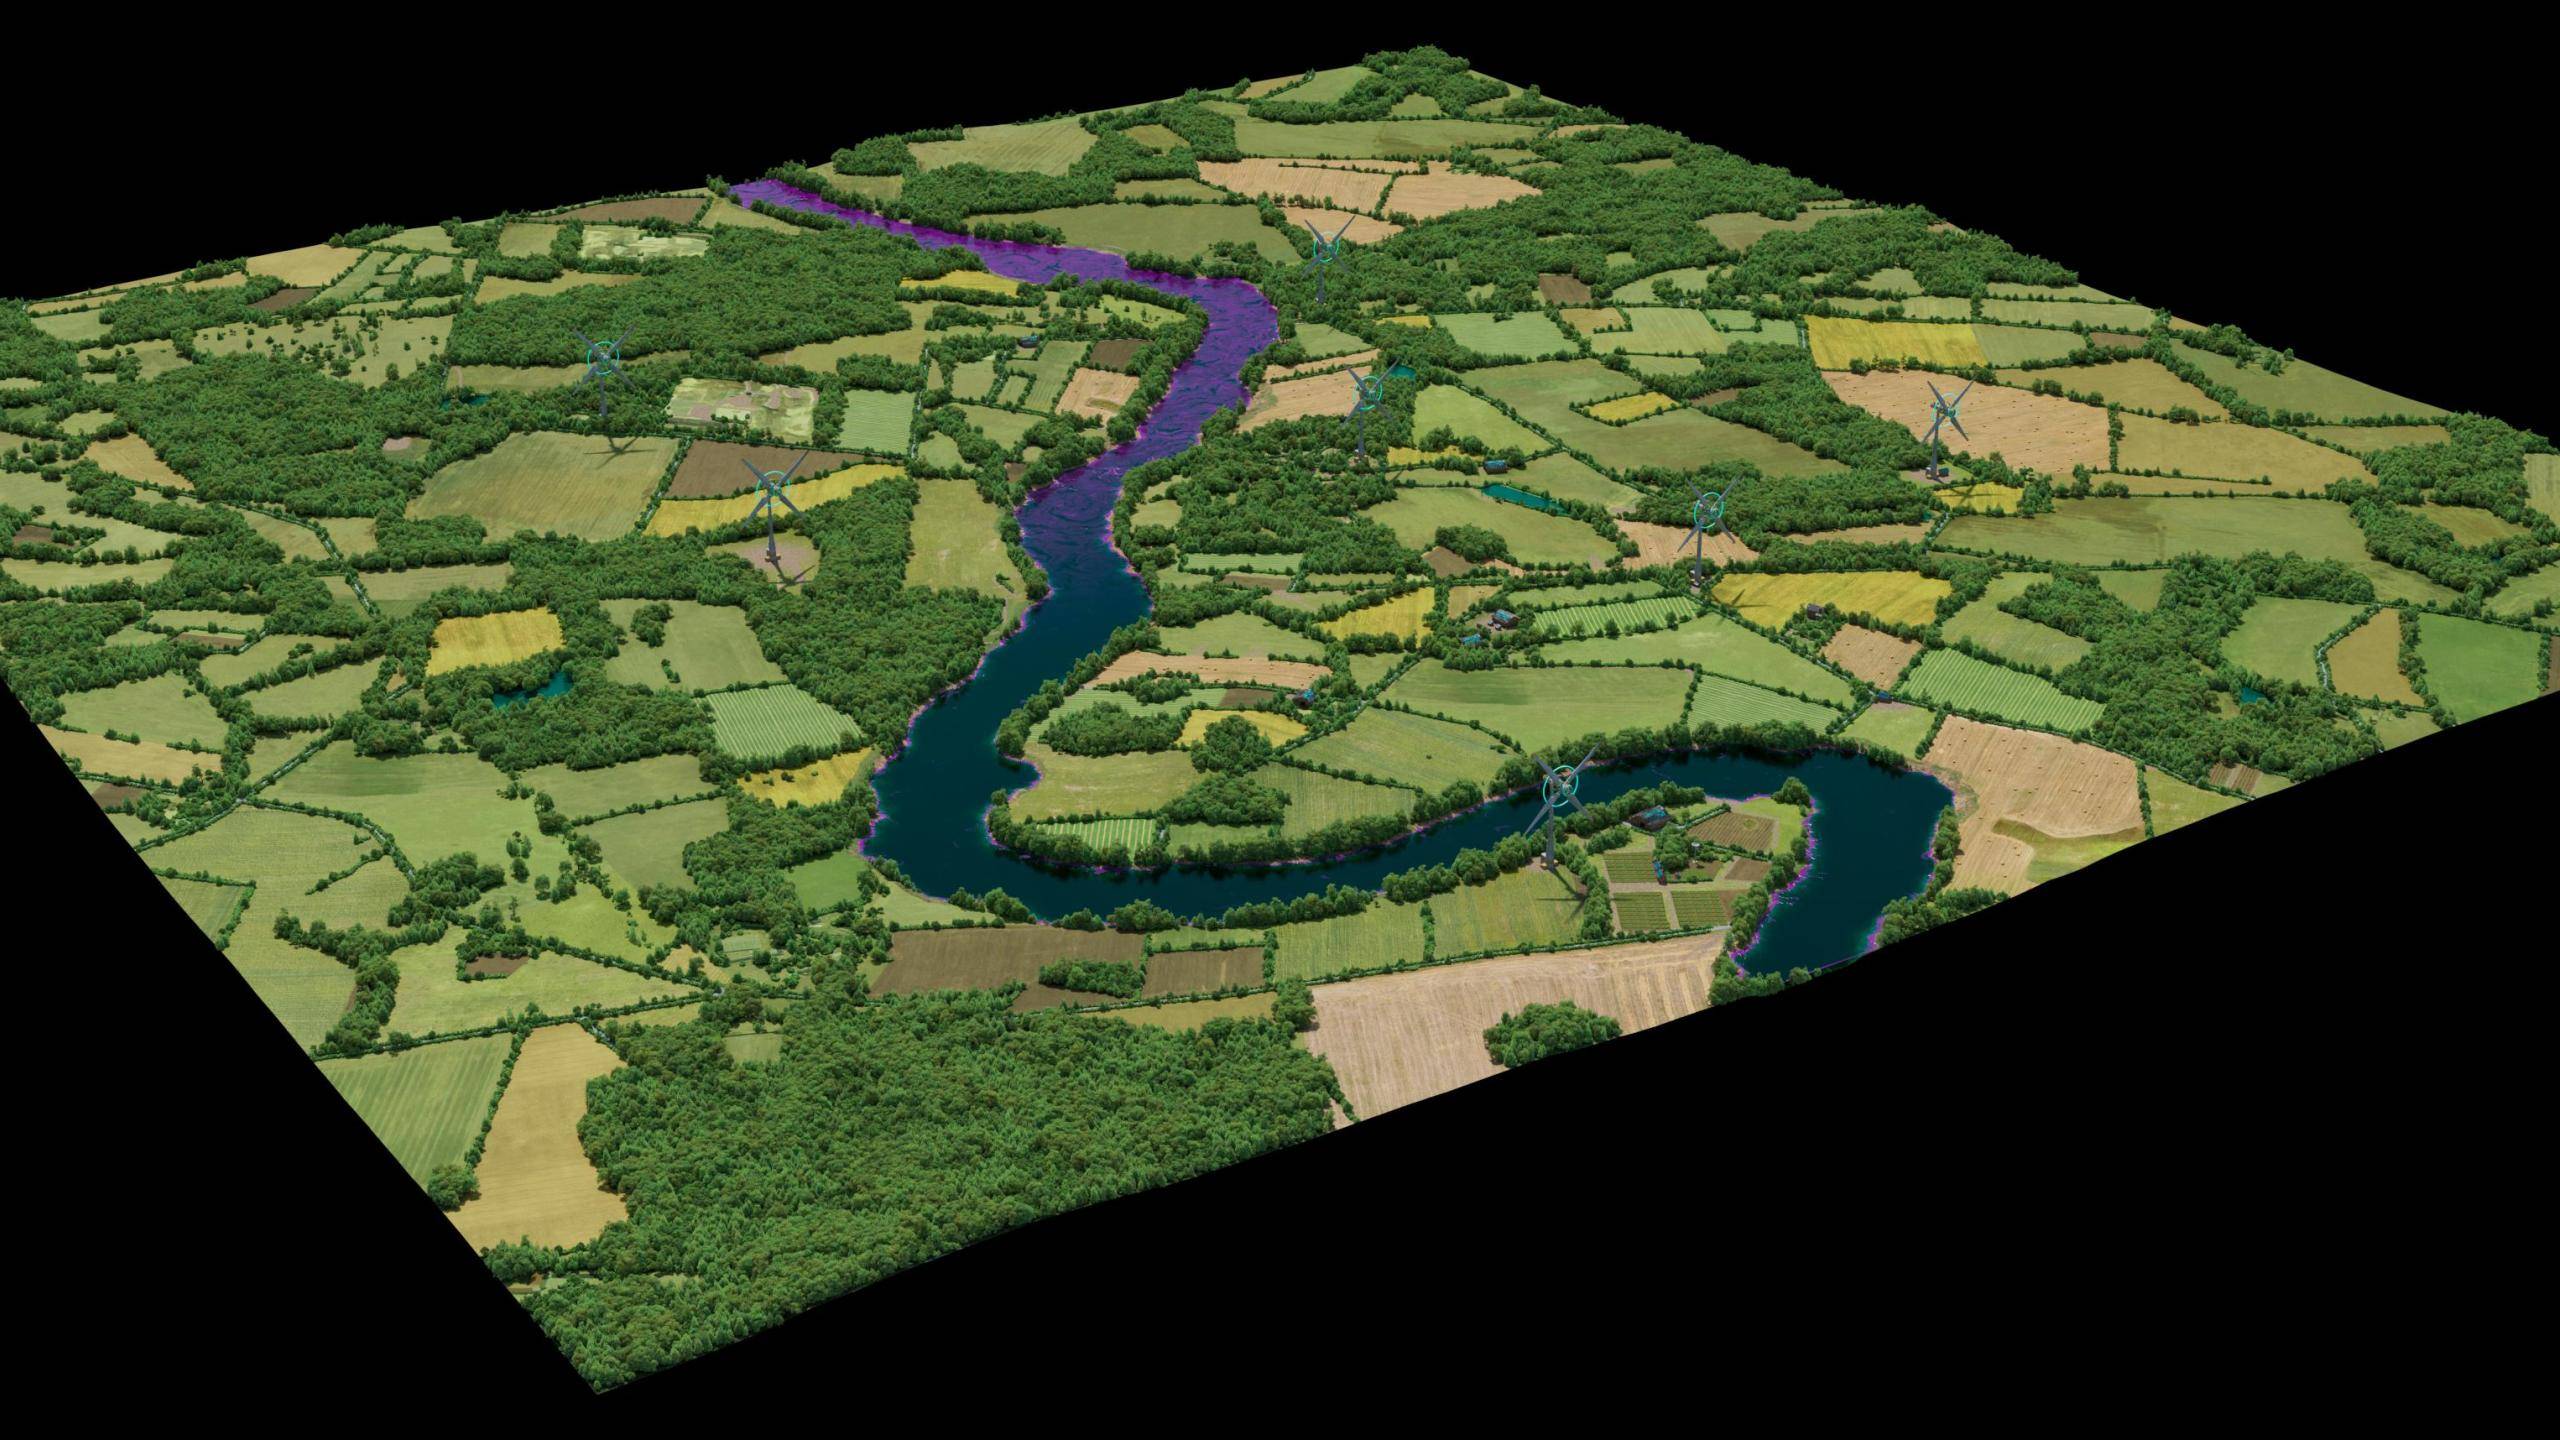
The City (Mehdi)
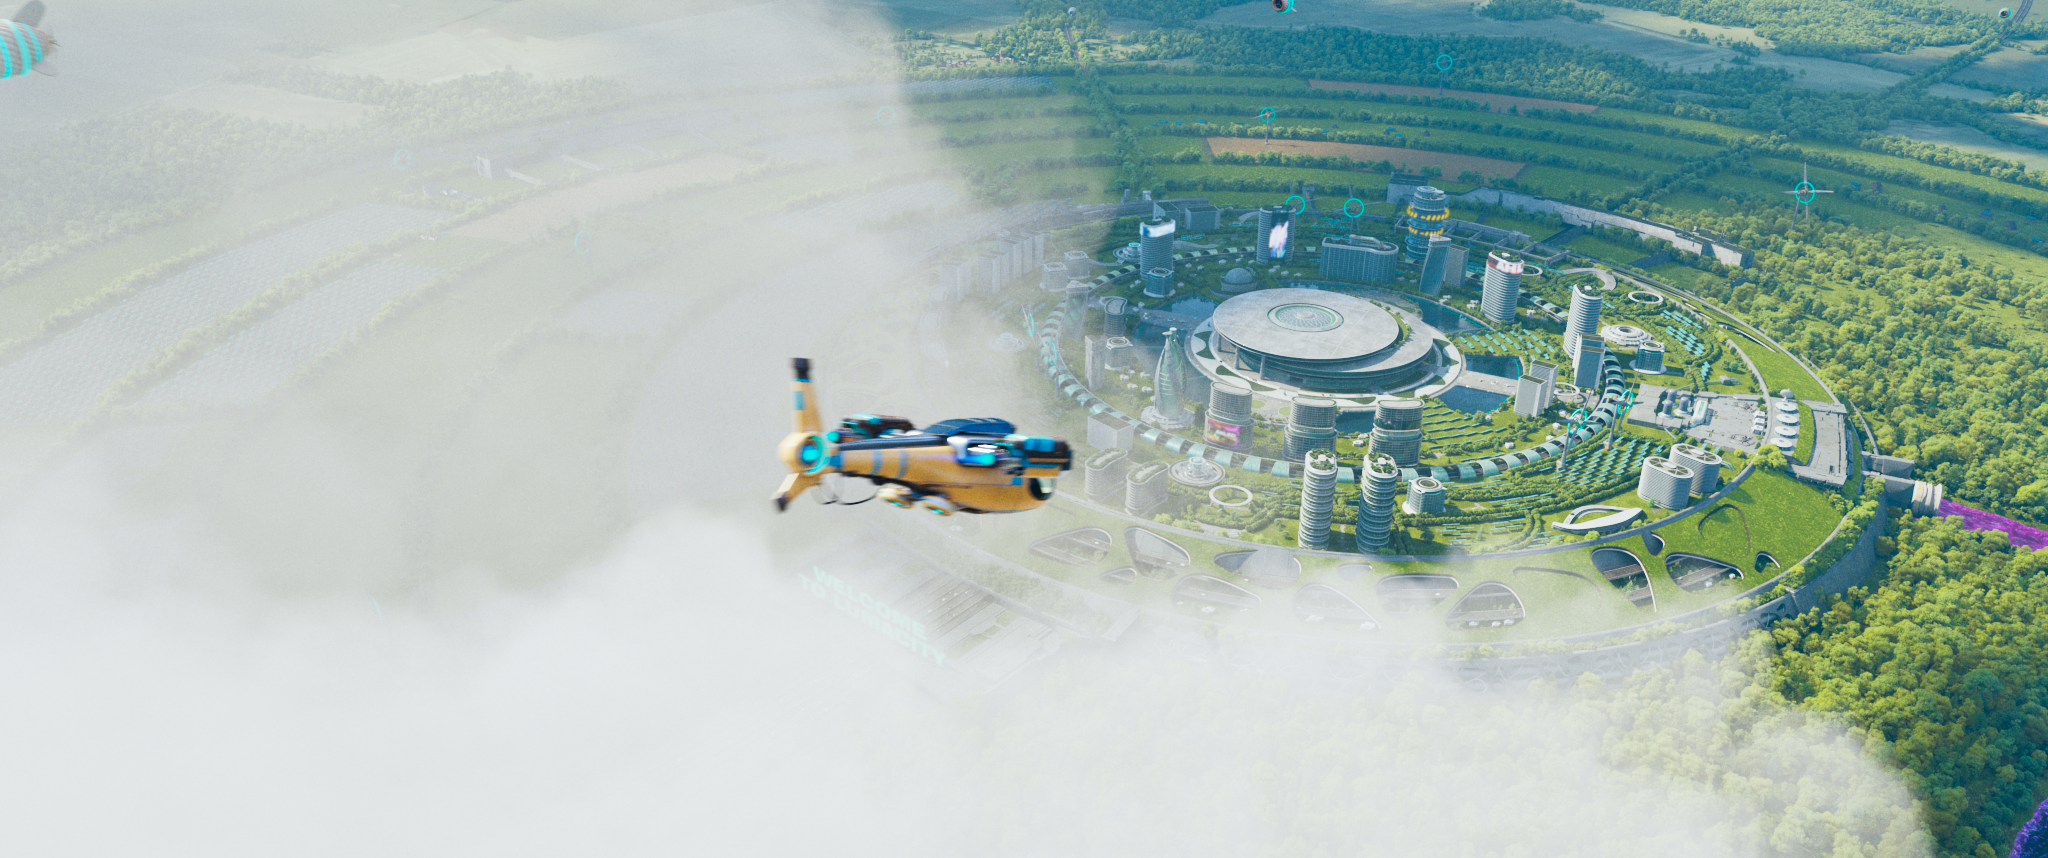
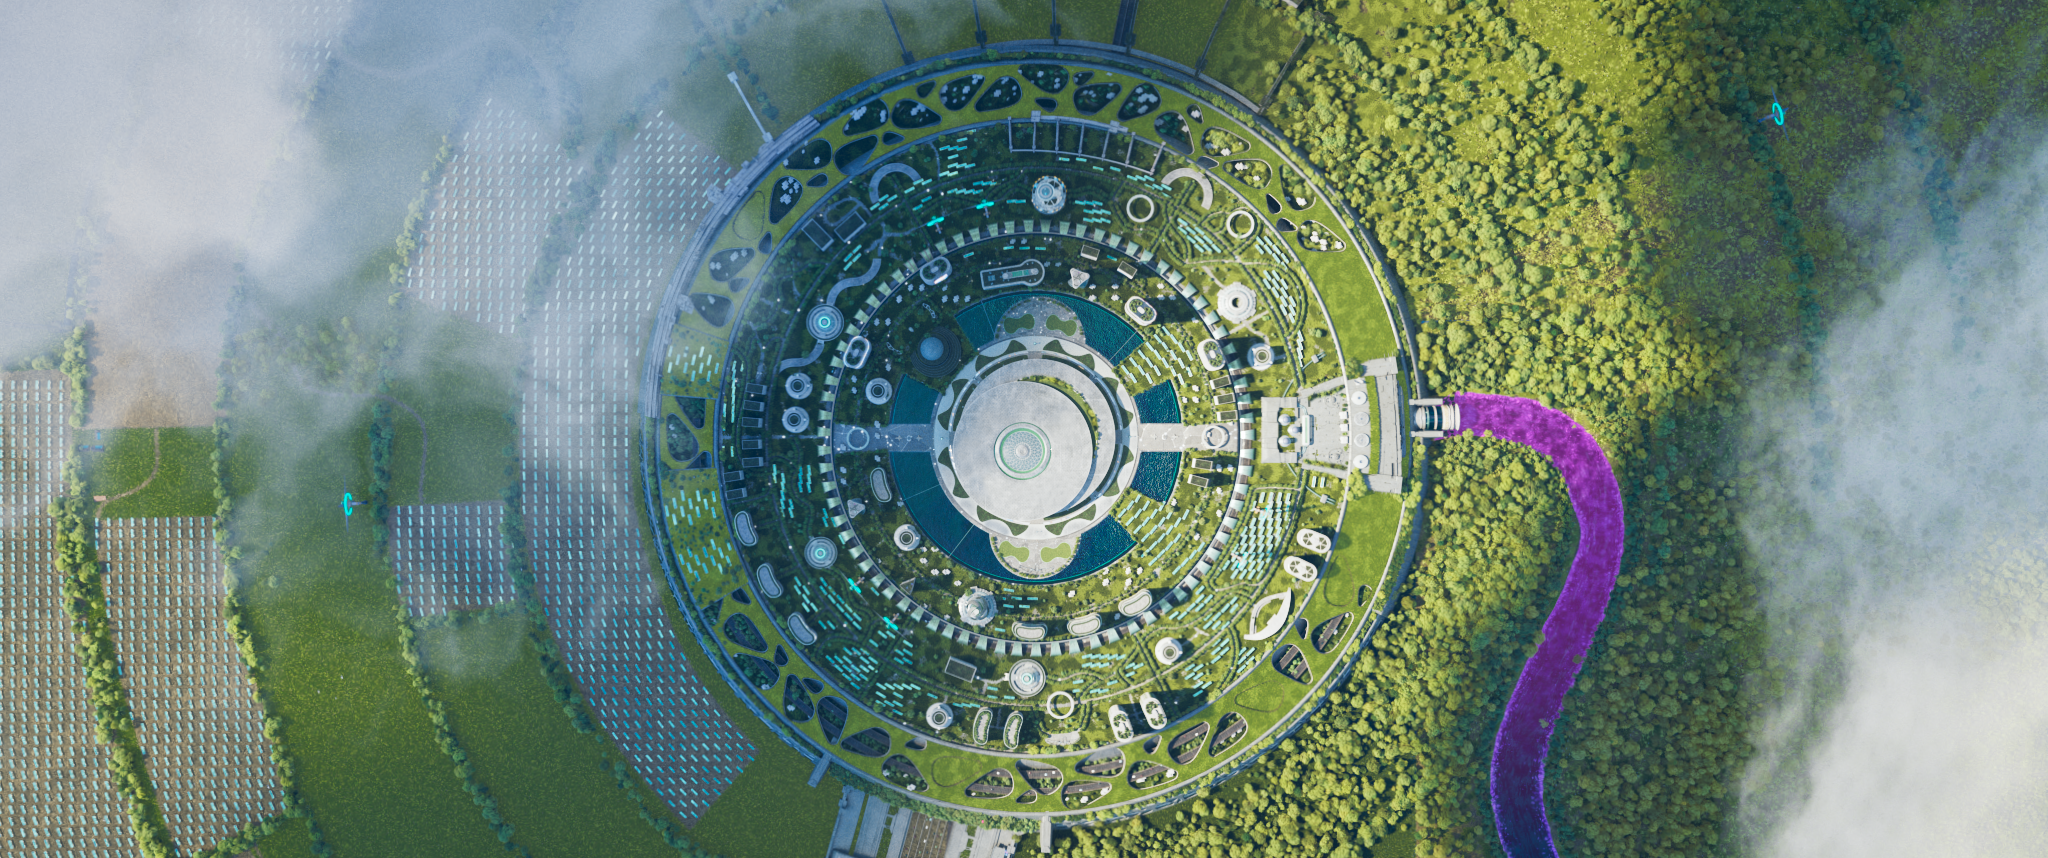
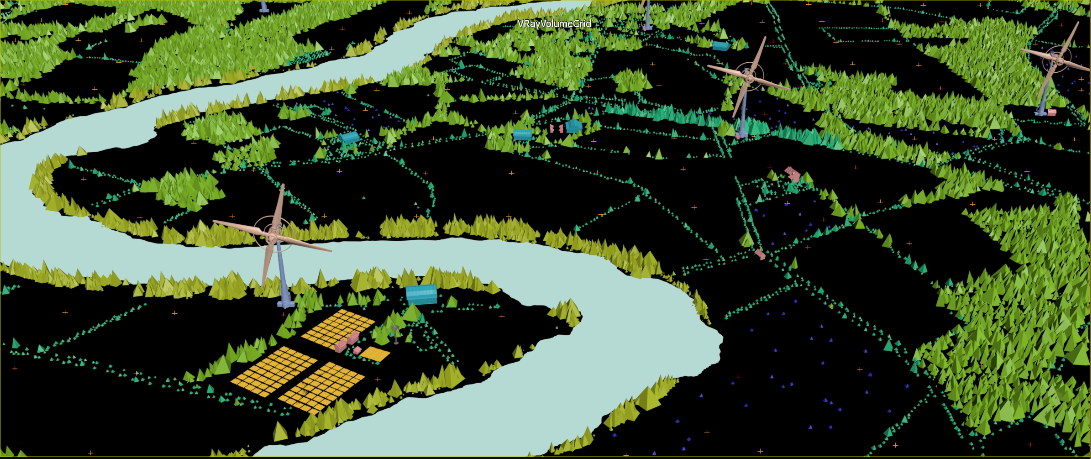
To create the vegetation around the city, I used the same principles as for the river environment: masks combined with ForestPack’s Paint tool.
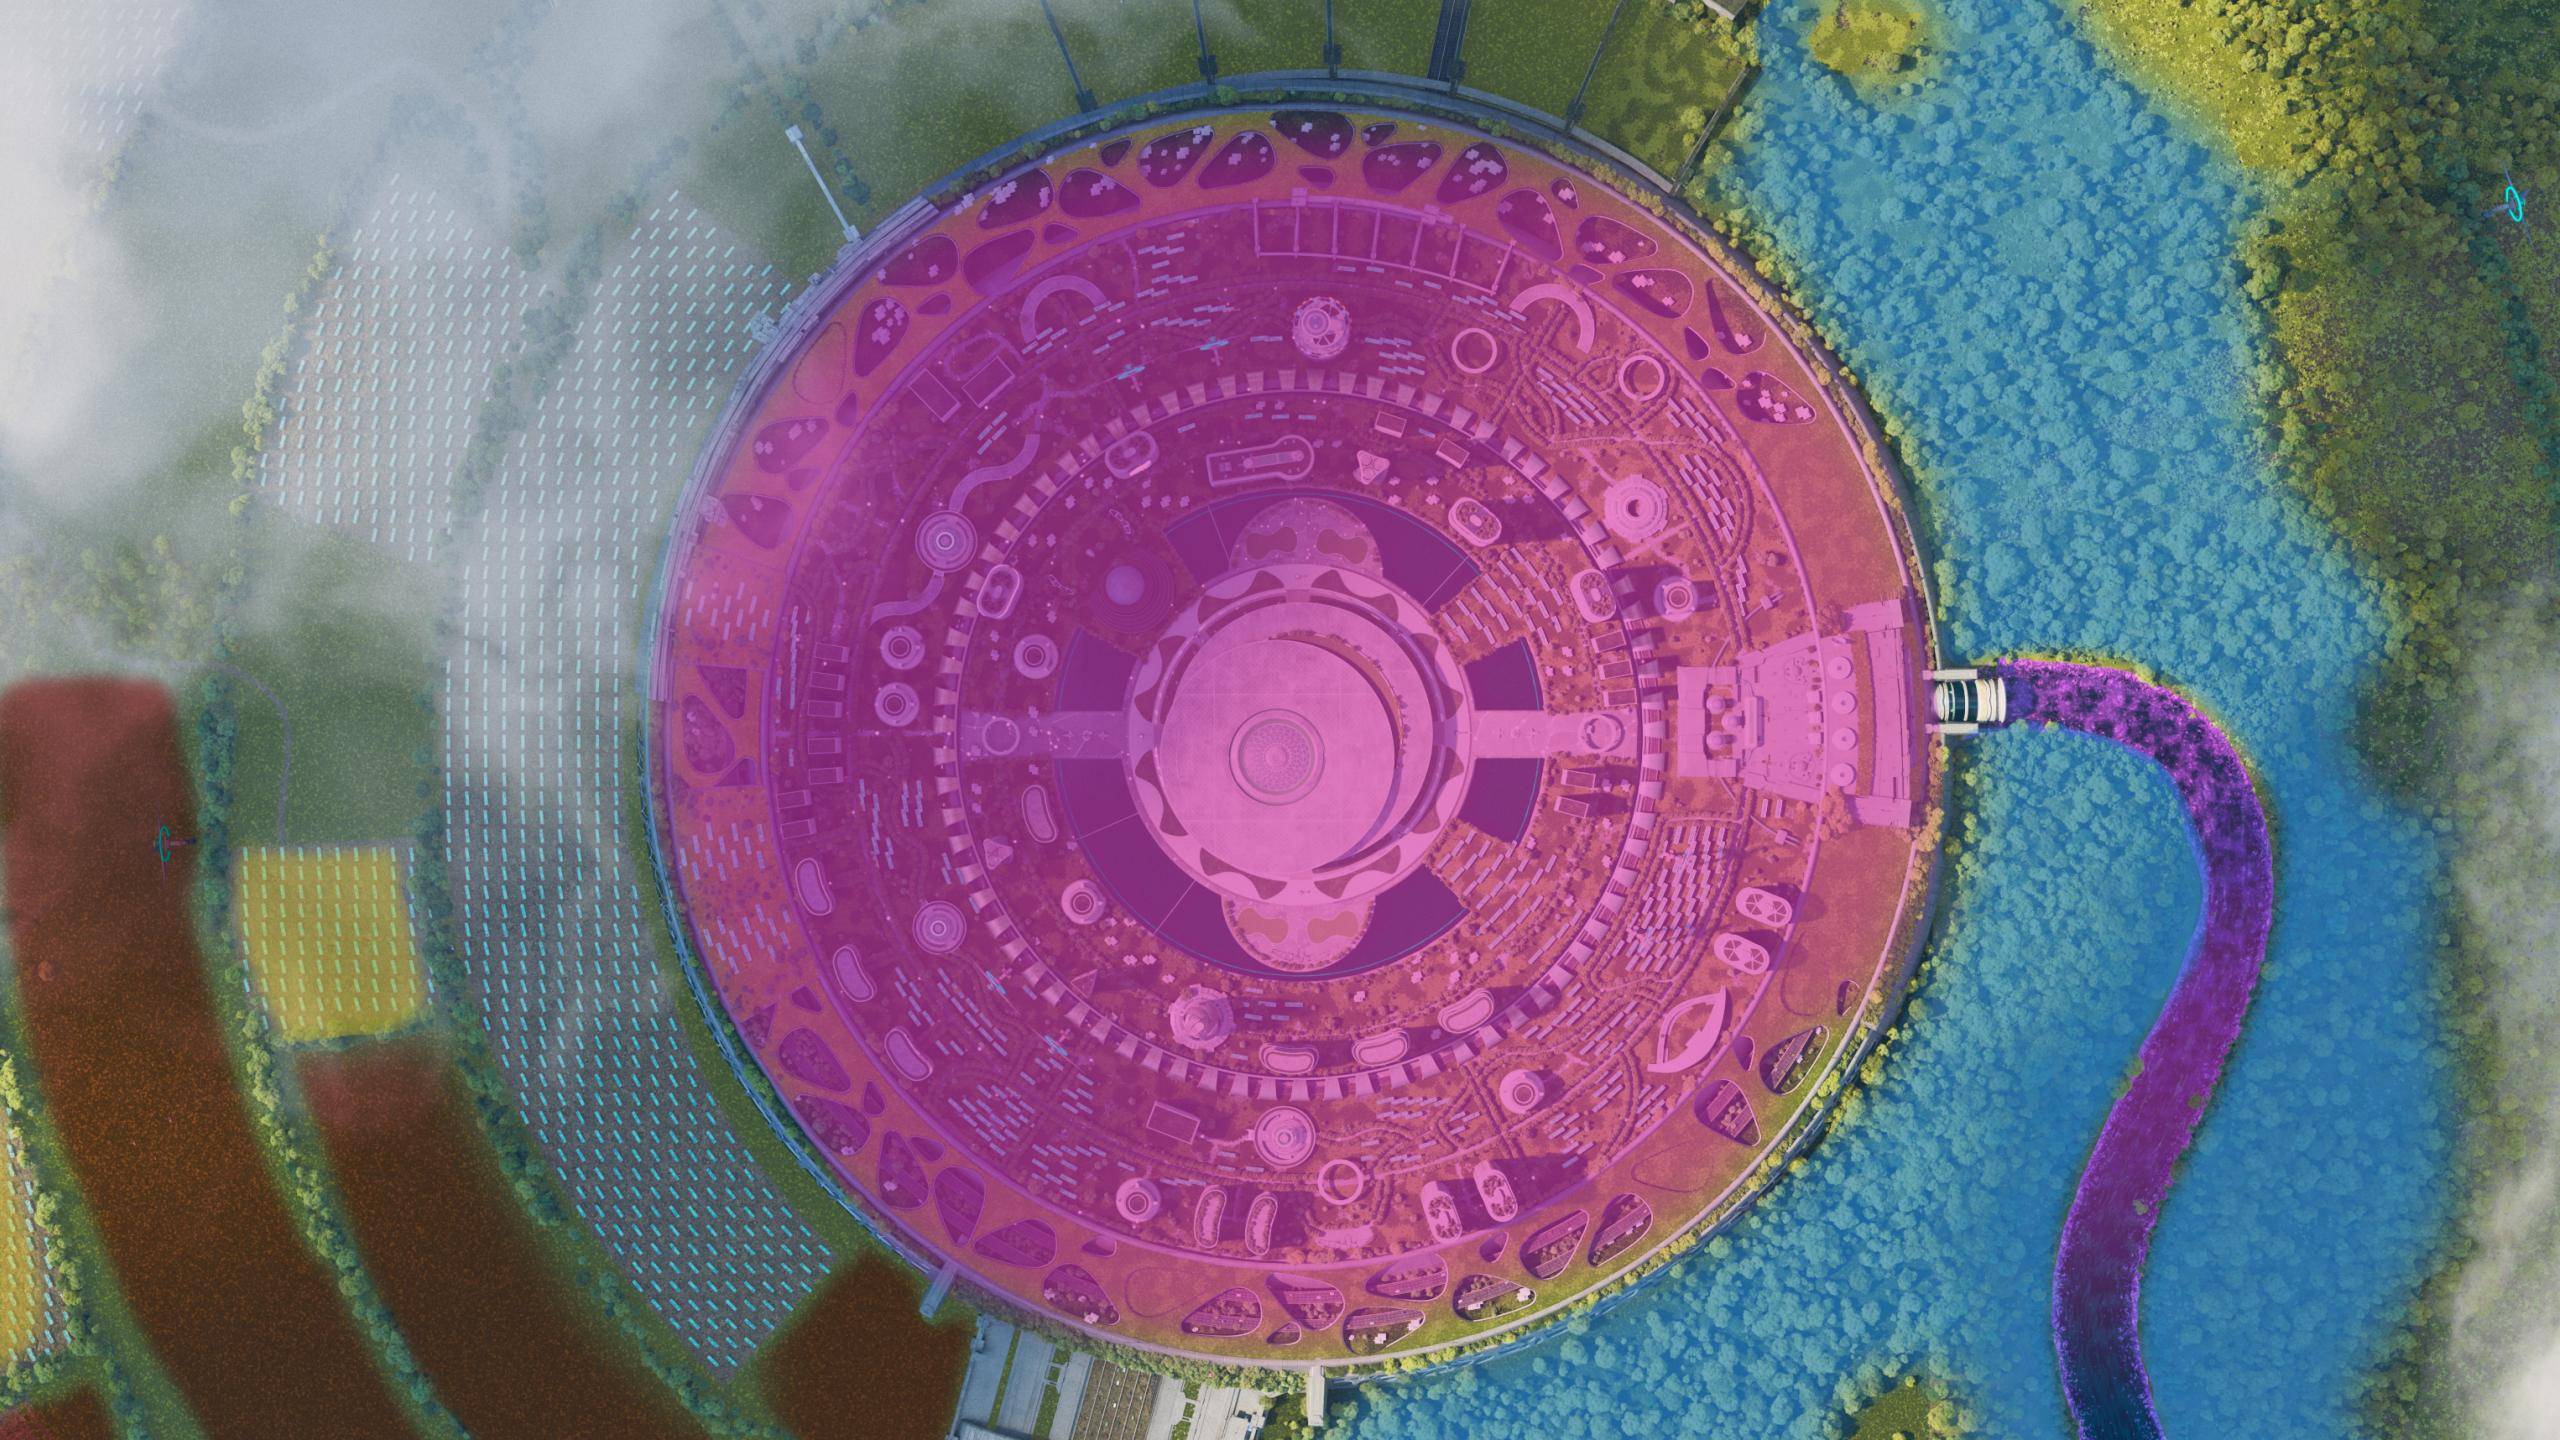
Inside the city, I organized my Forest into different layers:
- First, I created a Forest around the city to enclose it, using paths (cyan color).
- Then, I divided my Forest of solar panels (yellow color) by districts.
- I added a few very low poly grass clumps to give a bit of relief (red color).
- Finally, with the Forest Paint, I placed trees along the entire right side (blue color) to make their distribution look more organic.
Conclusion
We were already familiar with ForestPack in our work as environment artists, but this project gave us the chance to explore new features and gain more control over the tool. Creating a stylistically coherent short film in just nine months was a huge challenge, but also a major achievement for our team. Working together as if we were in a studio prepared us for the collaborative workflows we’ll use in the industry, and we’re excited to keep learning as we move into our careers.
We’d like to thank Eva Pringault, Arthur Pezi, and Mehdi Kaouane for sharing their experience of using ForestPack on LUMA. You can follow their work here:
- Eva Pringault – Artstation | LinkedIn
- Arthur Pezi – Artstation | LinkedIn
- Mehdi Kaouane – Artstation | LinkedIn
Related Post
Explore more articles from the ITOOSOFT team

Join Bartek Muczyń as he talks us though how he made "Container Harbor"
We talk to TAT productions about bringing The Jungle Bunch to the big screen
State of Art Academy has published a fantastic overview of Forest Pack 7's ability to scatter non-geometric objects like lights and VDB volumes.