Fichiers de ressources
Conditions
- info RailClone and Forest Pack Pro or Lite

In this tutorial, we will introduce some of the most commonly used features of Forest Pack Lite. This is a completely free version of Forest Pack that includes a great many of the features of the paid version, can be used commercially and never expires!
To get the lite version to follow this tutorial, just go to the Forest Pack Product Page. The download link can be found at the bottom. Sign up for an account and you’ll be emailed a link to the software. Installing it is self explanatory, but you can visit the documentation if you need more help. Once you’ve got the software installed, let’s jump into 3ds Max and start populating this scene with grass, trees, hedges, gravel, ferns and more. At the end of the tutorial, we’ll also take a quick look at using RailClone Lite, which is also free, for the boardwalk.
This tutorial was created in cooperation with Ciro Sannino and GC Edizioni for a new book called Chioroscuro with V-Ray. With 15 chapters of explanation and exercises, this book describes an easy-to-repeat photographic approach to rendering that teaches a '5-Step Render Workflow' and the application of Chiaroscuro concepts to create artistic lighting. The book is in Italian with an English version due out in May.
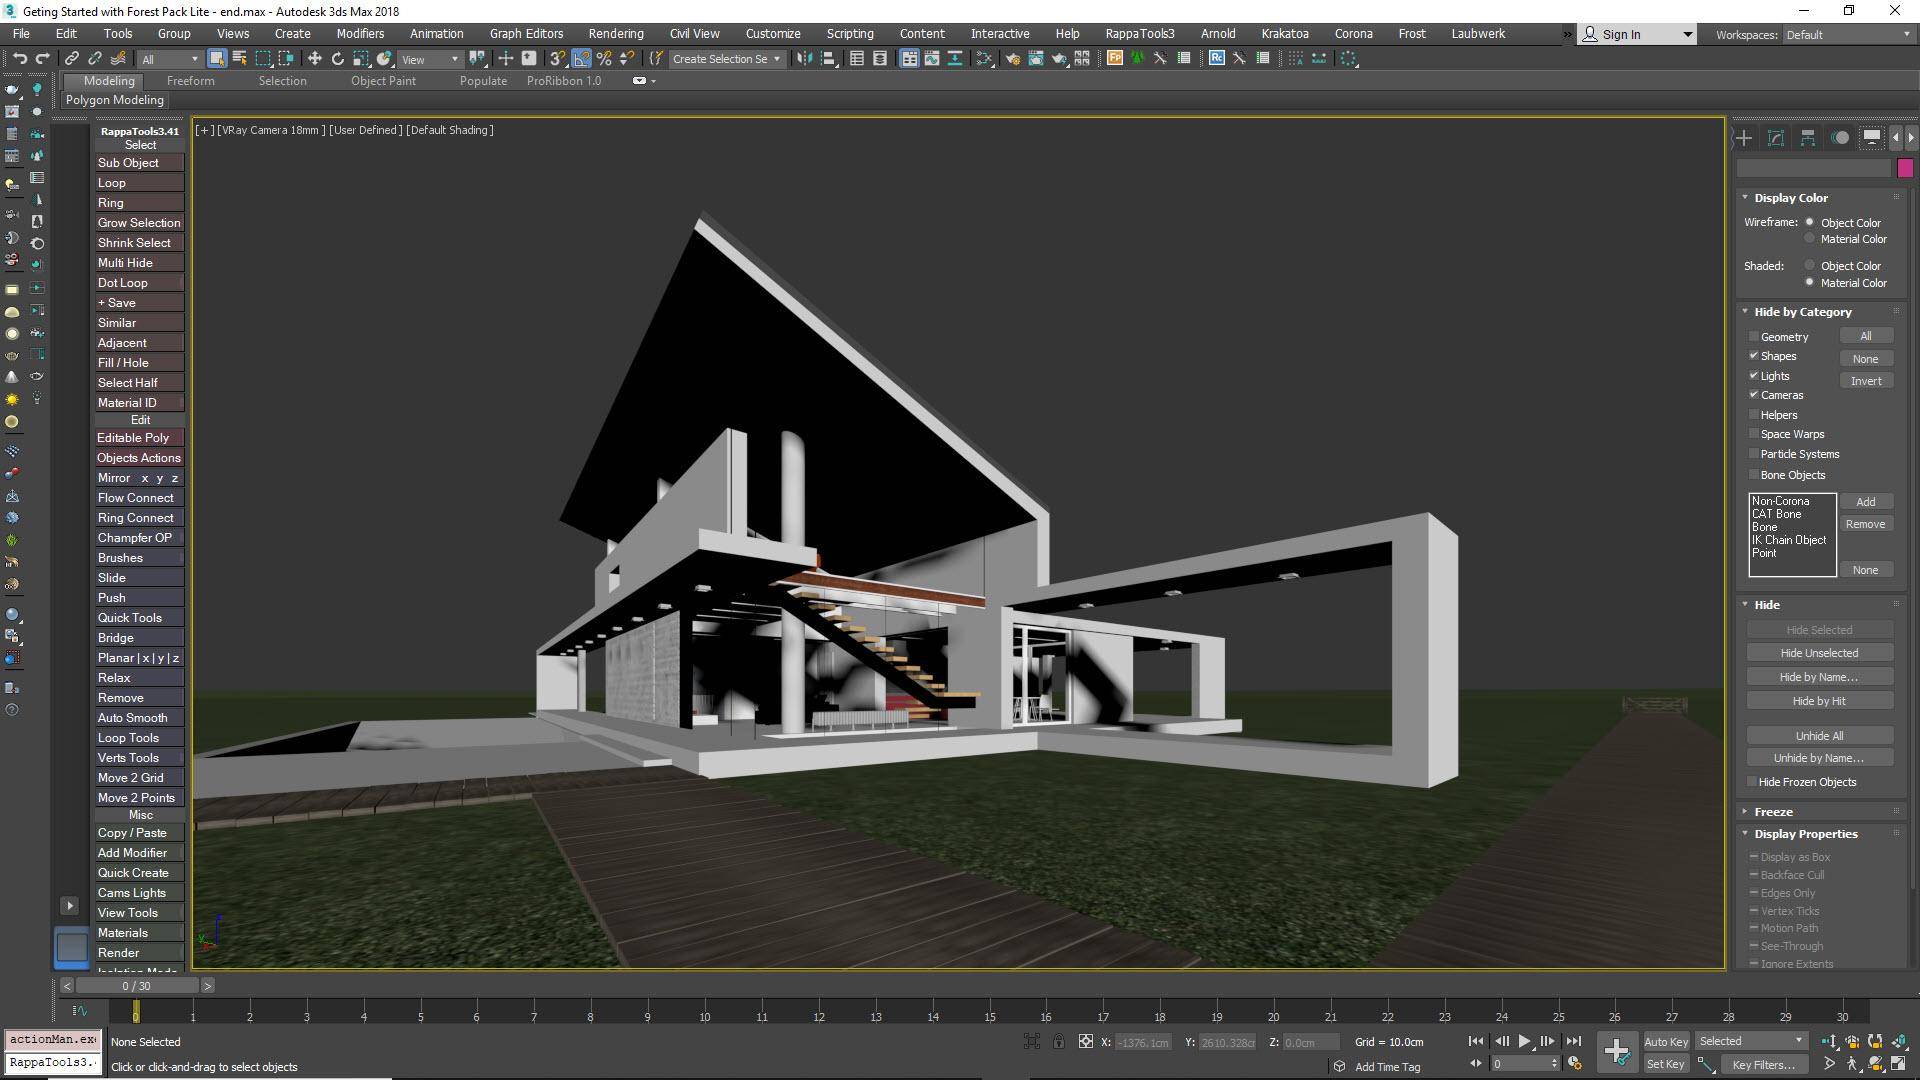
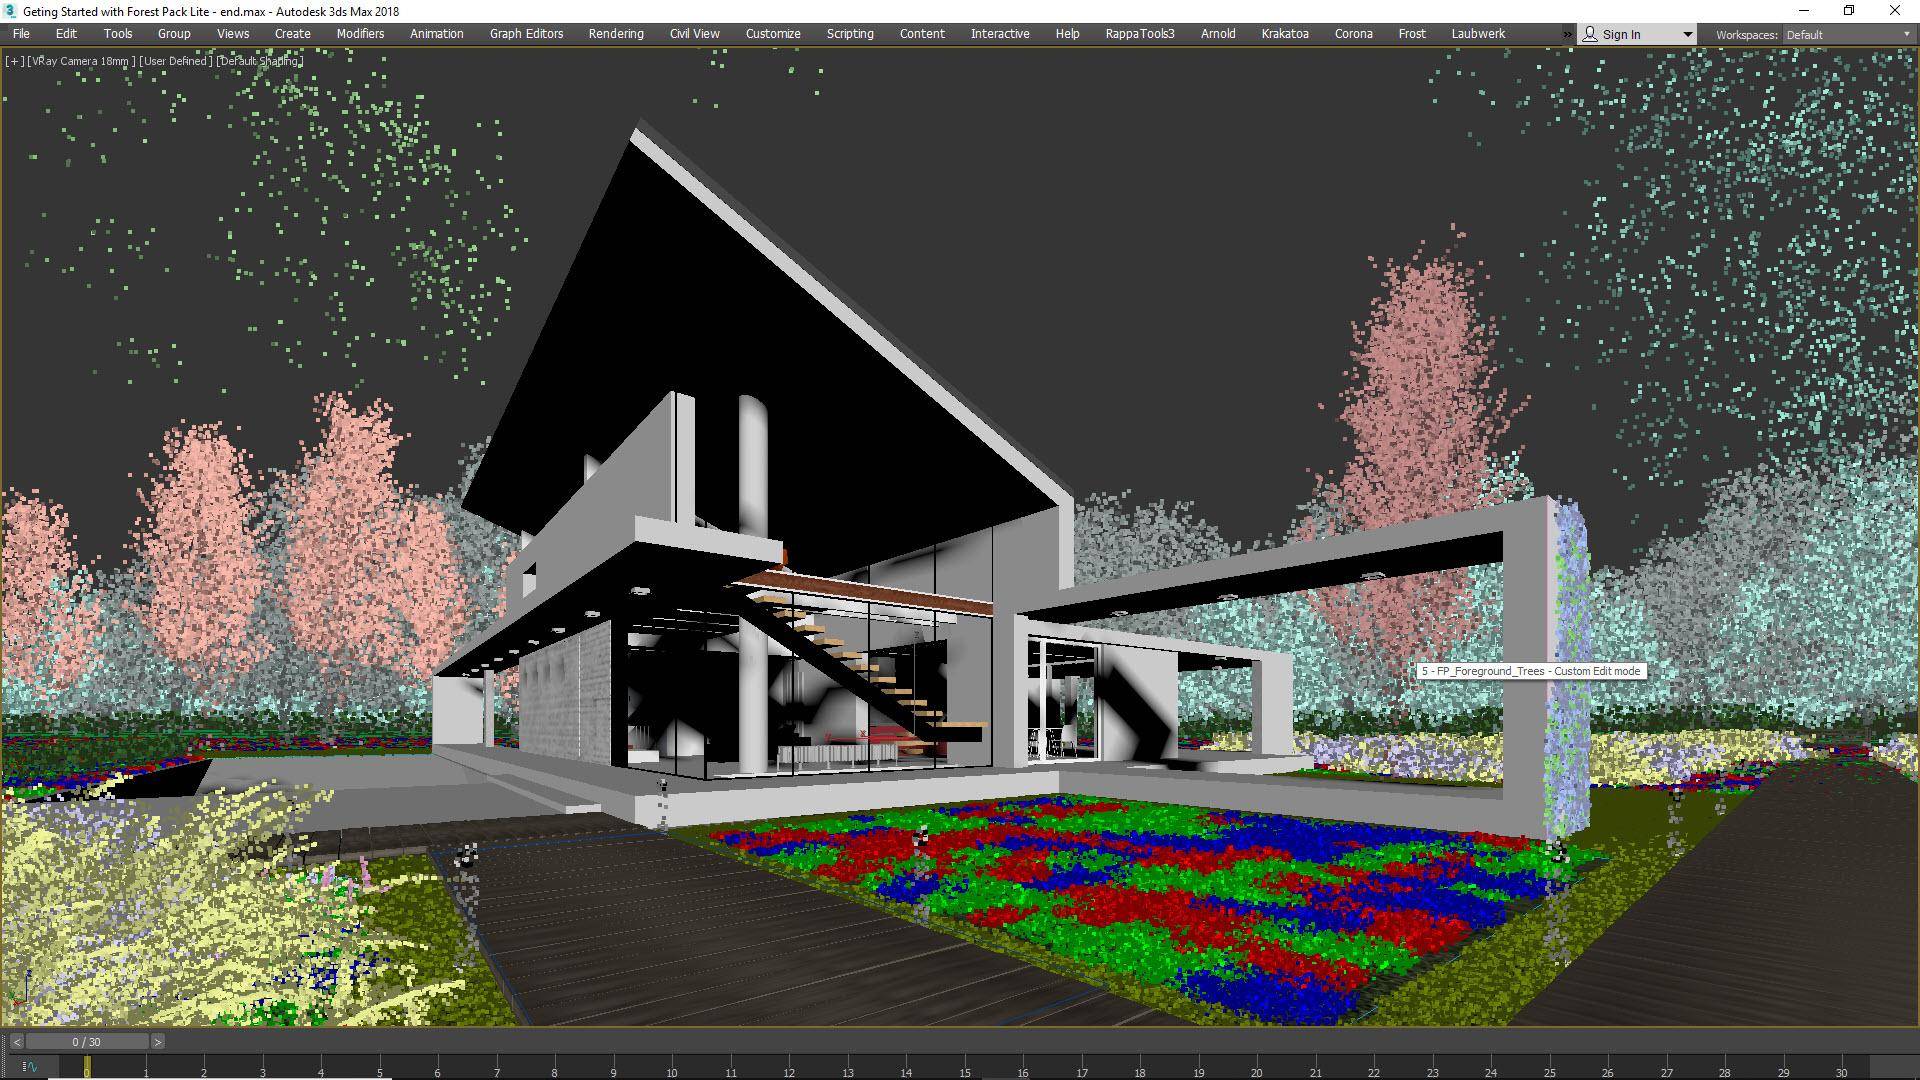
The Starting scene with Forest Pack or RailClone objects
Defining Areas for Forest Pack
To use Forest Pack, you define simple areas that are used to distribute objects. Several types are supported, including splines, surfaces, paint areas, marker objects and, in the pro version, particles. Rather that provide a long description of how to create every spline, let’s just take a look at what was used in this scene. I’d encourage you not to try and recreate this exactly, instead you should experiment and create your own interpretation.
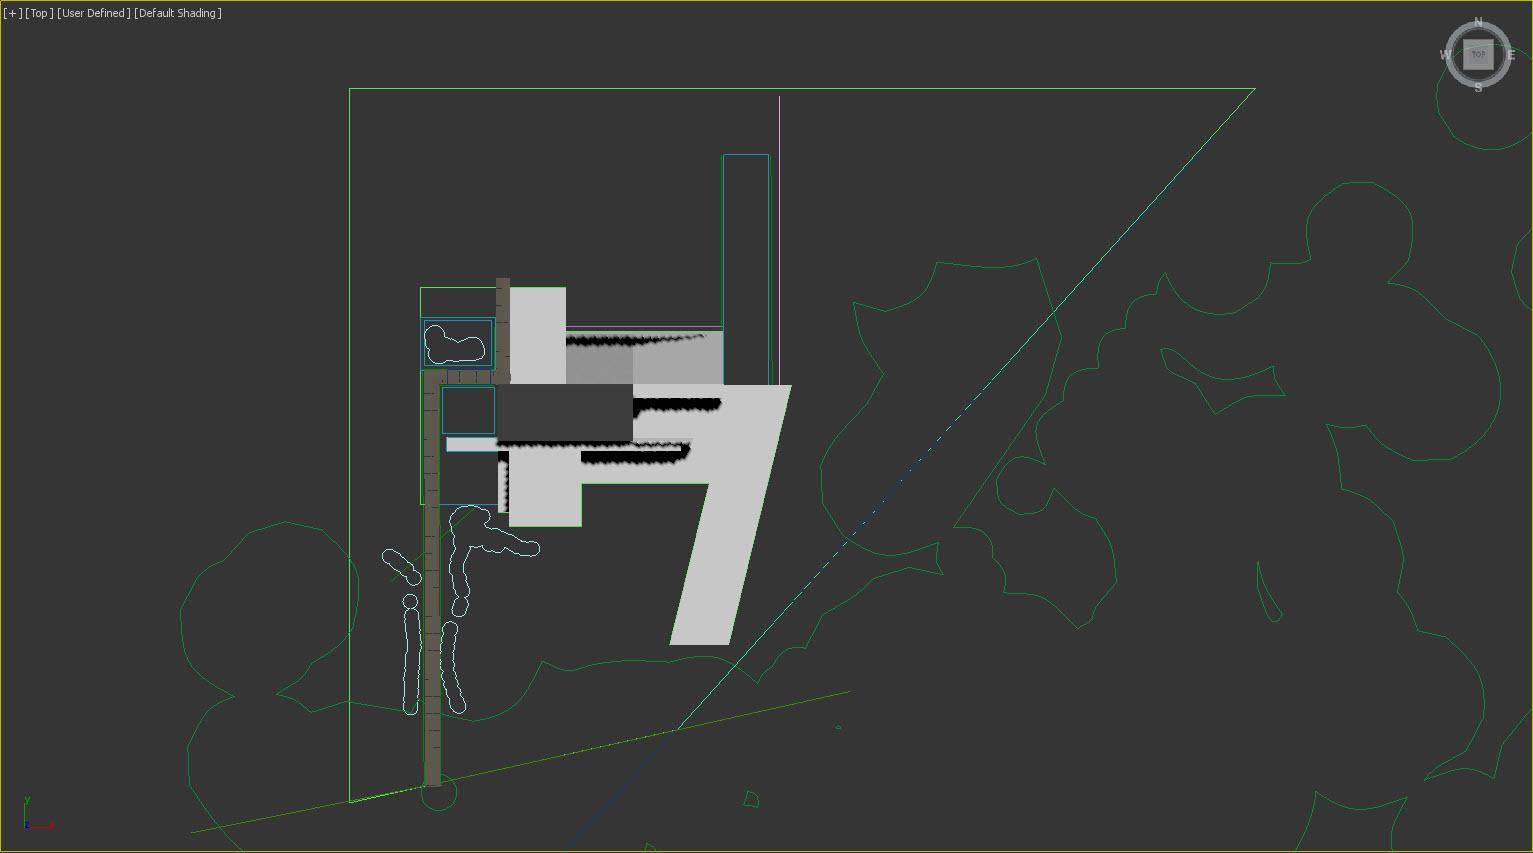
With that in mind, in this scene we had:
- A large spline encompassing the whole site, for the grass, plus another couple of rectangles for separate lawn areas.
- A spline for the gravel areas in the foreground and another for the driveway.
- A large spline to add trees outside the perimeter of the site.
- Several open splines are used to create the hedges around the site.
- More open splines to add the lights along the boardwalk.
- A spline to add poplar’s adjacent to the driveway.
- Finally, a spline to be used with RailClone Lite to create the boardwalk in the foreground.
Creating grass from presets
Let’s get started by adding grass using a preset from the library. You can load items from the library before or after you create a Forest Pack object. In this example, we’ll pick a library preset first.
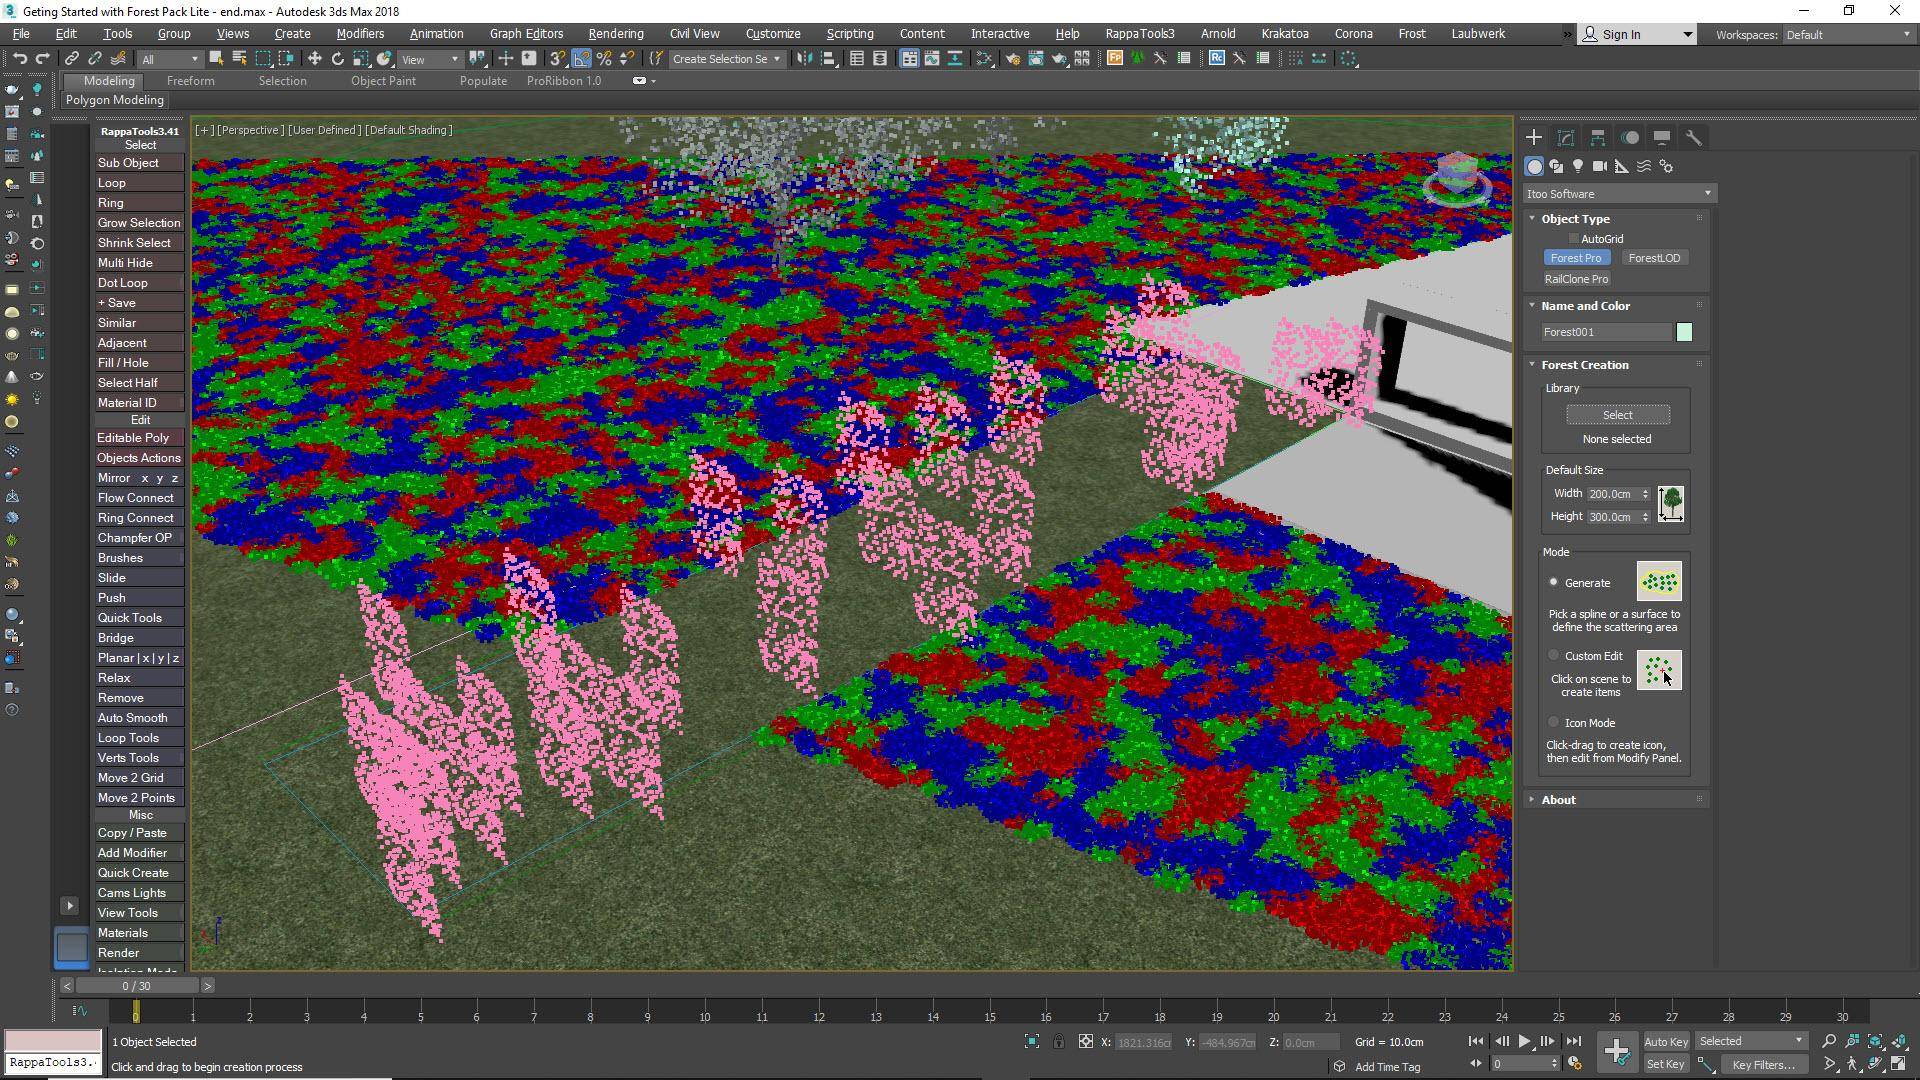
- Go to the iToo Software Category in the Create Panel and select Forest Pro or Forest Lite.
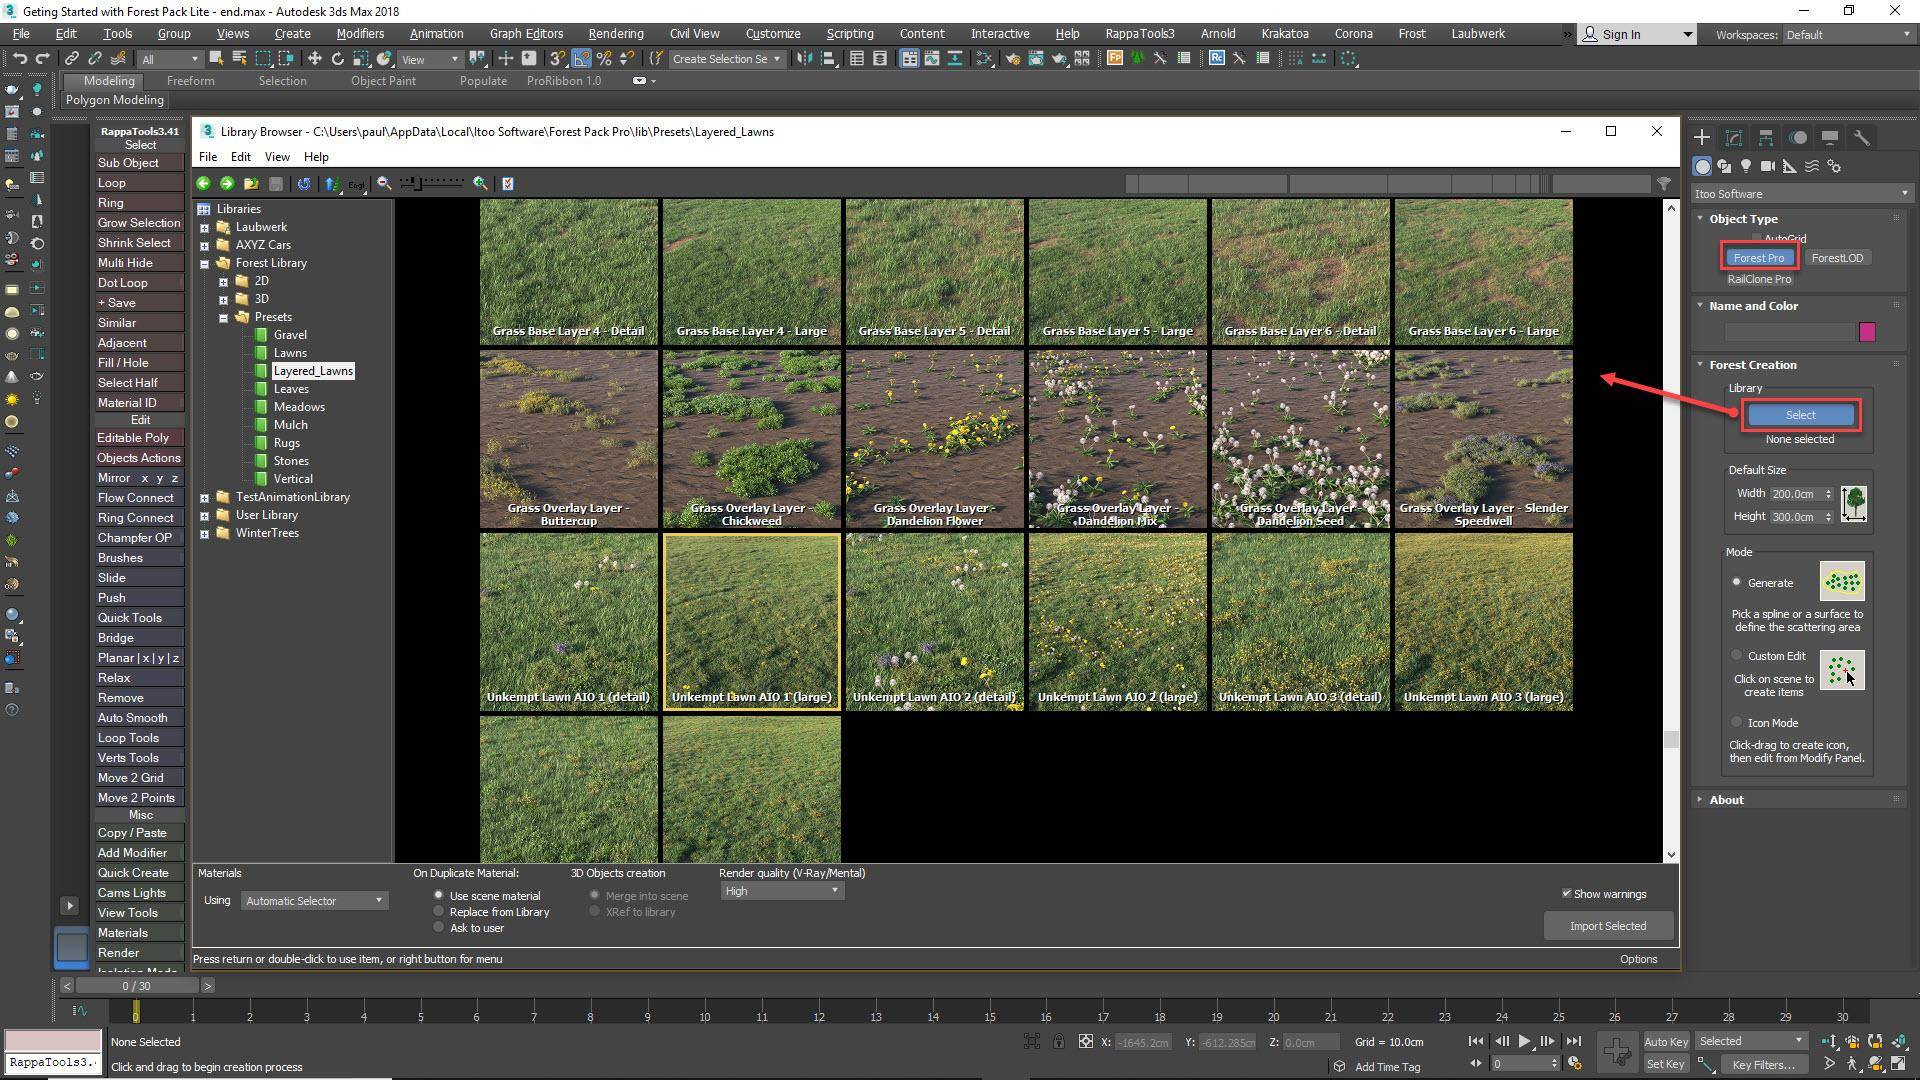
- Click on the Library button to open the Library Browser. The lite version has two grass presets included: For simple grass you can use the Lawns > Common Grass preset, or for a lawn containing more variety including flowers and weeds you can use the Layered Lawns > Unkempt Lawns OIO preset. Select whichever you prefer, and then click import selected. In a preset most of the necessary settings are preconfigured, all you need to do is add the areas.
![Using the library]()
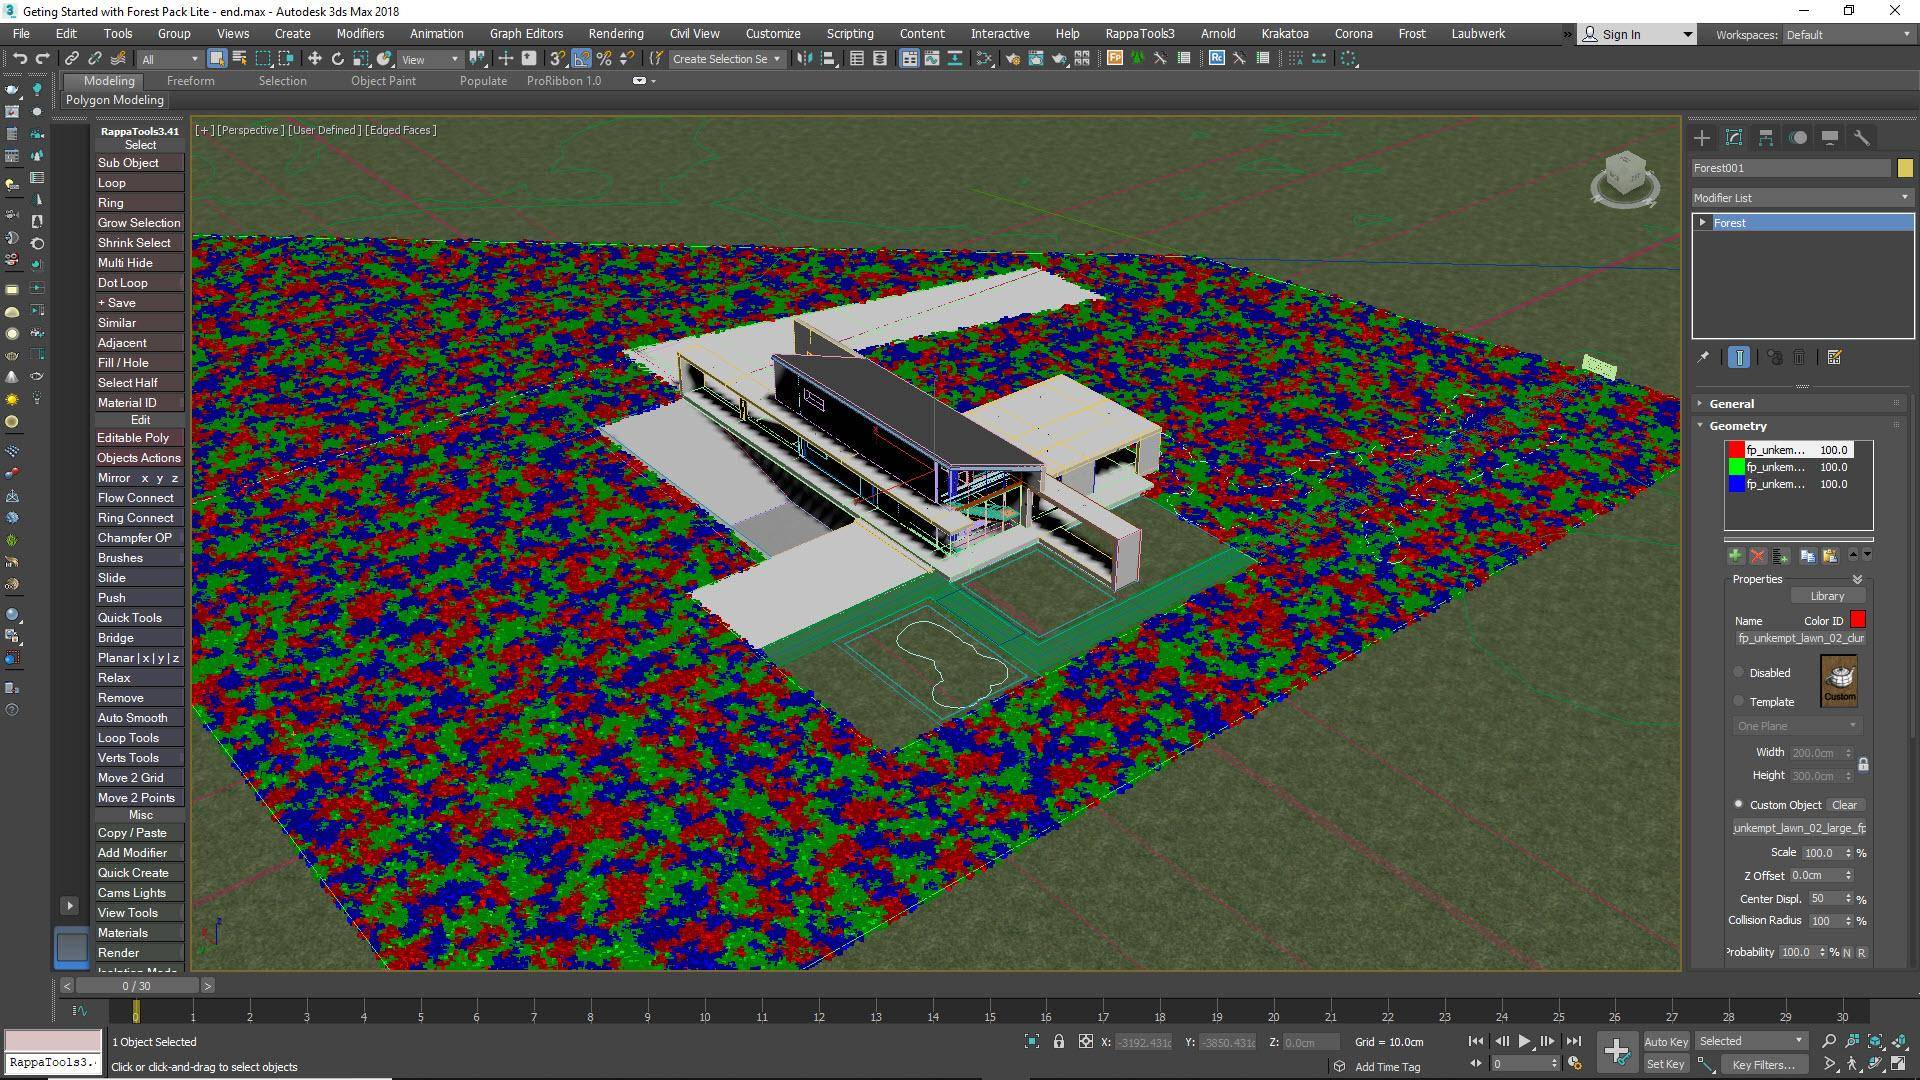
- To scatter the selected preset on a single surface or a spline, now all you need to do it pick it from the scene. A pop up may appear asking if you want to limit the scatter to the camera’s visibility and use Points-cloud display mode. Click Yes and that’s it! Your lawn is done.
![Adding Grass]()
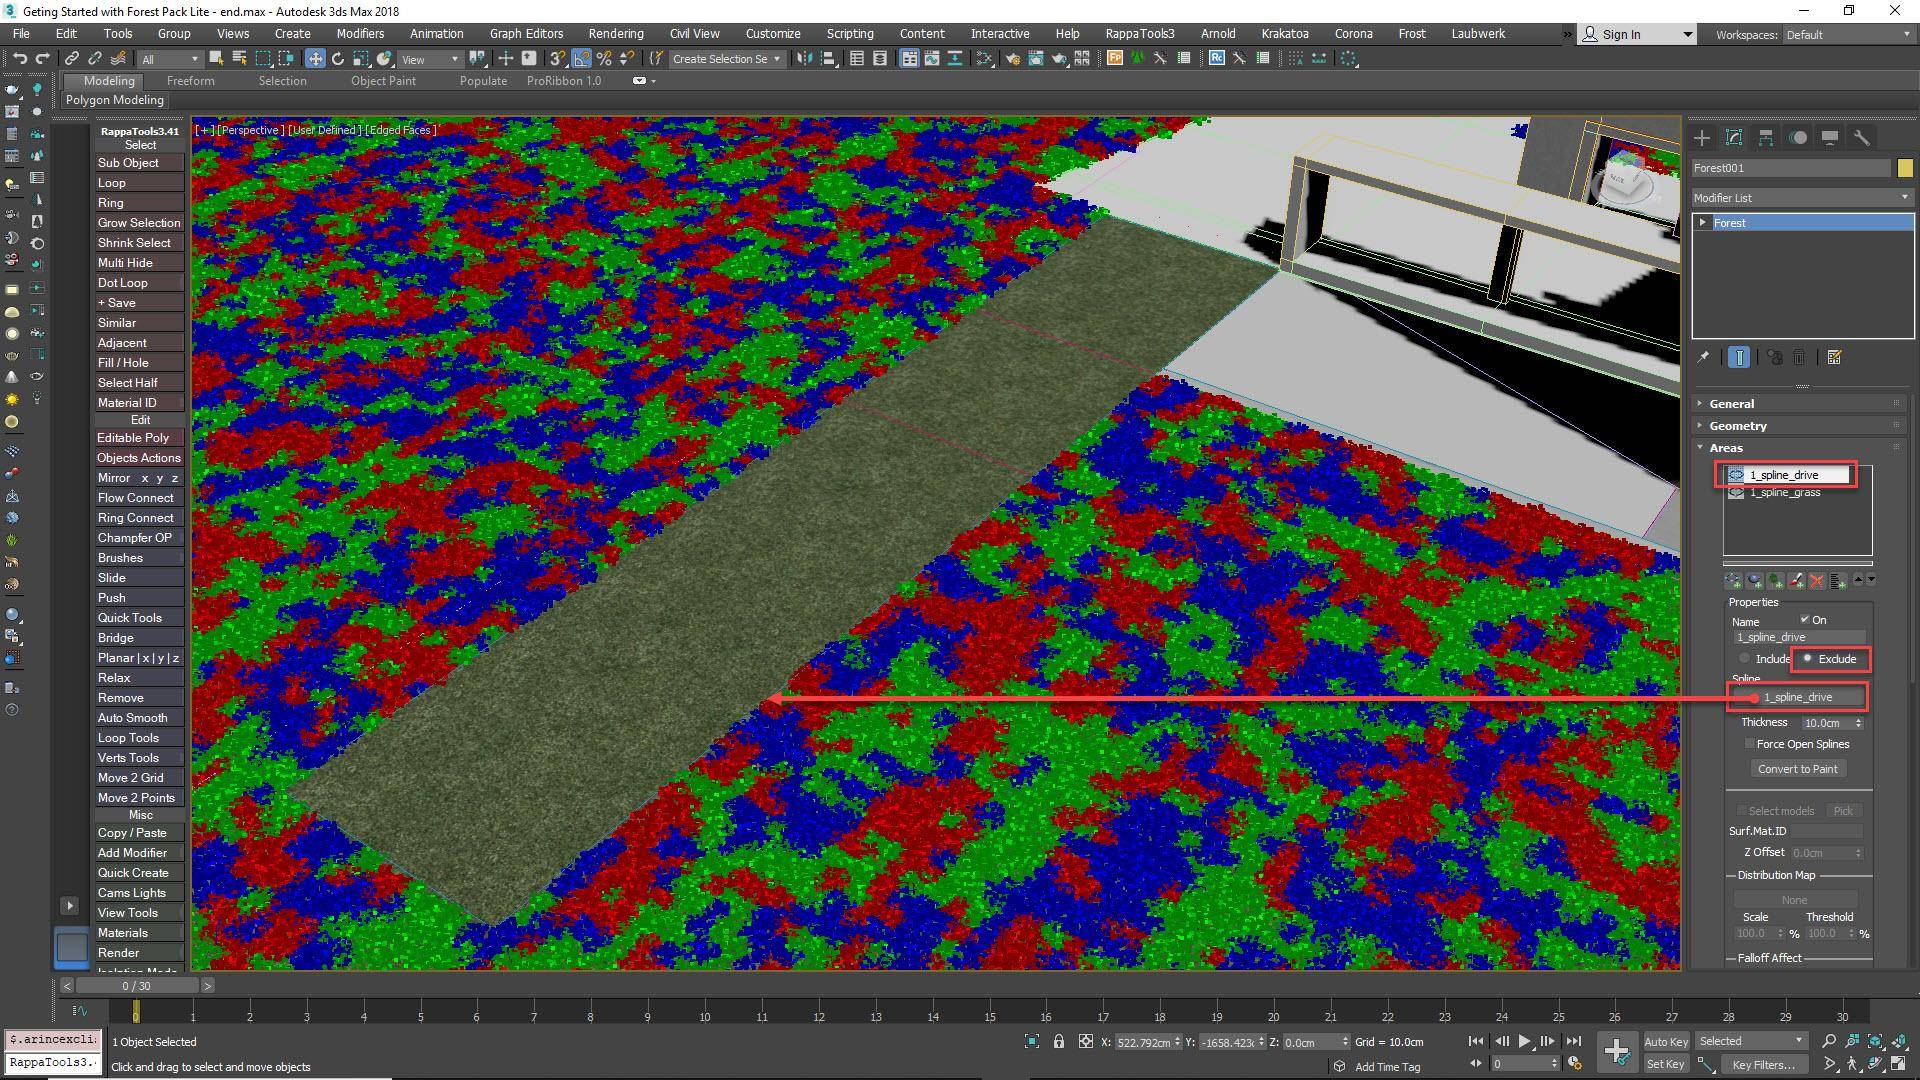
- If you want to add more areas, then switch to the Modify panel and go to the Areas rollout. Click on the button to Add a New Spline Area and then pick a spline from the scene. Forest Lite can use up to 4 areas, while the Pro version has no limits.
- You can also use areas to remove scattered items. In this example, we want to remove items from the drive. To do this, click the button to add another Spline Area and pick the drive spline from the scene. In the Areas rollout, change the mode to Exclude. Items will now be removed from that area.
![Exclude Areas]()
Scattering and randomising trees
Now we’ll add the trees using the same creation technique. This time though we’ll import models from the library and by picking them from the scene itself. Unlike presets, 3d models and scene geometry do not include distribution information, so you will also need to configure several settings yourself to randomise the trees and set the density of your scatter.
- Go back to the Create panel and select Forest Pro or Forest Lite.
- Open the Library Browser and select 3D > Starter Library > Silver Maple 1 to load a free tree.
- Click on a spline in the scene to be used as a scatter area.
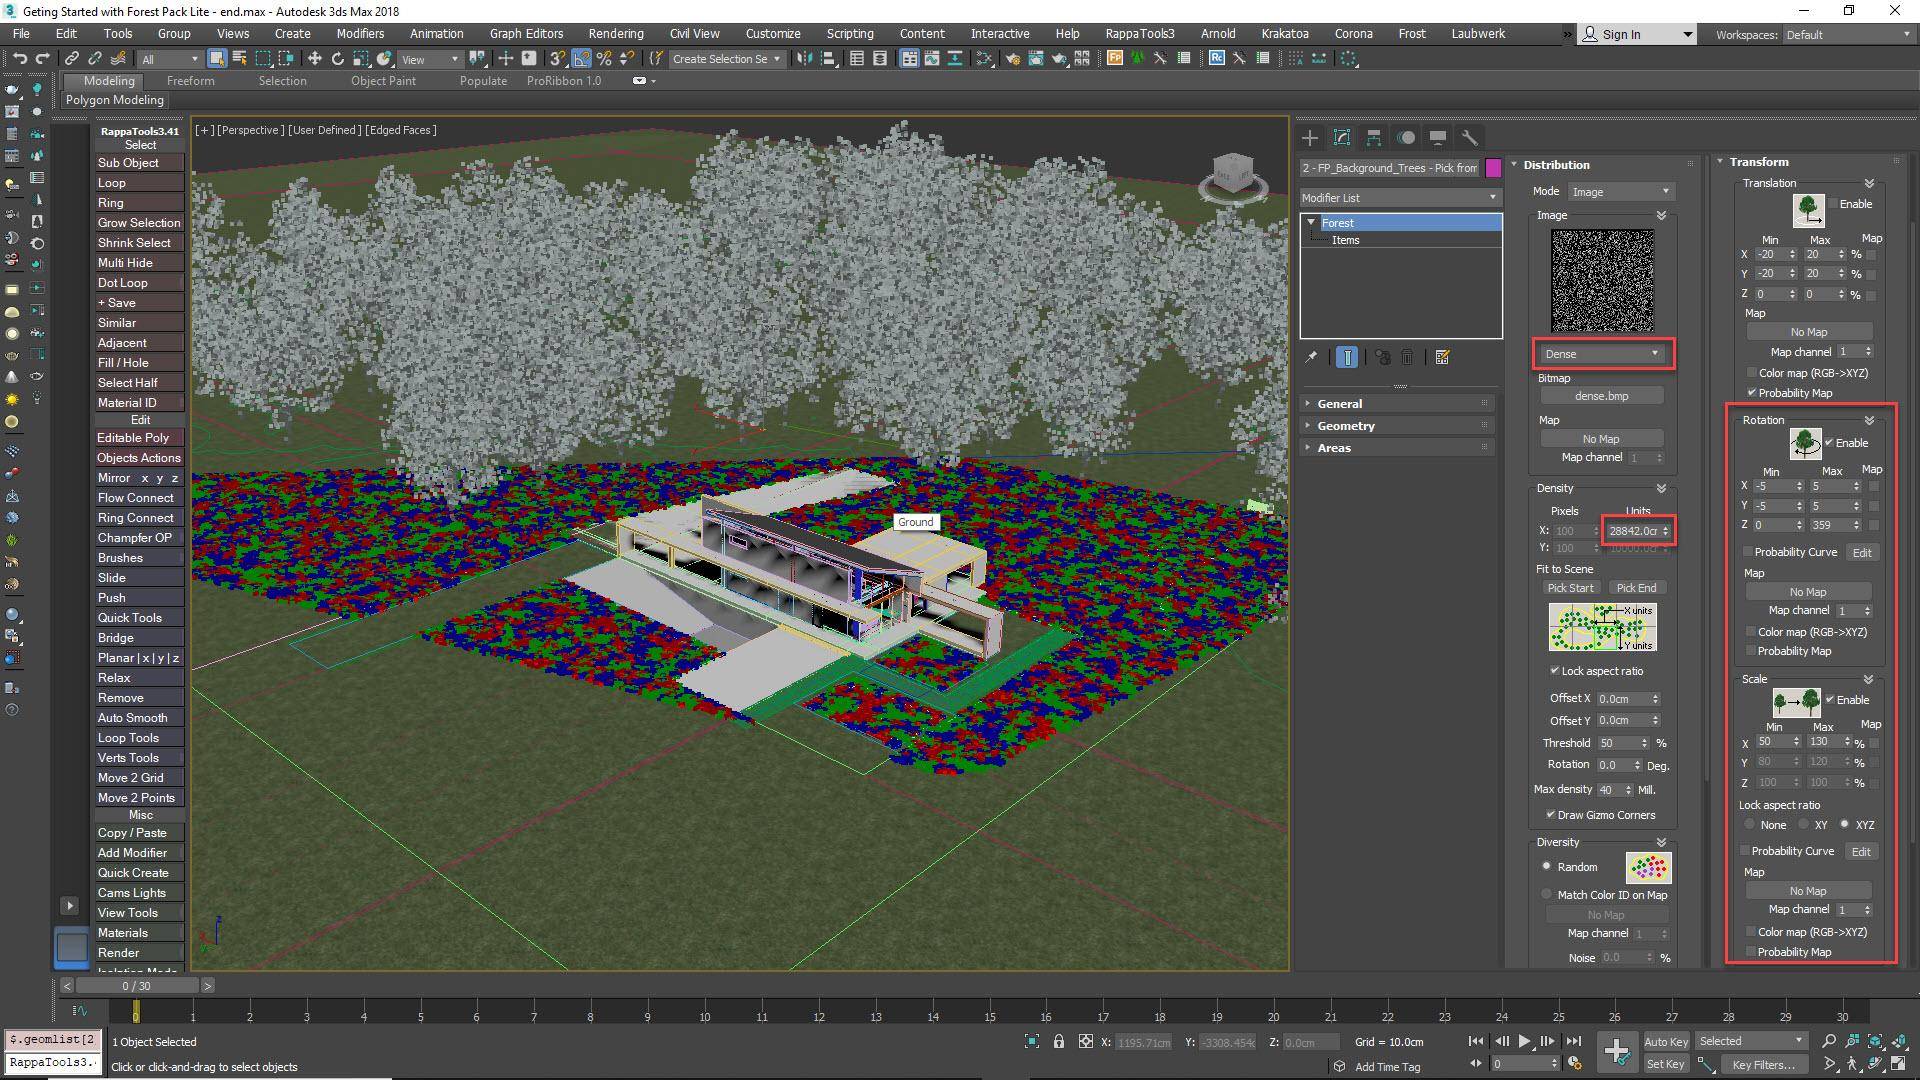
- To control the density of the scatter, go to the Distribution rollout. There are two important settings here: the image map which controls the Distribution pattern, and the Density setting which controls the size of the pattern projected onto the scene. Smaller values increase the density while larger values decrease the density.
- Once you have the density set, you’ll want to randomise the Rotation and Scale to hide the fact that you’re repeating a single tree. To do this, go to the Transform rollout and enable Rotation and Scale. For many purposes the default settings are fine, but you can of course edit them to get exactly the desired look.
![Randomising trees and controlling distribution]()
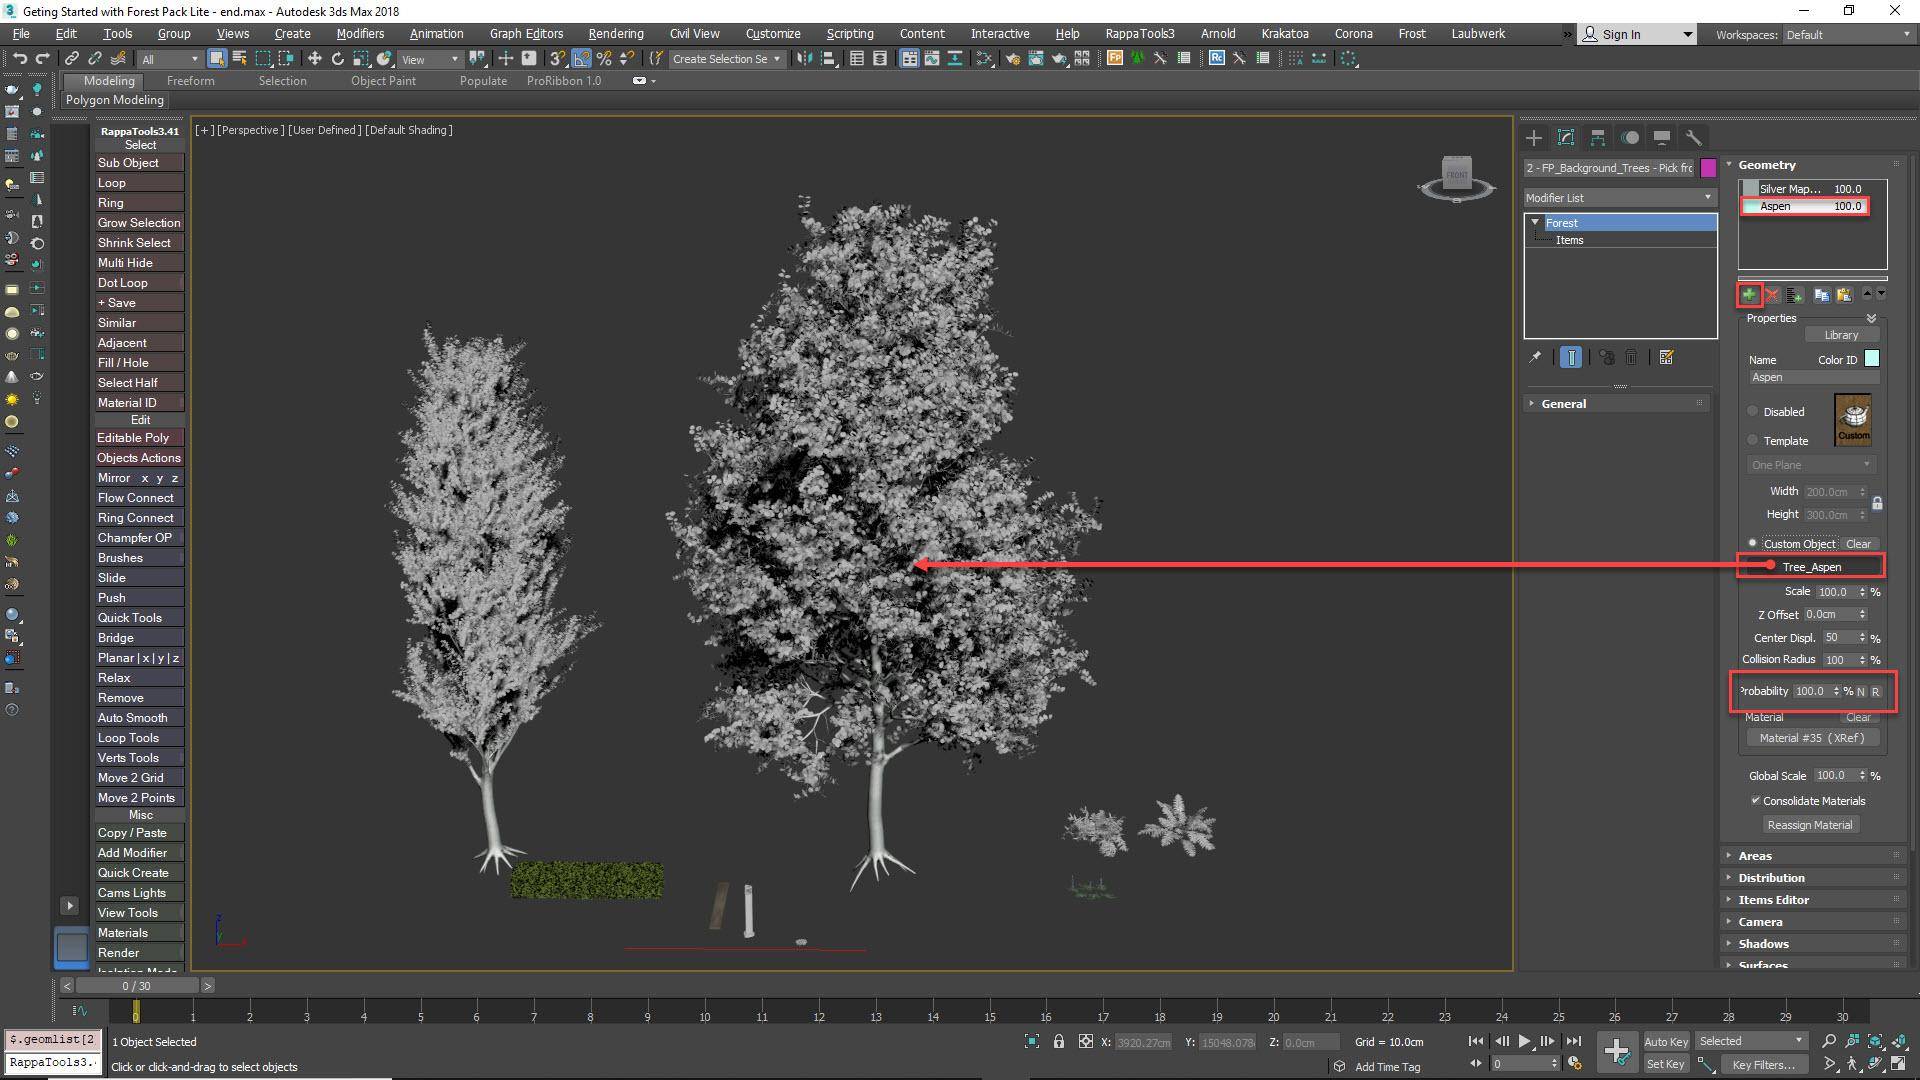
- To further disguise repetition, you can add another tree model. This time, instead of importing an object from the library, we will select one from the scene. Go to the Geometry rollout and click on the + button to add a new item.
- Change the mode to Custom Object and click on the Object Selector button. Find the object in the scene you wish to scatter and click on it. Forest Pack is now distributing two objects, the one loaded from the library and the new one selected from the scene. You can also control the mix of items from this rollout using the Probability settings.
![Adding trees manually]()
Of course, it’s not necessary to start every scatter by loading something from the library. In the next part we will add gravel by building the style from scratch.
- Go the Create Panel and select Forest Pro or Forest Lite.
- Right-click on the Library button. This will clear any presets that were loaded from the last time it was used.
- Click a spline or surface in the scene. A new Forest Pack object will be created with temporary billboard geometry.
![Billboard Geometry]()
- To replace the billboards, go to the Geometry rollout and select the default object from the Items List.
- Change the mode to Custom Object and click on the Object Picker button. Select an object from the scene.
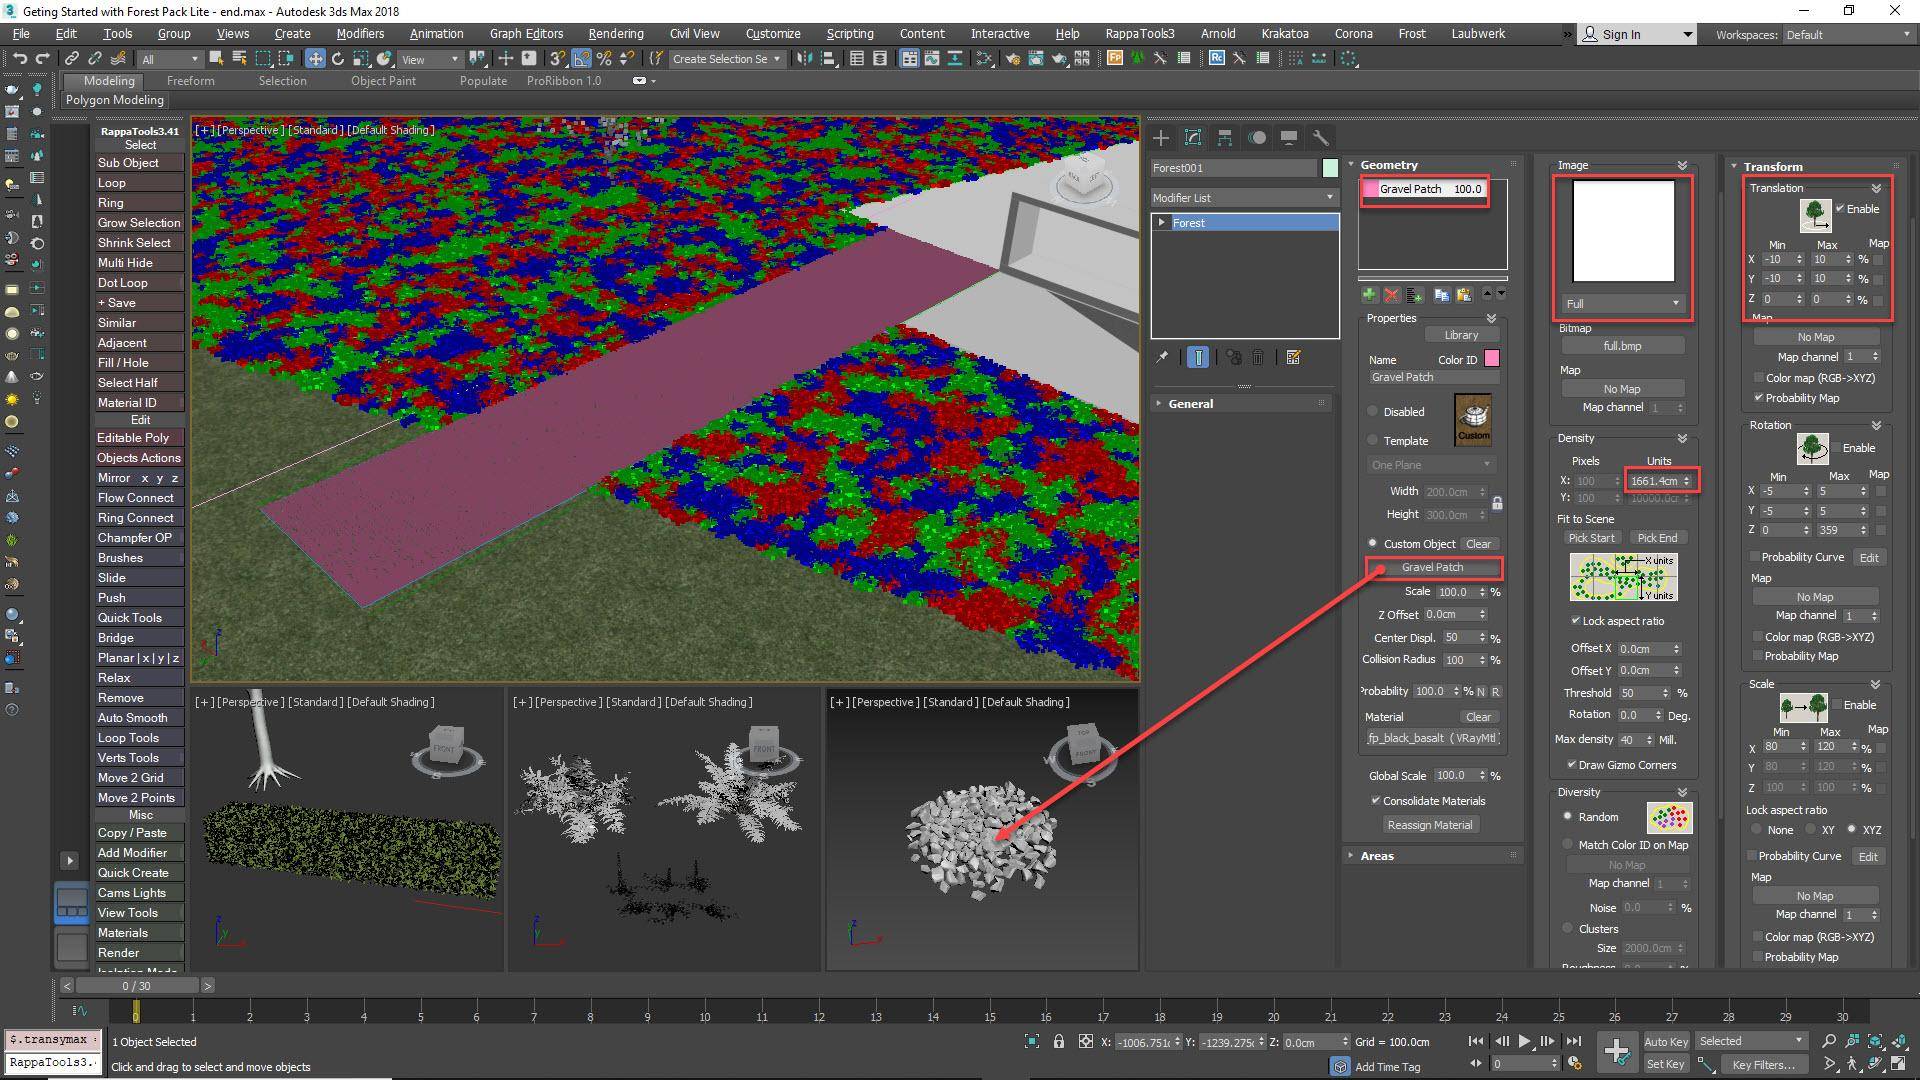
- With the object added, we can change the density. Go to the Distribution rollout and change the map to Full. This is the best map type for areas of uninterrupted ground cover.
- Lower the Density until there are no gaps between the gravel patches.
- Next let's hide the repetition of this patch by randomising its transforms. Go to the Transform rollout and enable Translation, Rotation and Scale.
- Translation randomisation disguises the grid-like distribution caused by the Full map. To prevent gaps opening up in the distribution, change the XY Minimum values to -10 and Maximum to 10.
![Adding the Gravel]()
- Change the X and Y rotation Min and Max to 0. This stops the patch from tilting up so you can see its edges.
- Change the Scale min to 90% and Max to 110% to reduce the scale range and prevent gaps and other visual anomalies from appearing.
So far so good, to finish this style let’s go to the Areas rollout and add any other areas that are required. Remember, click the + button and pick the area from the scene. You can then choose if it is an Include area to add items, or exclude to remove them from an overlapping Include area.
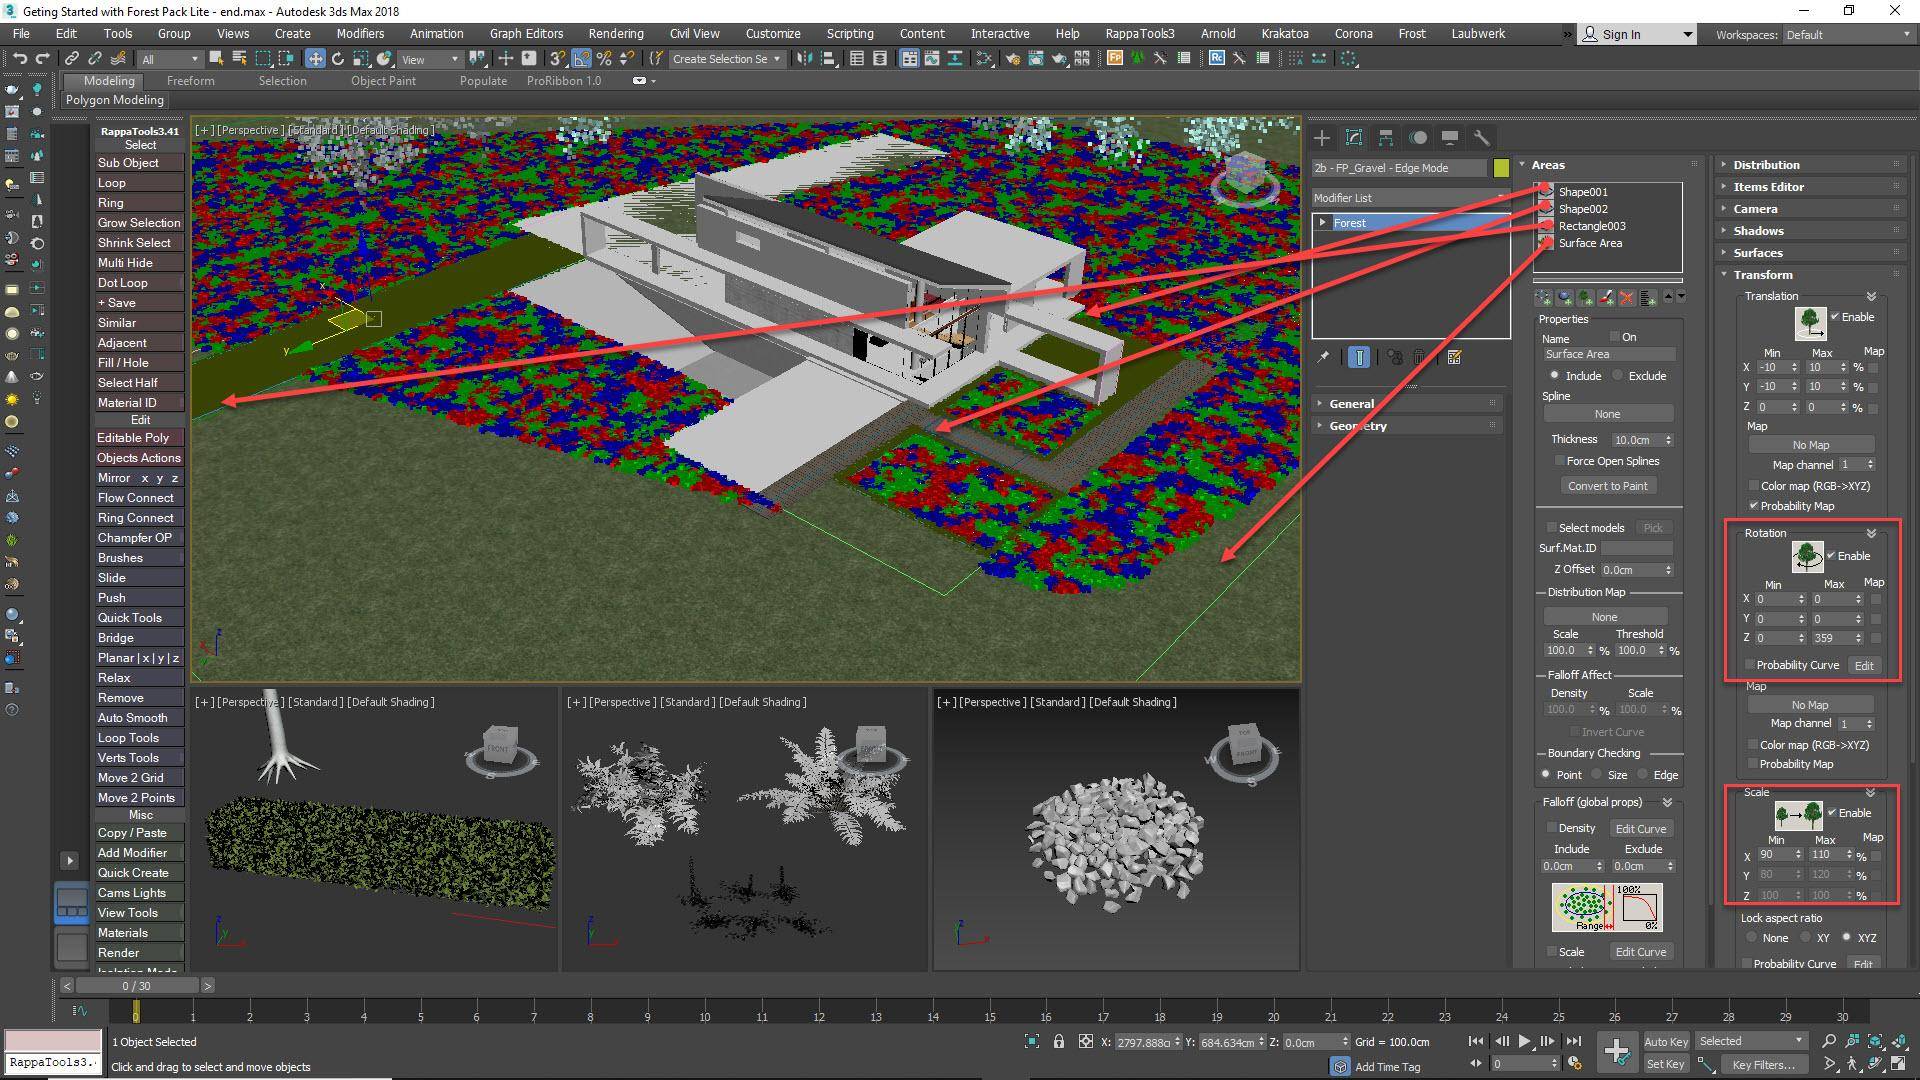
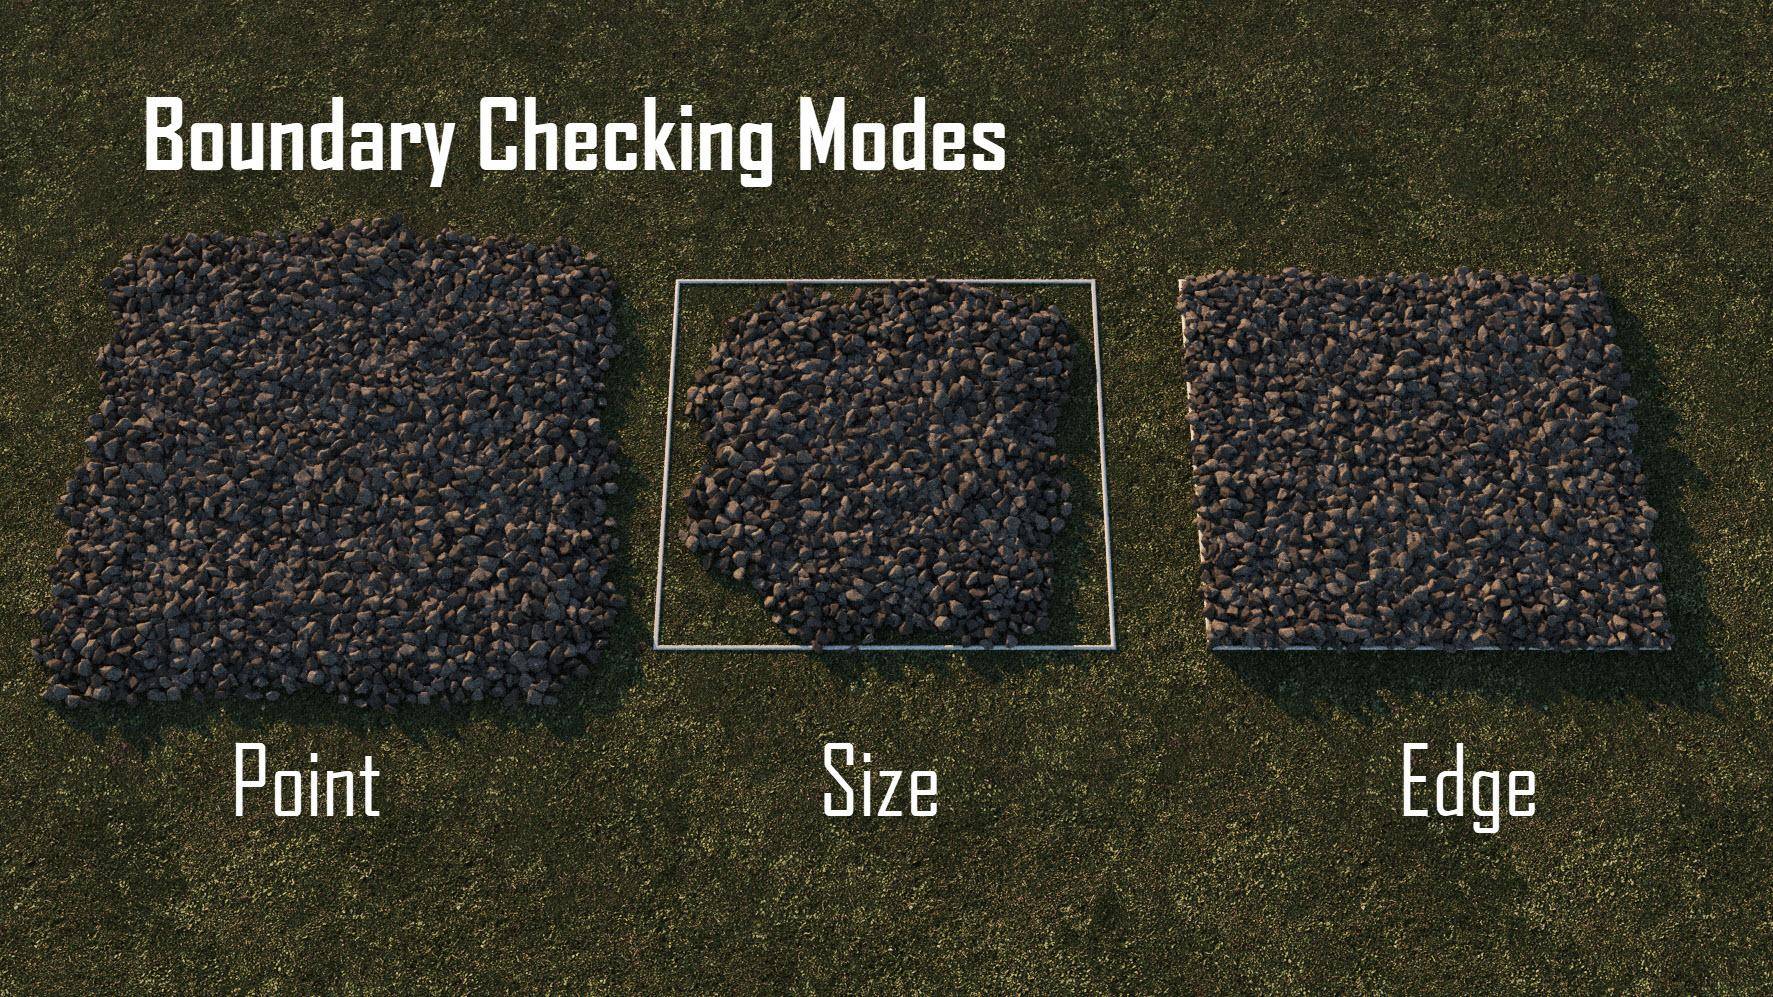
A very useful feature here is the boundary checking modes which are used to decide when an item is removed around the perimeter of a spline of surface. You have three modes: Point mode uses the items pivot to decide if it is inside an area, Size mode uses the size of the geometry itself, and finally, Edge mode uses the items pivot but then is able to remove individual elements that extend beyond the boundary. It’s great for getting nice clean edges.
Distribute bushes along Splines
It is also possible to distribute items along splines at set intervals. In this scene we used this technique to add all the hedges, here’s how.
- Go to the Create Panel and select Forest Lite or Forest Pro. Change the creation mode to Icon. This is useful when you want to use any of the non map-based distribution techniques.
- Click and drag in the scene to add a Forest Object.
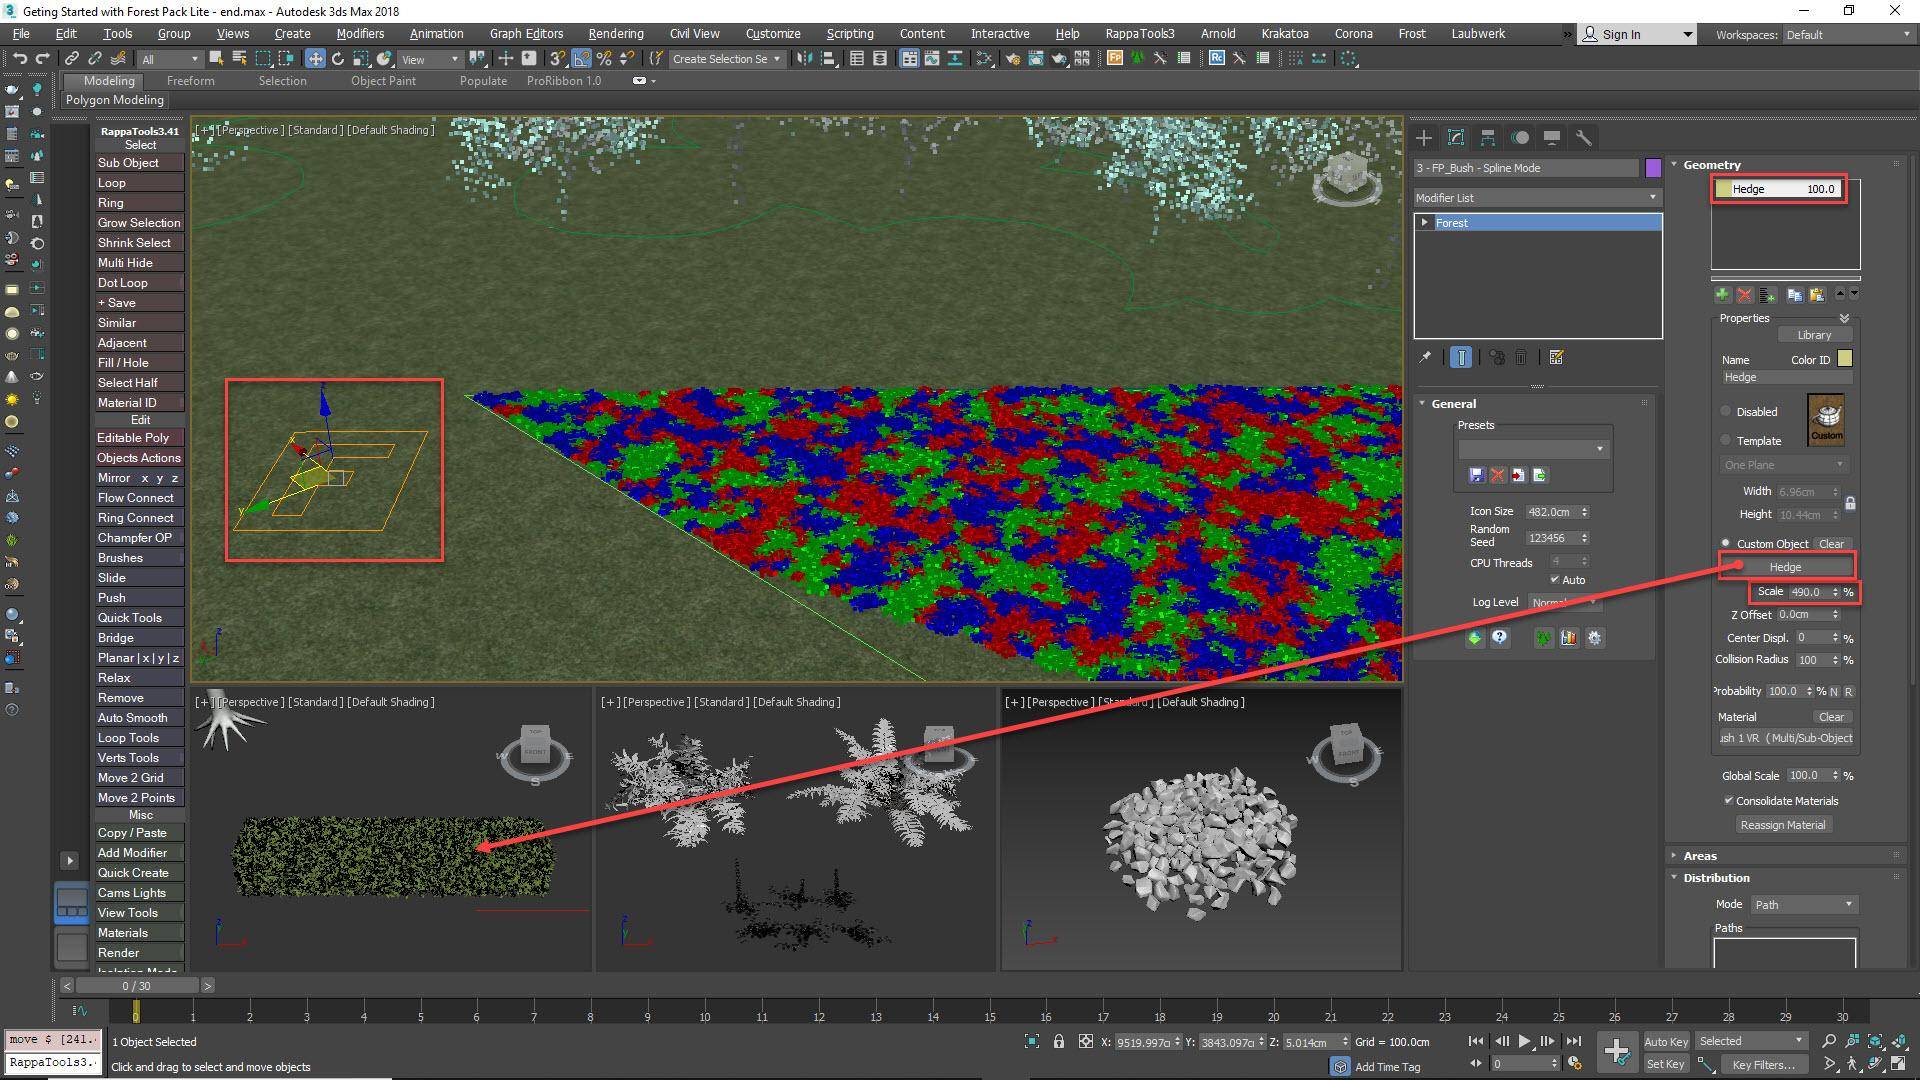
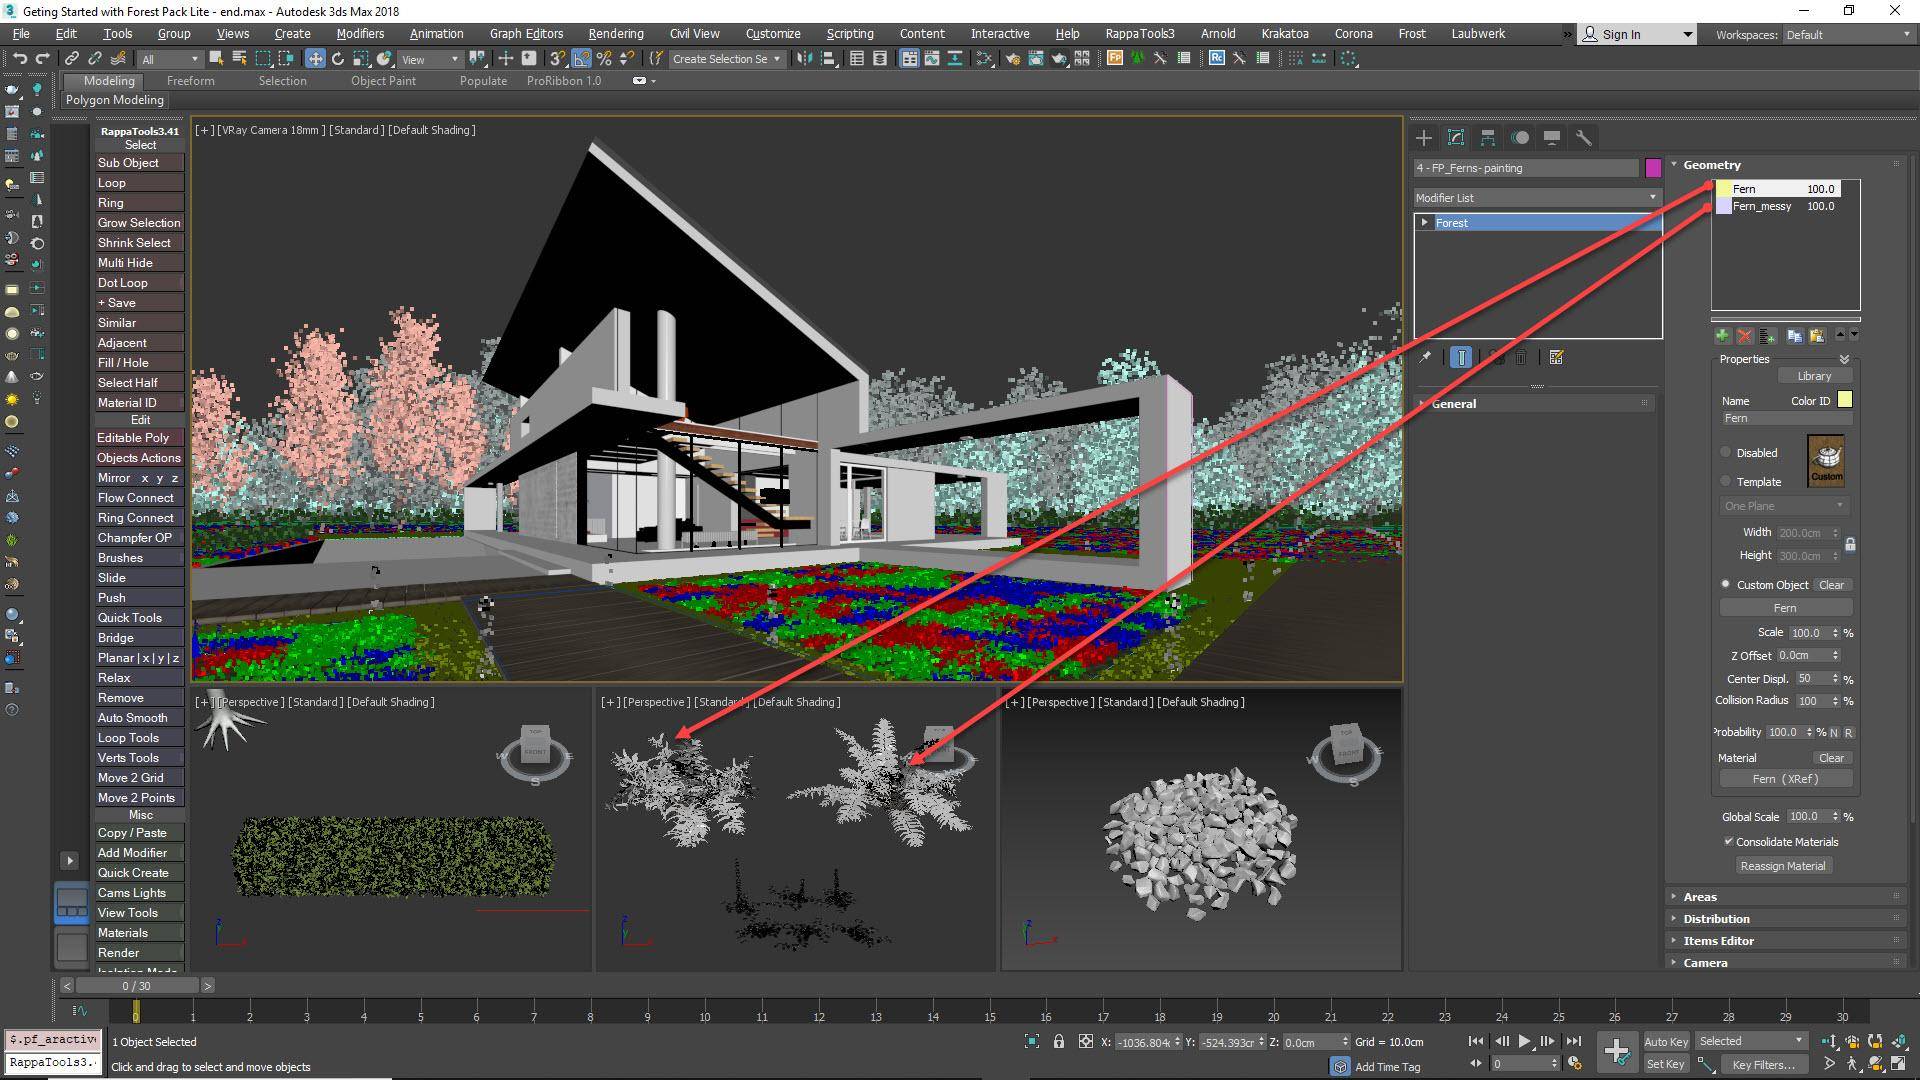
- In the Modify panel, go to the Geometry rollout and click + to add a new Item. Pick the geometry from the scene. In our example the hedge is a bit small, so I also increased the Scale to 490%.
![Adding hedge geometry]()
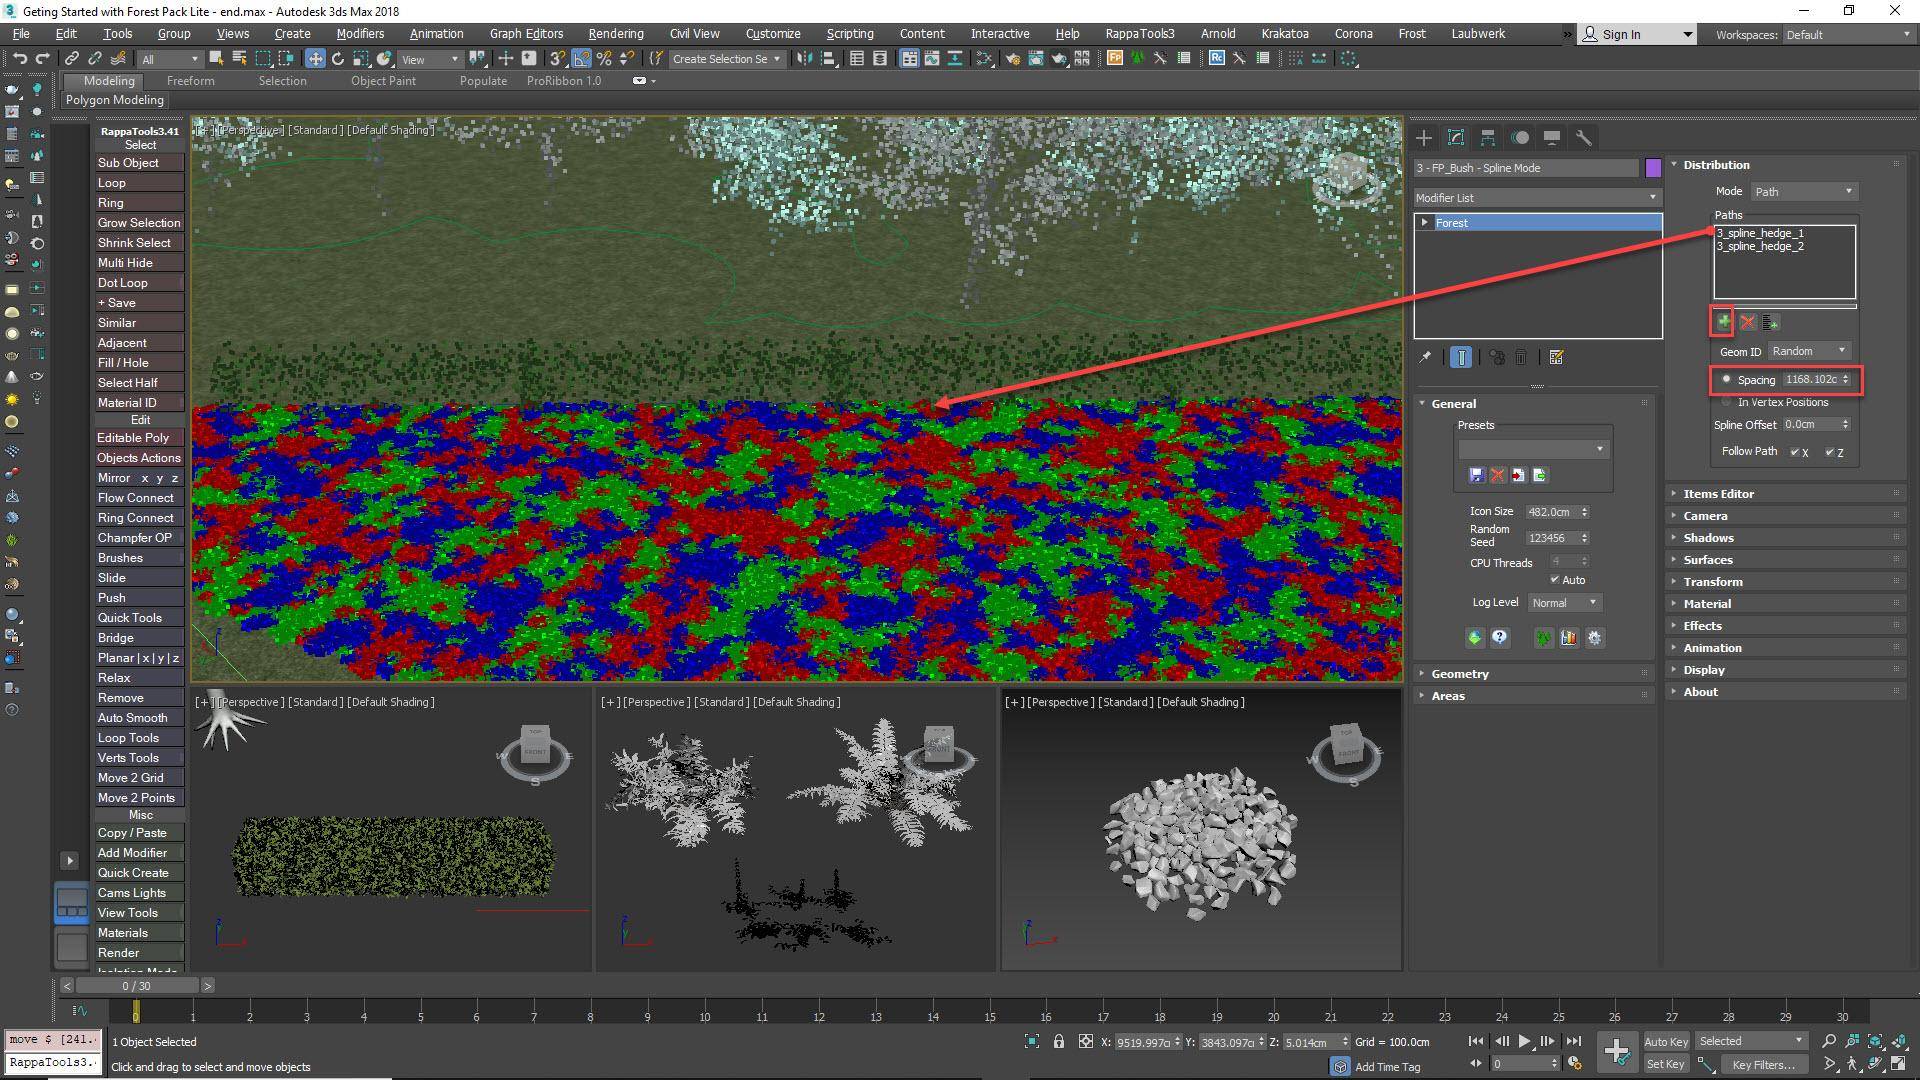
- Go to the Distribution rollout. Here you’ll find a drop-down menu that allows you to select from 4 possible modes. Select Path and then click on the + button and select a spline from the scene to add a new path from the list. For multiple splines, there’s also an Add Multiple option.
- You can then adjust the distance between objects using the Spacing property. You also have the option for the items to Rotate and Follow the spline on and X and/or Y axes.
![Spline Spacing Mode]()
- If you like, you could also add a little Scale randomisation from the Transform rollout.
Exactly the same procedure was used in this scene to add the Poplar trees alongside the drive and the light poles in the foreground.
Painting objects
Another approach to distributing objects is to paint them exactly where you need them using a mouse or tablet. To do this, the setup is very similar to our previous examples:
- Go to the Create Panel and Select Forest Pack Pro or Forest Pack Lite.
- Make sure the Mode is set to Generate and pick a Surface from the scene. This is important, you can only paint on the selected surface.
- Add the objects to the Items list in the Geometry rollout. In this case we will add some Ferns.
![Adding the ferns]()
- Adjust the Density and Map in the Distribution rollout as required.
- Randomise Transforms to disguise repetition.
- Go to the Areas rollout and turn Off the existing Surface area.
- Now, click on the button to add a new Paint area.
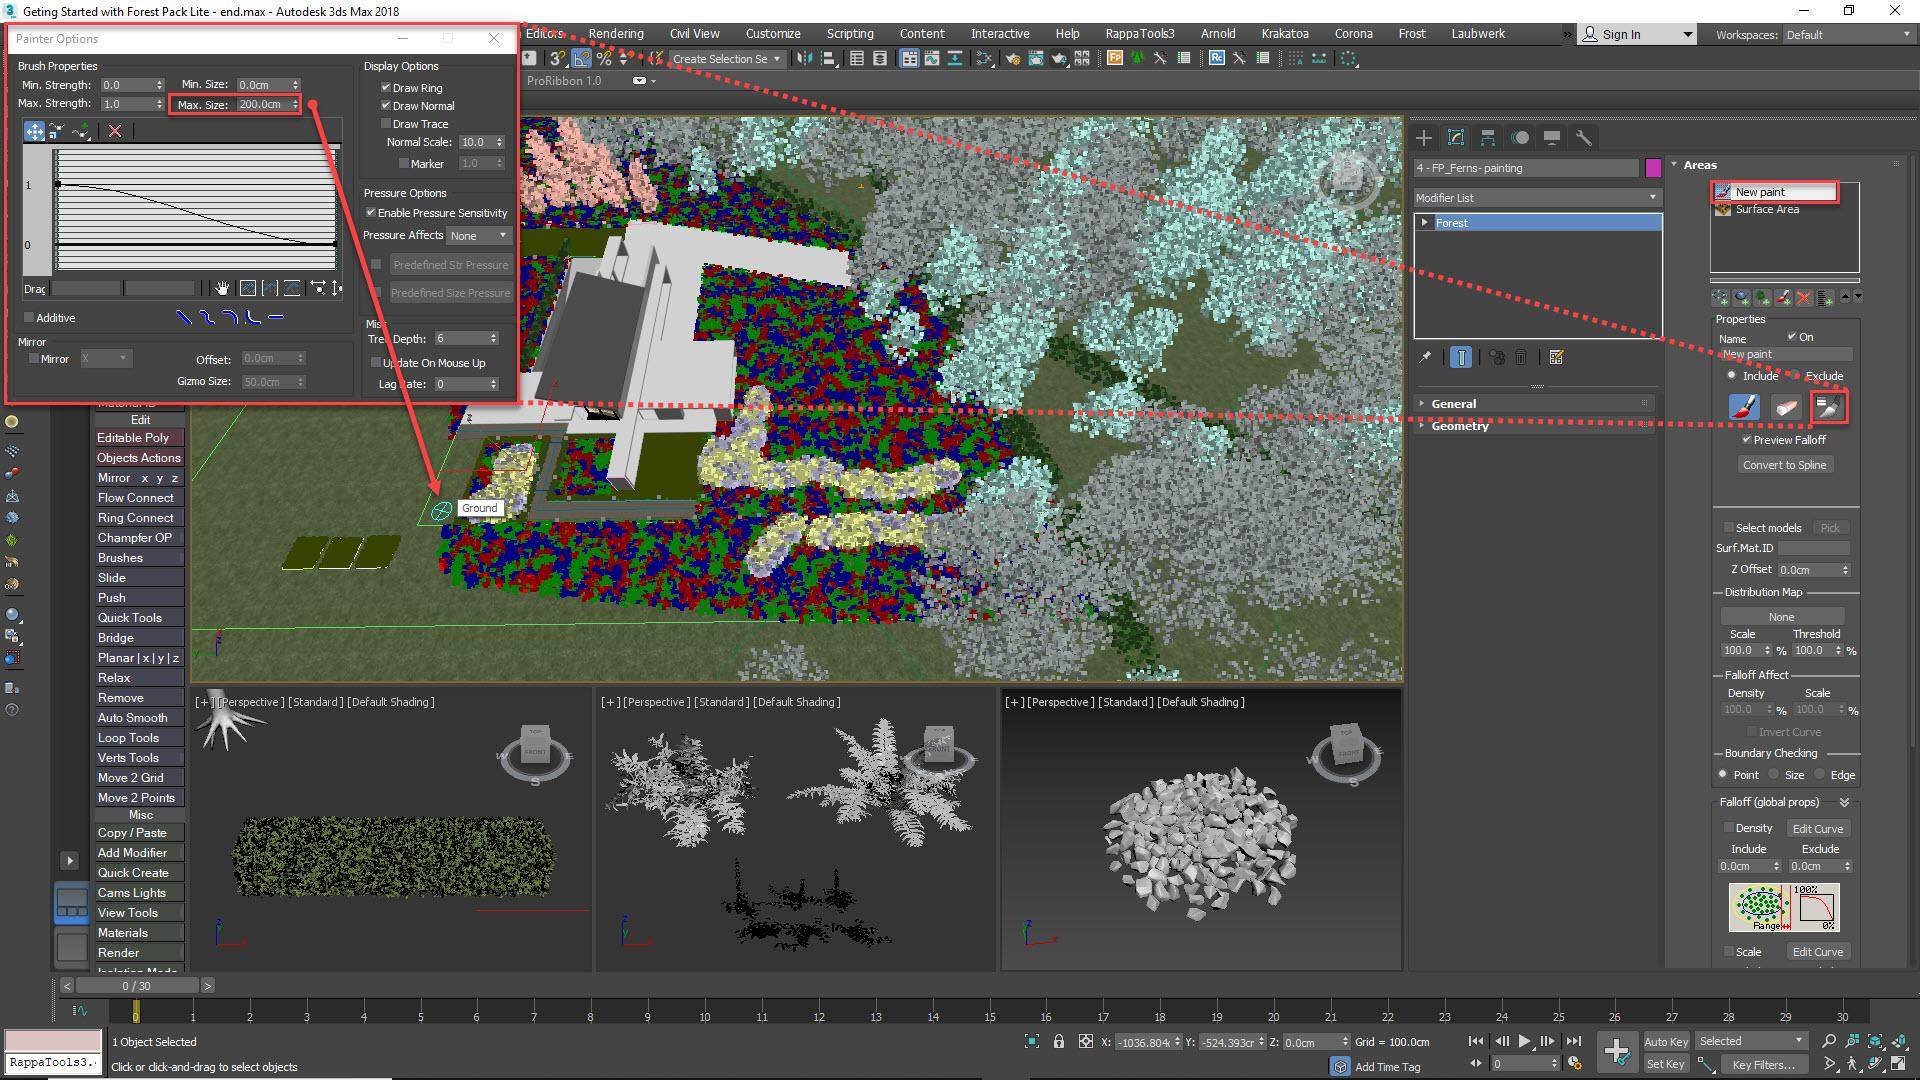
- Click on the Paint Brush button and draw on the surface to paint an area. If you wish to remove items, use the Eraser tool.
- Brush size can be adjusted by opening the Brush Settings options. If you are using a mouse, the Max size property is the value to edit.
- Keep painting until you have added plants where you’d like them. The advantage of this technique is that it’s very intuitive and easy to visually compose your image. Also of note, just like splines, Paint areas can be set to Exclude mode to remove items as well as add them.
![Brush Settings]()
So far so good, but what if you have another Forest Object that you would like to scatter in exactly the same place, for example in this scene we have another Forest object ready to go containing smaller flowers that we’d like to occupy the same area.
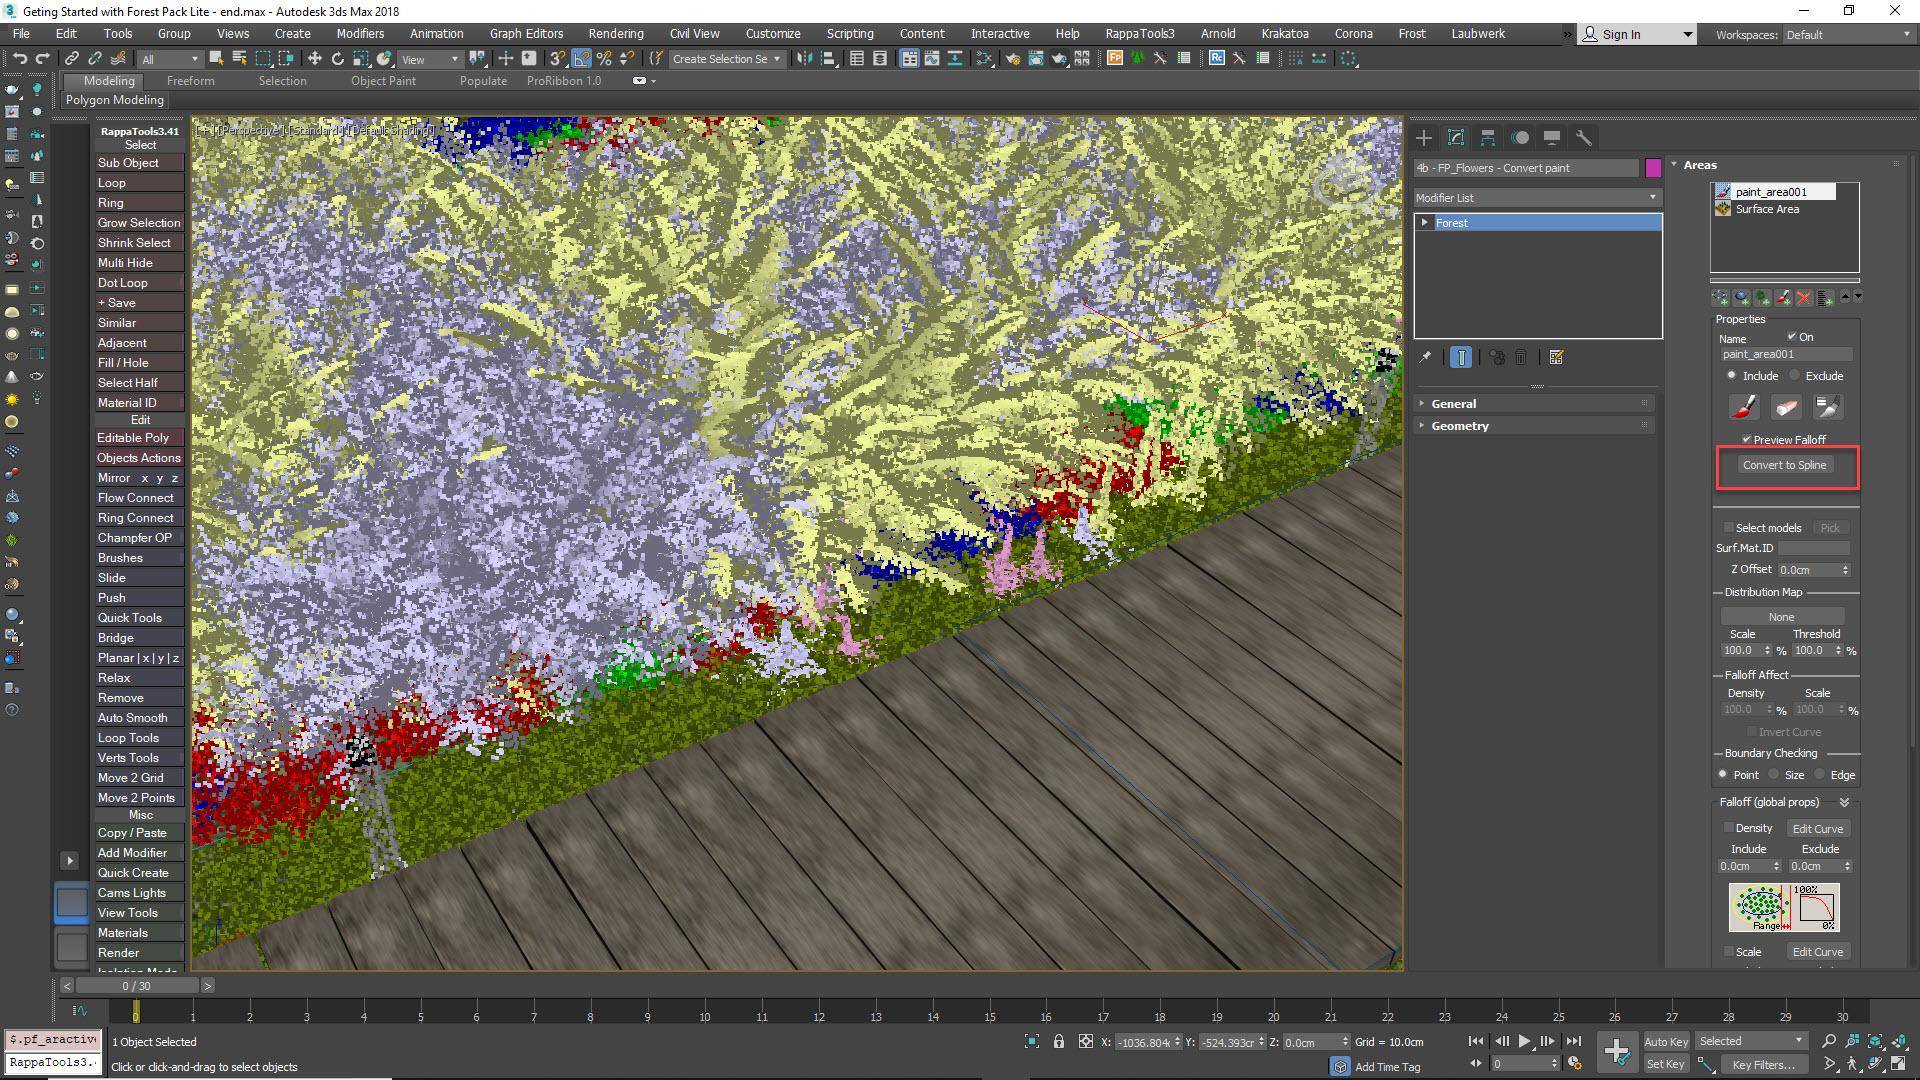
Of course we could simply paint the area again, but that’s wasting valuable time, so instead Forest gives you the option to convert a Paint Area to a Spline area that can then be used in the scene just like a normal object. To do this:
- Go to the Areas rollout and select the Paint area you’d like to convert.
- Click on the Convert to Spline button.
![Converting paint areas to splines]()
- Go to a new Forest Pack object and go to the Areas rollout.
- Add a new Spline area.
- Pick the spline created during the conversion in the previous step. Both these Forest objects are now sharing the same spline!
Moving individual items to refine the scatter
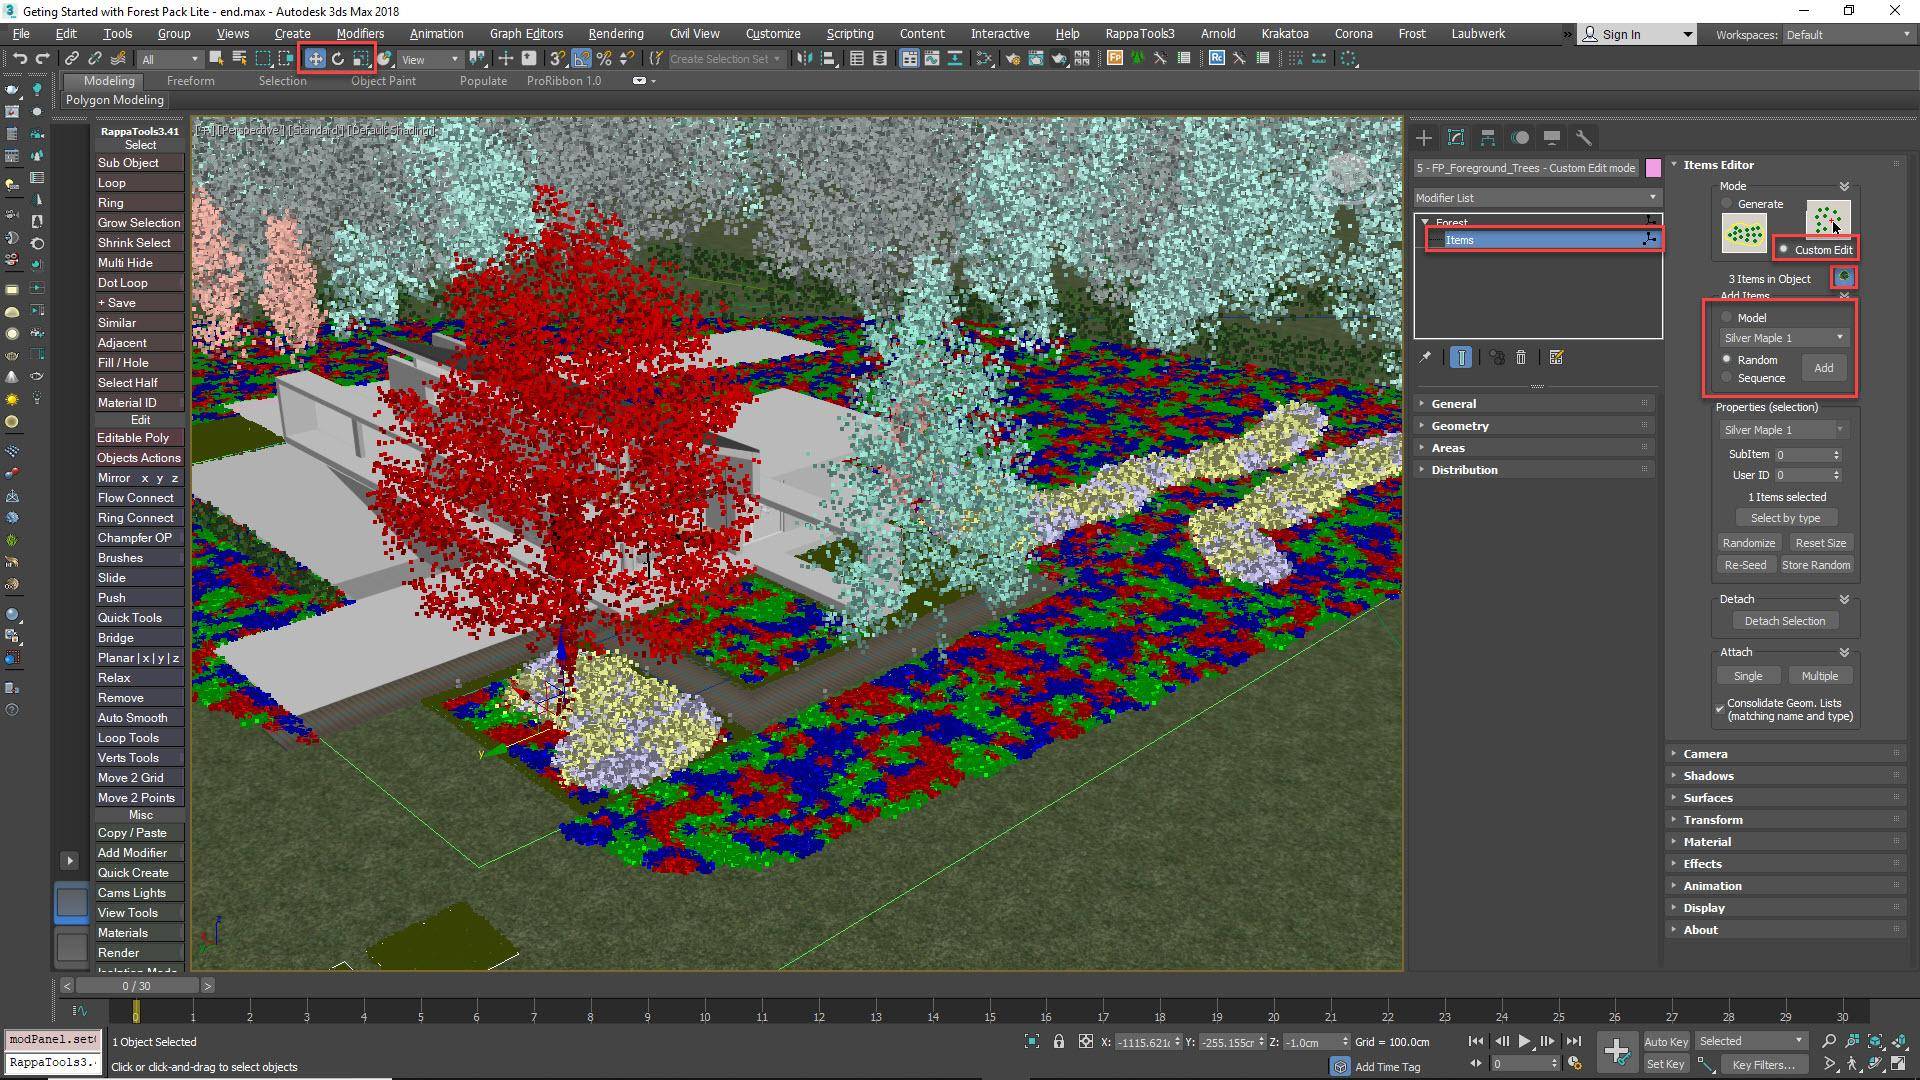
Forest Pack is fantastic at scattering huge numbers of objects, but sometimes you just want to edit a few items to really perfect the composition. That’s where Item Editor mode comes in, it allows you to access individual items in a scatter and move, rotate and scale them or even clone and add new objects one at a time. Let’s add some trees in the foreground to frame the view and illustrate how it works.
- Select the Trees Forest Pack object
- Go to the Items Editor rollout and change the mode from Generate to Custom Edit.
- A warning with appear telling you that you are essentially baking in the current distribution and removing parametric Area and Distribution controls. Click yes.
- Go to the Items sub-object level or click the Tree button.
- You can now select items and move, rotate and scale them. You can also hold down Shift while transforming to create a clone, just like a normal object in Max.
- To change the Geometry used by selected items, use the Properties group. You can also randomise, reseed and reset the size of items using these commands.
- To add new items, press the Add button and click in the scene. You can either specify the model from the drop-down list, randomly select the from the items list, or use a sequence.
![Using Item editor mode]()
- In our scene we used this technique to add the trees on either side of the camera in the foreground as well as adding one in the midground next to the house.
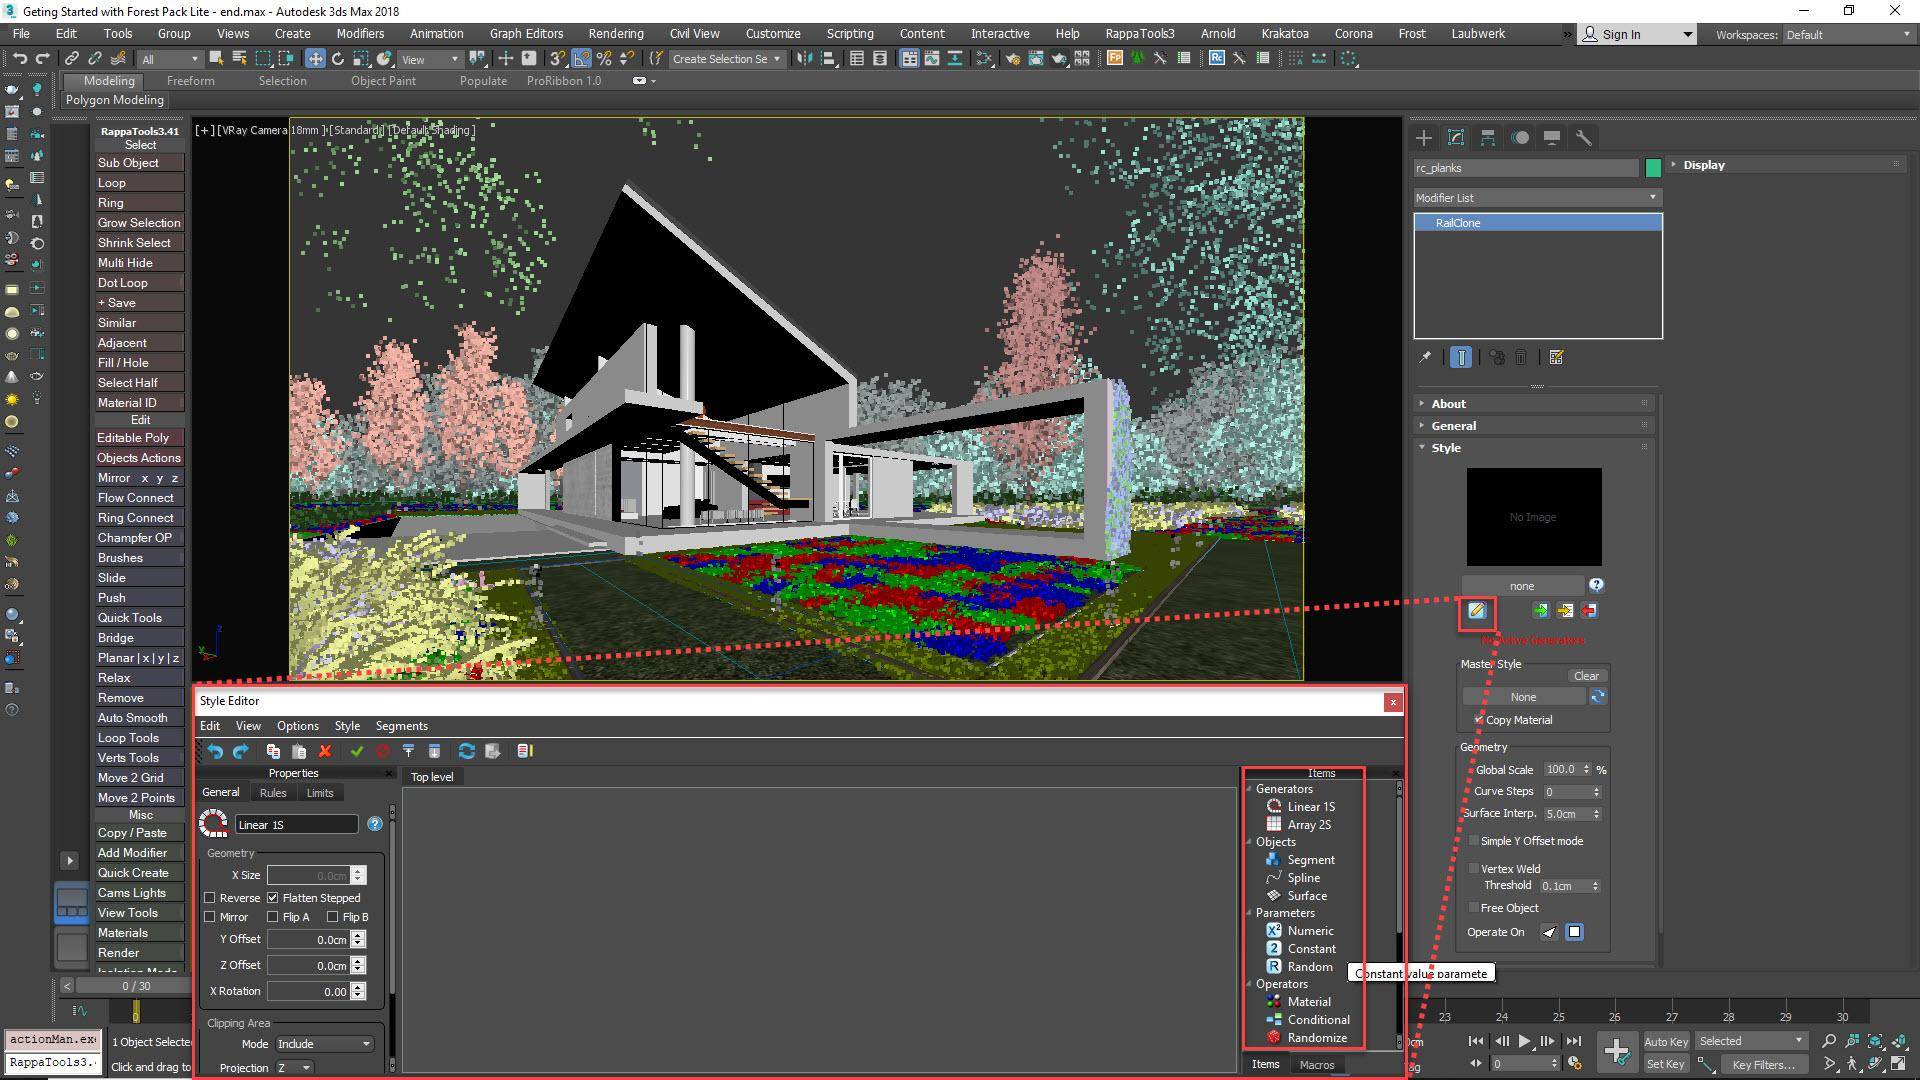
Adding the boardwalk with RailClone Lite
Though this is primarily a Forest Pack tutorial, for the final section we couldn’t resist adding a little bit of RailClone. Like the rest of the tutorial, you can use the free Lite version which can be downloaded from the product page.
The boardwalk is a simple setup that uses just one source object - a single plank. It’s nothing fancy, but we have added a RailClone colour map to its material that randomises between 9 different wood board textures. If you want to know more about RailClone colour we recommend this introductory tutorial.
To make the style:
- Create a new RailClone object by dragging an icon in the scene.
- Go to the Modify panel, and in the Style rollout click the button to open the Style Editor. This is a node based interface that is used to create rules for parametric models.
![Opening the Style Editor]()
- As a minimum a RailClone style needs 3 things, A path or value to determine the size of the array, some sort of geometry to distribute, and a Generator which is used to control the creation rules.
- Add an L1S Generator to the graph. This generator distributes objects along a spline, a little like the spline distribution mode we saw earlier in Forest Pack. In RailClone though you have many more advanced options and the plugin is “aware” of the size of the items being distributed.
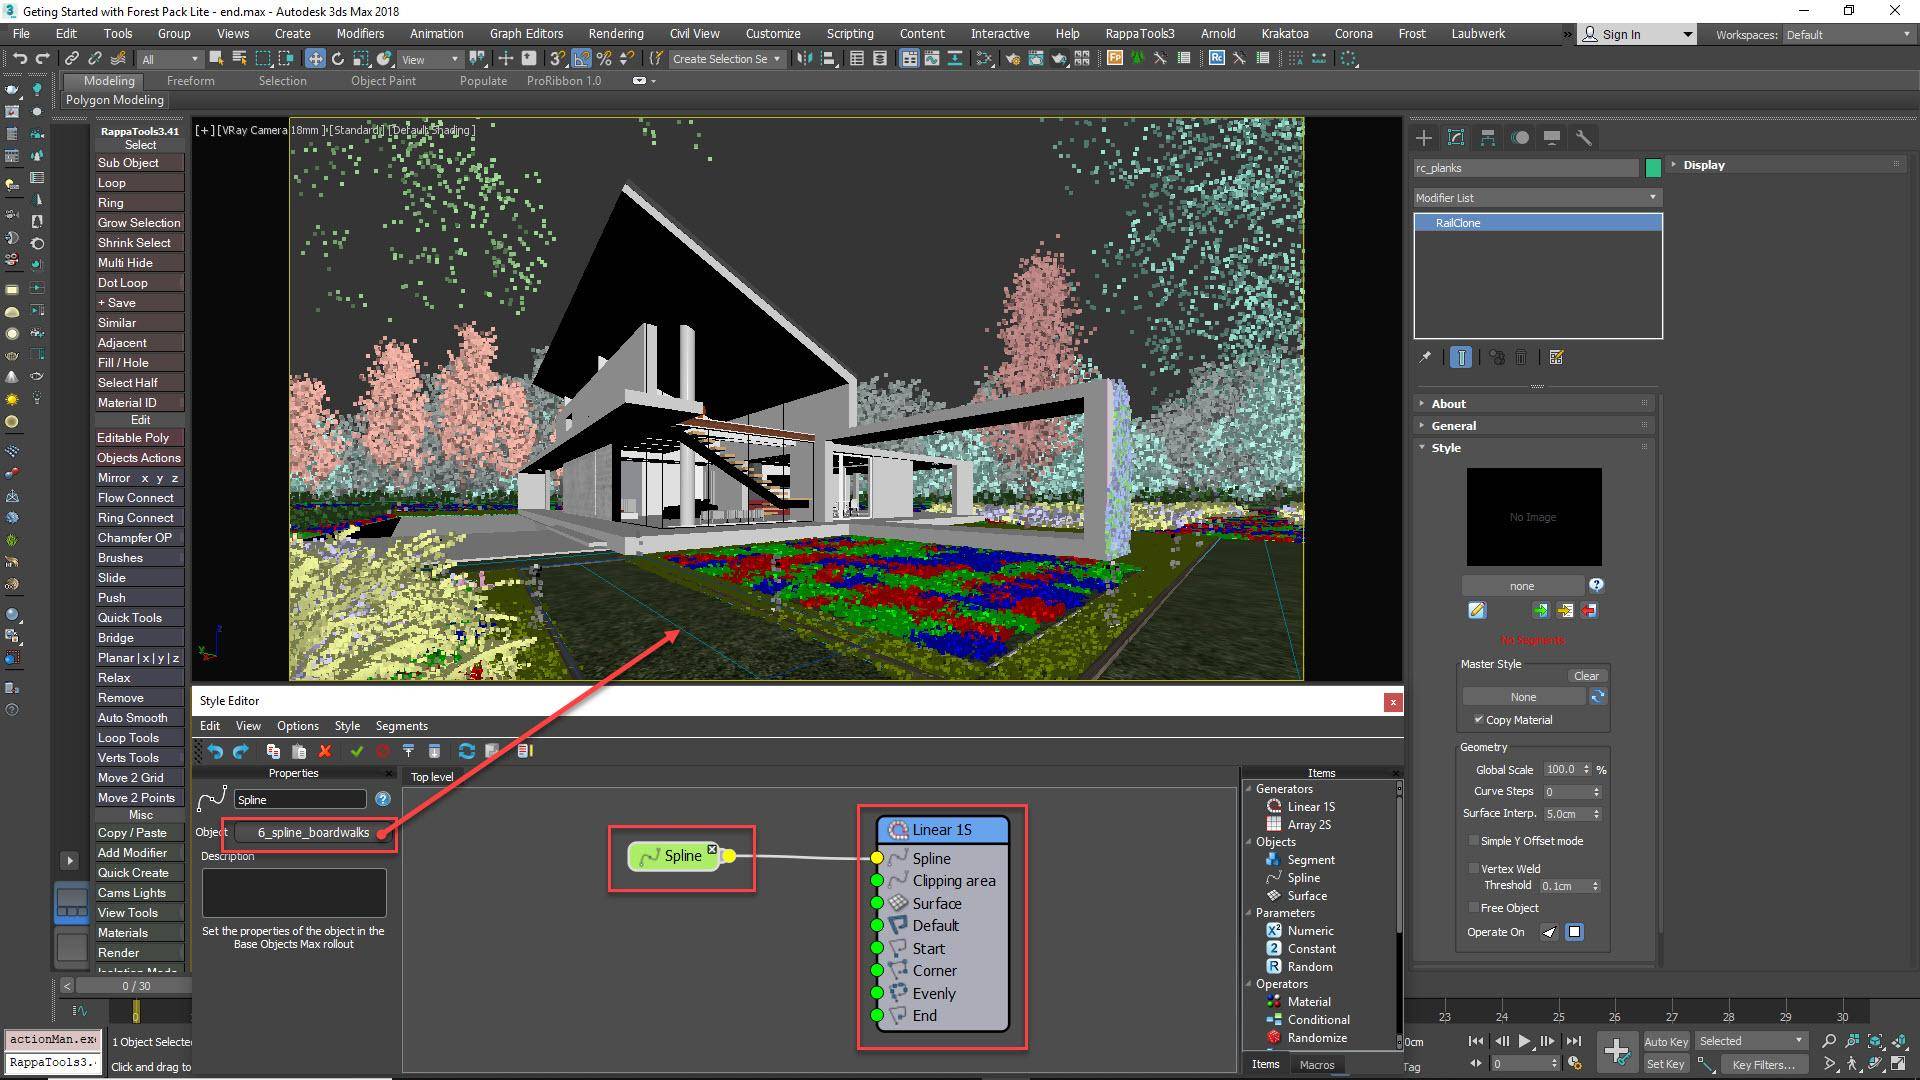
- To add a path, drag a Spline node to the graph and pick the spline from the scene by clicking the button found in the Properties panel. Wire the Spline node to the Generator’s Spline input.
![Adding Splines to the Graph]()
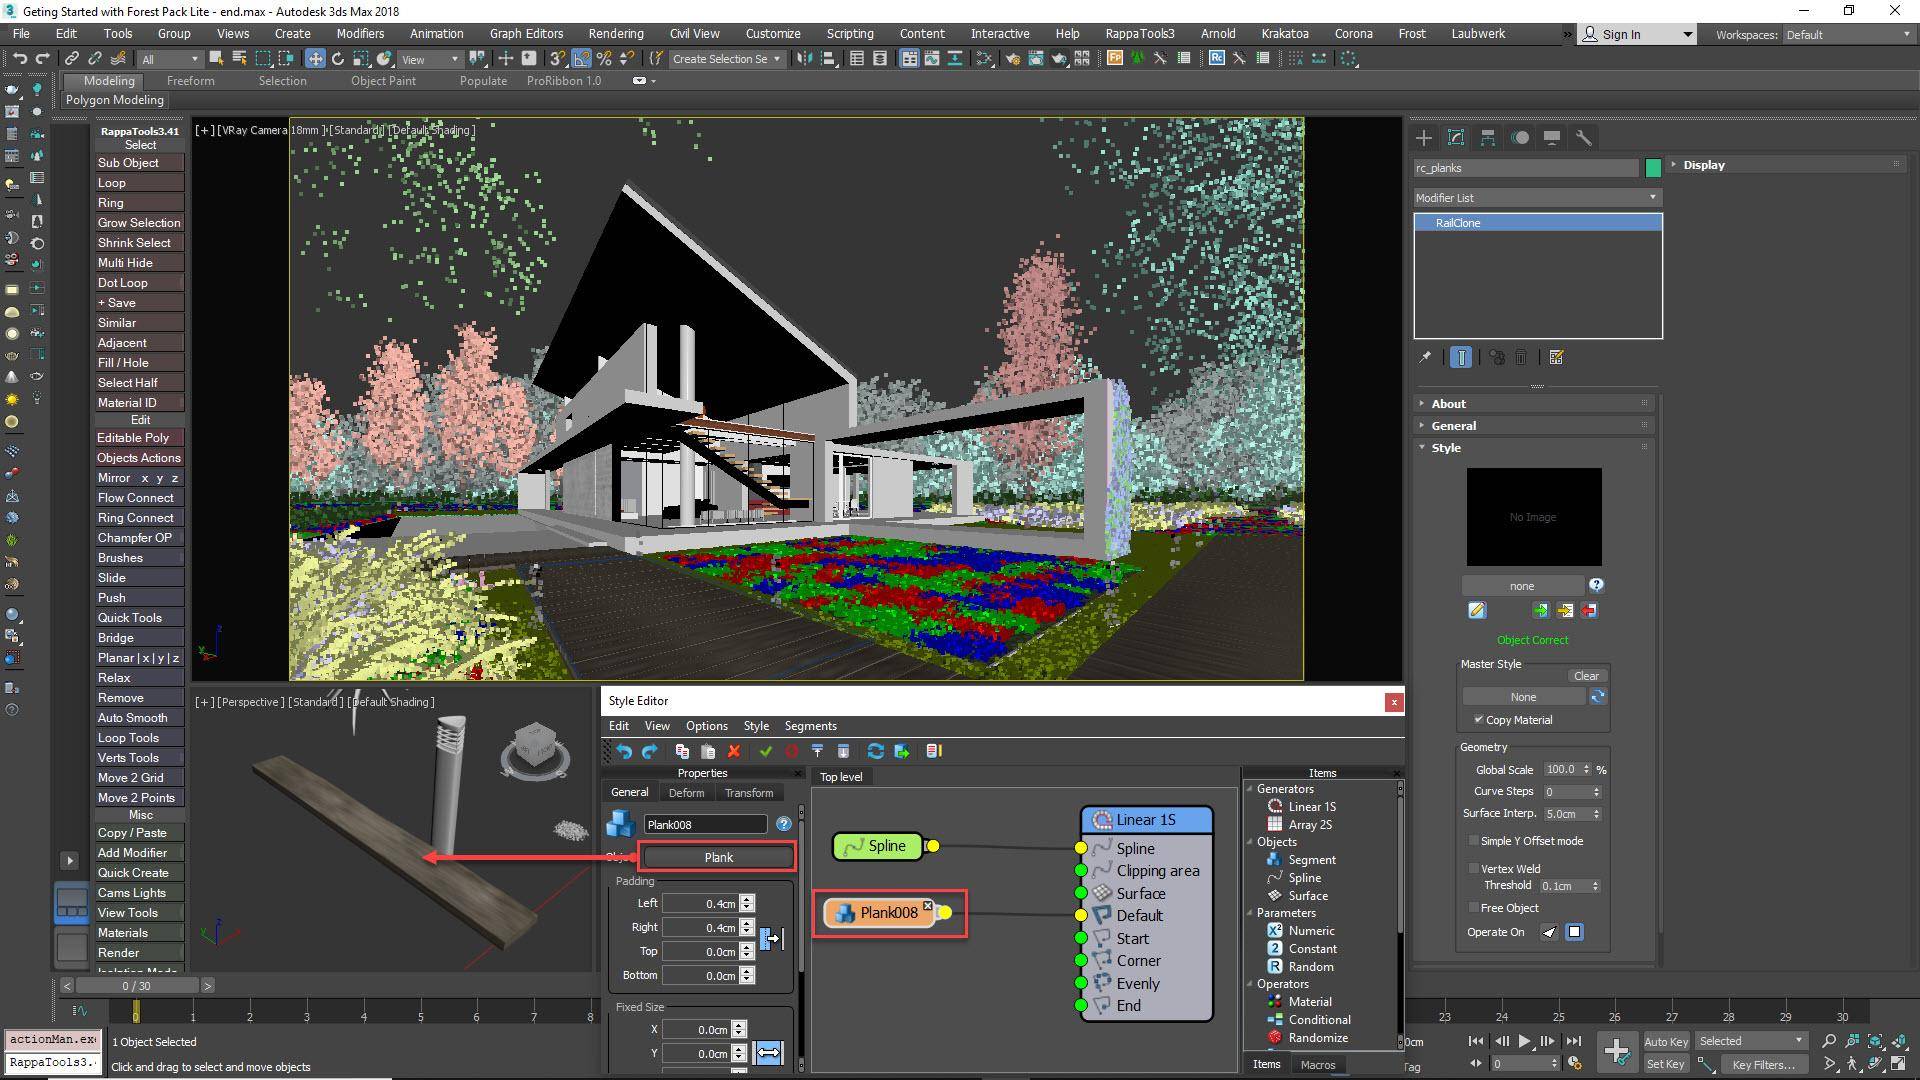
- Finally we’ll add the geometry. Add a Segment node to the graph and wire it to the Generator’s Default input. In the Properties panel, use the selector button to pick the board geometry from the scene.
![Adding Segments to the Graph]()
- If you’d like to add a bit of randomisation, go to the Segment’s Transform tab and set Min and Max values for Translation, Rotation and Scale.
- Finally, apply the material to the RailClone object. Unlike Forest Pack, RailClone 3 and below does not automatically consolidate the materials used on the source objects.
The boardwalk is now complete, created, like everything else in this scene, with the free Lite versions of the plugins.
That concludes this introduction to Forest Pack (and a bit of RailClone) for Lite users. If you’d like to learn more, we have plenty more tutorials on our website, many of which will be useful for both the free and commercial versions of the plugins. We hope you’ve enjoyed this introduction, stay tuned for much more content coming soon!