Fichiers de ressources

Every year we release a tutorial for a Christmas tree created using RailClone - and I use the word tree here very loosely. In fact, this is now the fourth of these tutorials. This time around we are going to demonstrate how to make this rather festively shaped building from just 3 pieces of source geometry. As always, along the way you'll learn some useful RailClone tips, including the use of the Conditional and Material operators, RailClone Colour maps, Clipping, Deform modes and more. You might wonder why you would want to create a building like this, but of course, the techniques shown in this video can be very useful for creating architecture that is a much more orthodox shape.
This tutorial is also significant for another reason. In RailClone 4 we made the free version more powerful by enabling the use the vertical deform modes AND the ability to distribute on non-flat splines. That means this tutorial is fully compatible with RailClone Lite which can be downloaded from the iToo Software website.

In this scene, we will start with three segments that will become our building. As you can see, the geometry is very simple. We have two sections which we will randomise to make up the majority of the building, one with a window and one with simple cladding. The third piece will be used at the start and end of the spline where windows or a balcony would be inappropriate.
The boards each have a material ID of between 8 and 14 assigned so that they use slightly different colour corrected versions of a wood cladding material. We will randomise these IDs using a Material operator later.

There are also some polygons that have been assigned a V-Ray Light material to add a bit of illumination to the inside of the building and on top of the facade for some uplighting. These will be randomised using RailClone Colour.
As always, pivot placement is very important. Generally speaking, you don’t need to worry about the pivot’s position on the X-axis - RailClone’s automatic placement takes care of that for you. But I will adjust the pivot on the Z-axis because I want the top of segment (ignoring the ledge) to align to the top of the spline. Similarly, on the Y-axis I want the front wall (ignoring the cladding thickness) to align to the spline, so I move the pivot forward so that they will jigsaw together correctly.

We’re nearly ready to create the RailClone object, but before that, a quick word about using Max’s helix spline object. When using these primitives with RailClone, you might find you don’t get smooth deformations. This is because Max’s helix spline object outputs segments with their type set to Line instead of Curve. You can fix this in two ways, either add an Edit Spline modifier, select all the segments and change the type to Curve, then change all the vertices to Smooth. Or instead, simply add a Normalise Spline modifier and tweak the spacing. I’m using the second option because it’s parametric and it allows me to change the properties of the Helix at any point if necessary.
So, with all the segments and the spline ready, it’s time to build the RailClone style.

- Create a new RailClone object, go to the Modify Panel and open the Style Editor
- Add a new Linear Generator. This will control the rules for the building
- Add a new Spline node and use it to pick the Helix from the scene. Wire the Spline node to the Generator’s Spline input.
- Create a new Segment node and use it to pick the Default Glass geometry from the scene. Wire it to the Default input.
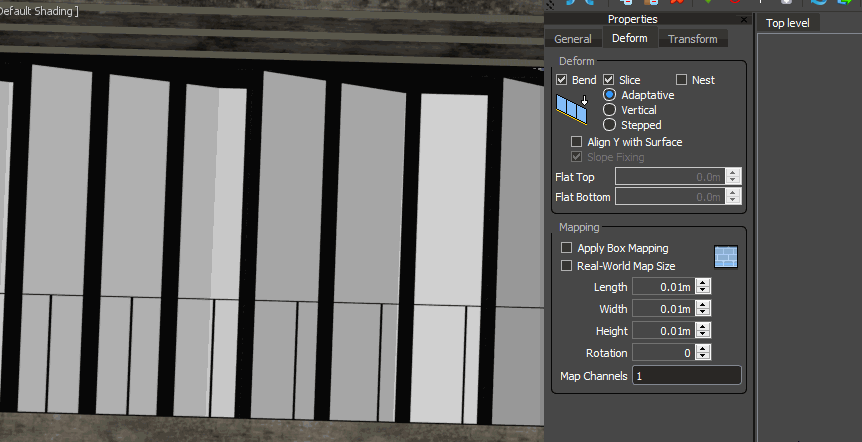
- We now can control how this sits on the spline using the Alignment settings. Changing Z-Alignment to Pivot will move the segment down so that it sits below the spline. Change Y-Alignment to Pivot too, so that the spline now defines the front of the building.
- You will some strange rotation happening as the segments ascend the building. This is because they are banking to follow the curvature of the helix. Fortunately, we can easily fix this using the Segment’s Deform features, an option that only recently became available for users of the free Lite version of RailClone. By changing the Deform Mode to Vertical, We correct the rotation, but more importantly, the vertical elements of the mesh remain upright, while the horizontal elements continue to follow the spline. This is a very useful mode, especially for things like banisters and handrails - and now anyone can use it!
![Vertical Deform Mode]()
- Let’s add another facade piece and randomise it with the original. Clone the existing segment to save from having to enter all those settings again, and use it to pick the Default Clad.
- Add a new Randomise operator and wire both segments to its inputs. Wire the Random node to the Generator’s Default input.
- You now have a number of randomised facade elements, but what if we want more windows than clad walls? To do that you can change the Presence settings in the Randomise node to control the probability of a segment being used.
![Presence Settings]()

Because the base of this spline is not flat, we’re going to lose the windows on the bottom floor into the ground.

To swap windows for something that looks less weird, well, slightly less weird, we will use a Conditional operator. This node allows you to choose segments based of certain attributes of a spline such as the Material ID, vertex angle, length, type (curve or line), or in this case position along the spline.

- Wire a Conditional Operator between the existing Randomise node and the Generator.
- Clone one of the existing Segment nodes and use it to select the top/bottom geometry from the scene. Wire this to the Conditional node’s False input. Enable Position and make sure to pick Spline from the drop-down. Change the mode to Greater. Increase the percentage until the window sections only start after the first revolution of the helix.
![Conditional Settings]()
- Now we’ll do the same for the top because as the building narrows there is not space to add a room behind the facade. Add another Conditional operator to the Default input. Wire the top/bottom segment to the False input.
![Conditional Settings]()
- Enable Position and select Spline. This time change mode to Less and then decrease the Percentage from 100% until you have removed the windows from the desired area at the top of the building.


So far so good. Now we want to add some material randomisation to this style. Remember the planks of the facade are currently set to Material IDs between 8 and 14. We want to take each one of those in turn and randomise it between the same range every time the segment is used. To do that we will create a chain of Material nodes, one for each ID we want to randomise.

- Add a new Material node to the graph. Set the Replace Material ID and the From value to 8. Set the To value to 14.
![Material Settings]()
- Clone this Material node 6 more times, one for each of the other material IDs in the range.
- Wire them all together in series.
- For each one, go through and increase the Replace Material ID value by an extra 1 - starting from 8.
- Wire the Conditional operator to the first Material node in the chain.
- Wire the final Material node in the chain to the Generator’s default input. Each segment’s planks will now be randomised!

Finally, let’s cut the bottom off the building to level it off. You’ll need a rectangular spline in the scene aligned flat on the X or Y-axis. Everything inside this spline will be removed.
- Add a new Spline node and pick the rectangular spline from the scene.
- Wire it to the Generator’s Clipping Spline input.
![Clipping Spline Input]()
- Go to the Generator’s Clipping settings and change the Projection Axis to X or Y depending on the way the spline is aligned.
![Clipping Settings]()
- Change the Mode to Exclude to slice and remove the geometry inside the spline.


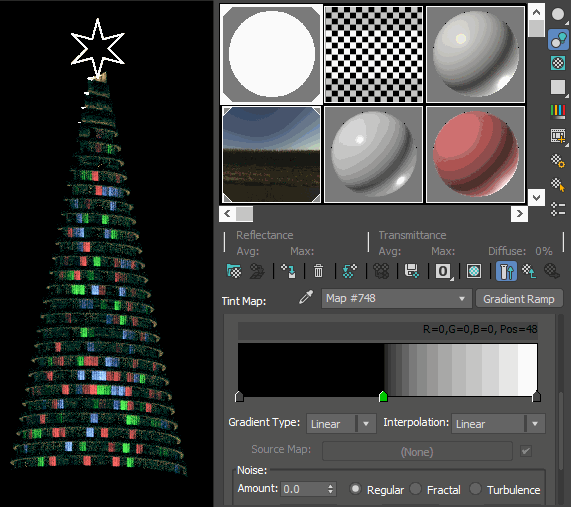
That’s the modelling done. All that remains is to add some randomisation to the lights inside the rooms. To make this look a bit more Christmassy we’re going to tint them red, green and blue like tree lights.
- Open the Material editor and find the V-Ray Light material you’d like to randomise. I’m using the old material editor here, sometimes I just find it a little easier to navigate big multi-sub object materials. The material I’m going to use is on Material ID 5
- Open the V-Ray Light Material’s settings and add a RailClone Colour map to its Colour map slot.
![Add a RC Colour map]()
- First of all, we’re going to randomise the intensity of the lights and the number that are on or off.
- Enable the Tint settings and change the Blending Mode to Multiply
![Tint Settings]()
- Enable Get Colour From Map > Random Values. A random pixel value selected from a map will now be multiplied by the maps or colours selected above.
- To make it easy to control, we will add a Gradient Ramp.
- Change the centre flag of the gradient ramp to black. This size of this black area controls the probability of a light being turned off. The smaller the area the more lights are enabled and vice versa.
![Gradient Map example]()
- The light areas control the brightness of the lights that are turned on. By using a gradient here we get nice randomisation of intensities. Feel free to add additional flags as you see fit. This is an enormously flexible way to control and randomise the value of maps or colours using RailClone.
- Finally, we can change the colours to something more festive. Go back to the RailClone Colour map and enable the first 3 map slots. Change the colours to red, green and blue.
![Map Settings]()


This building has several Christmas trees distributed along the spline (did we mention it’s Christmas?). To do that we’ll use Forest Pack’s recently introduced Spline mode.
- Clone the existing Helix and adjust its two radius value so that the spline is between the edge of the building and the railing.
- Create a new Forest Pack object in Icon mode.
- Go to the Geometry rollout and add a new item. Open the Basics Library and find the most festive tree you can!
- Go to the Distribution rollout and change the mode to Path. Add the 2nd Helix to the path list and set a large Spacing for now.
![Distribution Mode]()
- The chances are the tree is way too large. Go back to the Geometry rollout and reduce the item’s Scale. Once this is done, go to the Distribution rollout and refine the Spacing.
- Finally, head to the Transform rollout and add a little Scale and Rotation randomisation.

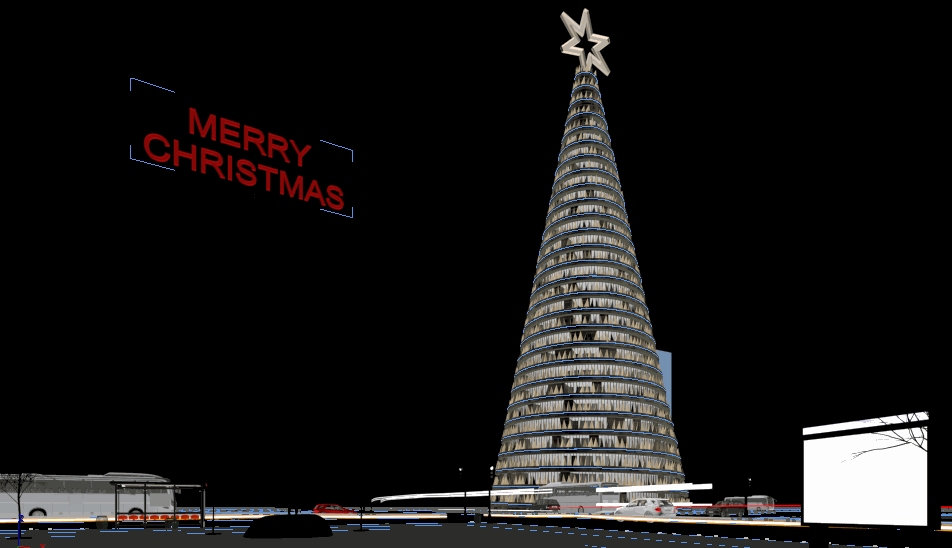
That’s the end of the part of this tutorial that relates to our Xmas tree building. We now have our spiral building with randomised facade, textures and lights with different segments used at the start and the end of the helix. Bit a weird one, but we hope you’ve learnt some useful tips you can apply to other projects. Before we finish up though, I wanted to take a lines to talk a little about the rest of the scene, because it uses some exciting new assets that will be available soon.
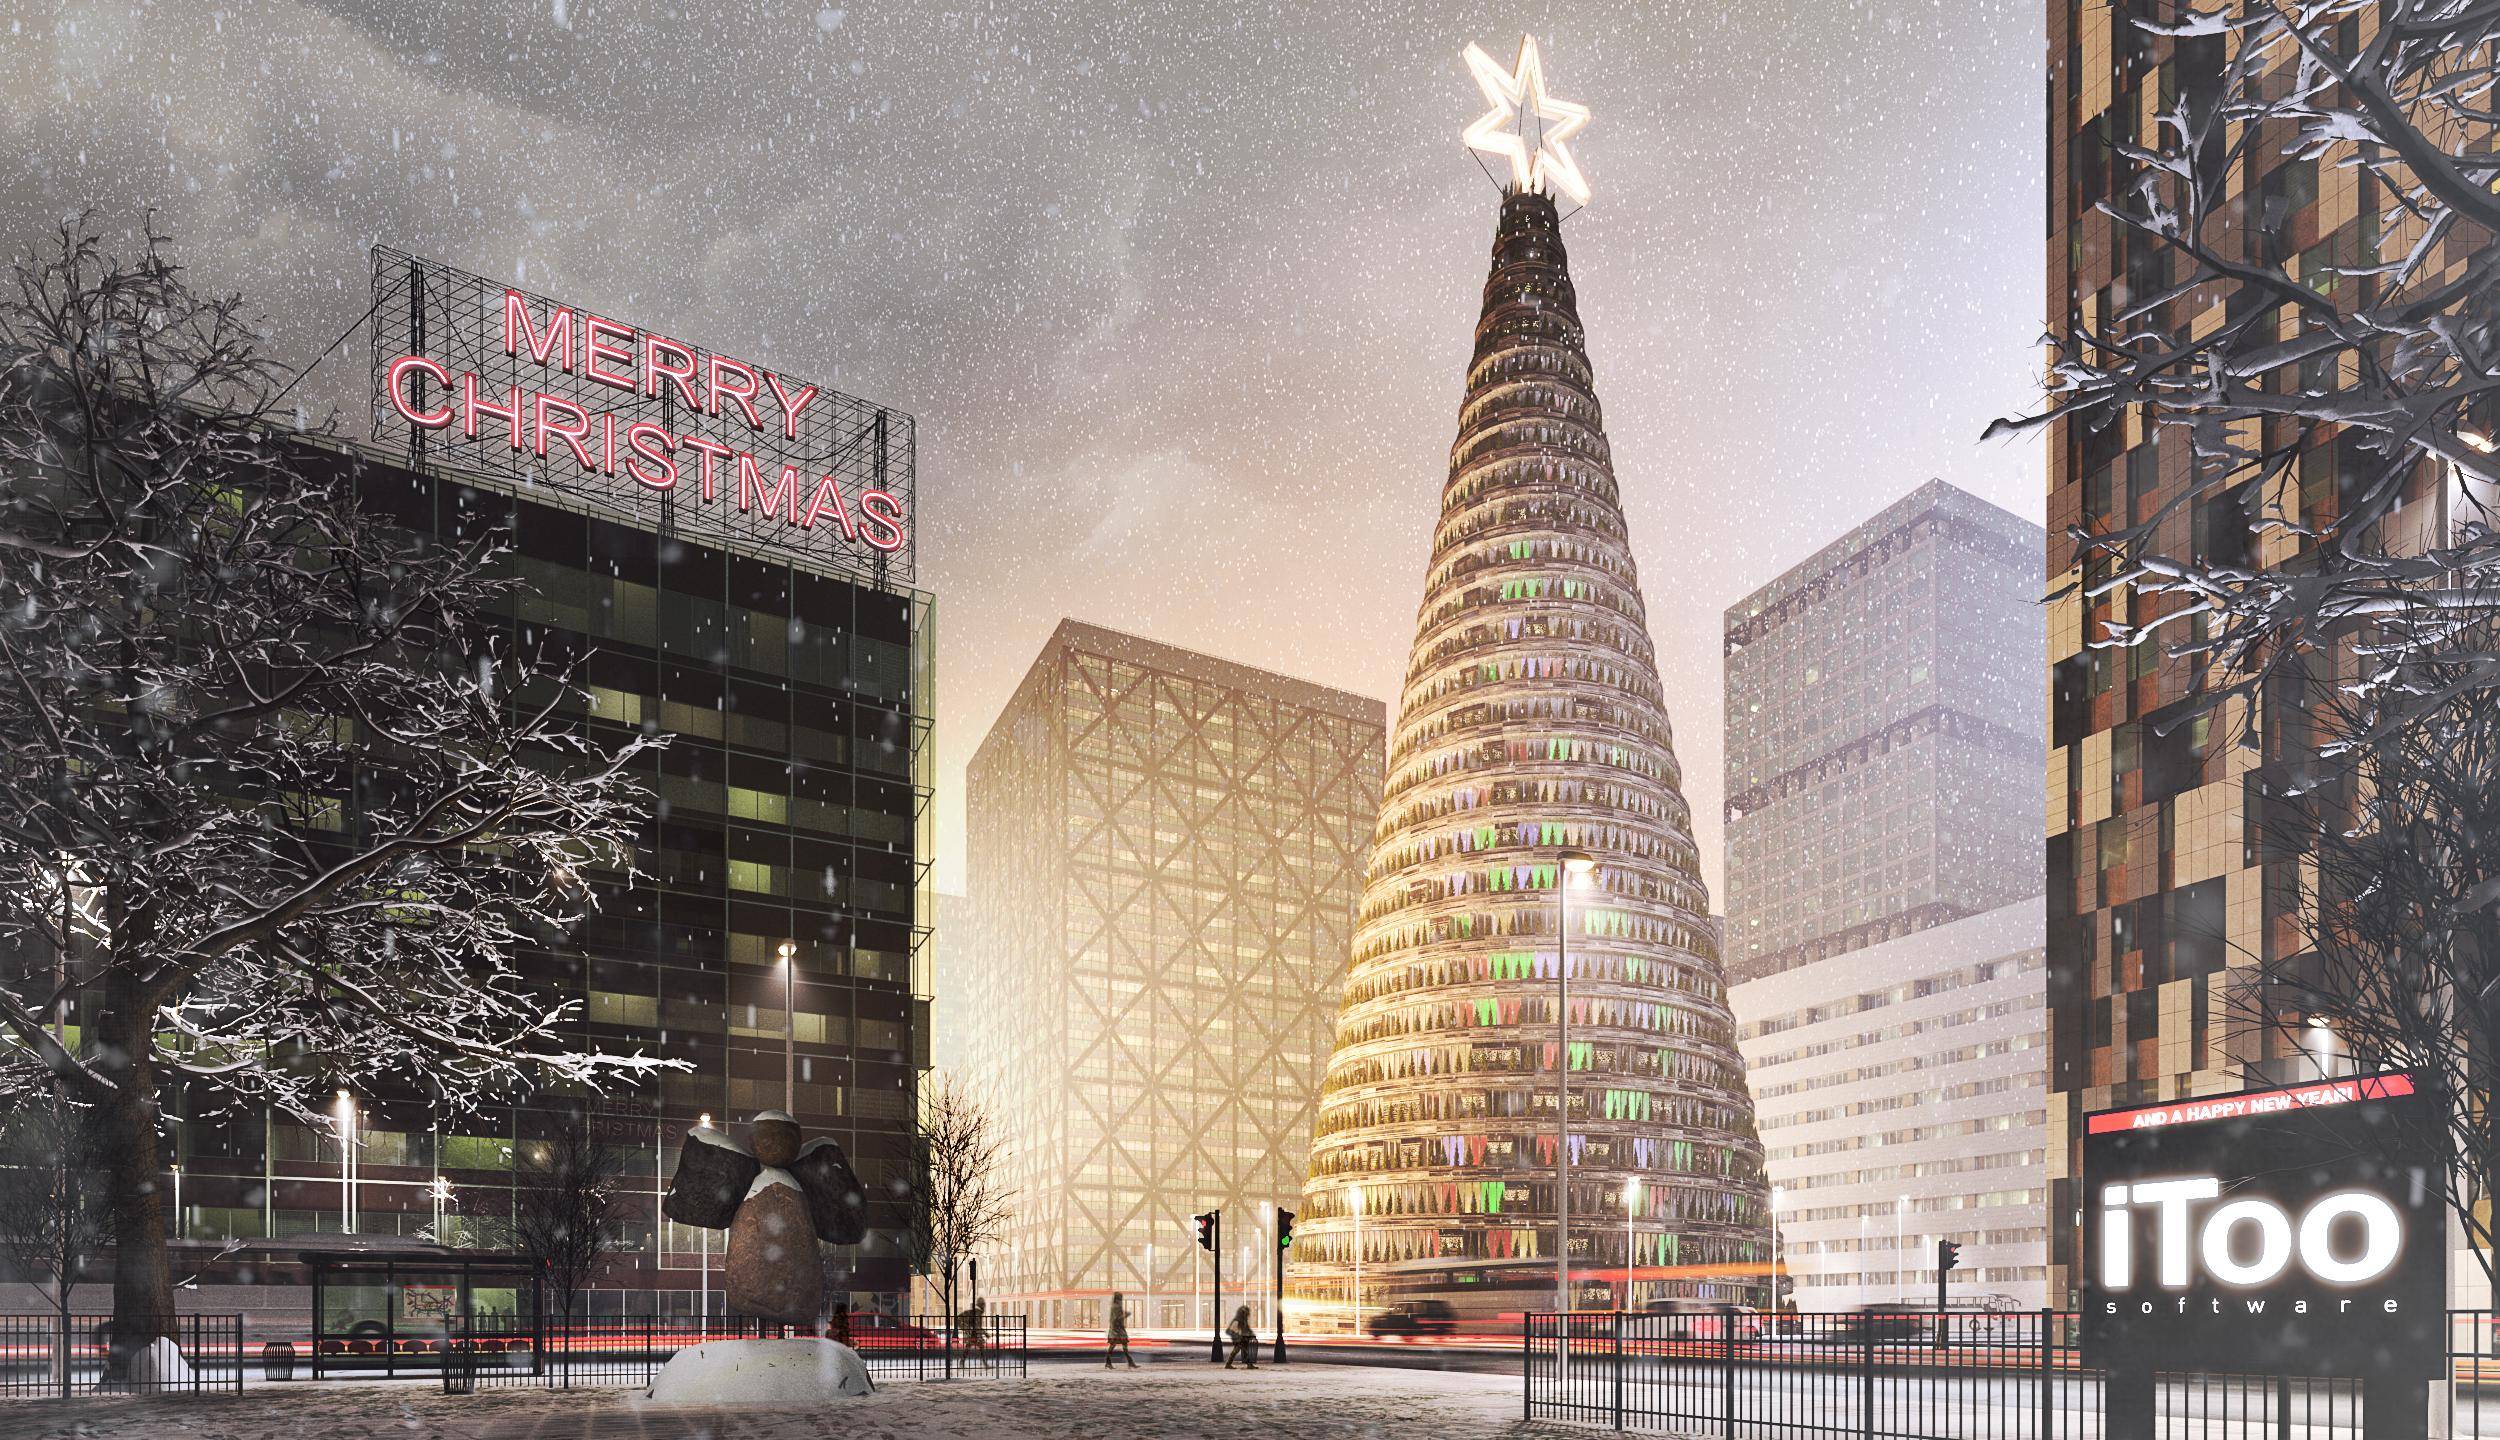
Nearly the whole scene is created with RailClone including all the buildings and of course the bus shelters from our RailClone basics tutorial. There’s also a smidgen of Forest Pack Pro used for the trees and some ground debris in the foreground. These trees are assets from The3dGarden Winter collection which integrates perfectly with Forest Pack so you can easily add them from the library.
The buildings are a sneak preview of a new commercial collection that’ll be available early next year called background buildings. I’ve used them rather closer to the camera than they were intended here, but I think they hold up rather well. The collection will include about 25 fully parametric tower style buildings. They can have any number of stories and you are not limited to a fixed footprint. Instead, you simply load a building from the library, then go to the Base Objects rollout and assign a spline. The number of stories is set from the parameters rollout and really it’s as easy as that!

There are also parameters that allow you to select from over 50 materials for each building element, options to enable interior lighting and more depending on the style.
We hope you’ll find this really useful. In fact, all the buildings in this scene were created using the library. It’s a really great way to quickly populate scenes. Keep an eye out for more announcements about this in 2020.
On that note… this was the final video of 2019, we’ve released over 25 tutorials this year. We hope you’ve enjoyed them and that they’ve helped you to understand our plugins and made your work easier and more enjoyable. We'd like to take the opportunity to thank you for watching and we hope you'll stay tuned to plenty more episodes and more announcements in the new year.