Requirements
- info Forest Pack Pro or Lite
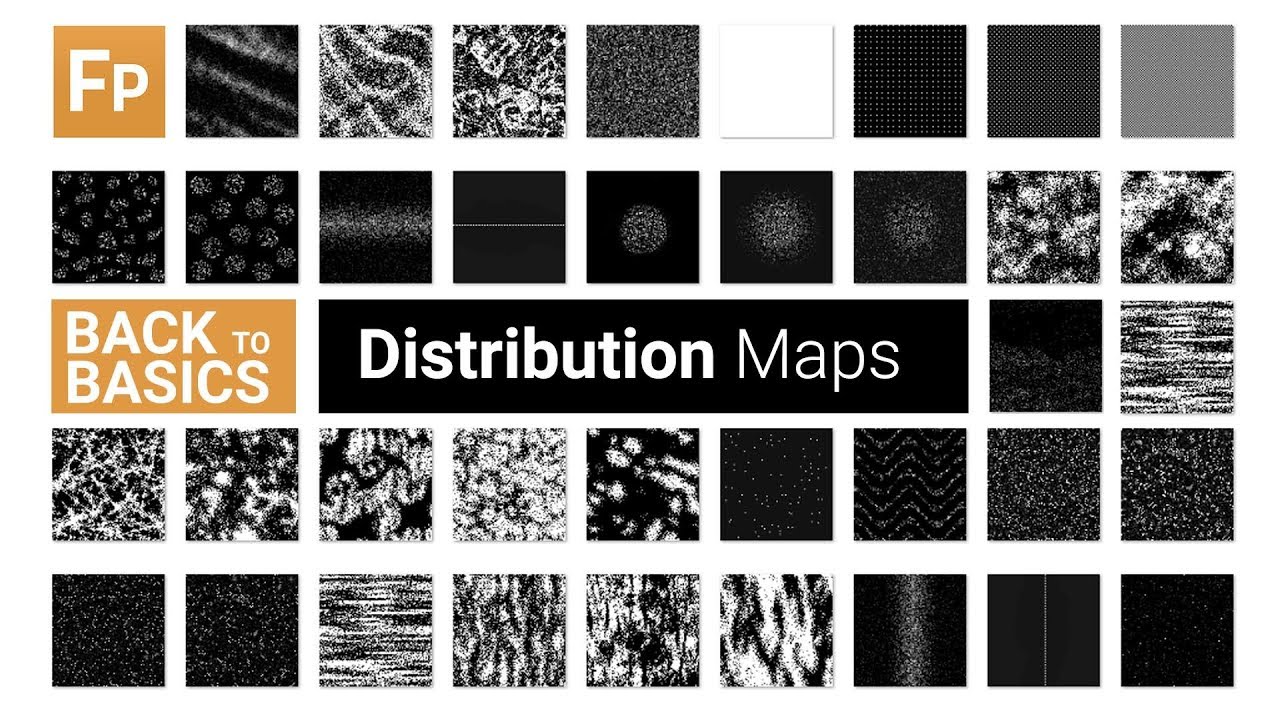

In this back to basics tutorial, we're going to take a look at those mysterious black and white maps that are at the heart of Forest Pack's approach to scattering. Understanding Distribution maps can make getting the right results much easier and faster, as well as helping you to create your own custom patterns. They work based on one simple principle. A white pixel scatters an item, and a black pixel does not. This means that each pixel on a distribution map has basically two states: Create an item, or create a gap. The benefit of this system is that it's very easy to create specific patterns by drawing bitmaps in a photo editing application or even generating them procedurally..
To illustrate how they work, let's look at a few examples:
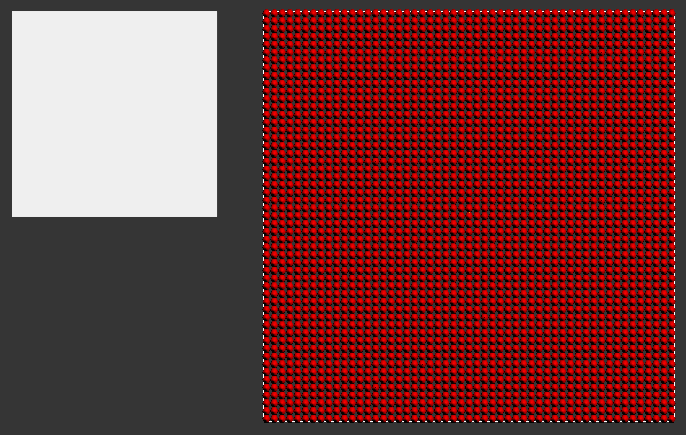
A solid white map will create a dense grid of items - because every pixel is full white. This is useful for ground cover like grass where you want an unbroken blanket of vegetation.
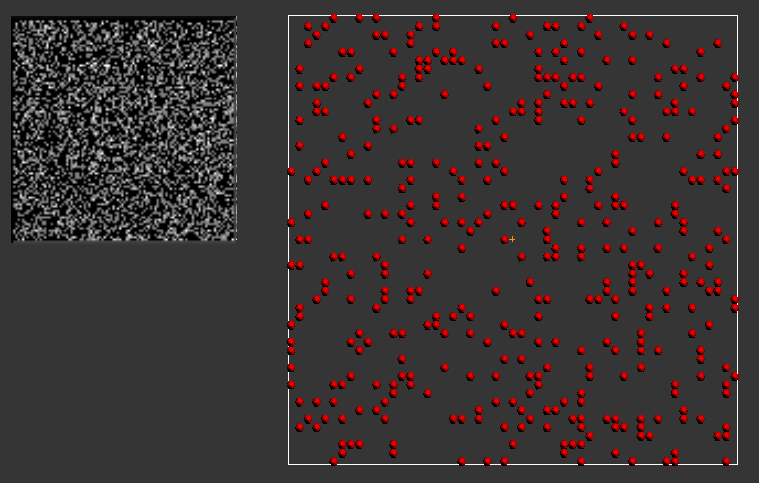
On the other hand, this noise map has a mixture of black and white dots to create a more chaotic distribution...
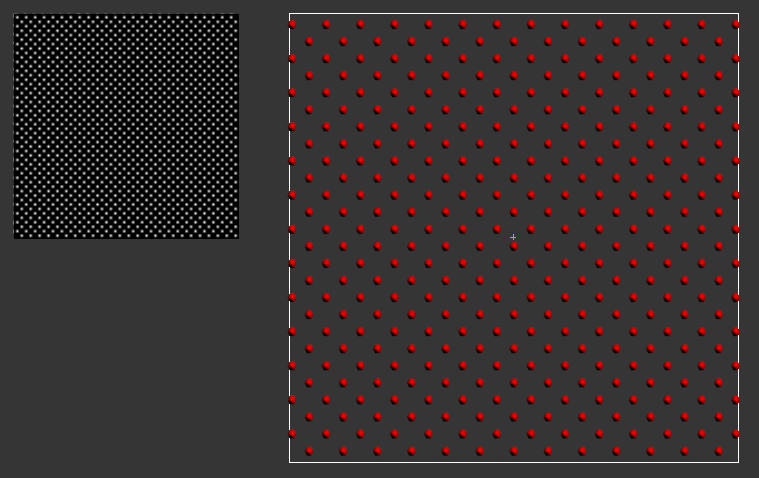
... or you can even create regular patterns by laying out white pixels in a grid pattern. Useful for more man-made distributions like city grids, lighting, furniture and much more.
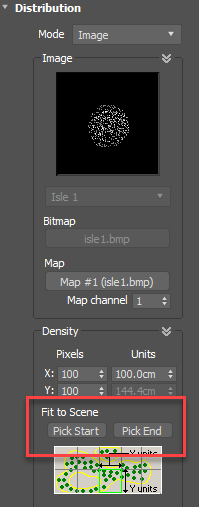
The built-in maps are positioned and scaled on a plane defined by Forest Pack's local X/Y axis, unless you are using a surface in UV mode, in which case the surface's UVW coordinates are used instead.
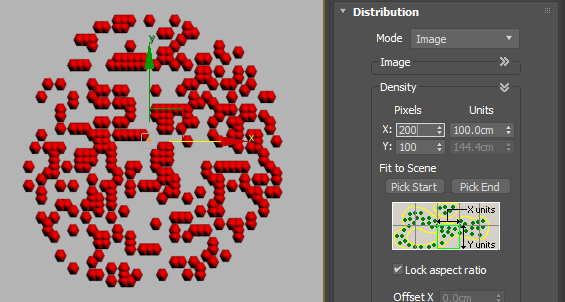
To change the size of a map you use the Density > Size settings. This sets the scale of the map in real-world units which is then tiled in all directions. Remember that the perimeter of the scatter is always defined by the items in the areas list. The distribution defines a pattern for the scatter within those areas.
Forest Pack calculates every pixel in the map, whether it is black or white. Therefore to increase the density of objects, it is more efficient to use a Distribution map with more white pixels than it is to reduce the size of a map with a lot of black pixels.
For example, using the Dense map at a large size will yield similar results visually as using a sparse map with a small size. But in the last example, Forest has had to process far more items because of the increased number of black pixels in the map.
You can also place a map in the scene visually. To do this Click on Pick Start and click in the scene to specify the top-left position of the map. Then click Pick End and click to place the bottom-right. When Draw Gizmo Corners option is enabled, you will see crosses to help visualise where the map tiles.
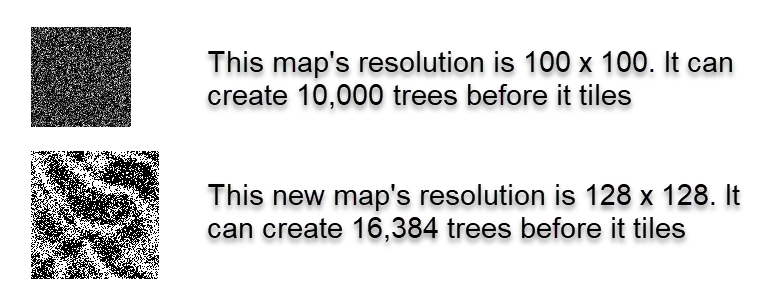
So we now know that a map's size can be controlled using the Density settings, but how many items can a distribution map actually scatter before it repeats? For the built-in maps and textures loaded directly into the Bitmap slot, Forest Pack creates one item per pixel (if it is white of course). This means that the built-in maps, most of which are 100 x 100 pixel resolution, are capable of producing up to 10,000 items in an area before the pattern repeats. Using higher resolution bitmaps allows you to create more trees before tiling occurs.
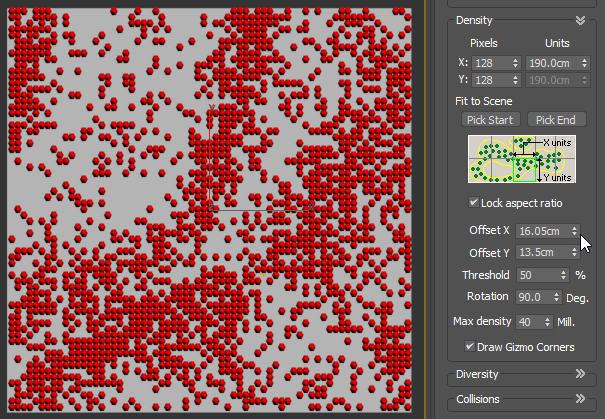
In addition to being scaled, maps can also be Offset and Rotated using the parameters with the same name. The white point, the value at which a pixel generates an item, can also be adjusted using the Threshold parameter. At the default, 50%, any pixel above mid grey will create an item and any pixel below 50% will not.
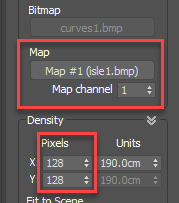
We include over 35 maps in Forest Pack, but sometimes you'll also want to create your own. That's no problem, you can either load a texture directly into the Bitmap input in the Distribution rollout, or load a map - including procedural maps - into the Map input.
When using the Map input the Pixel settings become important. Since procedural maps may be used in this slot the Pixel parameters allow you to set the resolution, controlling exactly the number of items a map generates. Use a low number for few items and a high number for more.
Be aware though, that if you are scattering on surfaces then these settings behave slightly differently, depending on if you are using XY or UV mode.
In Surface > XY mode when using the built-in maps or a texture in the Bitmap input, the Density settings behave exactly the same as we've just discussed. The Surface's UVWs don't affect the distribution.
In Surface > XY and Surface > UV mode, when using a texture in the Map input, the Density > Size settings only change the density of items, without affecting the position or scale of the map itself. The Surface's UVW are now responsible for placing the map which acts as a kind of filter on top of a solid grid that's defined by the combination of the Density and Pixel settings. For example, a Pixel setting of 100 and Size of 100cm gives the same results as a pixel setting of 200 and Size of 200cm. This is because though the resolution was increased, so was the size of the grid.
To offset, rotate or scale a distribution in this mode, you would either have to modify the surfaces UVWs or the Map's coordinates.
Finally, in Surface > UV mode when using the built-in maps or a texture in the Bitmap input, the size settings scale the distribution map using the Surfaces UVWs (not world space) as a reference. The final distribution is therefore determined by a combination of the surfaces UVWs and the Density > Size setting.
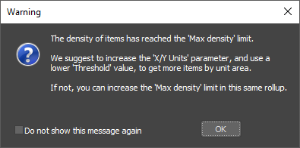
When manipulating distribution maps you may get a message that the density of items has released the Max Density limit. This value is there as a safety net to help prevent you from accidentally creating so many items that it affects system performance. However, if you need more items, simply increase the Max Density value or enter 0 to remove the limit altogether.
And that's all you need to know about distribution maps, stay tuned for more back to basics tutorials coming soon!.