Resources

This is a guest tutorial by Mickael Riciotti, an environment artist at Unit Image in Paris. Inspired by a recent article on FXGuide about creating the sand in Houdini for Pixar's piper, Mikael wanted to see if he could create a similar look with 3ds Max, V-Ray and Forest Pack Pro. We think the results speak for themselves.
Introduction
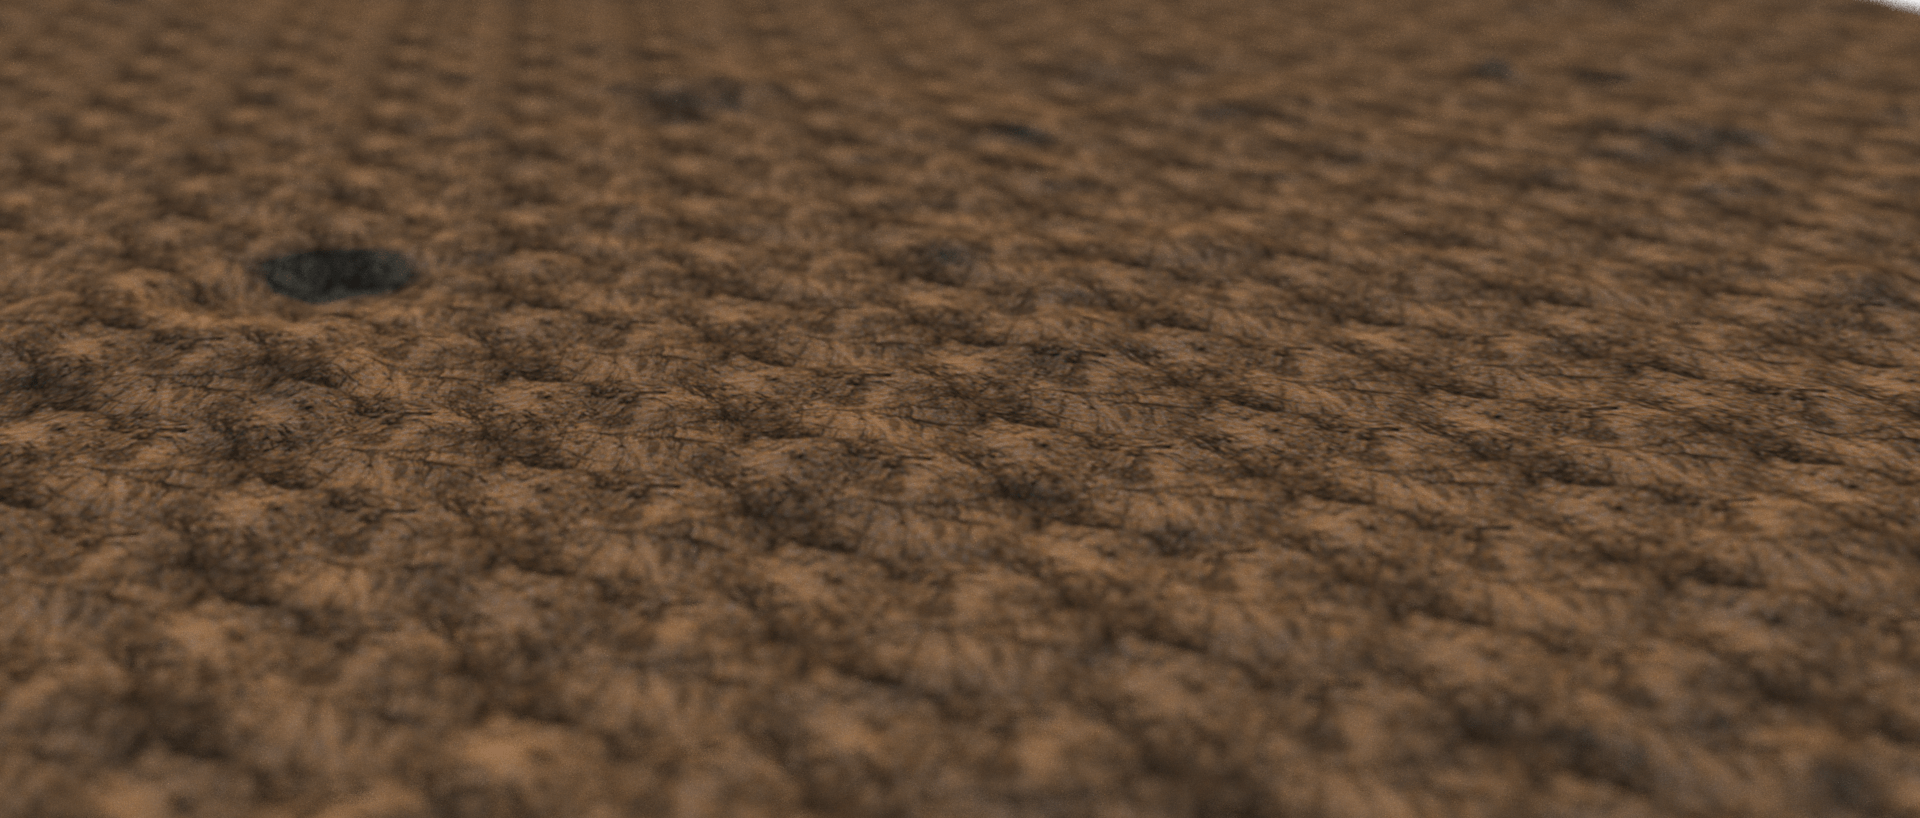
In this tutorial, we will see how we can use Forest Pack's "Forest Color" map features along with various optimization tricks to recreate sand macro-photography. When dealing with extreme close ups on a grainy surface like sand, a displacement map may show some stretching and you will need to increase the subdivision substantially to get the amount of details you need. Moreover, sand is translucent, so having separate geometry for each grain of sand will help with scattering light and bring far more realism to your image.
Scene Files
For this tutorial, you will need a texture from textures.com. It's a free texture but you will need an account to download it. Just follow this link and download the displacement 3x3 medium size
Before we scatter grains on our beach, we'll need a basic ground and lighting, to create this:
- Open the file called "vray_start.max" from the downloads for this tutorial.
- You will see a simple plane with a displace modifier, a V-Ray Sun (and Sky) and a Physical camera with an exposure control already set up.
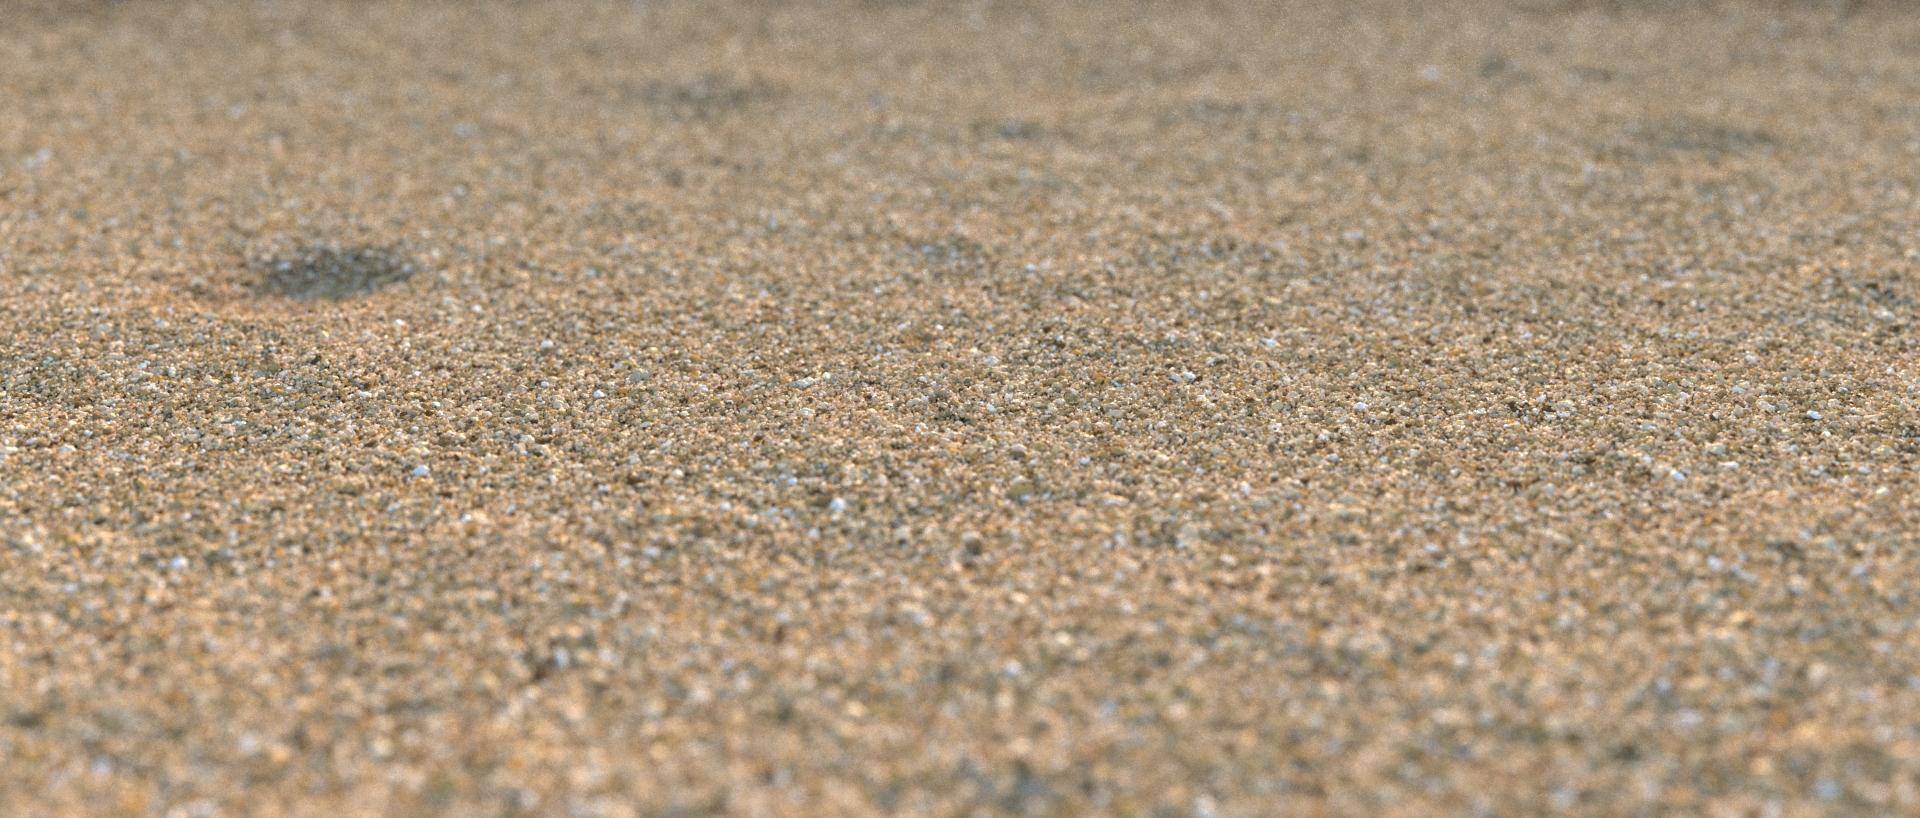
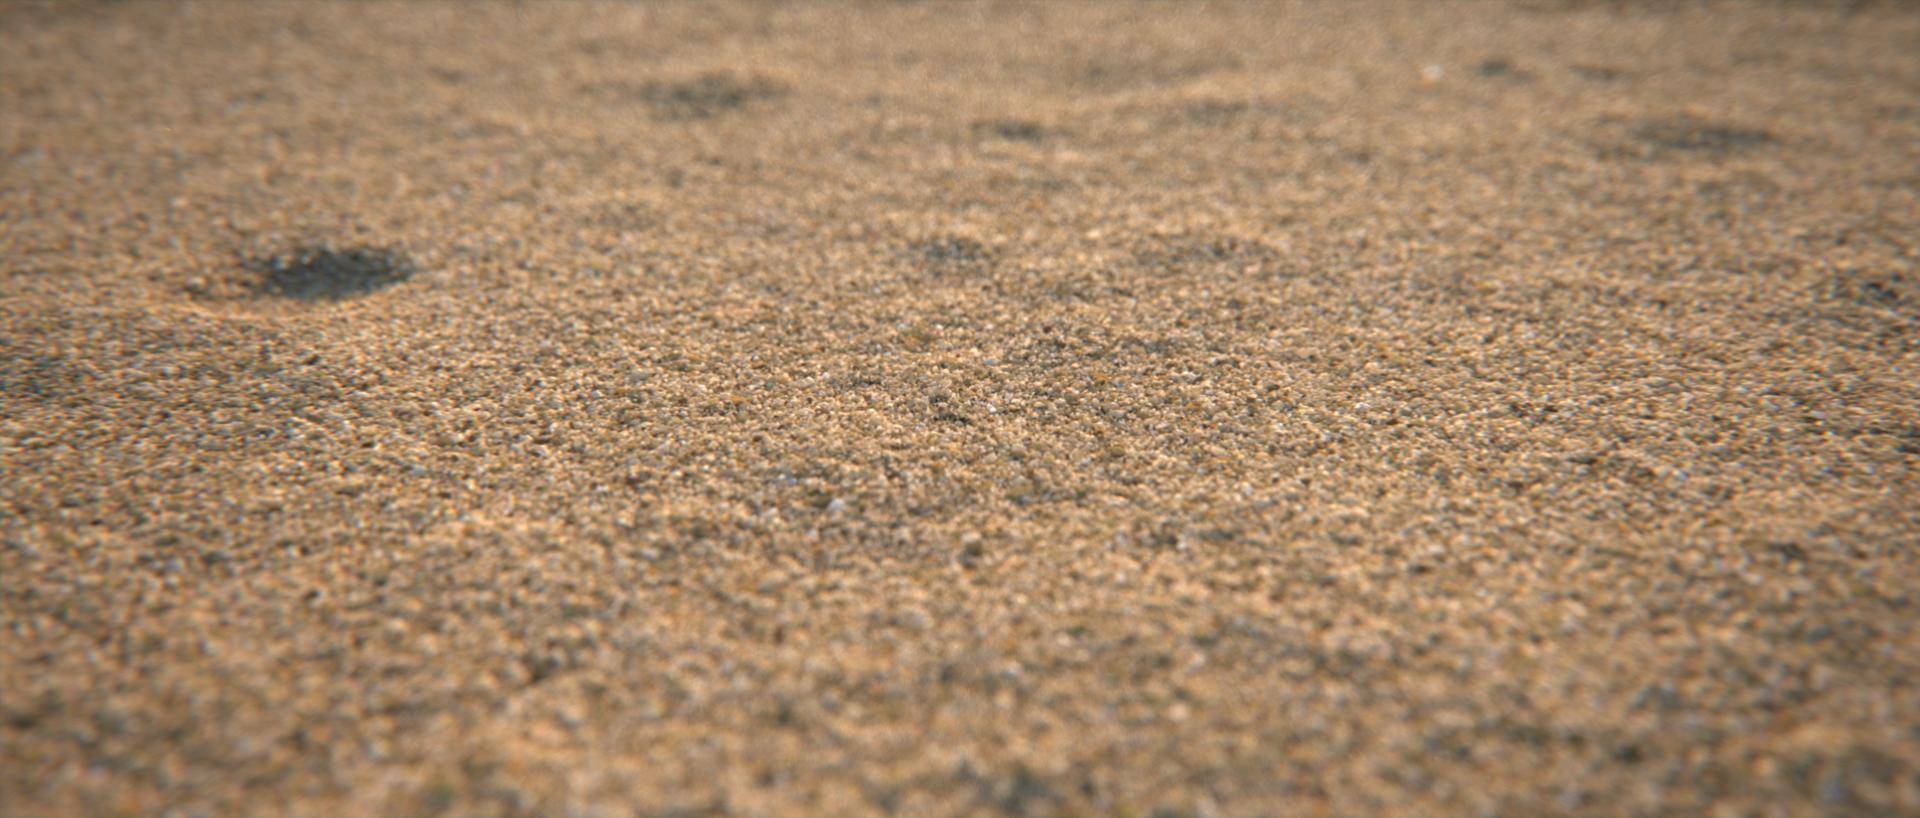
- If you render now, you will get the results shown below. The texture on the ground will not really be seen, but just in case there's a small hole here-and-there between our grains of sand, we'll see texture instead of the sky:
PART 1: Modelling the grains of sand
Forest Pack can handle a huge amount of geometry, but it is more efficient if you limit the number of instances it has to create. This is why instead of scattering individual grains, we will be creating patches containing multiple grains and use them as our source geometry.
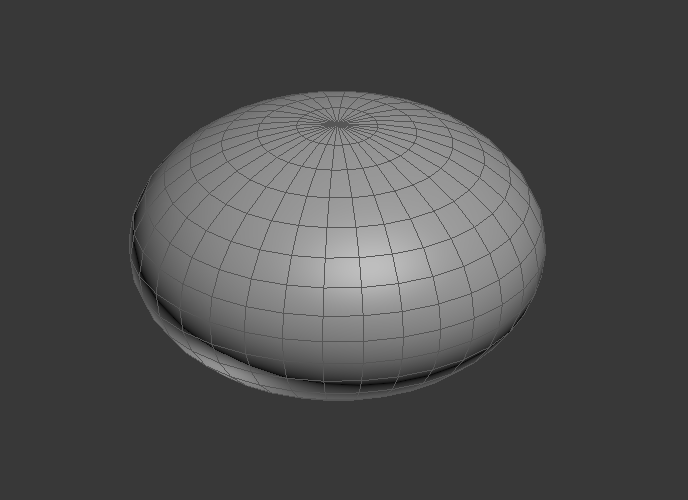
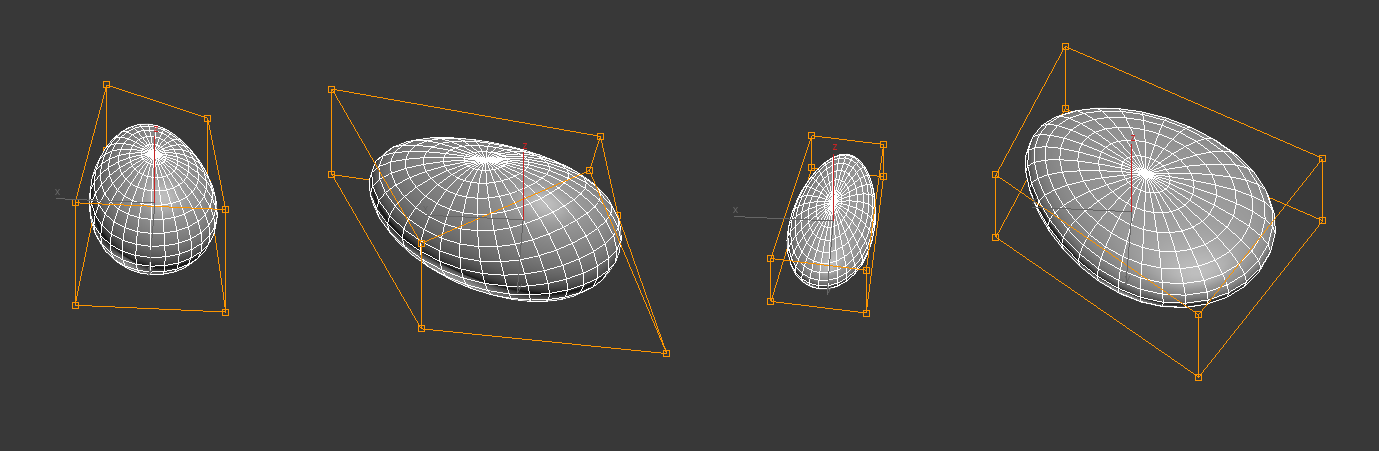
Create a sphere and squash it a little bit vertically. Add a FFD (2X2) modifier to it and deform it randomly. Duplicate it and tweak the variants so that you have enough difference between your grains.
![Creating detailed sand with Forest Pack-01_sphere_squashed.png]()
![Creating detailed sand with Forest Pack-02_spheres_ffd.png]()
- Duplicate these grains and manually randomise their rotation, scale and position to create a little patch. you can randomise the vertical position, but not too much, otherwise your grains of sand will either float or go through the ground.
Once you have created your patch, add a ProOptimiser modifier to it, followed by a turbosmooth and a noise modifier. This is to break the roundness of your grains and add crispy details to catch specular highlights.
![Creating detailed sand with Forest Pack-03_spheres_grouped.png]()
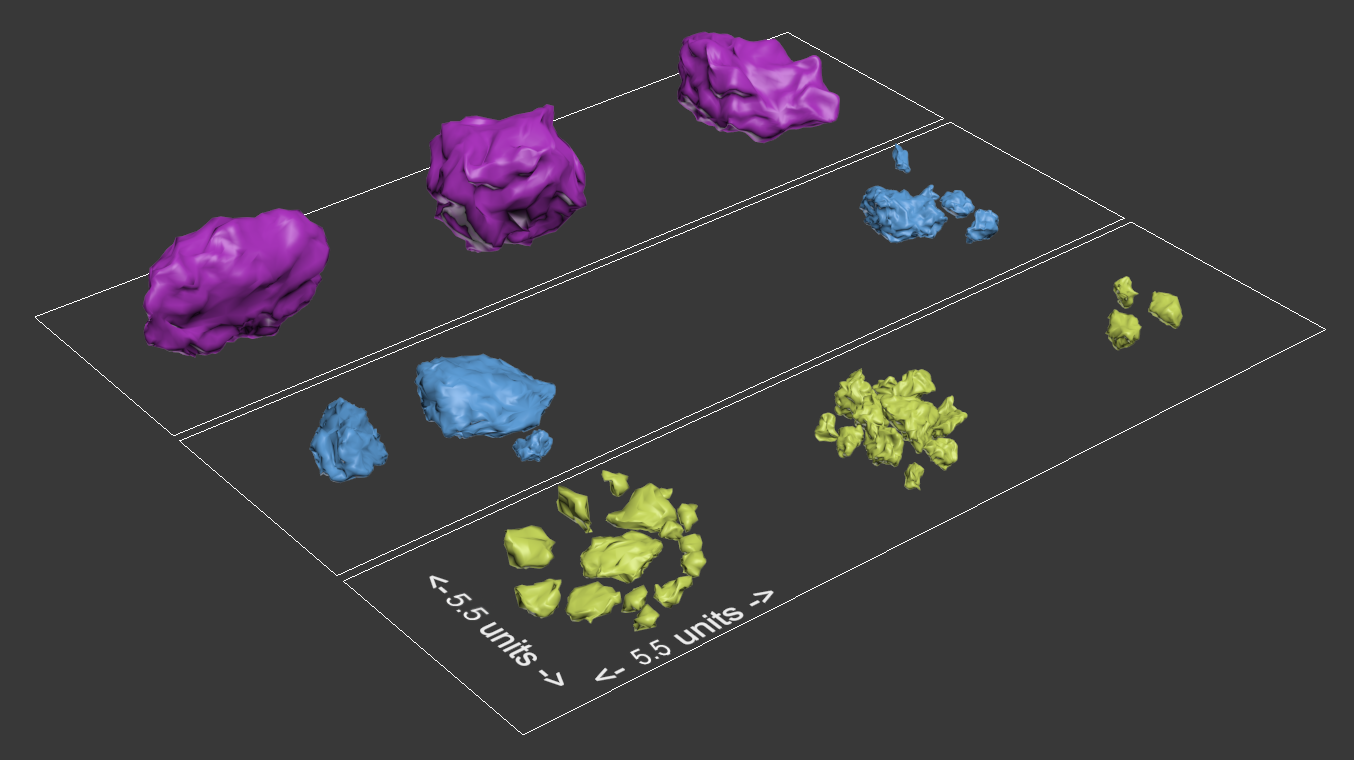
Repeat the process to generate different patches. In the image below, I created 8 variants: 3 single grains, 2 large patches, 2 medium patches and 1 tiny patch.
![Creating detailed sand with Forest Pack-04_scatter_sources_v2.png]()
- For this scene, you will have to resize your patches so that they fit in a 5.5 by 5.5 units square. Also, remember to adjust the pivots so that they are in the centre of the patch, and a bit above the bottom of the object on the Z axis.
- You can now apply a final Reset X-form to your patches to make sure everything is clean and ready to go.
- Last but not least, select all your patches and assign a V-Ray Material to them. This is to ensure Forest Pack generates a proper material later in the process.

That's all there is to the modelling !
PART 2 : Scattering with Forest Pack
The forest pack setup is quite straightforward:
- Create a Forest Pack object and assign it to the ground.
- Click Yes when forest pack asks you to limit the geometries to the camera frustum.
- In the Surface rollout, make sure the Auto checkbox is ticked. This will make sure Forest Pack always updates if you change the topology of the surface it is scattered on.
- Add the geometry you created above using the List Icon (
![Creating detailed sand with Forest Pack-image2017-3-24 17:46:33.png]() )in the geometry panel, and then remove the default geometry from the list.
)in the geometry panel, and then remove the default geometry from the list. - In the Distribution rollout, switch the mode from Dense to Full from the drop-down list, and set the X-Units to 150 in the Density group.
- Lower the Threshold to a minimum (1%) to make sure you don't remove any precious instances.
- This will fill the beach with a very dense cloud of grains.
 )in the geometry panel, and then remove the default geometry from the list.
Optimising the scatter
If you were to render now, you would scatter grains of sand on a huge surface and reach the maximum number of scattered items that Forest Pack can generate.
As mentioned above, we are already culling our scatter to the frustum of the active camera, but you can also limit it to only that which is close enough to the camera to be noticeable. This scene uses a lot of depth of field, so you can get rid of the grains that are far away and out of focus., to do this:
- Go to the Camera rollout of the Forest Pack object and tick the Density checkbox in the Distance Falloff group.
- Set the Min to 500 and Max to 1000 units. That way, you will have a smooth transition.
The fun part: tweaking our scatter
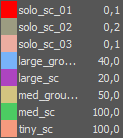
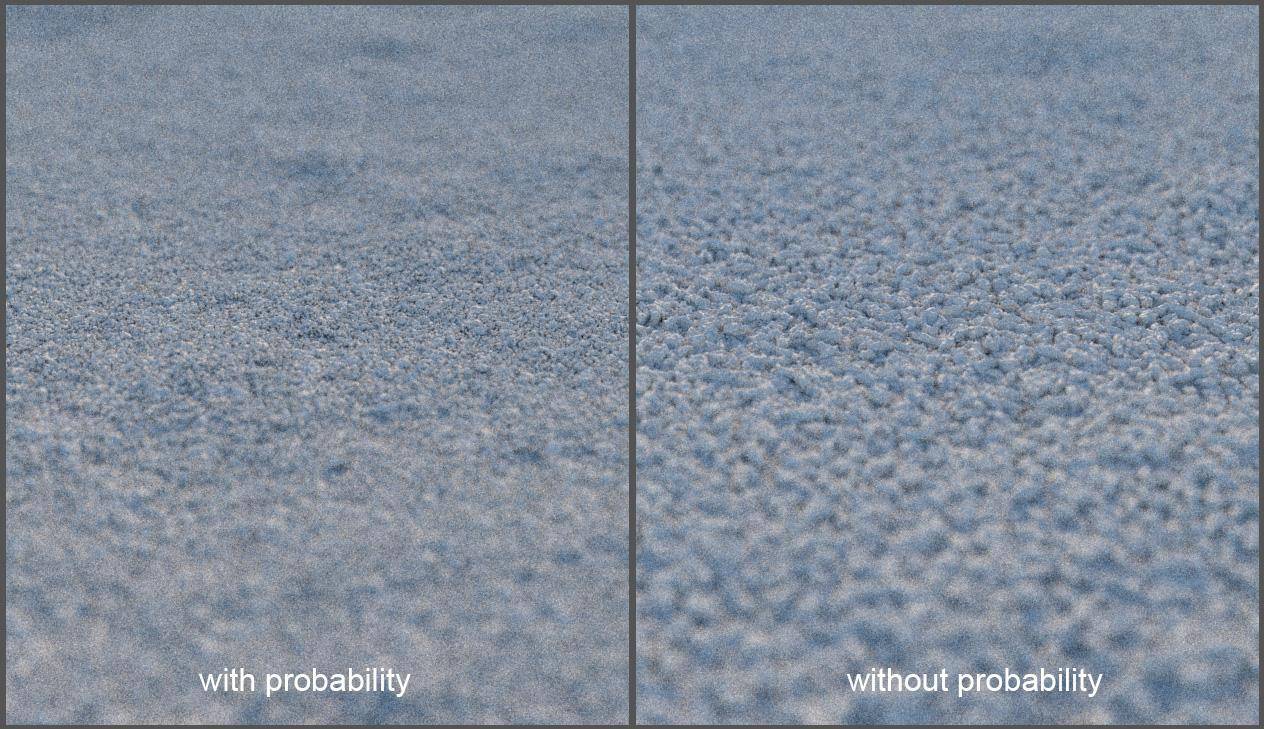
First, we'll need to fix the probability of our scattered items. The bigger individual grains are to be used sparingly to break the overall model and as such they need a very low probability.
You can edit probability by selecting an item from the list, and editing the value of the Probability parameter, just above the material slot button in the Geometry rollout. Here are the settings I used:
![Creating detailed sand with Forest Pack-probabilities.png]()
These settings give you a much more naturalistic distribution:
![Creating detailed sand with Forest Pack-sand_probability_ok.jpg]()
To refine further, In the Surface rollout, change the Direction from Up to Normal. This will force the patches to align to the surface of the beach and follow the small variations of angle.
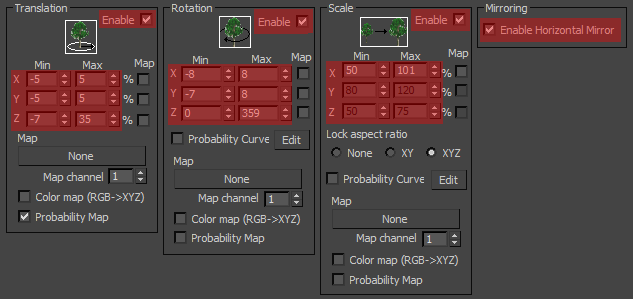
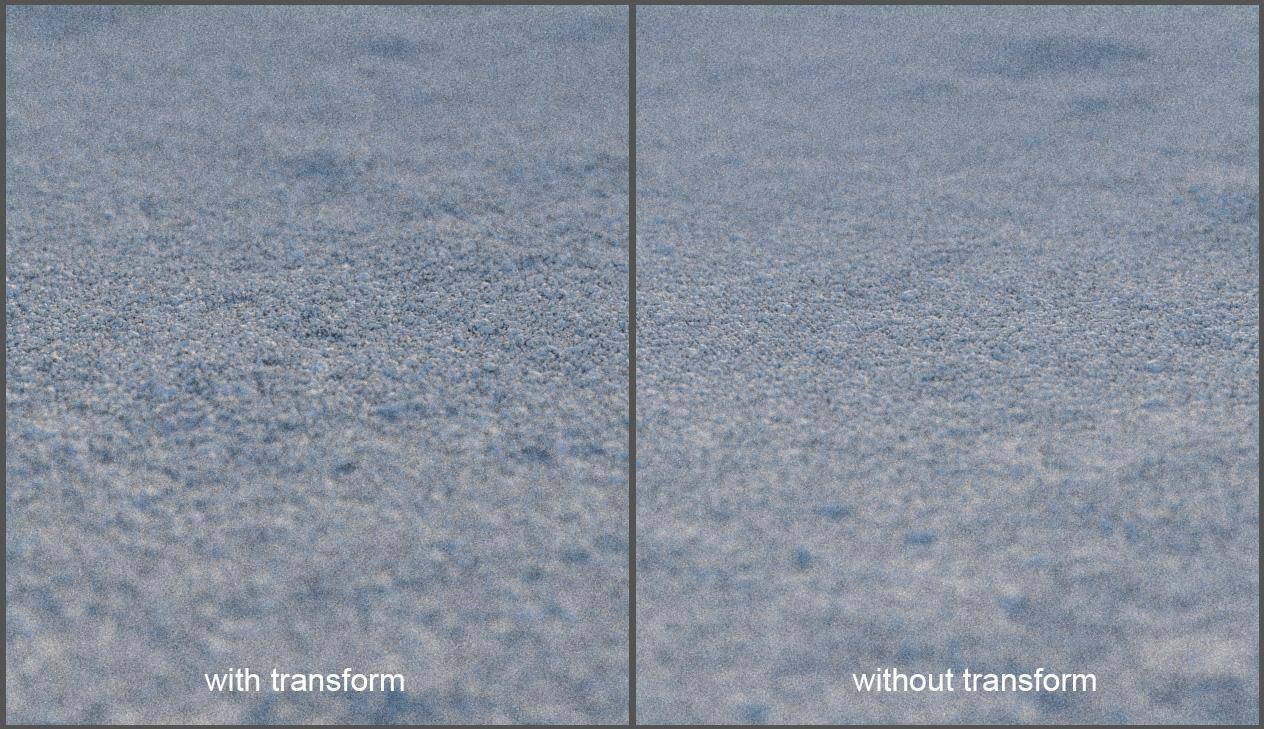
Finally, in the Transform rollout, enable Position, Rotation and Scale checkboxes, and use the following settings:
![Creating detailed sand with Forest Pack-transform_settings.png]()
This will help breaking the grid pattern of the distribution map
![Creating detailed sand with Forest Pack-sand_transform_ok.jpg]()
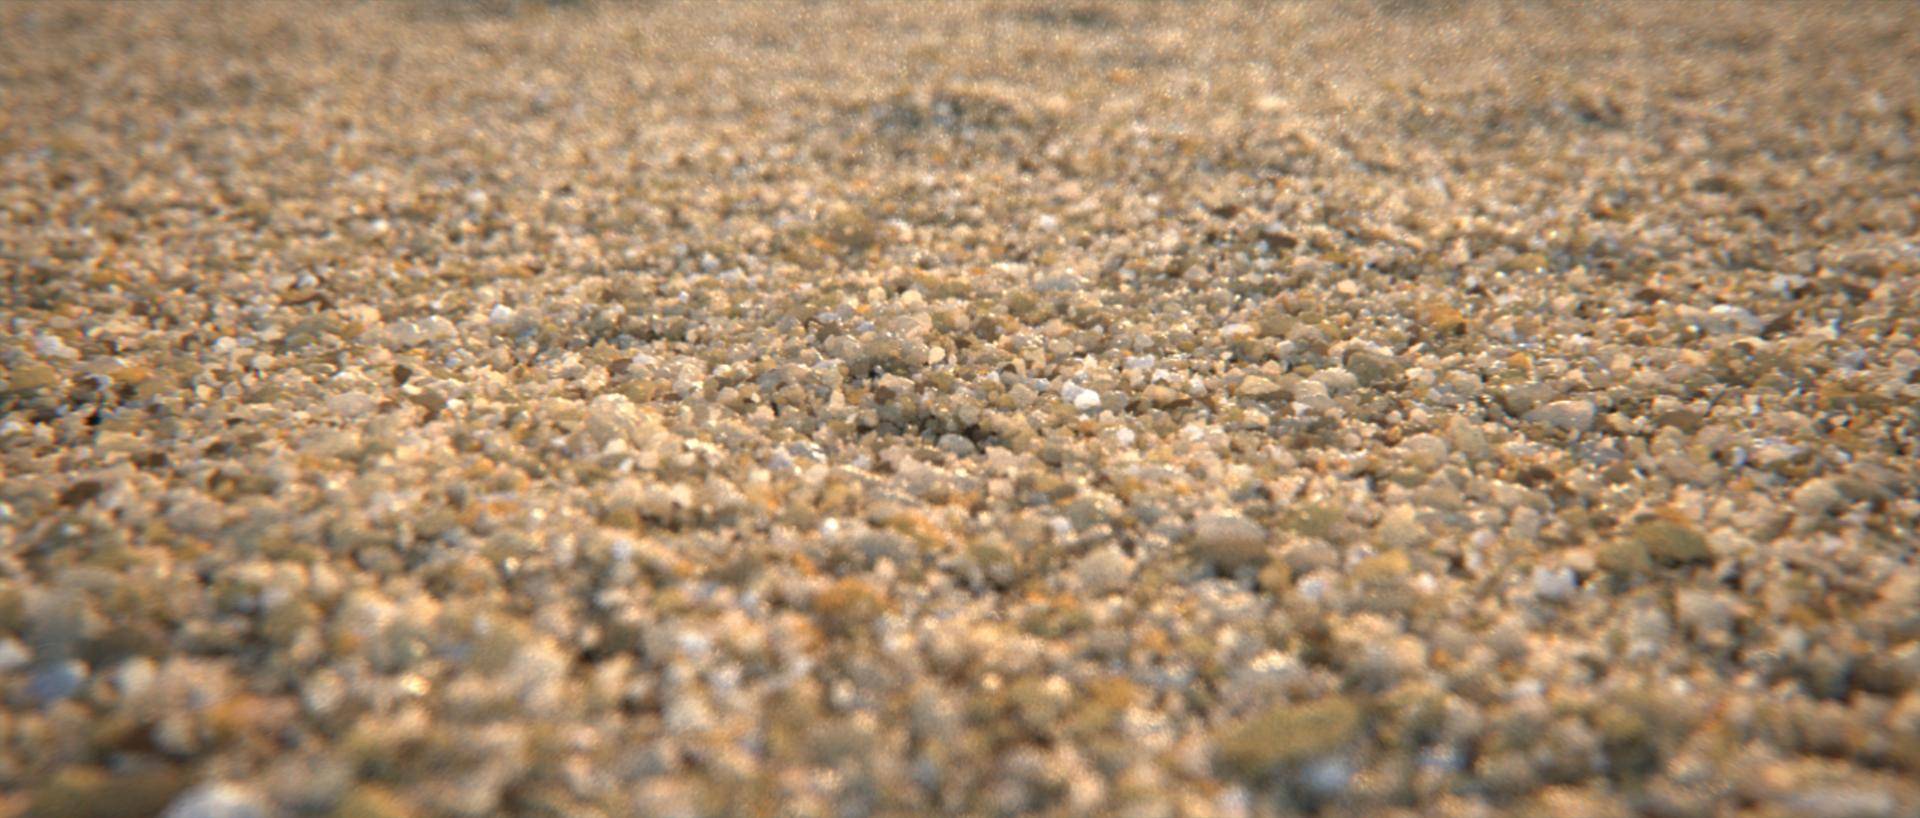
With all these settings applied, here's what you should get now:
Part 3: Setting up the material
Open up the material editor and pick the materials applied to the sand objects. By default, Forest pack automatically generates this material based on what you assigned to your source objects. To edit the material you use the material referenced at the bottom of the Geometry rollout, or pick it from the source geometry itself. It is not recommended to edit the multi-sub object material applied to the Forest object, as this is generated automatically and might be overwritten, in which cases changes will be lost.
How Forest Pack handles materials
- When you add an object to Forest Pack, its material is instanced to the material slot in the Geometry rollout.
- If you replace the materials on your source geometry after generating your forest pack object, these changes won't reflect in the render, because forest pack refers to the material at the bottom of the Geometry panel, not the one applied to your sources.
- To fix that, you can use the script provided in the downloads for this tutorial. To try it, select a forest pack object and run the script. The tool will go through all the sources used in the forest pack and update their materials (and their names in the geometry list, in case it also changed)
Creating the diffuse texture
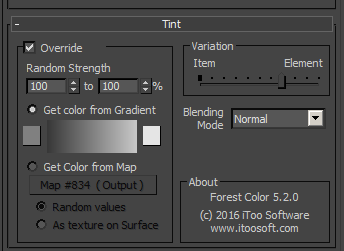
- Plug a Forest Color map to your Diffuse input slot.
- We will be using the lower half of the controls of this map for this tutorial: tick the Override checkbox, and the Get color from map option. Also, make sure the Random values option is enabled.
- Plug the provided bitmap sand_color_picker.bmp into the texture slot above it and drag the Variation slider all the way to the element mode. This will create a new random variation for each individual grain of sand!
- Finally, set the Blending mode to Normal
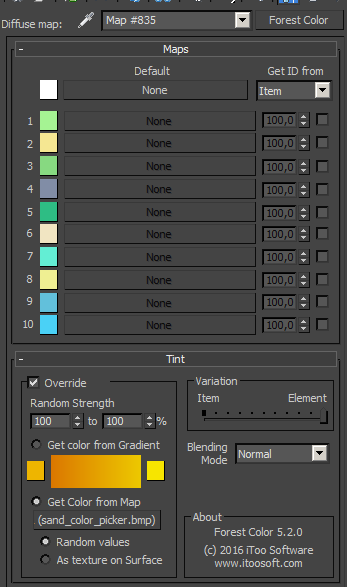
Basically, we will be using the texture provided as a source for Forest Pack to randomly choose colours and assign it to our scattered objects. Element mode will assign a different colour to every individual grain, and not just every patch.

The texture was generated by sampling colours from an actual sand photograph. The number of pixels that each colour uses is very important, because it will define the probability of that colour being chosen by Forest Pack. As you can see, most of the texture ranges between brown and beige, and you have 1 dark pixel, 2 bright pixels, and a saturated orange one. As a result, roughly 10% of our grains will pick one of these more extreme colours, and the rest will be shades of brown.
Creating a randomised reflection map
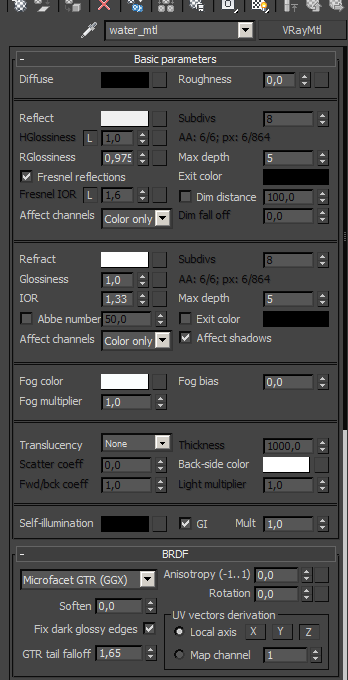
- In the BrDF panel of your material, switch the model to Microfacet GTR (GGX) and set the tail falloff to 1.3.
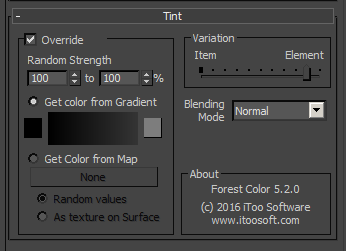
- Set the Reflection Glossiness to 0.8 and plug a new Forest Color map to the Reflection slot.
- Again, check the Override option at the bottom and enable Get color from gradient, this time.
- Set the right side of the gradient to a dark grey (53, 53, 53) and finally, set the Variation slider to Element.
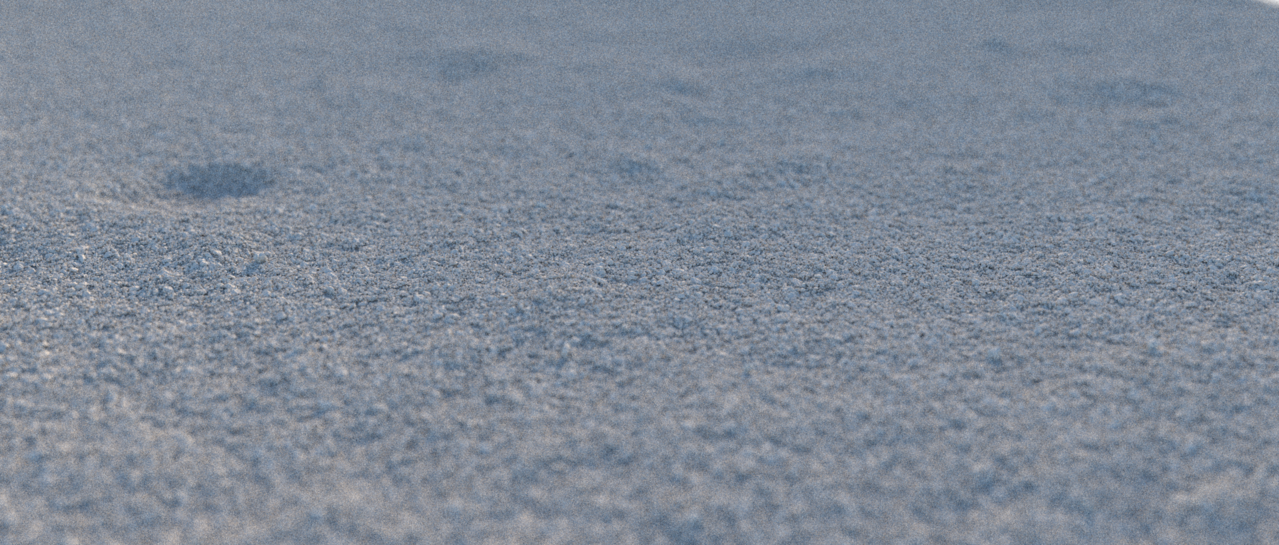
Just like we saw above, this will randomly assign a reflection value to our individual grains of sand. But this time, we'll be using a simple gradient instead of a custom map to drive the various colours our grains can use. If you render now, you should get something similar to this:
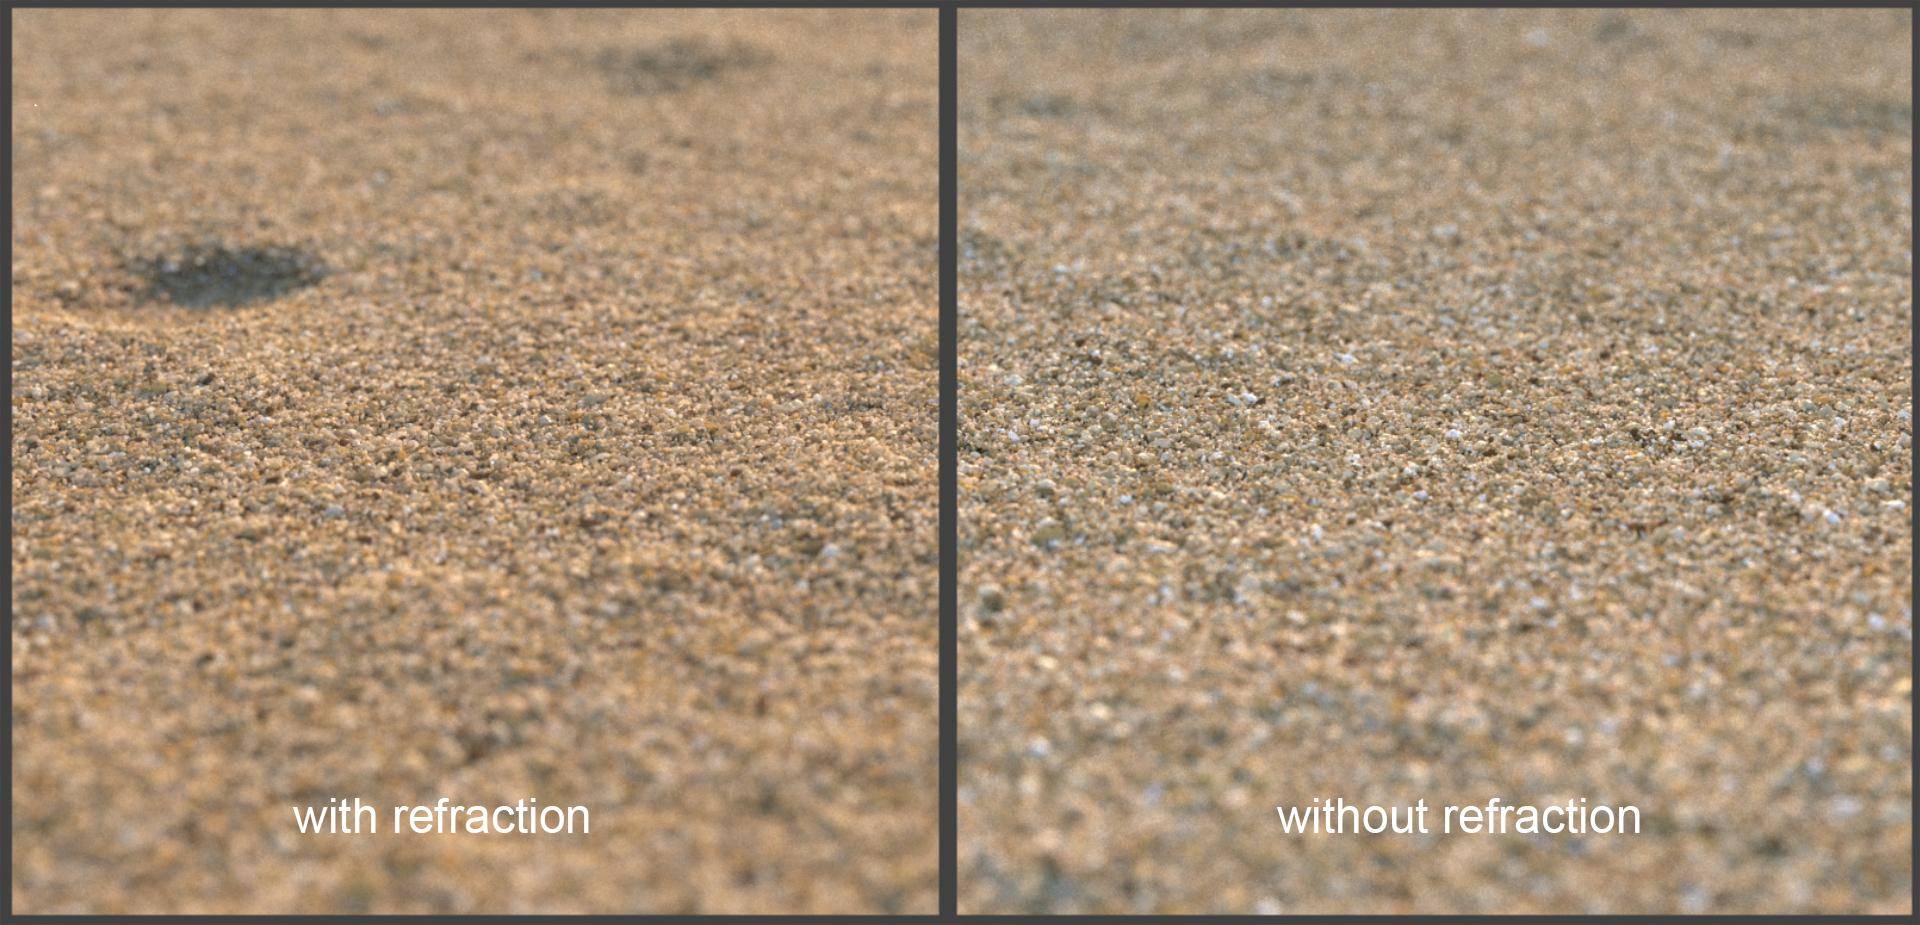
Creating a randomised Refraction map
If you look closely, the brightest grains of sand look quite dry and non-organic. If you observe sand closely, you will see that it actually it's a very translucent material. We will use refraction to emulate that, and to add some variation too, we'll use the Forest Color map again.
- Copy the Forest Color map from your diffuse slot and paste it (as a copy) in the refraction slot.
- Instead of using the Get Color from Map setting, we'll use the get Color from Gradient option.
- Change the left color slot a dark grey (value: 56) and the right one to a light grey (value: 201).
- Drag the slider to a random value between item and element, to change the seed a little bit.
If you render now, your render-time will take a (very) serious hit, since you will basically be rendering thousands of diamonds - but your grains of sand will blend a lot better:
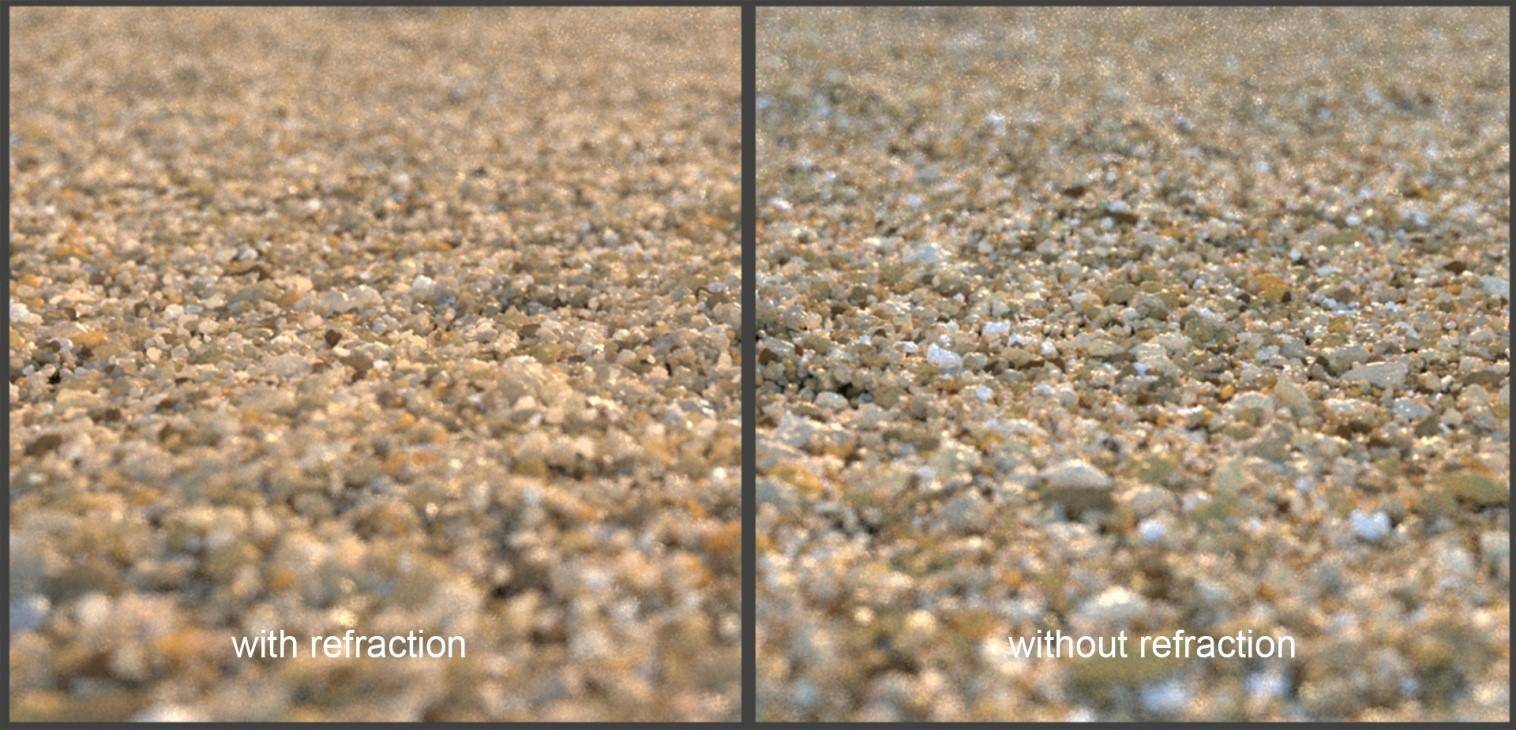
The effect is even more noticeable on a close-up.
Optimising refraction
Because using refraction is extremely costly, you can use the following trick to make things lighter: In the Forest Color map, in the Refraction slot, instead of using a gradient set the mode to Random from Map and add a black and white bitmap, similar to the one you used in the diffuse slot, made of 4 pixels: one white, one black and 2 shades of grey.

This way, you will force Forest Pack to limit its range of colours and include more fully non-refractive grains, thus reducing your render times.
Part 4: Post-production
Your sand is ready, you can now add a little bit of post production to emulate camera aberrations - for example some chromatic aberration, a vignette, and glow/diffusion.
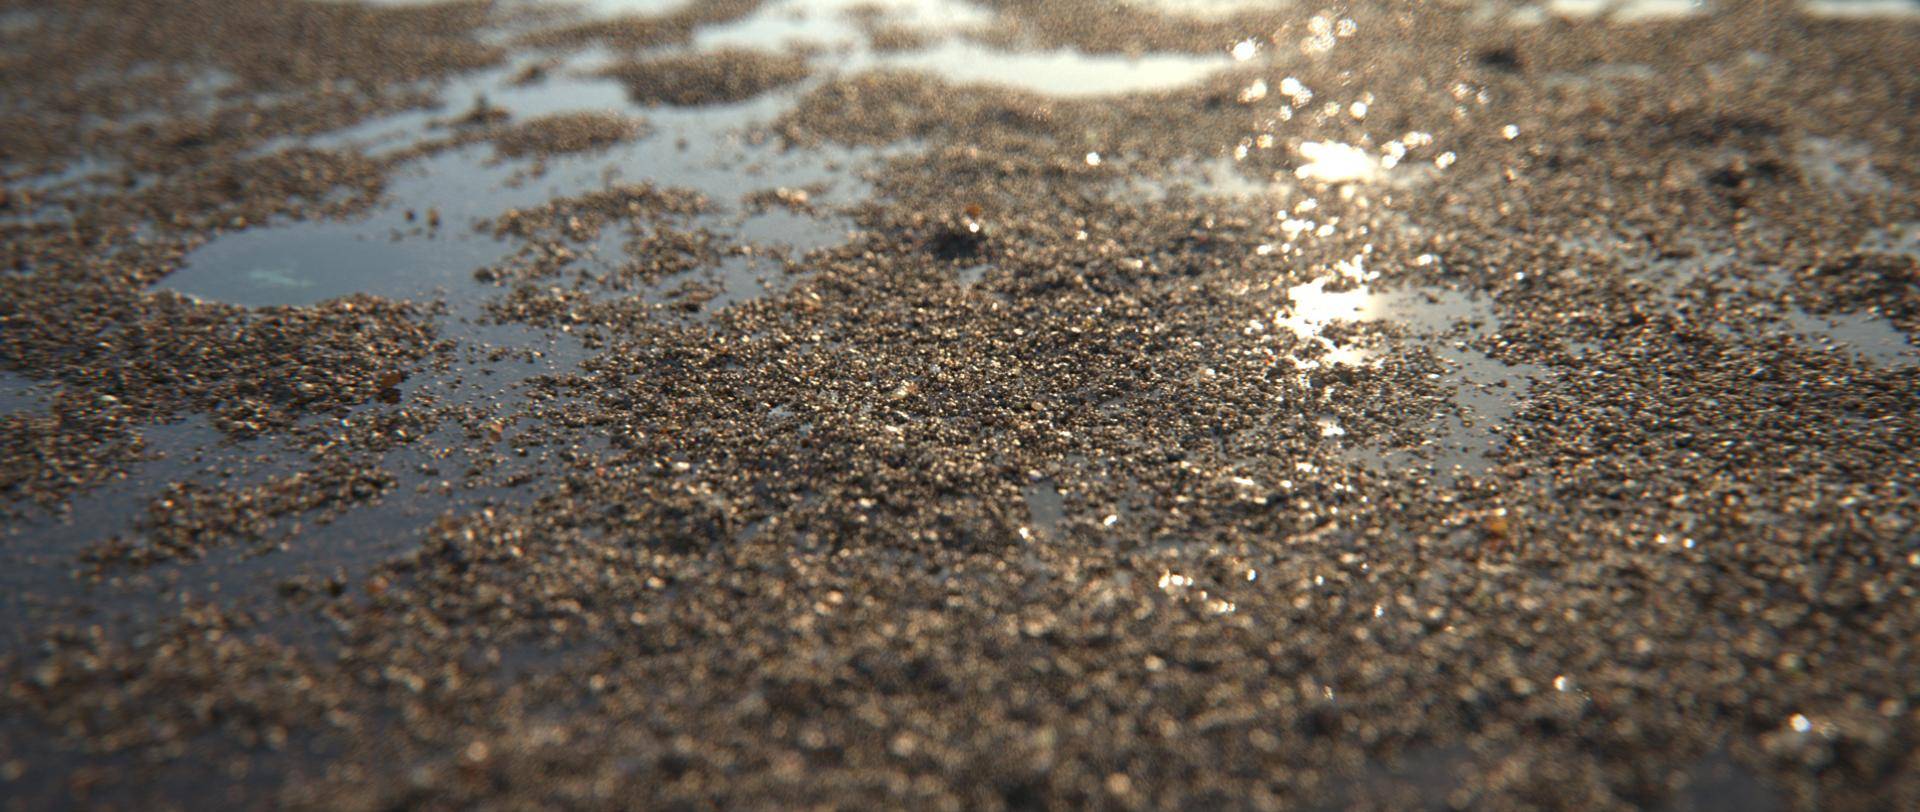
PART 5 : Taking it further, wet sand
Now we have our basic sand, we will make an alternative version of it, wet sand!
Adding water
- First, duplicate your ground and remove the noise and displacement map on this new instance. This will be our water surface. Set its Z Position to 3.875 so that it floats just a little bit above our ground surface.
- For the shader, use the following settings:
Modify the sand material
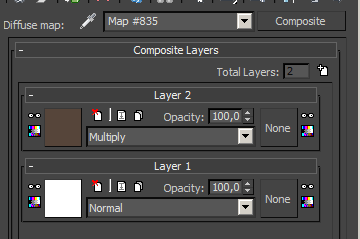
In the diffuse slot, nest the Forest Color map under a composite map, and add a new layer on top. Plug a brown V-Ray Color (value r:86 r:69 b:58) into this new slot and set to mode to Multiply. This will darken our sand to make it look wet.
![Creating detailed sand with Forest Pack-wet_sand_diffuse_map.png]()
Go to the Forest Color map in the Reflection slot and boost the right color of the gradient to a light grey (value: 180) so that it is looks more reflective.
- Set the Reflection Glossiness to 0.8 so it is a bit sharper.
- In the Refraction slot, change the mode to Get Color from Map and plug the provided bitmap refract_amount_map
![Creating detailed sand with Forest Pack-refract_amount_map_example.jpg]()
- This will make your render faster and will work better with the wet sand look.
You're done! Hit render, and add some post-production to it, just like you did with the dry sand.
Conclusion
This concludes this tutorial. Of course, feel free to take it further and add seashells, pebbles , debris, sticks, etc. You can also customise the deformations on your sand surface to add human foot or bird prints. Also play with your camera distance and angle and see if the optimisation settings still hold up; your creativity is the limit!