Resources
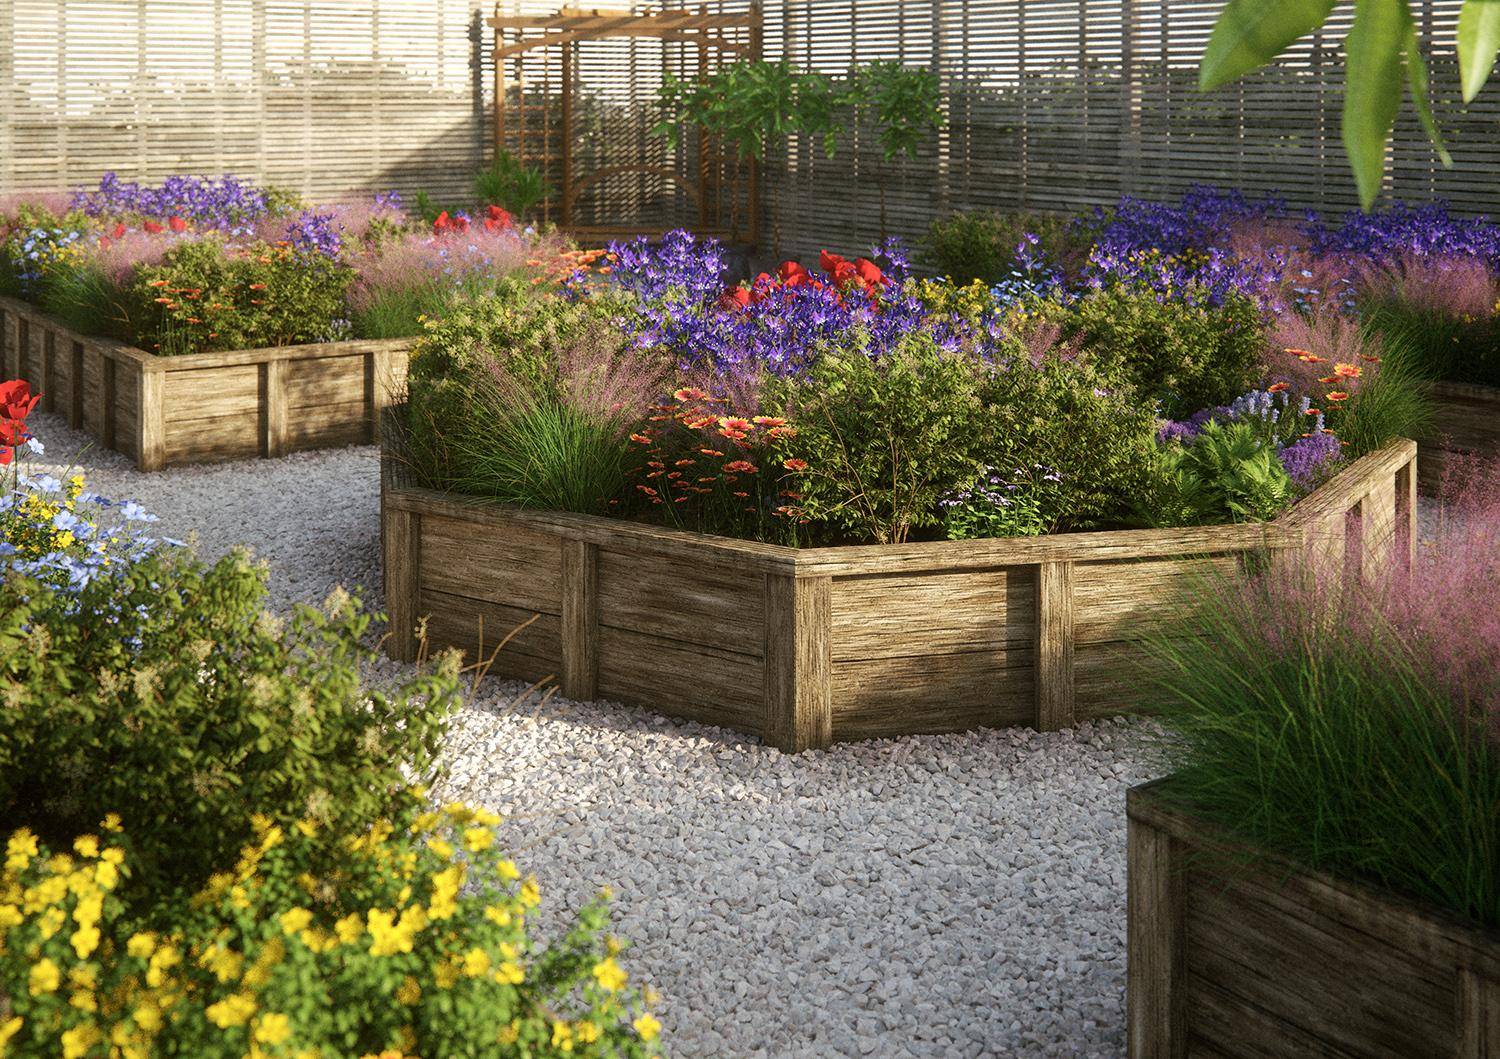
Over the next two short tutorials, we’re going to take a look at combining Forest Pack and RailClone to create a common feature of modern gardens - the raised bed. In the first tutorial we’ll use RailClone to create the wooden bed using a simple spline to define the footprint. In the second tutorial, we’ll use the same spline with Forest Pack to add all the planting. We will be using the Bushes and Flowers collection from The3DGarden. It contains 41 species of common small decorative garden plant, each in 4 variations for a total of over 180 plants (plus additional presets and grasses).
Geometry
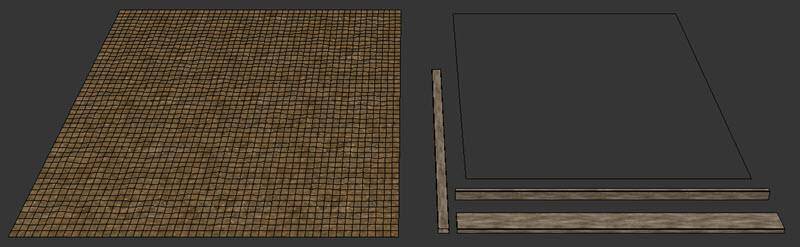
Let’s get started by creating the geometry for RailClone. It’s pretty straightforward, just 3 boxes and a plane for the bed. We need one box for the horizontal planks, one for the vertical stakes, and a third that will add a cap to the top. Finally, a plane is used with a noise modifier for the soil. Either make it large enough so that it will cover your biggest flower bed, or make sure that it will tile.
Materials and ID assignment
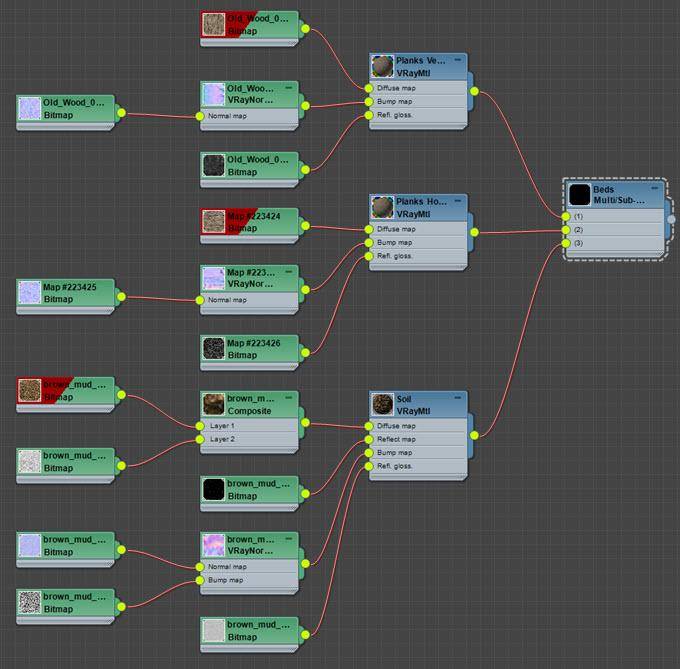
The materials are equally simple. The shader starts with a simple free PBR wood material. Create a Multi-sub object material and wire this to Input 1. In this scene, we are going to use RailClone to automatically box map the objects using real-world map sizes and randomise the UVWs for variation. Because of this, we need two versions of the wood shader, the existing one with the boards running vertically, and a copy in which the maps have been rotated by 90 degrees. This one will be wired to Material ID 2.
Apply this material to the source objects and check the alignment of the textures. If necessary, edit the Material IDs on the geometry so that the boards are running in the correct direction. Remember we have vertical boards on material ID1 and horizontal boards on ID2
Finally, we have a soil material on Material ID 3 for the mud, and that’s it! To see the final material, see the downloads for this tutorial.
Create Splines for the beds
Both RailClone and Forest Pack are going to use the same spline, while we create the style we’ll use a simple rectangle, but you’re not limited to basic primitives - in the end, the beds can be any shape you like.
Creating the Style
With our geometry and paths prepared, it’s time to create the style.
- Create a new RailClone object
- Apply the material we just created.
- Go to the Modify Panel and open the Style Editor.
- In many tutorials I repeat the same advice - for ease, it’s often better to split your style across multiple generators. This is another example of that approach. We will use three generators, one for the planks, one for the stakes, and a third for the soil.
- Create a new A2S Generator.
- Create a Spline node and wire it to the generator’s Spline input. Select a closed path from the scene.
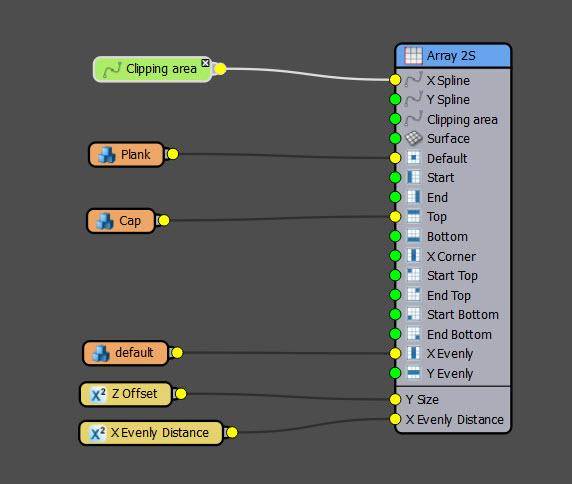
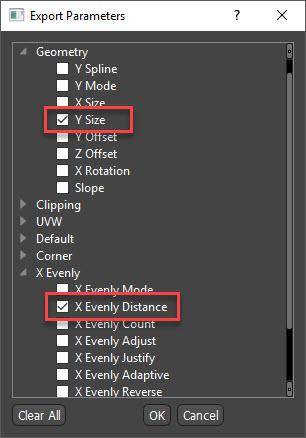
- Right-click on the Generator and export the Y Size and X Evenly Distance
![Export dialog]()
- Add two Numeric Nodes, change the type to Scene Units and wire them to the newly exported properties. You will now be able to edit these values from the Modify panel.
![Exporting parameters]()
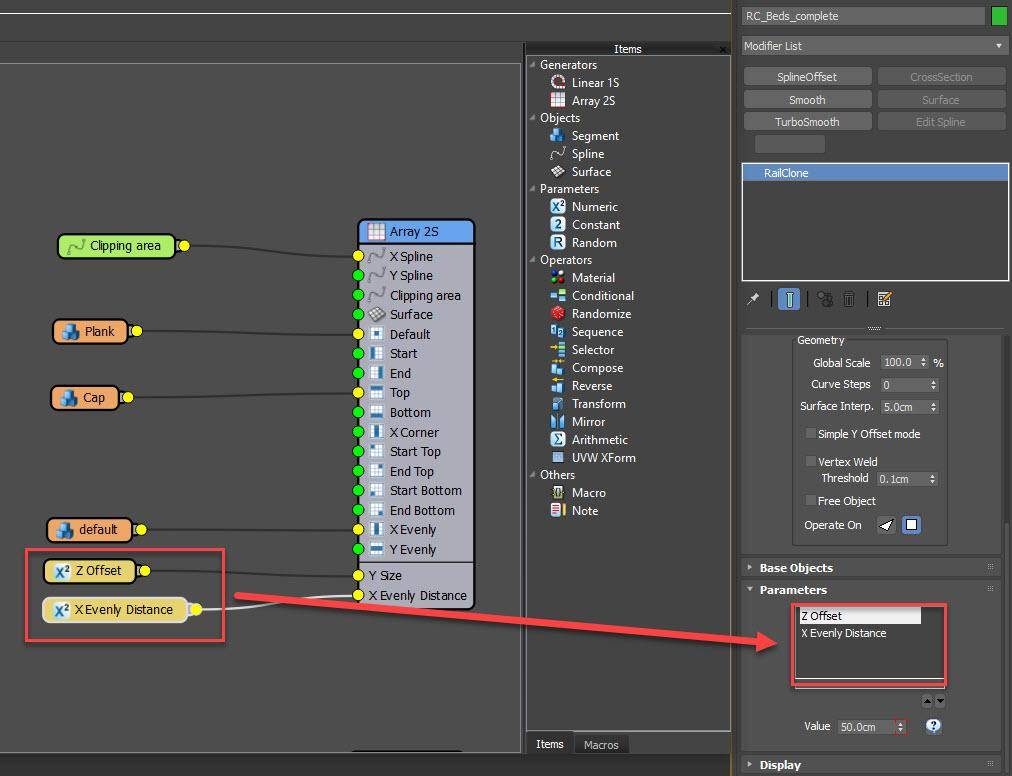
- Create a new Segment node and select the Plank geometry from the scene, wire it to the Default Input.
- In the Segment node’s settings, enable Apply Box Mapping and Real World Map size to automatically UVW map the geometry. For this to work in Corona you will need to disable the Instancing engine in the Display rollout.
![Box Mapping]()
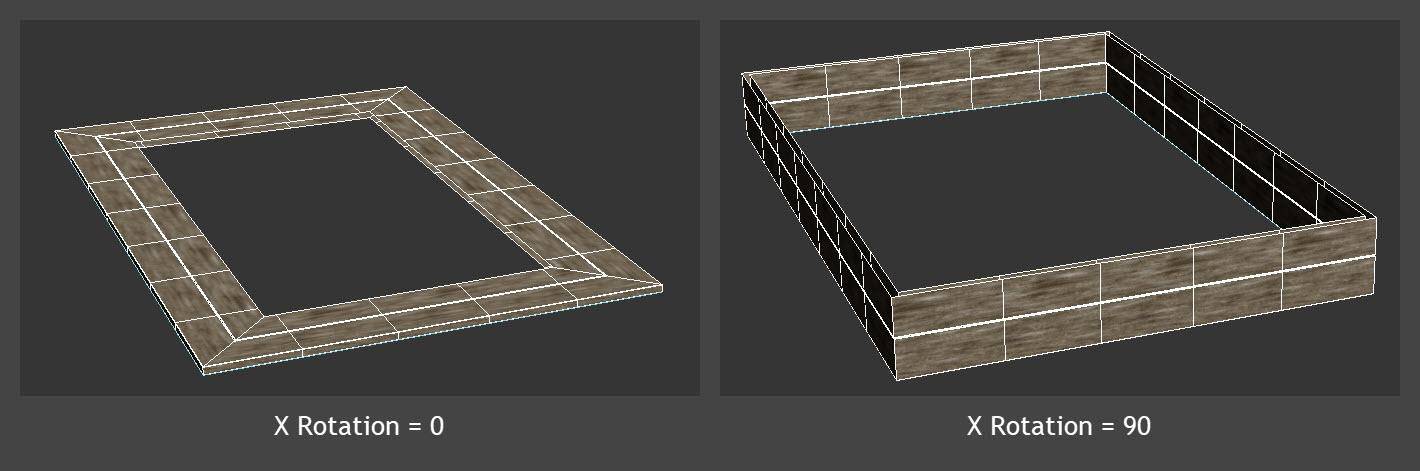
- Increase the Y Size value from the Parameters rollout in the Modify panel and you’ll see that the array is laying flat on the X/Y plane. To rotate it to be vertical, change the Generator’s X Rotation to 90 degrees.
![Image rotation]()
- Add a little Top Padding to the Segment to create a gap between the boards.
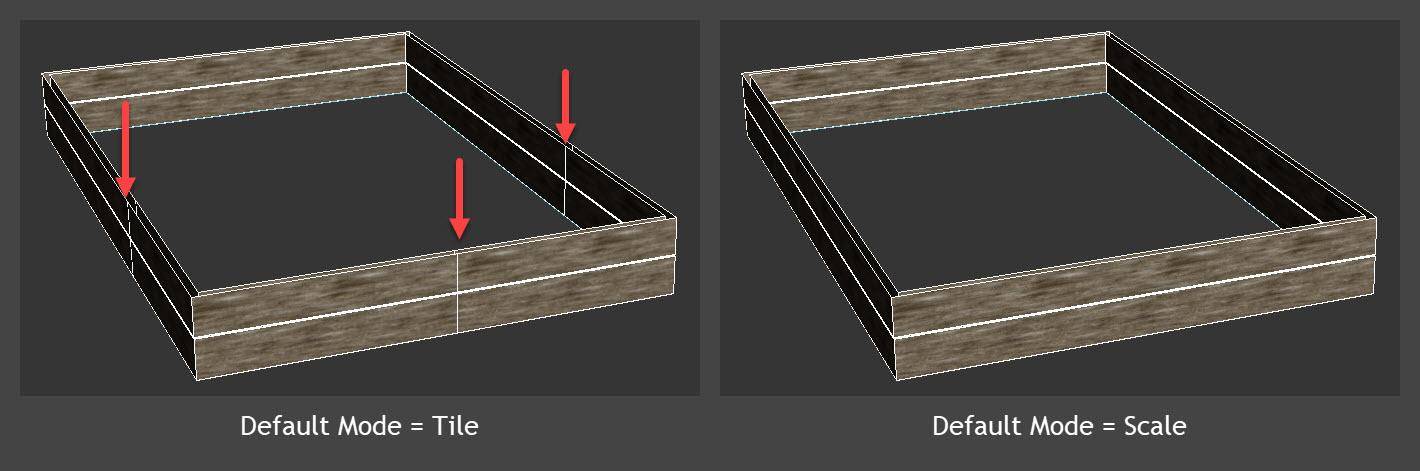
- To change the way the Default segment is distributed along the spline, go to the Generator’s Default Segment settings. It is set to Tile, instead we want to change the mode to Scale. A single segment is now scaled between the Corners and/or Evenly segments.
![Default Mode]()
- Create a new Segment node. Don’t pick any geometry but wire it to the X Evenly input. The boards will now be divided at regular intervals which can be adjusted from the modify panel. This is done so that the materials on each section between the stakes can be randomised separately for more variety.
- Let’s add a Cap. Create a new Segment node and pick the Cap geometry from the scene.
- Wire the Cap to the Generator’s Top input.
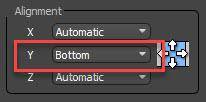
- Select the Cap Segment and change the Y Alignment to Bottom. The Y Size is now measured to the bottom of this cap geometry.
![Bottom Alignment]()
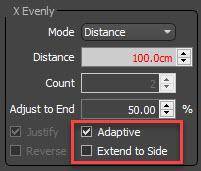
- Finally, to stop the cap from being divided by the Evenly segments, go to the Generator’s X Evenly settings and uncheck Extend to Side. While we’re here, let’s enable Adaptive too so that all the bays are an equal size.
![Evenly Settings]()
Now let’s add the stakes in a separate Generator.
- Select the existing generator and Copy and Paste to create a new one.
- Remove all inputs except the Spline and the Parameters
- Create a new Segment node and select the Stake geometry from the scene.
- Turn on Automatic Box Mapping and Real World Map size.
![Box Mapping]()
- Wire the Segment to the X Evenly and X Corner input. You will now have a stake on the corners of the spline and at each place the planks are divided, however, they intersect the boards instead of appearing in front of them. To fix this we will offset the entire array.
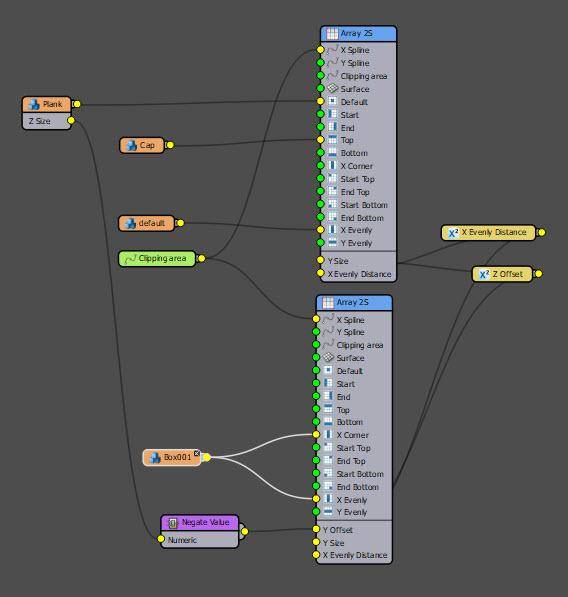
- Rather than hard-code the offset value, it is better to automatically read it from the plank geometry. That way you can change the geometry easily at a later date and the style will update automatically. To export the Plank’s size, right-click on the Segment node and choose Export Attributes > Z-Size.
![Export attributes]()
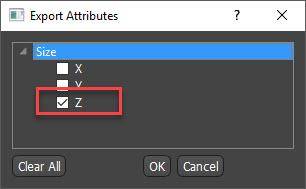
- Right-click on the new generator and choose Export Parameters> General > Y Offset.
![Export Y Offset]()
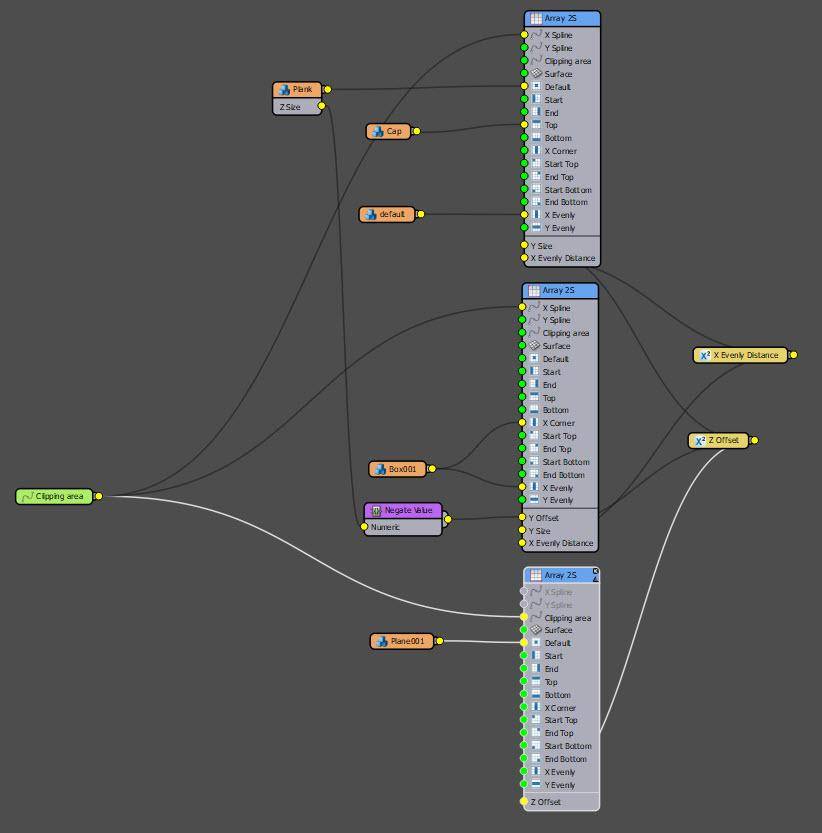
- Connect the two new exposed slots together. The array has now offset the thickness of the plank, but in the wrong direction. To reverse the number, we need to multiply it by negative 1. You can do this with an Arithmetic and a Constant node, alternatively, there’s a macro called Negate Value especially for this purpose. Connect it to the middle of the wire.
Note: In older versions of RailClone there is a small glitch where some Evenly segments might disappear when an array is offset, to fix this change the Y Mode to Free and enable simple Y Offset mode from the Style rollout. (This is fixed in new versions).
Nearly there. In this part, we’ll add the Soil
- Create a new A2S generator.
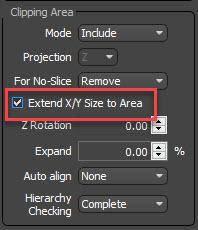
- This time we will use a different approach. RailClone can fill a closed spline with geometry. To enable this mode, go to the Generator’s setting and turn on Extend X/Y Size to Area.
![extend X/Y size to area]()
- Attach the existing Spline node to the generator’s Clipping Spline input.
- Create a new Segment node and select the soil geometry from the scene. Wire the segment to the Default input
- The soil is now filling the area, but it needs to be raised to the top of the bed. To do this, export the generator’s Z Offset property and wire it to the Y-Size numeric node. If you like you could always adjust the height from this point using the segment’s Z Fixed Translation parameter
Finally, we’ll randomise the materials. At present, texture repetition is quite obvious. We can fix that by randomising the offset of the UVs and adding some tint using RailClone colour.
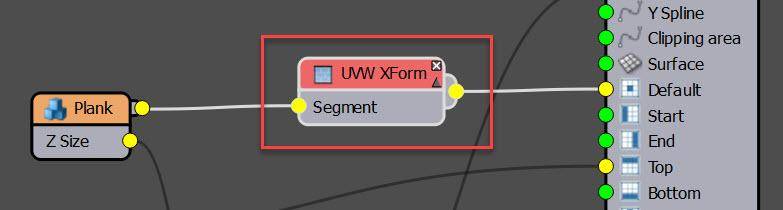
- Wire a UVW XForm modifier between the wood segments and the generator.
![UVW XForm]()
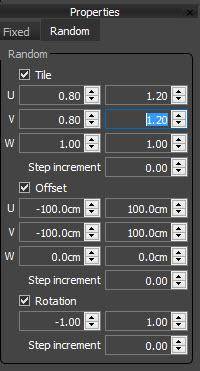
- Go to the Random tab in its settings and enable Offset. Enter a value of -1000cm to 1000cm for the U and V axes.
![UVW Settings]()
- You could also add a little Tile and Rotation variation too if you like.
- Now open the Material editor
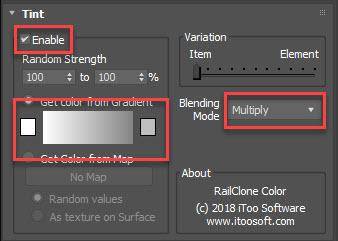
- Add a RailClone Colour material after the Wood material's diffuse maps.
- Enable Tint
- Change the Gradient setting so that it is white and one end and grey at the other.
- Change the Mode to Multiply. Each time the segment is used, it’s brightness will now be randomised.
![Tint Settings]()
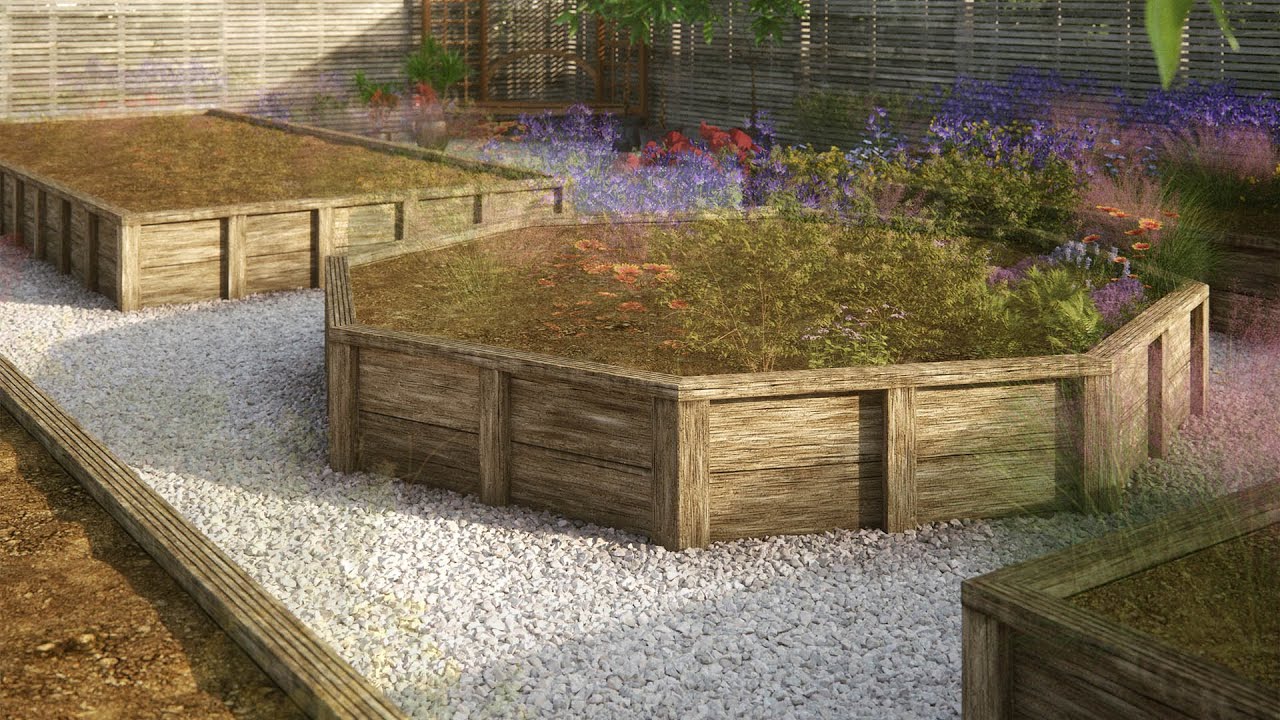
The RailClone raised bed is now complete - you should be able to easily change the size of the bed by adjusting the spline and create multiple beds by simply attaching of adding additional splines. Once it’s set up, you shouldn’t ever need to model another raised bed again, and don’t forget, we didn’t hard code any values so it’s easy to change the size of the source geometry or even swap it out for a different model.
In the next tutorial, we’ll add the plants and flowers to the tops of these beds with Forest Pack, reusing the same splines so that the whole system is parametric and easy to update.