Resources
Requirements
- info RailClone Pro, Forest Pack Pro
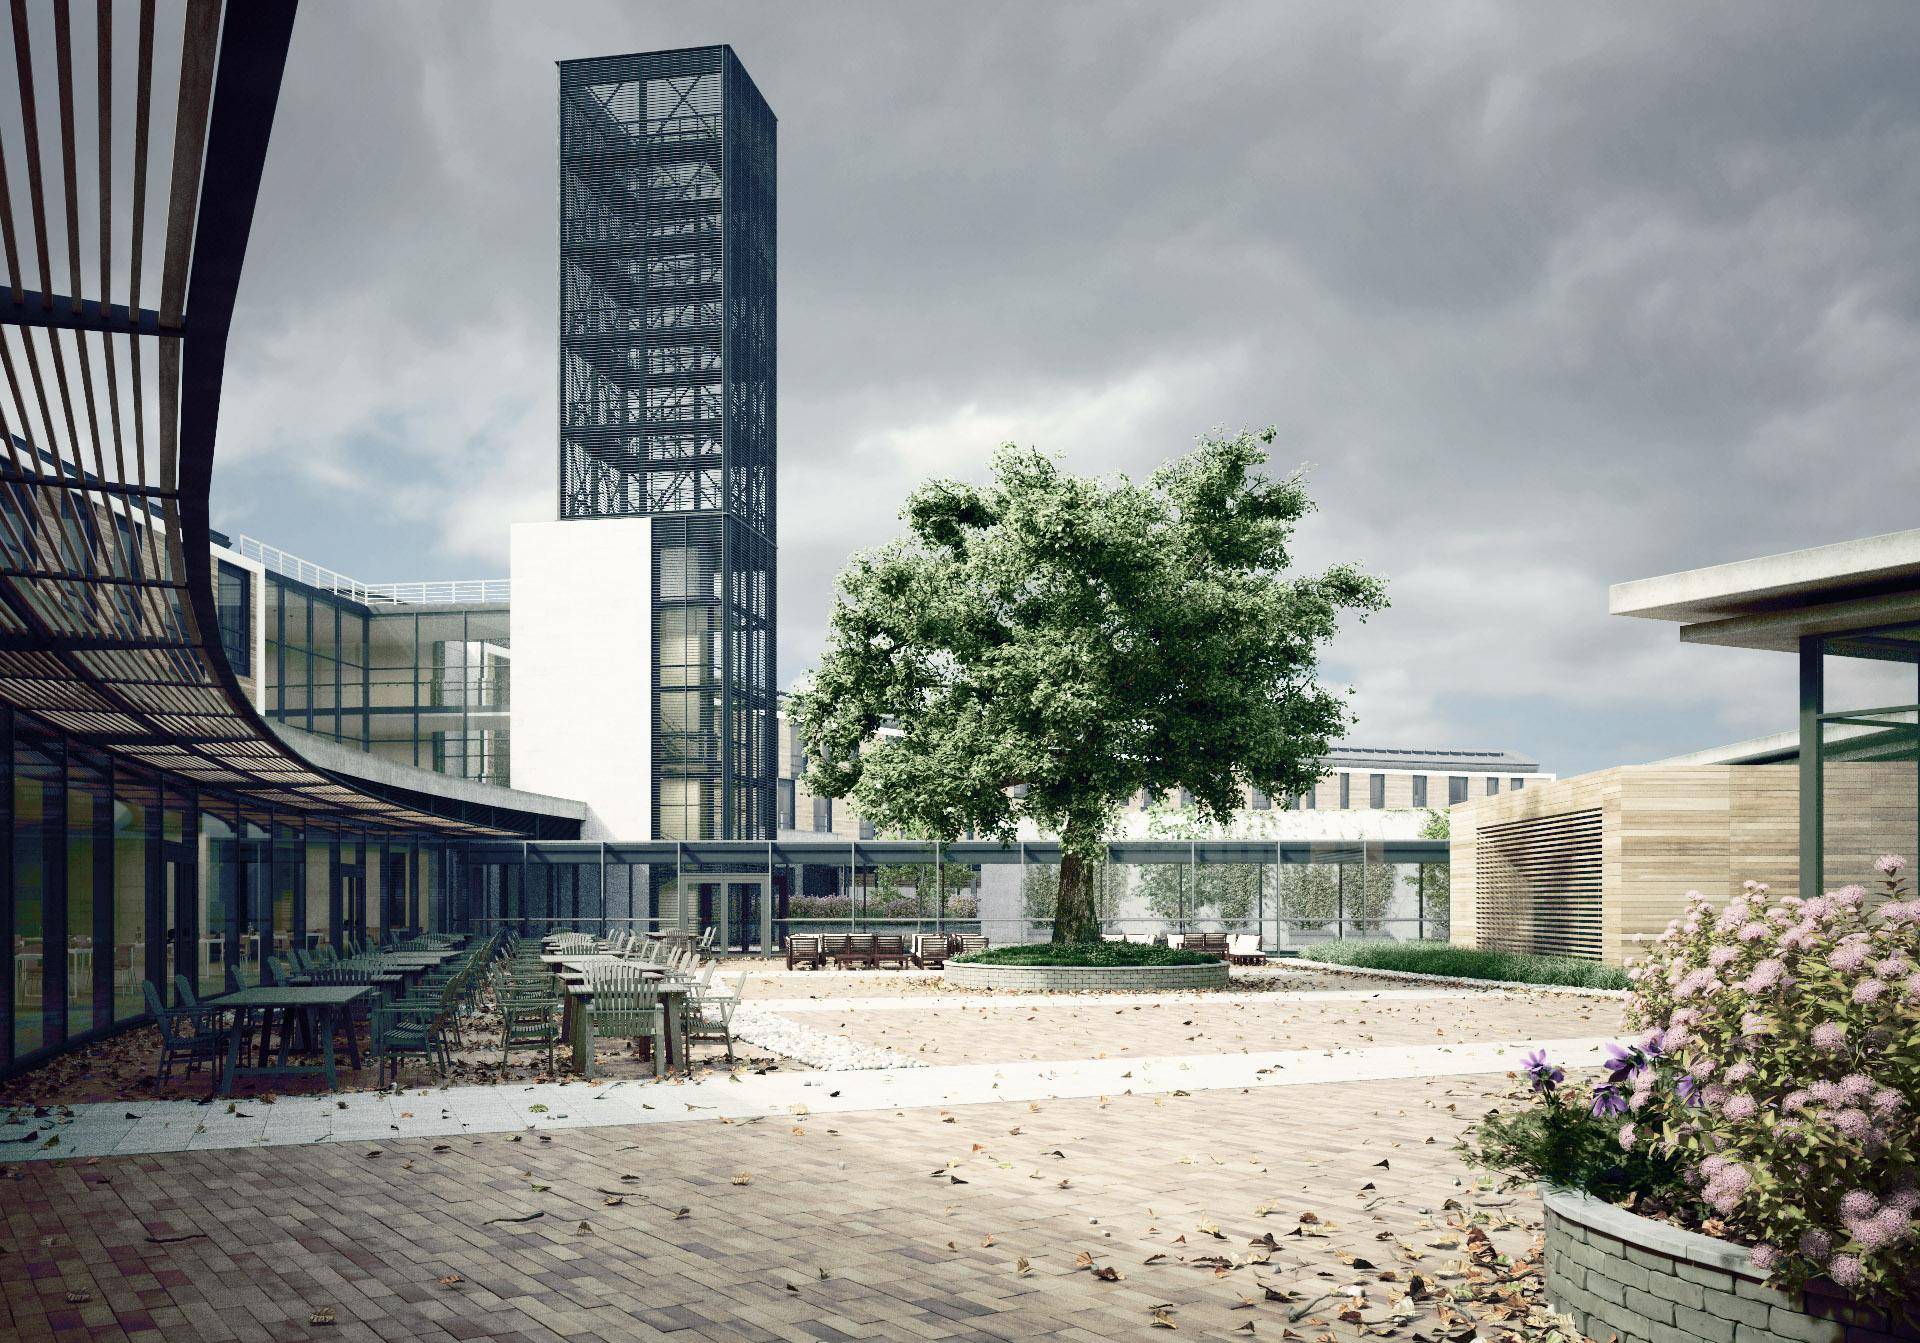
This presentation and the scene files were originally shown at State of Art Academy Ad#5. We promised attendees that they'd discover a new super-power: The ability to see parametric objects everywhere in the world around them. We've decided to release this now so that users who weren't able to attend can benefit.
Using the example of the DoubleTree by Hilton Hotel - the venue for the conference - we explored the limitless applications of RailClone and Forest Pack. The presentation was structured around a number of questions you should ask before your start creating a parametric object. Via a wide range of examples, we explained how to analyse, model and create materials for a typical arch viz scene using scattered and rule-based parametric geometry. Along the way showcasing many of RailClone and Forest Pack’s features and illustrating how they can be used to compliment one another.
Here you can find theexercise files and the presentations itself. No sound I'm afraid but there are some notes below. So if you want to augment your powers without need for an experimental serum, exposure to cosmic rays, or a bite from a radioactive spider - just read on!
As mentioned there's no sound in the videos in this presentation, but below you can read the notes that accompanied each slide.
There are 10 questions posed in this presentation. Click below to go to the notes for each associated video.
- What type of array should I use?
- Can any segments be reused?
- How do segments deform on the Z axis?
- Are there any conditional rules?
- Is there any randomisation?
- How do I define the Scatter area?
- Is there any advantage to grouping geometry?
- What happens at the boundaries?
- Is there any texure variation?
- Is there any animation?
Presentation Notes
1 - What Type of Array Should I use?
If you reduce RailClone to its essence, it’s an array based modelling tool. Each array has a number of possible inputs and each array is suited to a different purpose. Consequently the first question you should ask yourself when tacking a new modelling challenge is "which is the best array to to model that?". In this video we’ll look at how RailClone’s two array types are used to model different parts of the hotel.
Let's start at the top, literally, with the roof. In this simplified version there are 4 segments: A start, an end, a main roof section and the ribs. I'll use these to illustrate a one dimensional array.
First of all each array type has a generator with a number of inputs. For the L1S generator we need a single spline (or a dimension) to set the length of the array.
Then we can add other elements like the start of the array ... and the end ... and then the default, which always fills in the spaces inbetween. Finally to add the ribs we can use the Evenly input which breaks up the array with regularly spaced segments.
The distance between evenly segments is adjusted using the Evenly Distance parameter which can be found in the properties panel when you have the generator selected. The beauty of RailClone is that once this is set up changing the path updates the whole array, including deforming segments to create curves. Unfortunately the roof on this hotel isn't quite as simple as that, it has a section above the main entrance with an offset between the front and back. This can be solved by splitting the source models for the roof into four segments, two for the front and two for the back. And then the back and front, each have a separate generator with two slightly different splines.
A2S Generator
In this example I'll create the wooden cladding on seen on the facade. Like the previous example, this array is driven by splines, but this time one for the X and one for the Y axis. So we'll add a single plank to the Default input to create the array. If you right click on a RailClone object you have the option to select its Base Splines, and as you can see adjusting this splines automatically updates the array. It's also possible to build arrays purely using dimensions. To do this don't attach splines to the generator. Instead use the X and Y Size values from the Properties panel.
You'll see that with no splines attached the array is built on the X/Y plane. To rotate it you can use the X Rotate parameter. The default segment tiles along the length of the array, when it reaches the end it will be sliced. This behaviour can be changed. In Scale mode for example, only one single default segment will be scaled to fit the length of the entire array. In Adaptive mode a new segment is added only when the length reaches a certain threshold, and then they are are scaled to ensure that only whole segments are used. In Count mode you specify a fixed number of segments to stretch along the array, again no slicing occurs in this mode.
Continuing with this facade we'll look at how to construct the windows. It's often helpful when slicing up a mesh for use with RailClone to thing of it as a stack of 1D arrays, in each case the height of the segments in a row should match if you don't want gaps to occur. Let's start by adding the Left hand side and Corners. You can see that there are a number of different elements of the array that can be targeted, making it great for creating objects like this. Next we'll add the Bottom, Glass and Top section. And finally by using the mirror operator we can reuse the segments in the left side slots to create the right side of the array and finish the style.
Once created, use the Y Spline to control the overall height... and add new spline segments to add windows of different lengths and orientations.
Using Multiple Generators
When I first started using RailClone I used to heroically try to fit everything into one generator. That's the instinct. But it's often much easier to create styles using multiple generators. This also often has the benefit of making them easier to paramaterise. Lets take the sun shade outside the entrance as an example. I've built this with 3 generators, but this allows me to easily adjust the height in case I need to change or re-use it later.
In the first generator I add the main supports to the Evenly input and also export the Evenly Distance so that it's easy to wire multiple generators together. I'm also going to export the support segment's X Size value so I can control the height. Now we have those properties set up, copy and paste the generator to save doing that work again. We'll use this generator to build the horizontal elements and export the Z Offset so that it sits on top of our supports.
Now copy the generator a third time and add the brackets for the glass to the evenly input and the glass to the default. I'm adjusting the padding at the beginning and end, we'll look at that in more detail later.
Finally if you look at this sun shade there are twice as many glass supports as there are posts. To create that I can add a sequence operator and alternate between a post segment and a segment that has no geometry selected, creating a "gap". Of course, now that this is set up. If you want to create a curved shade it's as easy as adjusting the base spline!
Combining A2S Generators
Now lets turn out attention to the tower in the middle of the hotel. In this example I'm going to use multiple generators to layer up detail. The segments for this are astonishingly easy to model. Starting with the structural elements, we use the Top/Bottom, Y Evenly, X Evenly and Corner inputs to create the main frame. Then duplicate the generator and detach the elements. Note that the X Evenly and Y Size values are wired together.
I'm using this generator to add the diagonal braces. Wire an empty segment to force a break at the corners and evenly segments. Because this generator is set to Scale mode, this will result in only one brace in each bay on the X axis.
On the Y axis we have to do something different. I need to scale the brace segment so that it matches the story spacing. Just export the segment's Y Evenly height and wire to the same numeric node used to control the Y Evenly distance.
Now I can clone the generator a 3rd time to add the outer mesh but I want to interrupt this for a second to talk about RailClone's new Bevel Corners function. In this example I'll add some quoins to the corner input. Notice that it's one input but with bevel on two segments are placed one either side of the corner and sliced. The spacing is controlled using BC offset. What happens if we add a compose operator and a window segment either side of the corner input, so there are 3 inputs? In that case the centre segment is slice, but the windows either side are displayed only once. In our tower example we want to do something similar, but the centre segment in this case will be empty to create a gap. So in the same way attach the segments, only this time we need to add a mirror operator to flip one side on the X axis. Next we can add the default segment to fill in between the corners and then add X evenly segments. Finally you can keep going like this - adding further generators driven by the same splines and parameters to add for example, a top, bottom and floor plates, including two sets of railing inside. Once this is done it's easy to assign new splines or create completely different shapes by drawing new splines.
2 - Can any segments be reused?
As you can see segments can be re-used in various ways, so the second question I ask is "how little can I get away with modelling?" To answer that question you need to know the ways in which RailClone allows you to sequence, combine and manipulate geometry. Before we look at that let's take a look at another related key principle - padding to create all the dwarf brick walls surrounding the flower beds.
Again the segments are pretty simple, two ends and default segment plus a stone cap. If we connect these to their respective inputs you can see the problem, but by setting the padding to a negative value we are able to close up those gaps. Then add the cap using a second generator and adjust the height. A simple style that's quick to create.In this second example I'll create the paving that's just out the back there. Instead of using padding I will use the Fixed Size features with Scale switched off. This sets an exact dimension used to calculate the position of adjacent segments that is independent of the segments actual size.
First of all I need to create an alternating pattern of full and half size bricks to create the bond pattern. To do this I'm using Conditional operators that return true if the X Segment count is 1 and the Segment Y count a multiple of 2. That gives you a bond with one brick but we need 3 bricks side by side in each case. To do this we'll add a Compose Operator and 2 Transform operators to allow us to manipulate the fixed size of the segments. At the moment these are stacked one on top of the other. We need to move these around using the Transform operator.
First of all we'll add bottom padding to space these out (This style is rotate 90 degrees), Now we need to move the segments down. To do this I'm going to set the X Size to near 0 for the first and second segment, making sure scale segment is switched off. Once that's done we can simply duplicate it for the other brick. Since using fixed size isn't dependent on the segment size we don't need to change any settings, just attach new segments.
Next up we'll look at the concrete walls at the front of the hotel, these have a repeating pattern of: window - window - door. Let's look at using a sequence operator to recreate that. Here are the segments. I haven't broken this one down much. Let's add a Sequence operator and wire in the windows segment. Now we'll flip it using a Mirror operator. I want to randomise between two different doors, a single and a double. So add a Randomise operator and attach the two doors. Because I have nested Sequence operators I can change the counts to get different results.
Brise Soleils
To look at how to combine segments again we'll look at the Brise Soleils at the front of the hotel. So first of all lets attach the ends, note the Mirror operator, and the Default segments. Now we want to add a Compose. I'm going to re-use the front and end segments in the Evenly input. Compose allows me to add multiple segments to a single input slot where they will be distributed as though they are one.
Now actually I want a sequence, because these ends will only come after a number of supports fastening it to the wall. Changing the counters allows you to adjust the pattern. Also I want a space in the middle of those evenly segments, so I'm going to add an empty segment and add some padding to prise them apart. That's the framework pretty much done, now to make things easier there's a second generator used for the glass. There needs to be a space here too, so add another empty segment, with the same Padding, and wire both to a Sequence operator. Make sure the counters match the frame. Once this is done you can easily adjust the path of the sun shade and even create some wild undulating effects!
Just to show how far you can take this re-use I wanted to illustrate by showing the segments that most the doors in the scene are made from: Just a corner, side and glass. Starting with the corner, by using multiple mirror operators, I'm able to create all 4 corners of the array. Next up the sides, just add another mirror to flip the left side and fill in the right. To fill in the top and bottom, it's possible to simply use a Transform operator and rotate the side segments by 90 degrees. And finally add the glass to fill in the Default segment. The mode is switched to scale to avoid slicing geometry and generating more segments than are necessary.
By exporting the X size I can change the height of the door without needing to re-open the style editor. And finally here's the door used in the scene. There's a little more work done on this to enable me to animate the doors opening and closing.
3 - How does it deform on the Z axis?
One of the great advantages of using RailClone is the way it's able to deform geometry to follow a spline. When it comes to the Z axis there are a number of options so I'll often have to think about how I want my verticals to behave. In this scene, tucked away in the tower, is a staircase, to recreate the balustrades I needed to think carefully about how they would deform.
Stairs
The stairs are made of these simple segments. The 3 on the right for the handrail, glass balustrade in the middle, and a step. First let's look at the options. The default deform mode is called Adaptive, where the segments remain perpendicular to the spline, it's also possible to Step them, so there is no deformation. Finally you can set the mode to Vertical, so that the uprights remain just that - upright! It's also possible to mix these so you can have a vertical top and a stepped bottom or vice versa.
Now let's add the handrail. Like the glass we need to switch the mode for all the segments to Vertical, but once that's done it's easy to apply it to more or less any spline. To finish up, the treads themselves just use Step mode. Generally speaking this is how I make most of my stairs. (We have a tutorial).
Surfaces
In the recent release of Forest pack we introduced some nice new features, there's not an excuse to show them in the move hotel so I've gone a bit sci fi with some greebles. It's now possible to project geometry onto a surface, as the spline moves the geometry follows the surface. Likewise if the surface deforms. You can do this with 1d arrays too, at the rear of the hotel are some lights, simply project them onto the surface - no more need to conform splines! Surfaces also work with the Z deform modes as in this fencing example. Notice that the verticals remain upright - just like the stairs but we also introduce a new mode that allows the geometry to follow the surface normal as shown on this terrifying race track demo!
4 - Are there any conditional rules?
So far most of the choices we've made in modelling have been configured manually. I like to look for ways that I can use conditional relationships to create simple decision trees. In this example we'll return to the main facade and look at automatically placing wooden cladding and windows based on material IDs.
We've already created the windows and cladding, let's combine them into a single style. First set the Limit > Material ID for the generator to 1 then copy and paste the whole node tree into a new RC object. Open the window and set it to Material ID 2. Copy everything except the spline and paste it into the new RC object. Attach the same spline to all the generators. I quite like building up complex styles in parts like this. Once that's done I can create a new spline with a few segments and apply the railclone object. By changing the material ID I can choose exactly where I want a window and the cladding. The whole thing is easy to update.
A very similar approach is used to create the walkway you use to get to the conference centre. But in this case I've added further conditions so that if the doors segment exceeds a certain size it switches to a double door. For the ends this style checks to see what type of vertex is being used. If it's a Bezier-Corner the end is open. If it's a Corner the end is closed off.
I'm going to take this opportunity too to illustrate how you can use the Mirror, Y Offset and Flip controls to create both sides of the walkway without having to add new generators. I've also added a handrail and roof, so just turn these on and the style is done. Adjust the spline and everything updates. This walkway isn't deformed, but it could be!
5 - Is there any randomisation?
Finally for RailClone, I'm always on the lookout for opportunities to randomise either Segments, Transforms or Material IDs. In the last section I demonstrated how you can meticulously place the windows and cladding. In this section I'll illustrate the lazy approach, that randomises the sizes.
First of all though lets look at the curtains. There are 8 curtain segments that we could use in windows. To randomise them all we need to do is plug them into a randomise operator. That's great but they're all closed and in some cases overlapping. So to ensure that each curtain only uses half the segment width I'm going to use a quick expression plugged into the X Fixed size input of a transform operator. Add XSectionLength/2 to ensure they don't exceed half the section length.
It'd be more interesting though if we could randomise the curtain being open and closed. So to do that add a random parameter and attach it to the expression. We can subtract this from the existing expression to create some variety!
Now lets finish the wood cladding by randomising the material IDs and finally next all these RailClone objects together to create a fully randomised facade. Firstly to randomise the widths of the original doors and windows I've applied a randomly generated number to the Padding of the rightmost Segments of the cladding and windows. You can see that If I change the seed I get a nice range of sizes. Do the same for the window. There are a few more segments to have to deal with but the principle is identical. Next we'll add these to a 3rd RC object. As you can see they're all the same size. To allow the randomisation to cascade through you just need to turn on Nested. Do the same for the cladding and the style is complete. In the exercise files the version is slightly more complex to prevent windows being slided at the end of the array.
The same nesting technique is used for the lights in reception. A single light has been created from 3 segments with a randomised length. This is then nested inside a second RC object to create an array with random lengths.
I'm going to switch presentations and focus now. In the second half I'm going to focus on Forest Pack Pro, looking at how learning forest pack can make you obsess about untidy tables and fallen leaves.
6 - How do I define the Scatter area?
The first thing to think about when using Forest Pack is "How to I define the scatter area", well there are a number of ways you're probably familiar with, such as using splines. In this case though the spline is open, To obscure the perimeter of a building this works rather well. When using an open spline, the distance either side is defined by the Thickness property. Then of course there's closed splines, Like everything in Forest Pack this updates live in the viewports. And finally you can use surfaces. In the default XY mode, this works by projecting along the Forest object's Z axis until the tree hits the chosen surface.
Brand new in Forest 4.3 is the ability to limit the scatter to Material IDs when using surfaces. In this version you'll see a new Material IDs box. In here you simply enter the Material ID you wish to restrict too. Multiple IDs can be added, simply leave a space or add a comma between them. By using multiple forest objects it will be possible to creates some nice layered growth patterns.
UV Surfaces
Around the perimeter of the move Hotel you see hanging Ivy. We've discovered that a few of our users are using Forest Pack to scatter leaves on vines to create this plant type. By using UV mode you can scatter on more or less any surface. To create the impression of leaf age, or more leaves in sunnier areas, you can use the Density Falloff graphs. Similarly to control the size of leaves based on altitude, Size Falloff can be used. For this scene I collapsed a bunch of these models to poly objects and added them to a new Forest object. By using splines around the perimeter and Forest's Tree Edit mode I could easily add large amounts of ivy to the entire site. Both hanging and growing Ivy use the same splines by simple adjusting the scatter object's Z Offset parameter.
Painting in UV Mode
When using UV surfaces it's always been possible to paint areas using Forest's spline painting tools. Unfortunately when using UV surfaces that isn't possible. Here's a workaround. Say we want to add some fungus and ivy to the base of this tree. First of all, to make things easier to manage, clone a section of the tree to be used as a scatter object (we don't want plants growing on the leaves). Next assign the surface in a Forest Pack object and set the mode to UV. Ensure that AUTO is switched on. Assign a material to the scatter surface with a black bitmap in the diffuse slot. Apply an instance of the same bitmap to the Forest objects Distribution map channel. With that done we can simply paint a Distribution map, live in the viewports, using Viewport Canvas. To update the distribution simply deselect the brush.
If you look at the geometry rollout, you can see I've assigned red and green colour IDs to the items. This is because a cool thing about this technique is that by duplicating the map we can use Match Colour ID to paint specific plants in areas based on a colour palette. In this example I'm painting red to place fungus, and green to paint ivy leaves. It's a quick demo, but with a little care you can achieve great results.
RailClone as a scatter surface
Why not use RailClone as a scatter surface? For the rocks in the courtyard, technically there should be several layers, if I look between the gaps I should see more rocks right? This is hard to achieve with a single surface. So first I've created some simple but adjustable geometry with RailClone. Then select your Forest object and once again, assign this as a UV Surface. To help disguise the obvious layering you can use the translation randomisation settings to shift stones around on the Z axis. Because it's set to auto, updating the RC object automatically adjusts Forest Pack.
In this second example a similar layered approach is used to create a gabion wall. Using forest to place stones and enabling the use of Forest Colour to randomise textures.
7 - Is there any advantage to grouping geometry?
When scattering something like the tables and chairs seen in this scene the temptation is to attach them together to maintaining their spatial relationship. However grouping objects allows for some different effects as we'll see.
I have two table configurations I'm going to scatter. As mentioned, instead of attaching them into a single editable poly object, I'm going to group them. Once that's done, add them to the Forest Pack object. Notice that you can't simply pick them from the scene, you have to open a file picker to add a group. If we look at it from above now there is no noticeable difference than if we'd added them as a single object, all the tables and chairs are perfectly aligned. Except that it around the perimeter where you should notice that the individual chairs and tables are handled separately in terms of collision detection.
Where we see a real benefit however is if we add some transform randomisation. By using groups we can randomise each object separately but maintain a basic layout. If we add rotation randomisation for example we can make it look how I imagine these tables will end up by the end of tonights drinking session :) Of course not, we're better behaved than that- let's tone it down... When using Forest to populate large areas of seating, this give you a much more natural distribution, but why stop there? In this second example the same technique is used, but this time with randomised the placement of all the cutlery, bowls, and bottles as well as the chairs and tables.
8 - What happens at the boundaries?
So we've defined the scatter area but what happens around the perimeter, at the boundaries. Does it stop dead, fade away, or collect more? In this section I want to talk about the leaves, or litterfall, that I've scattered liberally throughout the Move Hotel. At this point I'd like to apologise to the Move hotel staff who I'm sure are far better at sweeping up than I've made them look.
Let's start by filling a whole area with leaves simply by adding a surface. Now lets's increase the Include falloff effect size. With Invert Curve switched off the leaf density will fade as it approaches the edge. With it inverted the opposite happens. Adjusting the curve gives you different effects, specifically I'd like a light scattering of leaves everywhere, getting more dense at the edges. Remember this curve is inverted so by reducing the start point from 100% to say , 99% will add a few leaves over the whole area.
Now that the curve is set up we can add all kind of other include and exclude areas to create leaves. For example an enclosed spline with Invert off will create a patch with decreasing density toward the edge. However hit invert and you get a boundary of leaves inside the spline. Set the mode to Exclude and the leaves are outside, around the perimeter. The same logic applies to other types of include and exclude area, even a a RailClone object or an open spline. Just like before you can use the thickness parameter to define the width - ideal for a path!
How about another forest object? This technique is great for adding litterfall under trees, where you would expect it to be. Remember you can adjust the scale to bring the leaves closer to the trunk. Finally, You can use a paint area to create irregular piles of leaves or selectively exclude an area.
9 - Is there any texture variation?
So far we've focused on how to control the placement of scattered geometry. Next I want to think about how to randomise the textures using Forest Colour.
For this example I'm going to use an example from the new Gravel presets that will ship with Forest 4.3. In this case a slate chips preset. First let's look at the preset without Forest Colour. Next I want to add some value variation. To do this I like to set the Gradient to a grayscale, make sure it is randomising by element and set the mode to multiply. This already gives a nice randomised effect. However we can do better, slate is rarely all the same colour, usual several hues creep in. So lets add a variety of maps. Let's render it now. Oh No! Too much variation, we've lost the blue slate look. We only want the occasional plum or green slate, to achieve this we can control the probability values of a particular bitmap being selected. Let's lower a few - something small like 3% and that's much better, it's still a blue slate but now with some light pollution from plum and green. Playing with the probabilities can give you a range of quite different effects.
10 - Is there any animation?
In the final section I want to address a few improvements we've made to animation since I was here last year. I also want to take this opportunity to try and reintroduce the obsession with hot air balloons visualisers had in the 90s. Surely by now it's retro-cool?
Firstly we have a new animation mode - the ability to specify and absolute animation frame using a grayscale map. Here's a simple pot animation... Let's add it to a forest object. In the default mode all the pots animate simultaneously, however with the new mode if I add an animated gradient to the map slot I can control the animation playback very precisely.
Pflow
Something we've been asked about a few times is using Forest Pack with Pflow. I'm happy to say it's possible, and actually we haven't has to change a thing. Here's how. First create a PFlow object, use a simple tri shape as a marker but make sure the viewport display is set to ticks. Set the Flow so that it isn't renderable.
You can't apply a forest object to a PFLOW directly, but you can convert it to geometry - to do this I'm going to use Mesher, but you could use any other meshing plugin such as ThinkBox's Frost. Align the mesher with the world origin so that it aligns with Pflow. Next since we're going to use UV surface modes, mesher needs some UVs. Easy enough - add a UV modifier and set it to face. Now you can select mesher as a surface. Ensure Auto is on and adjust the Distribution until you get just one object on each triangle.
This works great but there's an if. At present every particle has the same balloon. This is because every particle occupies the same UV space. To fix this I've created 10 triangles, one for each balloon. Each once occupies a different UV coordinate. They've been wiggled around to ensure they pick up a different balloon. Let's temporarily add these to the Forest Pack object to illustrate... Once again we need to adjust the density to ensure only one balloon is on each marker - notice though that this time it is a different balloon.
Now we need to add these to pflow to replace the generic triangle. To randomise objects they need to be grouped. Turn on group members and ensure the materials and mapping are on. From the mesher, remove the UVW modifier and VOILA! Forest Pack and PFLOW working together at last. Forest will always put a new object on the marker even if it's created mid flow. Oh, and just for fun - RAILCLONE baloons!